Whirlpool ADG 8516/1 IX Handleiding
Whirlpool
Vaatwasser
ADG 8516/1 IX
Bekijk gratis de handleiding van Whirlpool ADG 8516/1 IX (8 pagina’s), behorend tot de categorie Vaatwasser. Deze gids werd als nuttig beoordeeld door 95 mensen en kreeg gemiddeld 4.9 sterren uit 48 reviews. Heb je een vraag over Whirlpool ADG 8516/1 IX of wil je andere gebruikers van dit product iets vragen? Stel een vraag
Pagina 1/8

Whirlpool is a registered trademark of Whirlpool USA
5019 396 01085
1
GB ADG 8516
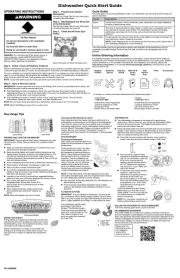
Before using the dishwasher, read the
installation and maintenance instructions carefully!
1) Programme data obtained in conformity with European standard EN 50242. The data may vary, for example, according to
different loads, extra functions, sensor settings (only with sensor programmes), water supply temperatures, water hardness
and power supply voltage.
2) Energy label programme in compliance with EN 50242. - Information for Test Laboratories: for more detailed information on
the EN comparison test and other tests, contact the following address: “nk_customer@whirlpool.com”.
1. OVERVIEW
Programme selector
START button
The indicator lights up during operation, flashes when a
fault occurs, and goes off at the end of the programme.
START button RESET function:
Press this button for at least 2 seconds; the selected
programme and options are cancelled. Main failure
displays (repeated flashing of the START indicator lamp)
can be cancelled by RESETTING. Detailed instructions are
given in chapter 5 “What to do, in case of...”.
On / Off button
Table 1.1.
Table of programmes Detergent
dispenser Consumption 1)
P Programmes Loading instructions large small Litres kWh Minutes
1 Pre-Rinse cold Crockery to be washed later. — — 4.0 0.03 14 ± 1)
2 Quickwash 40°C Lightly soiled crockery, without dry
residuals. X — 10.0 0.65 30 ± 1)
3Eco 2) 50°C Normally soiled crockery. X X 12.0 1.05 165 ± 1)
4 Daily 60°C Normally to heavily soiled crockery. X X 13.0 1.25 120 ± 1)
5 Intensive 70°C Recommended programme for heavily
soiled crockery, especially suitable for
pans and saucepans.
X X 14.0 1.55 155 ± 1)

2
2. QUICK REFERENCE GUIDE
Detailed instructions are given on the following pages; also see section “5. What to do, in case of...”
1. Switch on the
appliance Press the ON/OFF button.
2. Select a programme Press the button “Select programme” or the programme selector to display the
selected programme. If required, select possible options.
3. Select the type of
detergent
The detergent selection procedure varies depending on the dishwasher model.
Chapter “1. Overview” provides instructions for selecting detergent type.
4. Fill in the detergent 4a. Powder/gel/tabs
Fill the detergent dispenser compartments in
accordance with the wash programme selected.
Large compartment A for every wash cycle, additional
small compartment B for programmes with pre-wash
(see table 1.1.).
4b. Combined action detergents (2 in 1/3 in 1/... etc.)
Place the detergent in compartment A or in the cutlery
basket, as per the manufacturer's recommendations.
5. Check the rinse aid
level
6. Check the salt level Depending on the model:
7. Load the racks
Make sure that the spray arms can turn freely and are not impeded by crockery
or cutlery in the racks.
Detailed instructions on loading the racks are given in chapter “3. How to use
the appliance”, under “How to load the racks”.
8. Open the water tap
and close the door
9. Start the appliance Press the START button.
Wash cycle
If the appliance is switched off during a
wash cycle, when switched on again it will
resume the cycle from where it was
interrupted. Care must be taken when
opening the door, as steam will escape!
10.End of programme The START indicator lamp switches off at the end of the programme.
11.Switch off the
appliance Press the OFF button. All the indicator lamps switch off.
12.Turn off the water
tap, unload the racks
Unload the appliance, starting from the lower rack in order to avoid any
residual drips of water falling onto crockery below.
AC
B
Visual indicator in dispenser C
dark ➯sufficient rinse aid present,
clear ➯add rinse aid (approx. 100 ml).
The indicator lamp on the control panel lights up when rinse aid
needs to be added. Not all models are equipped with such an
indicator.
window in salt reservoir cap on bottom of appliance inside
orange ➯when sufficient salt is present,
clear ➯when salt needs to be added.
The indicator lamp on the control panel lights up when salt needs
to be added. Even once salt has been added, the indicator lamp
only switches off after several wash cycles!
Changing the programme
in progress:
- Keep the START button pressed
for about 2 seconds until the
START indicator goes off.
- (Water drains for up to 60
seconds).
- Select the programme again.
- Press the Start button.

3
3. HOW TO USE THE APPLIANCE
PROGRAMME SELECTION
Press the button “Select programme” or the programme selector to display the selected programme. The
appliance must be switched on. If required, select possible options. The corresponding indicator lights up. The
correct programme and the selectable functions are given in table 1.1 on page 1.
Programme times stated in the table were obtained under normal conditions and may vary
depending on conditions. Differences of up to 20 minutes are possible with sensor programmes
as a result of the appliance's automatic calibration system.
HOW TO FILL THE DETERGENT DISPENSER
Only fill the detergent dispenser prior to starting a wash programme. Only use detergents
specially recommended for dishwashers, observing the manufacturer's recommended dosage.
Observe the manufacturer's safety warnings!
Open the detergent dispenser compartments by pushing the left lever (lever 1) of the dispenser.
a. Powder/gel/tabs
Fill the detergent dispenser compartments in accordance with the wash programme selected (table 1.1).
Programmes without pre-wash:
pour the entire recommended dosage into compartment
A.
Programmes with pre-wash:
pour 2/3 of the recommended dosage into the large compartment
A and 1/3 into the small compartment B.
Dishwasher tabs should be placed, according to the
manufacturer's recommendations, in compartment A or in the
cutlery basket.
If the “Half load” option is selected, detergent dosage should be
reduced by approximately 1/3.
b. Combined action detergents (2 in 1/3 in 1/... etc.)
Combined action detergents should be placed, according to the
manufacturer's recommendations, in compartment A or in the
cutlery basket.
Firmly press the detergent compartment lid shut after filling.
Detergents with rinse aid incorporated may be effective only with longer programmes. In the
case of shorter programmes, detergent residue may be a problem (if necessary, use powder
detergent). Detergents with rinse aid incorporated tend to form excess suds.
The guarantee is not applicable if faults are caused by the use of these products.
HOW TO CHECK/FILL/ADJUST RINSE AID
Not necessary when using a combined action detergent.
a. How to check the rinse aid level
Check the visual indicator C on the rinse aid dispenser: dark = su ear = add rinse aid.fficient rinse aid, cl
In the case of appliances with an electric indicator on the
control panel, the rinse aid indicator lamp lights up red
when rinse aid needs to be added.
b. How to fill the rinse aid dispenser
Open the rinse aid dispenser by pressing the right lever
(lever 2) of the dispenser.
Fill the dispenser with rinse aid up to the “max” line
(approx. 100 ml).
Shut the lid again.
Only use rinse aids recommended for use in domestic dishwashers. Immediately wipe away
any rinse aid spilt accidentally. This prevents the formation of excess suds which can cause a fault
function of the appliance.
Lever 1
Large
compartment A
Small
compartment B
Lever 2Indicator C
max
Product specificaties
| Merk: | Whirlpool |
| Categorie: | Vaatwasser |
| Model: | ADG 8516/1 IX |
Heb je hulp nodig?
Als je hulp nodig hebt met Whirlpool ADG 8516/1 IX stel dan hieronder een vraag en andere gebruikers zullen je antwoorden
Handleiding Vaatwasser Whirlpool
14 Juli 2025
5 Juli 2025
4 Juli 2025
4 Juli 2025
3 Juli 2025
3 Juli 2025
1 Juli 2025
1 Juli 2025
1 Juli 2025
1 Juli 2025
Handleiding Vaatwasser
- V-Zug
- Kuppersbusch
- Bartscher
- Hyundai
- Bompani
- Sunny
- Elektra Bregenz
- Moulinex
- Profilo
- CDA
- Husqvarna
- Valberg
- Asko
- Sauber
- Novy
Nieuwste handleidingen voor Vaatwasser

5 Augustus 2025
5 Augustus 2025
5 Augustus 2025
5 Augustus 2025

5 Augustus 2025
5 Augustus 2025

5 Augustus 2025
5 Augustus 2025
5 Augustus 2025
5 Augustus 2025