V7 Videoseven CS0300 Handleiding
V7 Videoseven
CS0300
Bekijk gratis de handleiding van V7 Videoseven CS0300 (16 pagina’s), behorend tot de categorie . Deze gids werd als nuttig beoordeeld door 74 mensen en kreeg gemiddeld 4.5 sterren uit 37.5 reviews. Heb je een vraag over V7 Videoseven CS0300 of wil je andere gebruikers van dit product iets vragen? Stel een vraag
Pagina 1/16

Webcam
CS0300
www.V7-world.com
User’s Manual
Guía del Usuario • Guide de l’utilisateur • Bedienungsanleitung •
Manuale per l’utente • Gebruikershandleiding • Manual do usuário
English User’s Manual . .. .. .. .. .. .. .. .. .. .. .. .. .. .. .. .. .. .. .. .. .. .. .. .. .. . 1
Español Guía del Usuario . .. .. .. .. .. .. .. .. .. .. .. .. .. .. .. .. .. .. .. .. .. .. .. . 3
Français Manuel de l'utilisateu . .. .. .. .. .. .. .. .. .. .. .. .. .. .. .. .. .. .. .. .. .. . 5
Deutsch Bedienungsanleitung . .. .. .. .. .. .. .. .. .. .. .. .. .. .. .. .. .. .. .. .. .. .. . 7
Italiano Manuale per l'utente . .. .. .. .. .. .. .. .. .. .. .. .. .. .. .. .. .. .. .. .. .. .. . 9
Nederlands Gebruikershandleiding . .. .. .. .. .. .. .. .. .. .. .. .. .. .. .. .. .. .. .. .. . 11
Português Manual do usuário . .. .. .. .. .. .. .. .. .. .. .. .. .. .. .. .. .. .. .. .. .. . 13
1
3
2
CS0300
User’s Manual
English
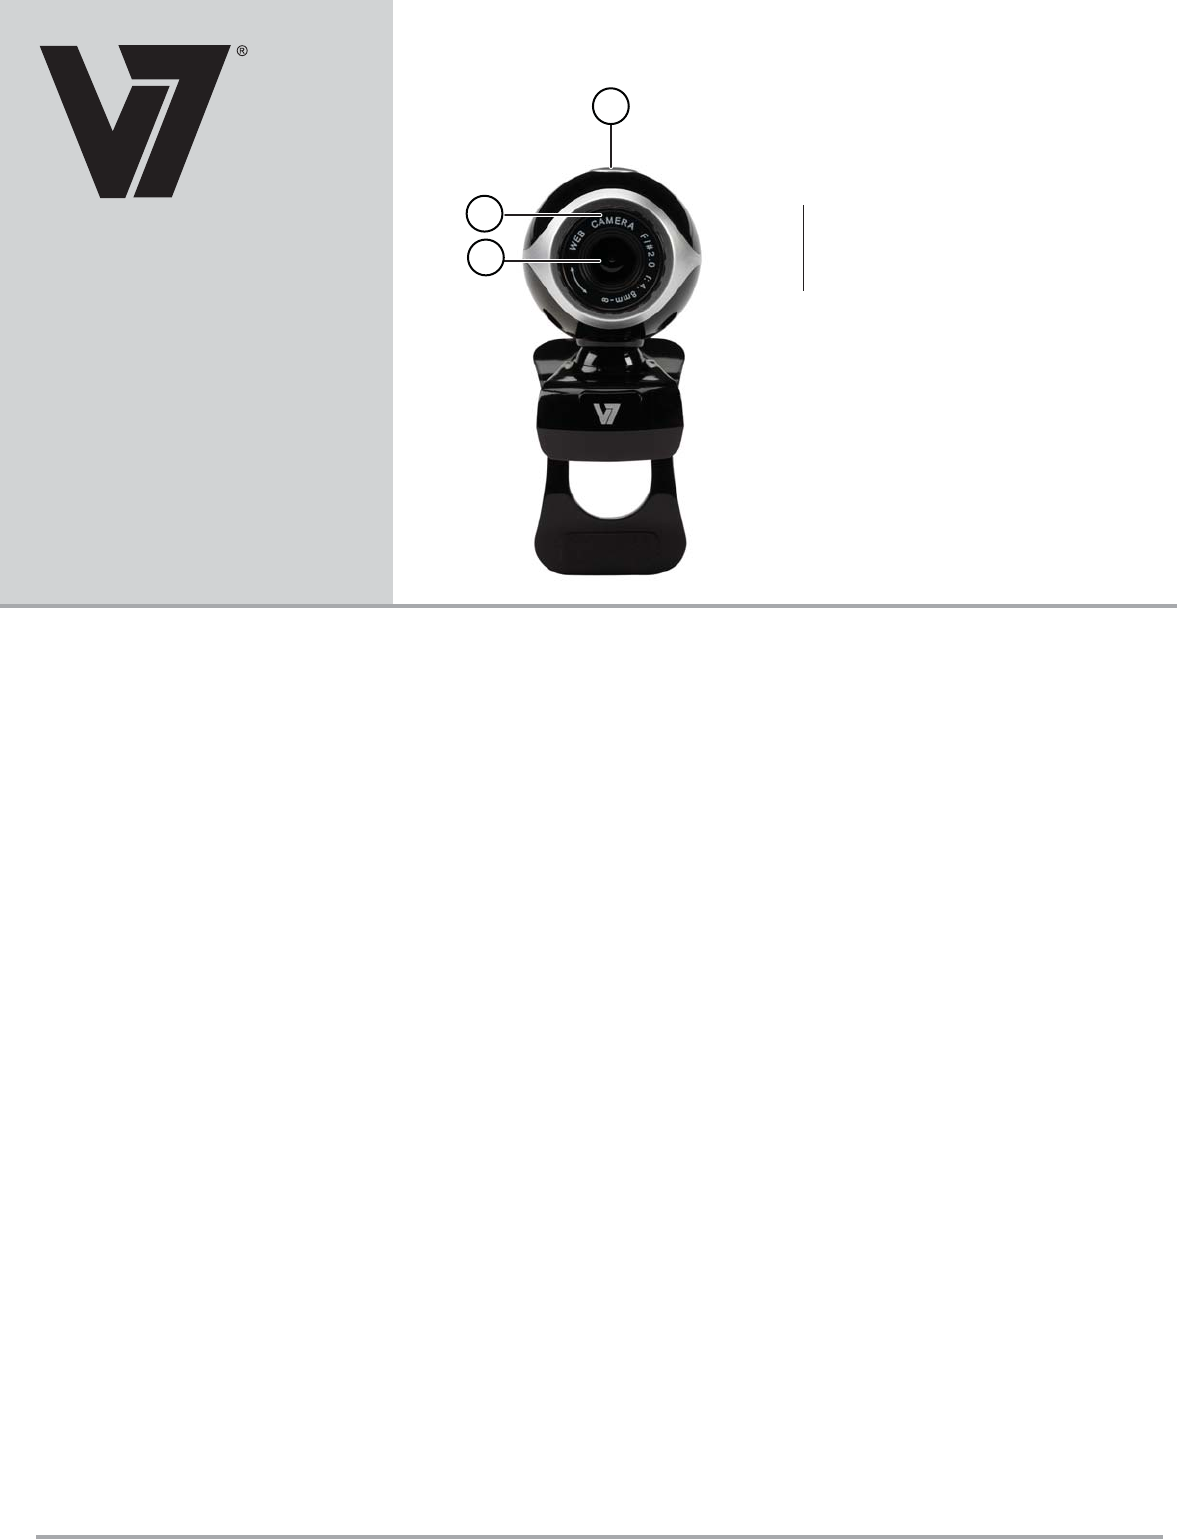
1 Camera lens
2 Focus adjustment dial
3 Snapshot button
Webcam Features
Installing the software
Note: Additional features will be available once you install the
software.
1. Connect the webcam to an available USB port.
2. After the hardware is found, insert the disc into your CD/DVD
drive.
3. Follow the on-screen instructions to install the software.
4. Double-click the Webcam VideoCap icon on your desktop and
then select Device. Make sure that USB 2.0 Webcam is
selected.
Note: The webcam software can also be found online at
www.V7-world.com under the Products and/or Support tabs.
Using the webcam
Important: If you have more than one webcam, set the CS0300
as the default. Double-click the Webcam VideoCap icon on
your desktop and then select Device. Select USB 2.0 Webcam.
Finding the proper location for your webcam
• For best eye contact, put your webcam in the middle of your
monitor.
• Make sure the microphone on the webcam is no more than 3
feet (1 m) away from you and is pointing towards you.
• If you use computer speakers, put them at least 12 inches (30
cm) away from your microphone to reduce feedback and then
angle the speakers away from the microphone.
Focusing your webcam
Firmly grip the black dial on the front of the webcam with your
fingers and turn the dial to the right and left until the webcam is in
focus.
Recording video
1. Double-click the Webcam VideoCap icon on your desktop and
then click Capture.
2. In the drop-down menu select Start Capture.
3. To stop capturing video select Capture again and then Stop
Capture. The video is automatically saved to My Videos or to
the location you specified.
Recording video with audio
1. Double-click the Webcam VideoCap icon on your desktop and then
click Capture.
2. In the drop-down menu select Record Audio. A checkmark will
appear.
3. Click Capture and select Start Capture.
4. To stop capturing video select Capture again and then Stop Capture.
The video is automatically saved to My Videos or to the location you
specified.
Taking a picture using the webcam
Press the silver snapshot button on top of the camera. The picture is
automatically saved to My Pictures or to the location you specified.
Taking a picture using the software
1. Double-click the Webcam VideoCap icon on your desktop and then
click Capture.
2. In the drop-down menu select Snap Shot. The picture is automati-
cally saved to My Pictures or to the location you specified.
Changing webcam settings
Saving videos and pictures
Pictures and videos automatically save to My Pictures or My
Videos. To change the location:
1. Double-click the Webcam VideoCap icon on your desktop and
then select Device. Make sure that USB 2.0 Webcam is
selected.
2. Click File.
3. Select the file type you wish to save (for pictures select Set
snapshot file Folder, for video select Set capture file Folder)
4. In the Browse for Folder window select where you would like
your pictures to be saved.
Note: To reset where pictures and videos are saved, click File,
then File index reset. The files will now be saved to the original
default location.
1
Plug and play
Connect the webcam to an available USB
port. The computer recognizes the webcam
and you are ready to start using the webcam.

2
English: FCC Statement
This device complies with Part 15 of the FCC Rules. Operation is subject to the
following two conditions: (1) This device may not cause harmful interference, and (2)
This device must accept any interference received, including interference that may
cause undesired operation.
This equipment has been tested and found to comply with the limits of a Class B digital
device, pursuant to Part 15 of the FCC Rules. These limits are designed to provide
reasonable protection against harmful interference in a residential installation. This
equipment generates, uses, and can radiate radio frequency energy and if not installed
and used in accordance with the instructions, may cause harmful interference to radio
communications. However, there is no guarantee that interference will not occur in a
particular installation. If this equipment does cause harmful interference to radio or
television reception, which can be determined by turning the equipment off and on, the
user is encouraged to try to correct the interference by one or more of the following
measures:
• Reorient or relocate the receiving antenna;
• Increase the separation between the equipment and receiver;
• Connect the equipment into an outlet on a circuit different from that to which the
receiver is connected;
• Consult the dealer or an experienced radio/TV technician for help
Changes or modifications not authorized by the party responsible for compliance could
void the user’s authority to operate this product.
Product Safety Instructions:
Read this guide for important safety and health information and for regulatory
information.
Warning: Failure to properly set up, use, and care for this product can increase the risk
of serious injury or death, or damage to the device or devices. Read this instruction
and keep all printed manuals, instruction for future references. This Product Safety
Instructions includes important information about many V7 products. Refer to sections
that apply to the feature of your device.
USB Powered Devices: Do not connect the USB power cable until all other cable
connections are made.
All Devices:
Do not attempt repairs. Do not attempt to take apart, disassemble, service, or modify
the hardware device or power supply. Doing so could present risk of electronic shock or
other hazard. Any evidence of any attempt to dissemble and/or modify the device,
including peeling, puncturing, or removal of any of the labels, will void the Limited
Warranty.
Do not abuse the device: Do not immerse the device to any liquid or expose to
moisture. Clean only with dry cloth. Do not use the device outside the specified
operating temperature range of 5°C (41°F) to 35°C (95°F). If the device is exposed to
environment outside of its prescribed operation, turn off the device and allow
the
temperature to stabilize within the specified operating range before using the device.
Regulatory Information: Disposal of Waste Electrical and Electronic Equipment (WEEE)
The Waste Electrical and Electronic Equipment (WEEE) Directive aims to
minimize the impact of electrical and electronic goods on the environment, by
increasing re-use and recycling and by reducing the amount of WEEE going to
landfill. The symbol on your V7 product or its packaging signifies that this
product must be disposed separately from ordinary household wastes at its end
of life. Please kindly be aware that this is your responsibility to dispose electronic
equipment at recycling centers so as to help conserve natural resources.
Each country in the European Union should have its collection centers for electrical and
electronic equipment recycling. For information about your recycling drop off area, please
contact your related electrical and electronic equipment waste management authority or
the retailer where you bought the product. Authorized Representative in European
Community: Ingram Micro Pan Europe GmbH, Heisenbergbogen 3, D-85609 Dornach /
Munich, Germany. (www.V7-world.com)
Adjusting video format
1. Select Option then Video Capture Pin… The Properties window
will open.
2. Adjust the Output Size using the drop down menu.
3. Click OK when finished.
Setting the frame rate
1. Select Capture, then Set frame rate.
2. Enter the desired frames per second and check the Enable Frame
Rate box.
3. Click OK when finished.
Adjusting the preview screen size
1. Select Preview, then Distinguish Settings. The Properties window
opens.
2. Select the desired display size.
3. Click OK when finished.
Adjusting the maximum video length
1. Select Capture, then Record time limit.
2. Check the Use Time Limit box and enter a time limit (in seconds) in
the Time Limit box.
3. Click OK when finished.
Setting the snapshot file size
Select Capture, then the desired file size from the drop-down menu.
Safety and Maintenance Information
• Do not touch the lens with fingers or any sharp or coarse items.
• Use a soft cotton cloth to clean the lens.
• Do not use this product in extreme hot, cold, or dusty environments.
• Avoid dropping the webcam, as it may cause it to not work correctly.
Specifications
• Video capture: up to 640x480 pixel
• Transmission Speed: 30 FPS
• Interface: USB 2.0
• Focus: Manual Focus
• Distance: 5cm /1.9in to infinity
• Cable Length: 1.5 m / 4.9 ft
• Software upgrade for up to 16-mega pixel (optional)
• Automatic white balance (AWB)
• Automatic color compensation (ACC)
Product specificaties
| Merk: | V7 Videoseven |
| Categorie: | |
| Model: | CS0300 |
Heb je hulp nodig?
Als je hulp nodig hebt met V7 Videoseven CS0300 stel dan hieronder een vraag en andere gebruikers zullen je antwoorden
Handleiding V7 Videoseven

3 Februari 2023

3 Februari 2023

3 Februari 2023

3 Februari 2023

3 Februari 2023

3 Februari 2023

3 Februari 2023

3 Februari 2023
Handleiding
- Roomelsbacher
- One For All
- Economy By Ferm
- IFavine
- I.t.Works
- Primo
- Asus
- Smart
- Ford Bluetooth En Voice Control
- ATAG
- Palm Beach
- Philips HD Dvd Recorder
- Electrische Fiets
- Tacklife
- Duss
Nieuwste handleidingen voor

8 November 2024

8 November 2024

8 November 2024

24 Oktober 2024

8 November 2024

12 Juli 2024

12 Juli 2024

12 Juli 2024

12 Juli 2024

12 Juli 2024