StarTech.com 161LM-PRIVACY-SCREEN Handleiding
StarTech.com Schermfilter 161LM-PRIVACY-SCREEN
Bekijk gratis de handleiding van StarTech.com 161LM-PRIVACY-SCREEN (2 pagina’s), behorend tot de categorie Schermfilter. Deze gids werd als nuttig beoordeeld door 18 mensen en kreeg gemiddeld 4.3 sterren uit 4 reviews. Heb je een vraag over StarTech.com 161LM-PRIVACY-SCREEN of wil je andere gebruikers van dit product iets vragen? Stel een vraag
Pagina 1/2
Quick-Start Guide
To view manuals, FAQs, videos, drivers, downloads, technical drawings, and more, visit www.startech.com/support.
Manual Revision: November 23, 2023 2:36 PM
To view manuals, FAQs, videos, drivers, downloads, technical drawings, and more, visit www.startech.com/support
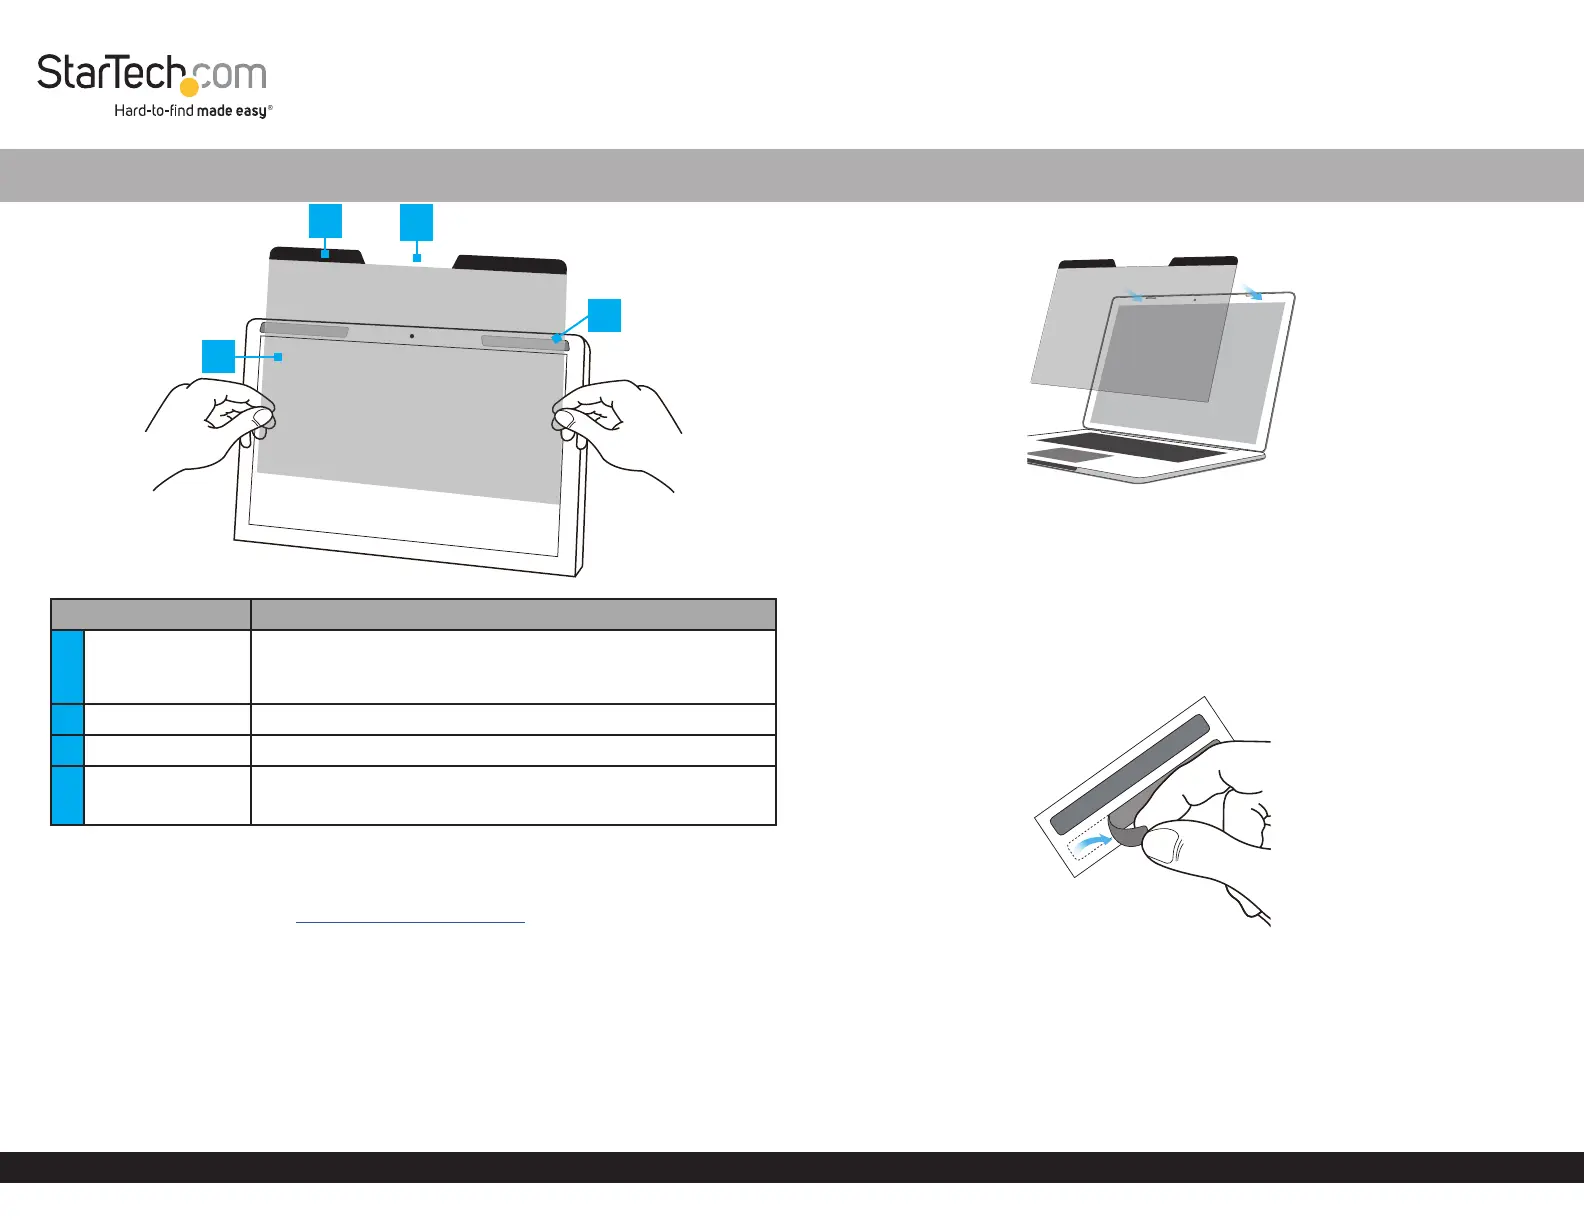
ComponentFunction
1Privacy Filter
• Privacy eect when viewing the Screen at angles greater
than 30° o-center from the Left or Right
• The total Field of View is 60°
2Magnetic Tabs • Secure the Privacy Filter to the Display Bezel
3Camera Notch• Ensures the built-in camera is not obstructed
4Metal Strips
• For Displays with a Non-Magnetic Top Bezel
Note: Not included with all Magnetic Privacy Filters
Requirements
For the latest manuals, product information, technical specications, and declarations
of conformance, please visit: www.startech.com/support
Install the Privacy Filter
Method 1: Direct Bezel Mounting
1. Clean the Screen and Top Bezel using the Wiping Cloth.
2. Remove all Protective Films from the Privacy Filter.
3. Attach the Privacy Filter by aligning the Magnetic Tabs against the Top Bezel.
Make any required adjustments to ensure that the Privacy Filter is covering the
entire screen. (Figure 1)
Note: If the Privacy Screen is reversible, choose the side that best ts the application.
Figure 1
4. Use the Wiping Cloth to clean any ngerprints or dust on the Privacy Filter.
Method 2: Metal Strips
1. Clean the Screen and Top Bezel using the Wiping Cloth.
2. Remove all Protective Films from the Privacy Filter.
3. Remove all Metal Strips from the Transparent Lining. (Figure 2)
Figure 2
4. Position the Metal Strips on the Top Bezel, aligning them to the Right and Left
sides. (Figure 3)
Note: Ensure there is at least a 0.47in (12mm) gap on the Bezel for the Metal Strips.
Installation Instructions for StarTech.com Magnetic Privacy Filters
*Product may vary from image
3
2
1
4
Product specificaties
| Merk: | StarTech.com |
| Categorie: | Schermfilter |
| Model: | 161LM-PRIVACY-SCREEN |
Heb je hulp nodig?
Als je hulp nodig hebt met StarTech.com 161LM-PRIVACY-SCREEN stel dan hieronder een vraag en andere gebruikers zullen je antwoorden
Handleiding Schermfilter StarTech.com

12 Maart 2026
15 September 2025
15 September 2025
9 Juli 2023
6 Juli 2023
5 Juli 2023
4 Juli 2023
4 Juli 2023
3 Juli 2023
30 Juni 2023
Handleiding Schermfilter
Nieuwste handleidingen voor Schermfilter
13 Maart 2026
2 Oktober 2024
2 Oktober 2024
2 Oktober 2024
2 Oktober 2024
2 Oktober 2024
2 Oktober 2024