Smeg VR 105 B Handleiding
Bekijk gratis de handleiding van Smeg VR 105 B (10 pagina’s), behorend tot de categorie Vriezer. Deze gids werd als nuttig beoordeeld door 74 mensen en kreeg gemiddeld 4.3 sterren uit 37.5 reviews. Heb je een vraag over Smeg VR 105 B of wil je andere gebruikers van dit product iets vragen? Stel een vraag
Pagina 1/10

8
GB
ATTENTION
Read your handbook carefully since it contains instructions
which will ensure safe installation, use and maintenance of
your appliance.
Your freezer is built to International standards (EN60) and
has been awarded the European approval mark (IMQ) for
compliance to UK electrical safety requirements. It also meets
the EC standards on the prevention and elimination of radio
interference (EC directive 87/308 - 02.06.89).
1. This appliance is designed to be used indoors and under
no circumstances should it be installed outside.
2. The appliance should be used only by adults exclusively
for storing foodstuffs in compliance with the instructions
provided in the handbook. Under no circumstances should
children be allowed to operate, or tamper with, this prod-
uct.
3. For electrical safety, do not attempt to operate this appli-
ance with wet hands or feet.
4. Do not operate this appliance connected to an extension
lead. If a longer supply cable is required, this must be re-
placed with one of the same specifications in compliance
Safety a good habit to get into
with the current electrical regulations. This operation should
be carried out by a qualified person. Ensure that the cable is
not trapped or damaged during the installation.
5. Never pull the cable or the appliance to remove the plug
from the socket.
6. Do not touch the internal cooling elements, especially if
your hands are wet, since you could burn or hurt yourself.
Do not eat ice cubes straight out of the freezer.
7. Before doing any cleaning, disconnect the appliance from
the electricity (by pulling out the plug orturning off the gen-
eral switch in your home).
8. Before disposing of your old appliance, remember to break
or remove the lock as a safety measure to protect children
who might lock themselves inside the appliance when play-
ing.
9. If your appliance is not operating properly, before calling
your after-sales service read the chapter on “Trouble Shoot-
ing” which might help you resolve the problem. Do not at-
tempt to repair the fault by intervening on the internal com-
ponents.
Installation
in compliance with all current electrical regulations. If the
system is not earthed, the manufacturer declines all liability
for consequent damages or losses. Do not use adapters of
multiple sockets.
FOR ENGLISH MARKET ONLY
This appliance is fitted with a continental 2-pim plug for
factory testing. Before installation the plug should be cut
off. The appliance is designed to be installed in a switched
spur outlet fused at 13 Ampere. If the installation requires a
13 Ampere plug type to be fitted it should be conform to
BS1363.
Check the power load
The electrical socket must support the maximum power load
of the appliance shown on the data plate.
Before plugging the appliance to the mains
Stand the appliance upright and wait at least 3 hours before
plugging the appliance into the mains to ensure proper per-
formance.
Proper installation of the appliance is essential to en-
sure the best and most efficient performance of your
appliance.
Ventilation
The compressor produce heat and therefore require adequate
ventilation; the appliance should therefore be installed only
in a room with doors or windows in order to ensure proper
air circulation. Remember that the room should not be too
humid.
Install the appliance away from heat
sources
The appliance should be installed at least 60 cm away from
cookers, boilers, cookers with ovens, fireplaces and chim-
neys and at least 3 cm away from the wall.
Levelling
The floor should be perfectly level; if not, you can adjust the
feet at the front of the appliance.
Earthing
Before making the electrical connection, check that the volt-
age shown on the data plate, that you will find on the bot-
tom left hand side of the appliance next to the crisper, cor-
responds to that of your home and that the socket is earthed

9GB
Compartment for freezing and storage
Storage compartments
Control Panel
Defrost water drain system
A closer look
B
A
C
D
B
A
C

10
GB
a
A
B
c d b
a d b c
Fig. 1
Control Panel
Recessed freezers have 2 different types of control panel as
shown in figure 1; corresponding with the one on the
appliance your have purchased.
Thermostat ’’a’’
This regulates the temperature inside the appliance
automatically. Turn the knob from setting 1 to 3 for
increasingly colder temperatures.To adjust the thermostat,
use a coin to turn the knob.
Green Light ’’b’’
Type “A” control panel.
When the light is on (move the switch to the right) this
indicates that the appliance is connected to the mains.
When the switch is moved to the left (green light covered),
the appliance is disconnected from the mains.
Type “B” control panel.
When lit it shows the appliance is connected to the mains.
Yellow Light ’’c’’
Type “A” control panel.
When this light is on (move the switch to the left), the
compressor will operate continuously to reach the lower
temperatures necessary for freezing fresh foods quickly.
By moving the switch to the right (yellow light covered) the
freezer is operated by the thermostat.
Type “B” control panel.
When lit (on setting “S”) the compressor runs continuously
to reach the low temperatures necessary for freezing fresh
foods. When off, the freezer is operated by the thermostat.
Red Light ’’d’’
This light goes on when the temperature inside the appliance
is not sufficient to preserve foodstuffs.
Setting up tour appliance
ATTENTION
After transport stand the appliance upright and wait
at least 3 hours before plugging the appliance into the
mains to ensure proper performance.
Use these average temperature settings to ensure op-
timum performance and save energy.
Once the appliance has been connected to the mains, ensure
that the green light is on and turn the yellow light on as
well.
When the red light is off, turn off the yellow light: the
appliance is now ready for use.
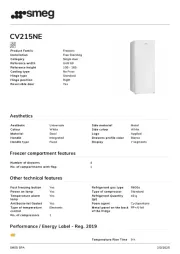
Product specificaties
| Merk: | Smeg |
| Categorie: | Vriezer |
| Model: | VR 105 B |
Heb je hulp nodig?
Als je hulp nodig hebt met Smeg VR 105 B stel dan hieronder een vraag en andere gebruikers zullen je antwoorden
Handleiding Vriezer Smeg
9 Juni 2025

7 April 2025

7 April 2025

5 Februari 2025

5 Februari 2025

7 Januari 2025

7 Januari 2025

21 November 2024

21 November 2024

21 November 2024
Handleiding Vriezer
- Avantco
- ElectriQ
- Avanti
- Nabo
- Curtis
- Vedette
- Altus
- Gigabyte
- Stirling
- Balay
- Changhong
- Emerio
- Cylinda
- LERAN
- Kolpak
Nieuwste handleidingen voor Vriezer

31 Juli 2025

29 Juli 2025
29 Juli 2025

29 Juli 2025
29 Juli 2025

29 Juli 2025
29 Juli 2025
29 Juli 2025

28 Juli 2025
28 Juli 2025