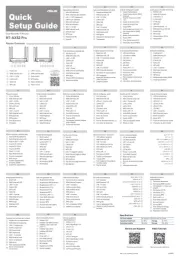
Smart-AVI HDR-8X8-Plus Handleiding
Bekijk gratis de handleiding van Smart-AVI HDR-8X8-Plus (9 pagina’s), behorend tot de categorie Router. Deze gids werd als nuttig beoordeeld door 57 mensen en kreeg gemiddeld 4.7 sterren uit 29 reviews. Heb je een vraag over Smart-AVI HDR-8X8-Plus of wil je andere gebruikers van dit product iets vragen? Stel een vraag
Pagina 1/9

Made in U.S.A. www.SmartAVI.com 1- -AVI- 800 2131
HDR-8X8-Plus
User Manual
HDMI 4K 8x8 Switch Matrix
Connect up to eight different HDMI video sources
to eight different outputs.

2
Introduction
The HDR- -PLUS HDMI switch matrix connects up to 8 HDMI sources to up to 8 display devices and facilitates 8X8
the creation of different connection schemes. With high reliability, low power consumption and high bandwidth
(supports HDMI 1.4 features). The user can control the switch matrix operation by front panel buttons, PC serial
port, or web browser via RJ45 (local area network). The input/output connection status is displayed on the front
LCD. The HDR- -PLUS has 4K resolution. 8X8
Layout
Figure 2-1: Front Panel
Control Panel
Status LCD
Figure 2-2: Rear Panel
HDMI inputs
HDMI outputs
RJ45 Jack
RS232 Port
Power IN
Power Switch
Table of Contents
What’s in the box? 2
Introduction 2
Layout 2
Connecting the HDR-8X8-PLUS 3
Using the Front Control Panel 3
IR Remote Control 4
LAN (TCP-IP) Control 5
Smart Control Pro (RS- 6 232)
Technical Specifications 7
Troubleshooting 7
LIMITED WARRANTY STATEMENT 8
What’s in the box?
PART NO.
PART NO.
PART NO.
PART NO. PART NO. QTY
QTY
QTY
QTY QTY DESCRIPTIO
DESCRIPTIO
DESCRIPTIO
DESCRIPTIODESCRIPTION
N
N
N N
HDR-8X8-Plus 1 4K Resolution 8x8 HDMI Switch Matrix
PS12VDC3A &
CCPWR06
1 Power Supply
RMHDR8X8 1 IR Remote
HDR8X8-PLUS-EAR 2 Mounting Brackets
User Manual 1 Quick Start Guide

3
Using the Front Control Panel
Switch between input signals easily with corresponding numeric buttons. Backlit SAVE, RECALL, LOCK, and
EDID function buttons enhance control, as well.
Figure 3-1: Front Control Panel
Numbered Buttons
1,2,3,4,5,6,7,8 respectively corresponding with HDMI output 1 through 8. Click on each output button to tog-
gle the input selected for that output.
Lock
The LOCK button restricts switching with front-panel buttons. It can be deactivated by pressing the LOCK but-
ton again.
Save
Assign and store connected signals (ex: signal 1, 2, etc).RecallSwitch between recently used signals.
EDID Learning
Press the EDID learning front-panel button to acquire information about connected display/monitors. Once
pressed, the EDID button will illuminate and LED indicators will light up.
Button Combinations
SAVE + n: Save the current connected status to item n. (n=1,2,3,4,5,6,7,8)
RECALL+ n: Recall item n connection status to current display. (n=1,2,3,4,5,6,7,8)
EDID + 1: AUTO LED light. Default EDID “SMEDID” is selected.
EDID + 2: MANUAL LED light. Local monitor in output port 1 EDID is learned.
CONNECTING THE HDR- -PLUS 8X8
1. Connect HDR-8X8-PLUS HDMI input to signal sources such as PC or DVD players.
2. Connect the HDR-8X8-PLUS HDMI outputs to displays, monitors, or projectors.
3. Connect HDR-8X8-PLUS to power supply.
4. Press the On/Off switch to activate the HDR-8X8-PLUS.
5. Switch between signals with either front-panel controls, or via PC with RS232 and TCP/IP web support
INSTALLATION DIAGRAM
Product specificaties
| Merk: | Smart-AVI |
| Categorie: | Router |
| Model: | HDR-8X8-Plus |
Heb je hulp nodig?
Als je hulp nodig hebt met Smart-AVI HDR-8X8-Plus stel dan hieronder een vraag en andere gebruikers zullen je antwoorden
Handleiding Router Smart-AVI

20 Februari 2025

20 November 2024

13 Maart 2024

13 Maart 2024

13 Maart 2024

12 Maart 2024

12 Maart 2024

12 Maart 2024
Handleiding Router
- NetComm
- Synology
- Conceptronic
- Sabrent
- LTS
- Digi
- Dahua Technology
- Premiertek
- Ocean Matrix
- Intellinet
- Kopul
- Atlantis Land
- Tele 2
- Sixnet
- VigilLink
Nieuwste handleidingen voor Router

30 Juli 2025

29 Juli 2025
29 Juli 2025

29 Juli 2025
29 Juli 2025
28 Juli 2025
15 Juli 2025
14 Juli 2025
7 Juli 2025

7 Juli 2025