Roland Edirol Motion Dive.tokyo Console MD-P1 Handleiding
Roland Niet gecategoriseerd Edirol Motion Dive.tokyo Console MD-P1
Bekijk gratis de handleiding van Roland Edirol Motion Dive.tokyo Console MD-P1 (4 pagina’s), behorend tot de categorie Niet gecategoriseerd. Deze gids werd als nuttig beoordeeld door 42 mensen en kreeg gemiddeld 4.1 sterren uit 6 reviews. Heb je een vraag over Roland Edirol Motion Dive.tokyo Console MD-P1 of wil je andere gebruikers van dit product iets vragen? Stel een vraag
Pagina 1/4
motion dive .tokyo console Owner’s Manual
Basic Operation
Read me first
04121223 ’05-10-1N
The most important thing about this hardware console is that it’s “easy to understand.” The “motion dive .tokyo console” is designed with the
same form of interface as motion dive. Operating the “motion dive .tokyo console” is extremely simple; this page contains everything there is to
know about it.
The “motion dive .tokyo console MD-P1” is a dedicated
controller for the “motion dive .tokyo” software. Roland
provides no guarantee or support regarding its use with
any software other than “motion dive .tokyo”.
For details on using the software “motion dive .tokyo” refer to
the separate “motion dive .tokyo” manual.
2
3
1Select the target.
Select the clip.
Execute.
Selecting a clip
1
2
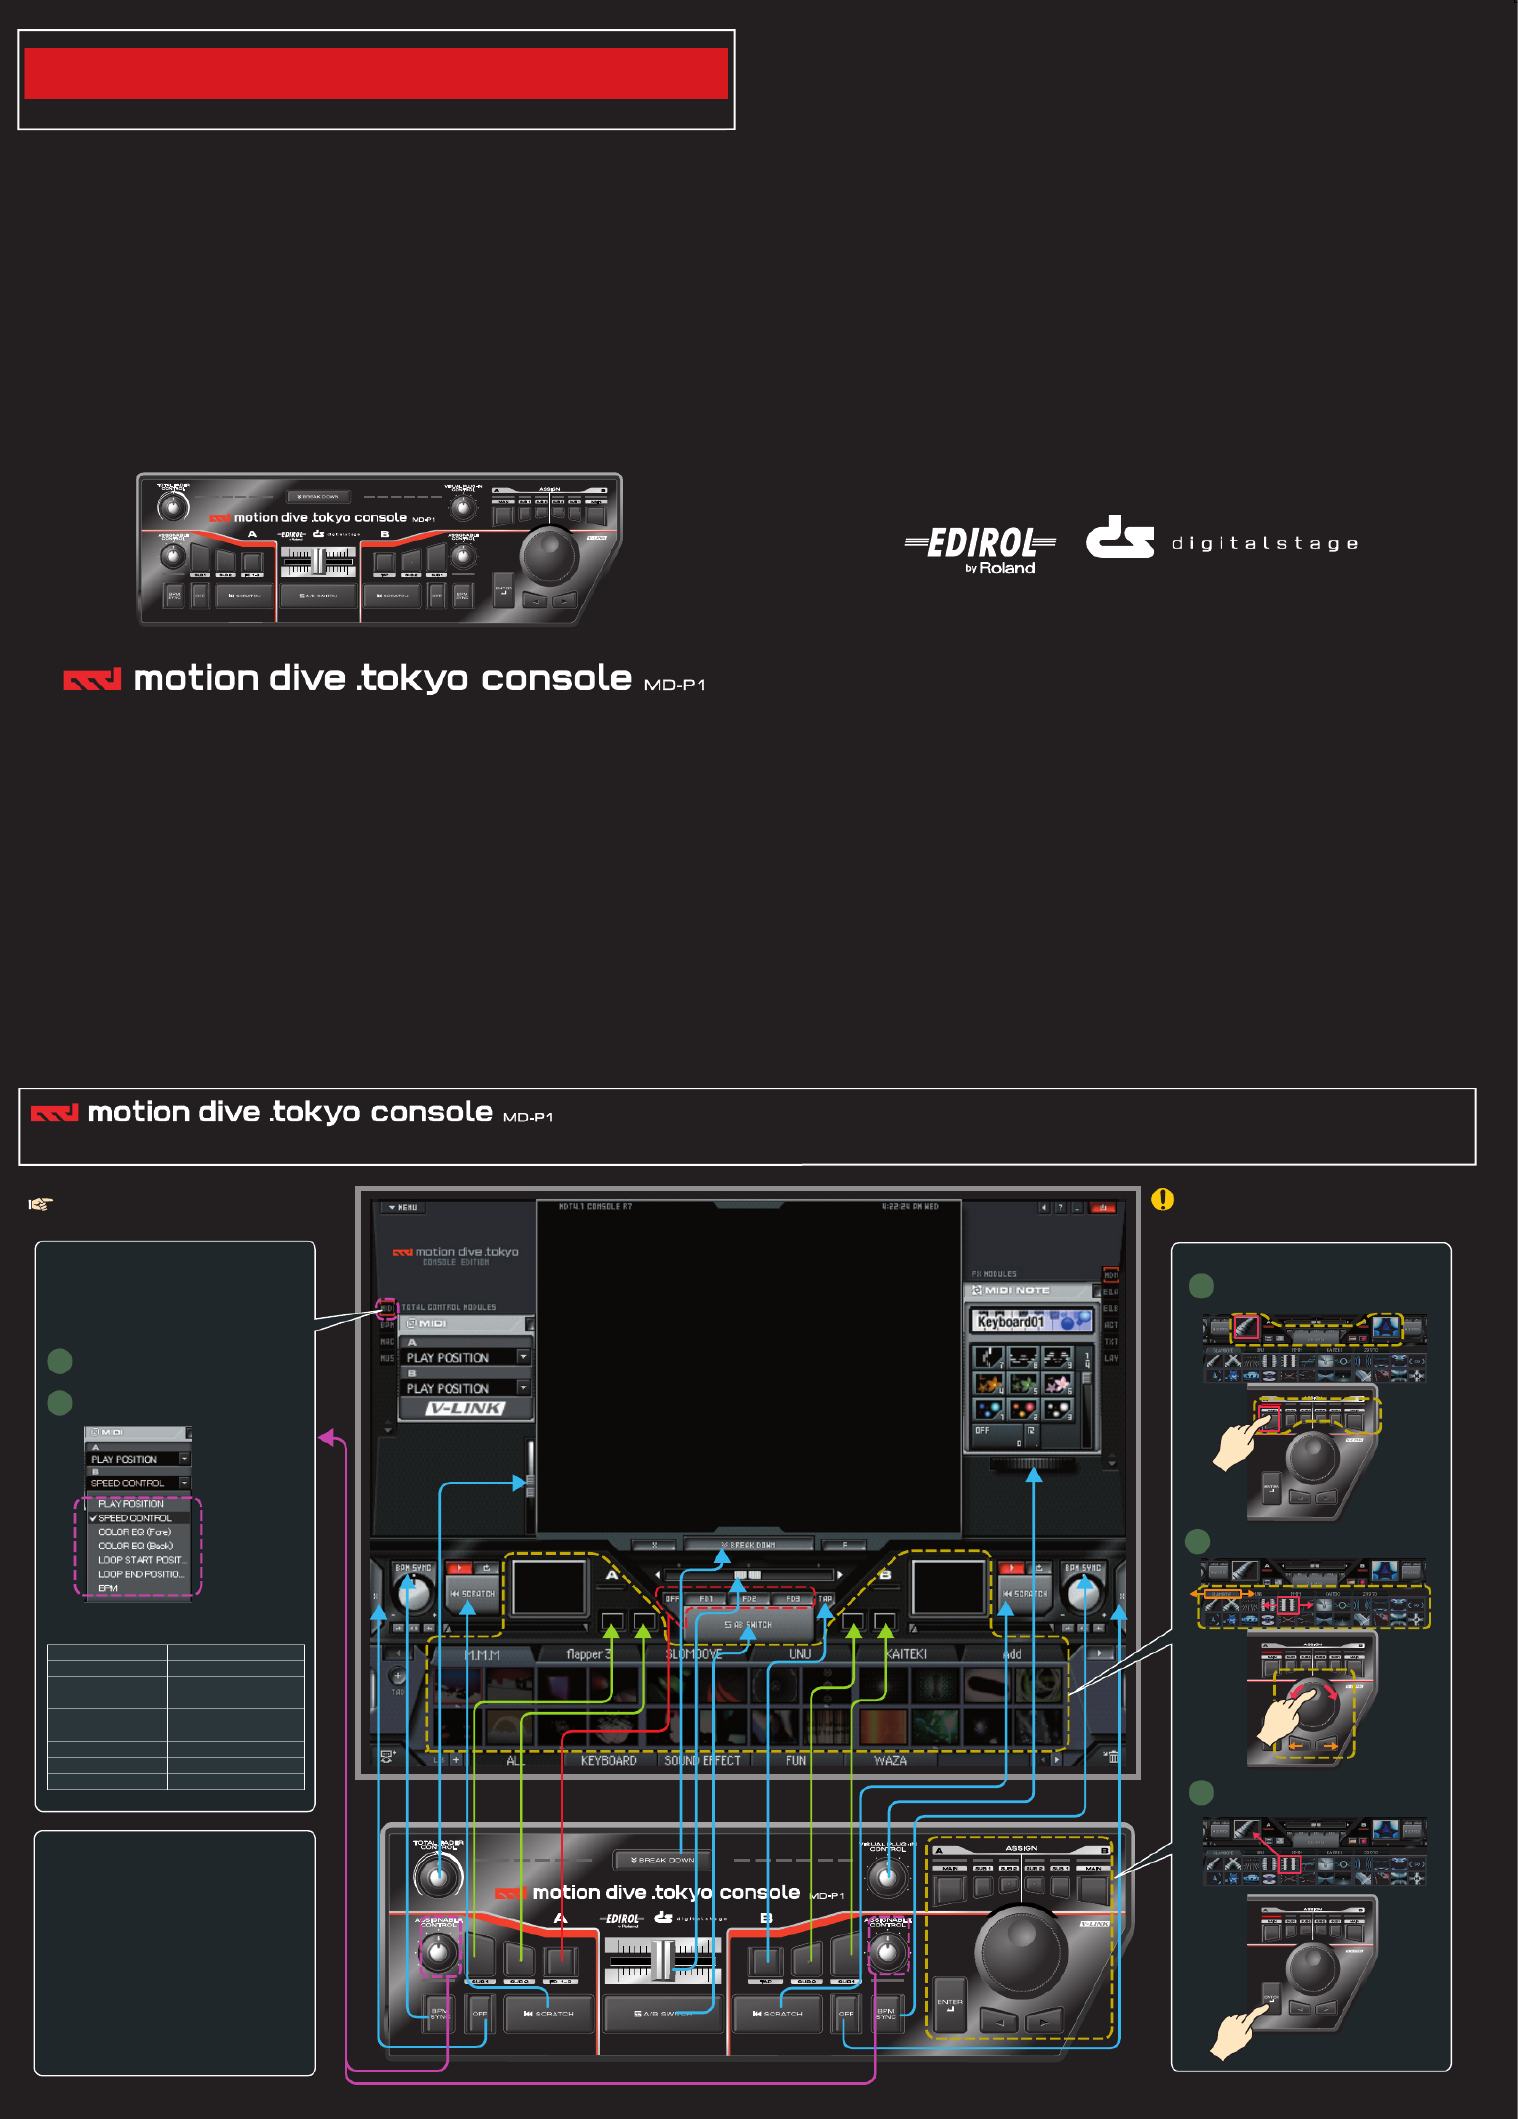
Assignable controls
You can assign various operations to the two knobs
A (left side) and B (right side). In the Total Control
Modules area, open MIDI to specify what you want to
assign.
Click [MIDI].
Specify what you want to assign.
The following choices are available:
• Hold down the computer’s Ctrl (control) key and turn
the MD-P1’s VISUAL PLUGIN CONTROL knob to
change the FX MODULES.
• Hold down the computer’s Ctrl (control) key and turn
the MD-P1’s TOTAL FADER CONTROL knob to
change the TOTAL CONTROL MODULES.
• Hold down the computer’s Ctrl (control) key and turn
the MD-P1’s ASSIGNABLE CONTROL knob to
adjust the ASSIGNABLE CONTROL parameter.
Operations in conjunction with the Ctrl key
PLAY POSITION
SPEED CONTROL
COLOR EQ (Fore)
COLOR EQ (Back)
LOOP START POSITION
LOOP END POSITION
BPM
Adjusts the playback point
Adjusts the speed
Adjusts the foreground
plug-in color EQ
Adjusts the background
plug-in color EQ
Adjusts the loop start point
Adjusts the loop end point
Change the BPM
Product specificaties
| Merk: | Roland |
| Categorie: | Niet gecategoriseerd |
| Model: | Edirol Motion Dive.tokyo Console MD-P1 |
Heb je hulp nodig?
Als je hulp nodig hebt met Roland Edirol Motion Dive.tokyo Console MD-P1 stel dan hieronder een vraag en andere gebruikers zullen je antwoorden
Handleiding Niet gecategoriseerd Roland

21 Juni 2026
15 Mei 2026
14 Mei 2026
13 Mei 2026
13 Mei 2026
12 Mei 2026
12 Mei 2026
12 Mei 2026
12 Mei 2026
12 Mei 2026
Handleiding Niet gecategoriseerd
Nieuwste handleidingen voor Niet gecategoriseerd
25 Juni 2026
25 Juni 2026
25 Juni 2026
25 Juni 2026
25 Juni 2026
25 Juni 2026
25 Juni 2026
25 Juni 2026
25 Juni 2026
24 Juni 2026