Reolink Go PT Ultra Handleiding
Reolink
Bewakingscamera
Go PT Ultra
Bekijk gratis de handleiding van Reolink Go PT Ultra (51 pagina’s), behorend tot de categorie Bewakingscamera. Deze gids werd als nuttig beoordeeld door 31 mensen en kreeg gemiddeld 4.1 sterren uit 16 reviews. Heb je een vraag over Reolink Go PT Ultra of wil je andere gebruikers van dit product iets vragen? Stel een vraag
Pagina 1/51

@ReolinkTech https://r eo li n k .com
Ap r il 2023
QSG1_A
58 .03 .0 05. 01 03
Technical Support
If you need any technical help, please visit our ocial support site and contact our support
team before returning the products, https://support.reolink.com.
Technische Unterstützung
Wenn Sie Hilfe brauchen, kontaktieren Sie bitte Reolink Support Team zuerst, bevor Sie Ihre
Bestellung zurücksenden. Meiste Fragen oder Probleme können von unserem Online Support
Center beantwortet und gelöst werden: https://support.reolink.com.
Support technique
Si vous avez besoin d’aide, veuillez contacter Reolink avant de retourner votre produit. La
plupart des questions peuvent être répondues via notre centre de support en ligne à l’adresse
https://support.reolink.com.
Supporto Tecnico
Se avete bisogno di aiuto, le chiediamo gentilmente di contattare Reolink prima di restituire
il prodotto. La maggior parte delle domande può essere risolta tramite il nostro centro di
assistenza online all’indirizzo https://support.reolink.com.
Soporte técnico
Si necesita ayuda, comuníquese con Reolink antes de devolver su producto. La mayoría de las
preguntas se pueden responder a través de nuestro centro de soporte en línea en
https://support.reolink.com.
REOLINK INNOVATION LIMITED
FLAT/RM 705 7/F FA YUEN COMMERCIAL BUILDING 75-77 FA YUEN
STREET MONG KOK KL HONG KONG
Product Ident GmbH
UK REP
EU REP
APEX CE SPECIALISTS LIMITED
Hoferstasse 9B, 71636 Ludwigsburg, Germany
Email: prodsg@libelleconsulting.com
Addr.: 89 Princess Street, Manchester, M14HT, UK
Email: info@apex-ce.com
Apply to: ReolinkGoPTUltra
Operational Instruction
EN /DE /FR/ IT/ES

English English1 2
What's in the Box
EN
Content
What’s in the Box ·············································································2
Camera Introduction ·········································································3
Set up the Camera ···········································································4
Charge the Camera ·········································································10
Install the Camera 11 ···········································································
Safety Instructions of Battery Usage (For Battery-Powered Cameras) · · · · · · · · · · · · · · · · · · · · · · · · · 16
Troubleshooting ·············································································17
Specifications ···············································································18
Notification of Compliance ··································································18
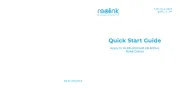
Camera
Quick Start Guide Surveillance Sign
Pack of Screws Mounting Template Hex Key
Camera Bracket USB-C Cable Mount Base
Antenna Reset Needle

English English3 4
Set up the CameraCamera Introduction
Activate SIM Card for the Camera
Insert the SIM Card
• Choose a Nano SIM card that supports WCDMA and FDD LTE.
• Some SIM cards have a PIN code. You may use your smartphone to disable the PIN first.
Rotate the camera lens, and remove the rubber cover.
NOTE: Do not insert the IoT or M2M SIM into your smartphone.
RST
MicroSD
RST MicroSD
Nano SIM
RST
Micro SD
RST MicroSD
Nano SIM
OFFON
POWER
MicroSD
Lens
Power Switch
Nano SIM Card Slot
IRLEDs
Antenna
Spotlight
Charging Port
Daylight Sensor
Battery Status LED
Built-in PIR Sensor
Built-in Mic
StatusLED
Speaker
Reset Hole
Micro SD Card Slot
* Press for more than five seconds to
restore the device to default settings.
* Rotate the camera’s lens to find the
reset hole and the SD card slot.
1
12
11
2
13
3
14
4
15
5
6
7
8
9
10
4
8
10
11
9
3
2
1
13
12
5 7
14
15
6
Product specificaties
| Merk: | Reolink |
| Categorie: | Bewakingscamera |
| Model: | Go PT Ultra |
Heb je hulp nodig?
Als je hulp nodig hebt met Reolink Go PT Ultra stel dan hieronder een vraag en andere gebruikers zullen je antwoorden
Handleiding Bewakingscamera Reolink

6 Juni 2025

4 Juni 2025
3 Juni 2025
31 Maart 2025

27 Maart 2025

27 Maart 2025

27 Maart 2025
27 Maart 2025

16 November 2024

16 November 2024
Handleiding Bewakingscamera
- AViPAS
- Brilliant
- August
- Vimar
- Owltron
- Stabo
- Advantech
- Pyle
- Dedicated Micros
- Somfy
- HiWatch
- Clas Ohlson
- Ag Neovo
- Y-cam
- Iget
Nieuwste handleidingen voor Bewakingscamera
29 Juli 2025
29 Juli 2025
29 Juli 2025
29 Juli 2025
29 Juli 2025

29 Juli 2025
29 Juli 2025
29 Juli 2025
29 Juli 2025

29 Juli 2025