Pyle PSW770 Handleiding
Bekijk gratis de handleiding van Pyle PSW770 (4 pagina’s), behorend tot de categorie Microfoon. Deze gids werd als nuttig beoordeeld door 63 mensen en kreeg gemiddeld 5.0 sterren uit 7 reviews. Heb je een vraag over Pyle PSW770 of wil je andere gebruikers van dit product iets vragen? Stel een vraag
Pagina 1/4
-8-
ThankyouforchoosingourproductThankyouforchoosingourproduct
Thisproductwasdesignedtobeinstalledonwoodstudwallsandsolidconcretewalls.
Beforeinstallingmakesurethesupportingsurfacewillsupportthecombinedloadofthe
equipmentandhardware.NeverexceedtheMaximumLoadCapacity.Thisproductis
intendedforindooruseonly.Useofthisproductoutdoorscouldleadtoproductfailureor
personalinjury.
CAUTION
INSTALLATIONGUIDE
Thisproductcontainssmallitemsthatcouldbeachokinghazardifswallowed.Keep
theseitemsawayfromyoungchildren
1.Makesuretheseinstructionsarereadandcompletelyunderstoodbeforeattempting
installation.Ifyouareunsureofanypartofthisinstallation,contactaprofessional
installerforassistance.
2.Thewallormountingsurfacemustbecapableofsupportingthecombinedweightof
themountandthedisplay;otherwisethestructuremustbereinforced
3.Safetygearandpropertoolsmustbeused.Aminimumoftwopeoplearerequired
forthisinstallation.Failuretousesafetygearcanresultinpropertydamage,serious
injuryordeath.
!
.
Warning
ItemNo.:PSW770ItemNo.:PSW770
TVsizerange:2342
Maximumweightcapacity:35kg/77lbs
Adjustableangle:012
~
~
""
°°
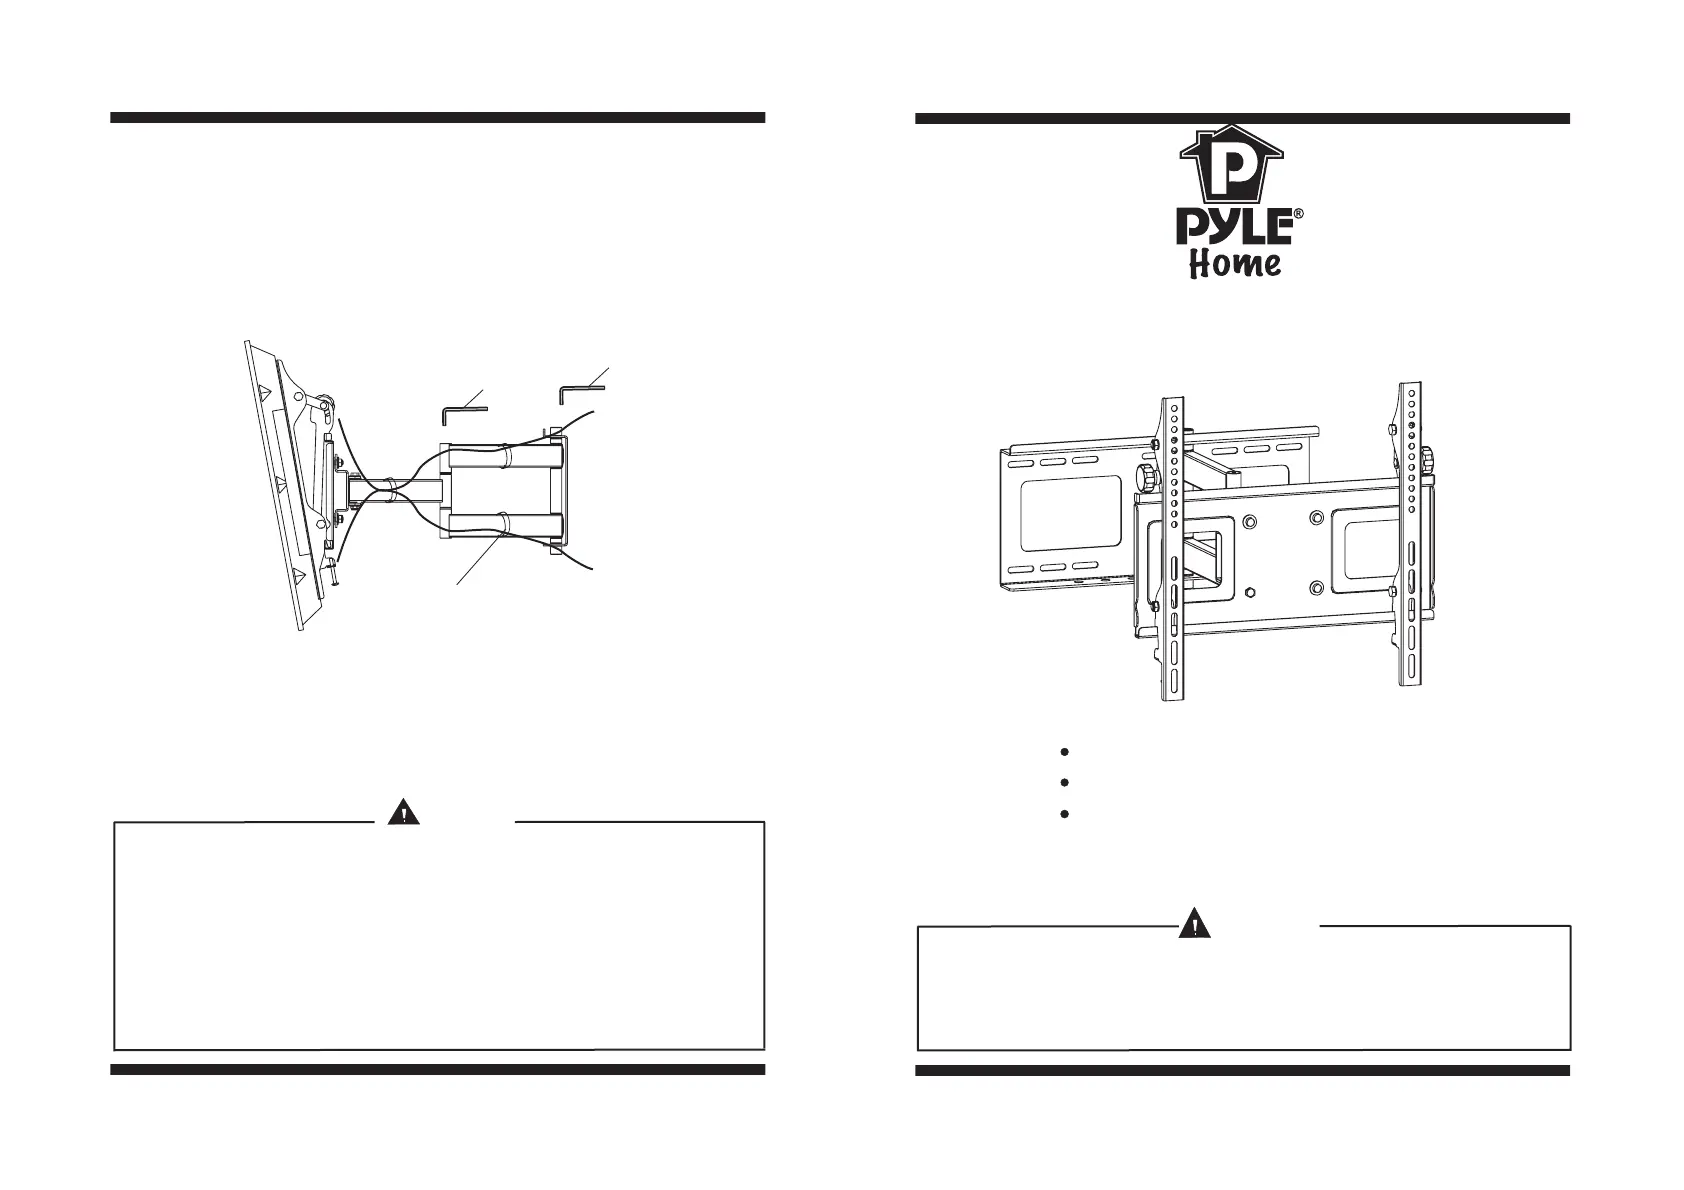
Part5-Adjustingdisplayandusingcordmanagement
Routecordsalongarticulatingarmsusingcordmanagements(7).
Articulatingarmscanbeadjustedtopositiondisplayintodesiredlocation.
Usewrenchtotightenandloosenthetensionscrew.Donotovertighten
anddonotloosentothepointthescrewscomeout.
clip
Part5-Adjustingdisplayandusingcordmanagement
8
9
7
wwwpyleaudiocom..
MADEINCHINA
PyleAudio
160063rdst,Brooklyn,NY,11204
(718)236-8000
Product specificaties
| Merk: | Pyle |
| Categorie: | Microfoon |
| Model: | PSW770 |
| Kleur van het product: | Zwart |
| Gewicht: | 8210 g |
| Breedte: | 465 mm |
| Diepte: | 99 mm |
| Hoogte: | 429.26 mm |
| Breedte verpakking: | 541 mm |
| Diepte verpakking: | 259 mm |
| Hoogte verpakking: | 264.2 mm |
| Gebruikershandleiding: | Ja |
| Montage gereedschap: | Ja |
| Montagewijze: | Muur |
| Maximale gewichtscapaciteit: | 35 kg |
| Paneelmontage-interface: | 100 x 100,400 x 400 mm |
| Verstelbaar: | Ja |
| Horizontaal draaibaar: | -90 - 90 ° |
| Inclusief schroeven: | Ja |
| Montage interface compatibiliteit (min): | 100 x 100 mm |
| Montage interface compatibiliteit (max): | 400 x 400 mm |
| Aantal displays ondersteund: | 1 |
| Bereik kantelhoek: | 0 - 12 ° |
| Maximale schermgrootte: | 42 " |
| Minimale schermgrootte: | 23 " |
| Aantal draaipunten: | 4 |
| Afstand tot de muur (min): | 99 mm |
| Afstand tot de muur (max.): | 455 mm |
Heb je hulp nodig?
Als je hulp nodig hebt met Pyle PSW770 stel dan hieronder een vraag en andere gebruikers zullen je antwoorden
Handleiding Microfoon Pyle

1 November 2025
6 Mei 2025
27 April 2025
28 Januari 2025
27 Januari 2025
27 Januari 2025
5 December 2024
5 December 2024
5 December 2024
5 December 2024
Handleiding Microfoon
Nieuwste handleidingen voor Microfoon
5 Juni 2026
3 Juni 2026
1 Juni 2026
23 Mei 2026
21 Mei 2026
21 Mei 2026
20 Mei 2026
19 Mei 2026
13 Mei 2026
12 Mei 2026