Panduit DP4300H Handleiding
Bekijk gratis de handleiding van Panduit DP4300H (2 pagina’s), behorend tot de categorie Printer. Deze gids werd als nuttig beoordeeld door 36 mensen en kreeg gemiddeld 4.4 sterren uit 3 reviews. Heb je een vraag over Panduit DP4300H of wil je andere gebruikers van dit product iets vragen? Stel een vraag
Pagina 1/2
Page 1 of 2
DP4300H
DP4600H
DP4300H/E
DP4600H/E
DP4X00H-QSG-EN
Rev.: 08-09-2024
© Panduit Corp. 2024
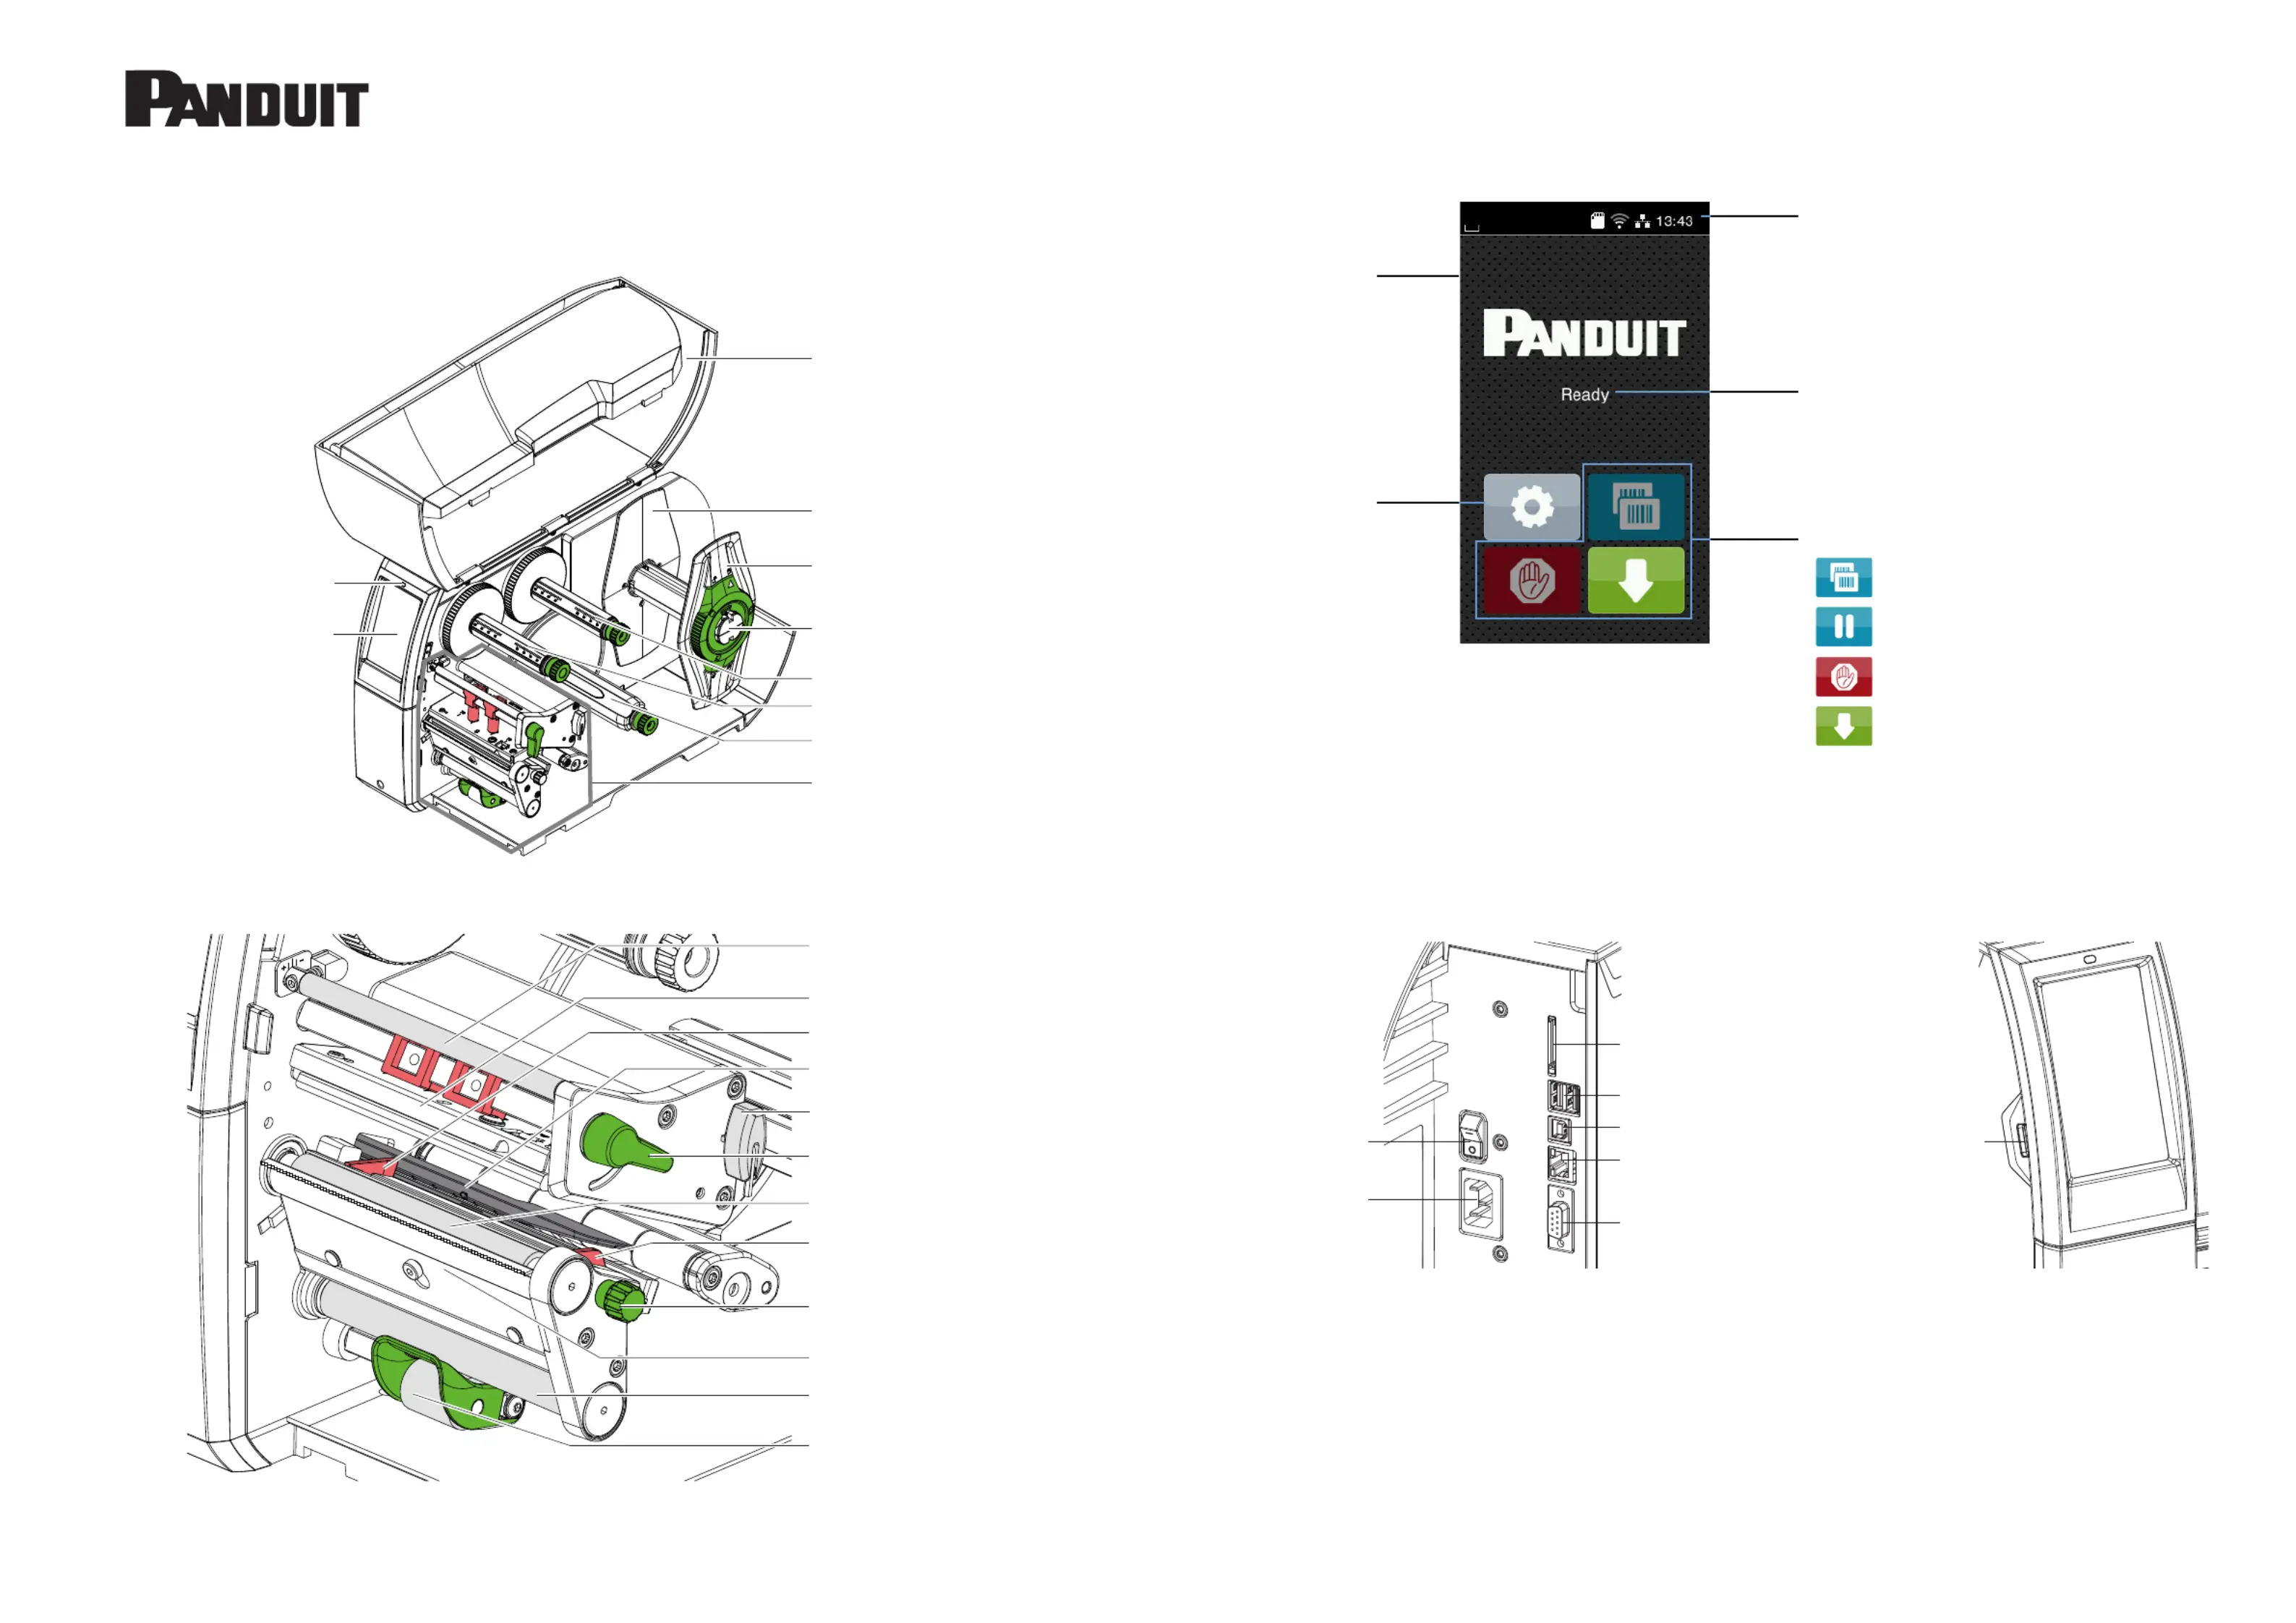
Ribbon deection
Printhead retainer with printhead
Label guide
Label sensor
Allen key
Printhead locking lever
Print roller
Label guide
Knob for adjusting label guides
Tear-o plate
Rewind assist roller
Locking system
USB-A port
Slot for SD card
2 USB-A ports
USB-B port
Ethernet 10/100 Base-T
Serial RS-232 port
Power switch
Power connection jack
LED "Power on"
Touchscreen display
Cover
Margin stop, inside
Margin stop, outside
Roll retainer
Ribbon supply hub
Ribbon take-up hub
Print mechanism
Internal rewinder
Printer Overview
USB-A ports can be used for:
•Keyboard
•Scanner
•USB memory stick
•USB WiFi stick
•Service key
Function Buttons:
Repeat the last printed label
Interrupt / Continue the print job
Short touch: Cancel the current print job
Long touch: Cancel all print jobs
Feed a blank label
Menu Button
Printer status
Widgets:
•Connections
•Memory media
•Time
•Active apps
Touch screen
Display when starting
Product specificaties
| Merk: | Panduit |
| Categorie: | Printer |
| Model: | DP4300H |
Heb je hulp nodig?
Als je hulp nodig hebt met Panduit DP4300H stel dan hieronder een vraag en andere gebruikers zullen je antwoorden
Handleiding Printer Panduit

14 Mei 2025
14 Mei 2025
14 Mei 2025
14 Mei 2025
14 Mei 2025
17 November 2024
26 Juli 2023
16 Juni 2023
29 Mei 2023
24 Mei 2023
Handleiding Printer
Nieuwste handleidingen voor Printer
5 Maart 2026
4 Maart 2026
4 Maart 2026
27 Februari 2026
23 Februari 2026
23 Februari 2026
7 Februari 2026
6 Februari 2026
6 Februari 2026
5 Februari 2026