Ozito PWE-1300U Handleiding
Ozito
Hogedrukreiniger
PWE-1300U
Bekijk gratis de handleiding van Ozito PWE-1300U (3 pagina’s), behorend tot de categorie Hogedrukreiniger. Deze gids werd als nuttig beoordeeld door 27 mensen en kreeg gemiddeld 4.5 sterren uit 14 reviews. Heb je een vraag over Ozito PWE-1300U of wil je andere gebruikers van dit product iets vragen? Stel een vraag
Pagina 1/3

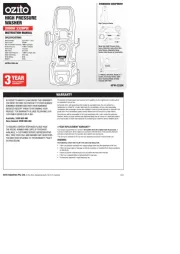
HIGH PRESSURE
CLEANER
1300W 100 BAR
ORIGINAL INSTRUCTIONS
SPECIFICATIONS
Input: 220–240V ~ 50Hz
Motor: 1300W
Rated Flow Rate: 5.7 l/min
Permissible Pressure: 10MPa (100 bar)
Rated Pressure: 7.0MPa (70 bar)
Max. Water Inlet Pressure: 0.6MPa (6 bar)
Water Inlet Temperature Max.: 40 Cº
IP Rating: IPX5
Weight: 4.3kg
PWE-1300U
WHAT’S IN THE BOX
DESCRIPTION OF SYMBOLS
WARRANTY
SPARE PARTS
ozito-diy.co.uk
HIGH PRESSURE CLEANER SAFETY WARNINGS
WARNING! Read all safety warnings and all instructions. Failure to follow the
warnings and instructions may result in electric shock, re and/or serious injury.
Save all warnings and instructions for future reference. The term “power tool” in the
warnings refers to your mains-operated (corded) power tool or battery-operated (cordless)
power tool.
1. Work area safety
a. Keep work area clean and well lit. Cluttered or dark areas invite accidents.
b.
Do not operate power tools in explosive atmospheres, such as in the presence of ammable
liquids, gases or dust. Power tools create sparks which may ignite the dust or fumes.
c. Keep children and bystanders away while operating a power tool. Distractions can cause
you to lose control.
2. Electrical safety
a. Power tool plugs must match the outlet. Never modify the plug in any way.
Do not use any adapter plugs with earthed (grounded) power tools. Unmodied plugs and
matching outlets will reduce risk of electric shock.
b. Avoid body contact with earthed or grounded surfaces, such as pipes, radiators, ranges
and refrigerators. There is an increased risk of electric shock if your body is earthed or
grounded.
c. Do not expose power tools to rain or wet conditions. Water entering a power tool will
increase the risk of electric shock.
d. Do not abuse the cord. Never use the cord for carrying, pulling or unplugging the power
tool. Keep cord away from heat, oil, sharp edges or moving parts. Damaged or entangled
cords increase the risk of electric shock.
e. When operating a power tool outdoors, use an extension cord suitable for outdoor use.
Use of a cord suitable for outdoor use reduces the risk of electric shock.
f. If operating a power tool in a damp location is unavoidable, use a residual current device
(RCD) protected supply. Use of an RCD reduces the risk of electric shock.
3. Personal safety
a. Stay alert, watch what you are doing and use common sense when operating a power
tool. Do not use a power tool while you are tired or under the inuence of drugs, alcohol
or medication.
A moment of inattention while operating power tools may result in serious personal injury.
b. Use personal protective equipment. Always wear eye protection. Protective equipment
such as dust mask, non-skid safety shoes, hard hat, or hearing protection used for appropriate
conditions will reduce personal injuries.
c. Prevent unintentional starting. Ensure the switch is in the off-position before connecting
to power source and/or battery pack, picking up or carrying the tool. Carrying power
tools with your nger on the switch or energising power tools that have the switch on invites
accidents.
d. Remove any adjusting key or wrench before turning the power tool on.
A wrench or a key left attached to a rotating part of the power tool may result in personal injury.
e. Do not overreach. Keep proper footing and balance at all times. This enables better control
of the power tool in unexpected situations.
f. Dress properly. Do not wear loose clothing or jewellery. Keep your hair, clothing and gloves
away from moving parts. Loose clothes, jewellery or long hair can be caught in moving parts.
g. If devices are provided for the connection of dust extraction and collection facilities,
ensure these are connected and properly used. Use of dust collection can reduce dust-
related hazards.
4. Power tool use and care
a. Do not force the power tool. Use the correct power tool for your application. The correct
power tool will do the job better and safer at the rate for which it was designed.
b. Do not use the power tool if the switch does not turn it on and off. Any power tool that
cannot be controlled with the switch is dangerous and must be repaired.
c. Disconnect the plug from the power source and/or the battery pack from the power tool
before making any adjustments, changing accessories, or storing power tools. Such
preventive safety measures reduce the risk of starting the power tool accidentally.
d. Store idle power tools out of the reach of children and do not allow persons unfamiliar
with the power tool or these instructions to operate the power tool. Power tools are
dangerous in the hands of untrained users.
e. Maintain power tools. Check for misalignment or binding of moving parts, breakage of
parts and any other condition that may affect the power tool’s operation. If damaged,
have the power tool repaired before use. Many accidents are caused by poorly maintained
power tools.
f. Keep cutting tools sharp and clean. Properly maintained cutting tools with sharp cutting
edges are less likely to bind and are easier to control.
g. Use the power tool, accessories and tool bits etc. in accordance with these instructions,
taking into account the working conditions and the work to be performed. Use of the
power tool for operations different from those intended could result in a hazardous situation.
5. Service
a. Have your power tool serviced by a qualied repair person using only identical
replacement parts. This will ensure that the safety of the power tool is maintained.
b. If the supply cord is damaged, it must be replaced by the manufacturer,
its service agent or similarly qualied persons in order to avoid a hazard.
GENERAL POWER TOOL SAFETY WARNINGS - PERSONAL SAFETY
ELECTRICAL SAFETY
1116
/min Revolutions or
reciprocation per minute
l/min dB Litres per minute Decibel level
psi BAR Pounds per square inch Pressure rating
WarningRead instruction manual
Hp Horse power
Ingress protection from water
IPX5
WWatts
~Alternating current
Volts
V Hz Hertz
Warning! High pressure jets can be dangerous if not used properly.
Do not direct the jet at persons, animals, live electrical equipment or
the pressure washer itself.
Double insulated MPa Megapascal
This machine is not suitable for connecting to the drinking water
network unless a backflow preventer is installed on the inlet of the
pressure washer.
96
Sound power level
6. TROUBLE SHOOTING
MAINTENANCE
8. STORAGE7. CLEANING & MAINTENANCE
IMPORTANT! BEFORE CLEANING YOUR HIGH PRESSURE
CLEANER OR CARRYING OUT ANY MAINTENANCE
PROCEDURE, MAKE SURE THAT THE MOTOR IS OFF AND
THE TOOL DISCONNECTED FROM THE POWER SUPPLY
TO PREVENT ACCIDENTAL STARTING.
IMPORTANT! WAIT UNTIL THE HIGH PRESSURE CLEANER
HAS COMPLETELY COOLED DOWN. RISK OF BURNS!
Cleaning
• Keep the safety devices free of dirt and dust as far as possible.
Wipe the equipment with a clean cloth or blow it with compressed
air at low pressure.
• We recommend that you clean the appliance immediately after you
use it.
• Clean the appliance regularly with a damp cloth and some soft
soap. Do not use cleaning agents or solvents; these may be
aggressive to the plastic parts in the appliance. Ensure that no
water can get into the interior of the appliance.
• You must disconnect the hose and any spraying tools from the
compressor before cleaning. Do not clean the compressor with
water, solvents or the like.
Testing the water intake lter
Periodically check the intake lter in
order to prevent clogging, which could
jeopardize operation of the pump.
To do this, unscrew the connector
for the water inlet hose from the
high pressure cleaner and clean the
exposed inlet sieve under running
water.
Cleaning the spray nozzle
Remove any obstruction with the
cleaning pin provided and back ush
with clean water.
High Pressure Cleaner
3m High Pressure Hose
RISK OF UNSAFE OPERATION
What can happen
• Unsafe operation of your high pressure cleaner could lead to serious injury or death to you or
others.
• The spray gun/wand is a powerful cleaning tool that could look like a toy to a child.
• Reactive force of spray results in gun/lance movement, potentially causing the operator to slip, fall
or misdirect the spray. Improper control of gun/wand can result in injuries to self, others and property
damage.
How to prevent it
• Become familiar with the operation and controls of the pressure cleaner.
• Keep children away from the pressure cleaner at all times.
• Never modify or remove the safety features of this product.
• Do not operate the machine with missing, broken or unauthorized parts.
• Never leave wand unattended while unit is running.
• Keep work area free of obstacles.
• Stand on stable surface and grip gun/lance rmly. Expect the gun to kick back when engaged
1) Do not use to pump ammable or explosive liquids such as gasoline, fuel oil, kerosene,solvents or
thinners. Pump should only be used with liquids compatible with water blaster component materials.
Failure to follow to this warning can result in serious personal injury, death and/or property damage.
2) Water high presser cleaner must be located on a solid level surface. Pump could tip or fall causing
serious injury.
3) Do not hold or suspend pump by means of a discharge pipe. Pipe could break or come loose.
WARNING!: This appliance has been designed for use with the cleaning agent supplied or
recommended by the manufacturer. The use of other cleaning agents or chemicals may adversely
affect the safety of the appliance.
WARNING!: Do not use the appliance within range of persons unless they wear protective clothing.
WARNING!: High pressure jets can be dangerous if subject to misuse. The jet must not be directed
at persons, live electrical equipment or the appliance itself.
• Do not direct the jet against yourself or others in order to clean clothes or foot-wear.
• To ensure appliance safety, use only original spare parts from the manufacturer or approved by
the manufacturer.
WARNING!: High pressure hoses, ttings and couplings are important for the safety of the appliance.
Use only hoses, ttings and couplings recommended by the manufacturer.
• Do not use the appliance if a supply cord or important parts of the appliance are damaged,
e.g. safety devices, high pressure hoses, trigger gun.
This machine is not intended for use by persons (including children) with reduced physical,
sensory or mental capabilities, or lack of experience and knowledge.
WARNING!: Water that has owed through backow preventer is considered to be non-potable.
Gun & Lance
Deck & Patio Cleaner
Adjustable Spray Nozzle,
Detergent Spray Bottle,
Cleaning Needle
Problem Cause Solution
The high pressure
cleaner does not start
1. No power supply 1. Check the power
supply, the power
plug and the
socket-outlet.
2. Insufcient supply
power
2. Make sure that
the extension
cable is not too
long.
3. Outside temperature
is too low
3. Never operate
with an outside
temperature of
below 5°c.
4. Motor is overheated 4. Allow the motor
to cool down.
If necessary,
remedy the
cause of the
overheating.
The motor starts but
there is no pressure
build-up
1. Water intake lter is
clogged
1. Clean the water
intake lter
2. Air intake in the
water inlet
2. Check the supply
hose and hose
connectors
and replace if
necessary
3. Water tap closed 3. Turn open the
water tap
The operating
pressure is irregular
1. Air intake in the
water inlet
1. Check the supply
hose and hose
connectors
and replace if
necessary
The high pressure cleaner should be fully emptied of water each
time after use. This requires you to switch on the equipment without
a connected water supply and to squeeze trigger on the gun (max. 1
minute) until no more water emerges. Then you must switch off the
equipment.
OZITO UK Unit 9 Stadium Court, Wirral International Business Park, Plantation Road, Bromborough, Wirral, CH62 3QG
All of our products undergo strict quality checks to ensure that they reach
you in perfect condition. In the unlikely event that your device develops a
fault, please contact our service department at the address shown on this
guarantee card. You can also contact us by telephone using the customer
service number shown. Please note the following terms under which
guarantee claims can be made:
1. These warranty terms regulate additional warranty services, which the
manufacturer mentioned below promises to buyers of its new products
in addition to their statutory guarantee claims are not affected by this
guarantee. Our guarantee is free of charge to you.
2. The warranty services only covers defects due to material or
manufacturing faults on a product which you have bought from the
manufacturer mentioned below are limited to either the rectication of said
defects on the product or the replacement of the product, whichever we
prefer.
Please note that our devices are not designed for use in commercial, trade
or professional applications. A guarantee contract will not be created if the
device has been used by commercial, trade or industrial business or has
been exposed to similar stresses during the guarantee period.
3. The following are not covered by our guarantee:
- Damage to the device caused by a failure to follow the assembly
instructions or due to incorrect installation, a failure to follow the operating
instructions (for example connecting it to an incorrect mains voltage or
current type) or a failure to follow the maintenance and safety instructions
or by exposing the device to abnormal environmental conditions or by lack
of care and maintenance.
- Damage to the device caused by abuse or incorrect use (for example
overloading the device or the use or unapproved tools or accessories),
ingress of foreign bodies into the device (such as sand, stones or dust,
transport damage), the use of force or damage caused by external forces
(for example by dropping it).
- Damage to the device or parts of the device caused by normal or natural
wear or tear or by normal use of the device.
4. Your Product is guaranteed for a period of 36 months from the original
date of purchase and is intended for DIY (Do It Yourself) use only. Lithium
Ion batteries and chargers are covered by a 12 month warranty. Warranty
excludes consumable parts. Guarantee claims should be submitted
before the end of the guarantee period within two weeks of the defect
being noticed. No guarantee claims will be accepted after the end of the
guarantee period. The original guarantee period remains applicable to the
device even if repairs are carried out or parts are replaced. In such cases,
the work performed or parts tted will not result in an extension of the
guarantee period, and no new guarantee will become active for the work
performed or parts tted. This also applies if an on-site service is used.
IN ORDER TO MAKE A CLAIM UNDER THIS WARRANTY YOU MUST
RETURN THE PRODUCT TO THE PLACE OF PURCHASE WITH YOUR
REGISTER RECEIPT.
Please refer to the restrictions of this warranty concerning wearing parts,
consumables and missing parts as set out in the service information in
these operating instructions.
CUSTOMER SERVICE HELPLINE
GB: 0151 294 4488
IRL: 1850 882711
Ozito-diy.co.uk
Spare parts can be ordered from the Special Orders Desk
at your local Bunnings Warehouse or Homebase store.
For further information, or any parts visit
www.ozito-diy.co.uk or contact Ozito Customer Service:
Great Britain: 0151 294 4488
Ireland: 1850 882711
E-mail: enquires@ozito-diy.co.uk
WARNING! When using mains-powered tools, basic safety precautions, including the
following, should always be followed to reduce risk of re, electric shock, personal injury and
material damage.
Read the whole manual carefully and make sure you know how to switch the tool off in an emergency, before
operating the tool.
Save these instructions and other documents supplied with this tool for future reference.
Before you connect the equipment to mains supply make sure that the data on the rating plate are identical to
the mains data.
This tool is double insulated; therefore no earth wire is required.
If the supply cord is damaged, it must be replaced by an electrician or a power tool repairer in order to avoid a
hazard.
Note: Double insulation does not take the place of normal safety precautions when operating this tool. The
insulation system is for added protection against injury resulting from a possible electrical insulation failure
within the tool.
Using an Extension Lead
Always use an approved extension lead suitable for the power input of this tool. Before use, inspect the
extension lead for signs of damage, wear and ageing. Replace the extension lead if damaged or defective.
When using an extension lead on a reel, always unwind the lead completely. Use of an extension lead not
suitable for the power input of the tool or which is damaged or defective may result in a risk of re and electric
shock.

ONLINE MANUAL
Scan this QR Code with your
mobile device to take you to
the online manual.
Water supply
For use only with mains pressure water when a backow preventer is
installed on the inlet of the pressure washer. For further information
contact Ozito Customer Service.
1. Run water through
your garden hose
to remove any
foreign matter before
attaching to the pump
2. Attach garden hose
(min.Ø 1/2”) to the
water inlet connector
on the pump. Always
use a reinforced
hose with a standard
coupling for water
inlet. The hose should
be at least 6m in
length for proper
operation.
Note: A lter is tted to the inlet connector preventing any debris
from entering the pump. Inspect and clean the lter before use as
insufcient water supply could damage the pump.
1. Accessory holder
2. Water inlet connector
3. High pressure hose connector
4. Quick connect system
5. On/Off switch
6. Carry handle
HIGH PRESSURE CLEANER
KNOW YOUR PRODUCT
PWE-1300U
1. ASSEMBLY 5. SPRAYING4. PRE-START PROCEDURE3. OPERATION2. CONNECTIONS
Fitting the accessory holder
1. Push accessory holder onto the high
pressure cleaner.
The holder can be used for storage of
the gun, lance and high pressure hose.
Deck & patio cleaner
1. Attach the extension onto the deck & patio
cleaner.
2. Fasten from the underside using the 2
screws provided
3. Attach the rotor arm to the deck & patio
cleaner and secure by inserting the U-clip.
SETUP & PREPARATION OPERATION
ACCESSORIES
Gun and lance
1. Fasten the
lance to
the gun by
pushing and
twisting.
Quick connect system
The connections of the accessories are attached with a quick
connection system.
1. To Connect, push the
accessory onto the lance
connection.
High pressure hose
1. Connect the high pressure hose to
the gun.
2. Connect the opposite end of the high
pressure hose to the high pressure
cleaner
Flat Fan
Solid Cone
-
+
On/Off switch
CAUTION! THIS PRODUCT MUST BE USED WITH A
RESIDUAL CURRENT DEVICE RATED 30mA OR LESS.
• To switch the machine On, set the
On/Off switch to position “I” (On)
• To switch the machine Off, move the
On/Off switch to position “0” (Off).
Spray gun
The trigger can be locked to prevent
accidental spraying. Disengage trigger
lock before squeezing trigger.
Adjustable spray nozzle
The shape of the water jet can be adjusted from solid cone or at fan
by turning the nozzle.
Detergent spray bottle
Fill the detergent spray bottle with suitable cleaning agent.
Note: Use only cleaning agents which are expressly suitable for
high pressure cleaners.
The quantity of cleaning
agent you want can be
adjusted by turning
(+ / - ) on the setting dial.
The cleaning agent will be
dispersed automatically.
WARNING! ENSURE THE TOOL IS SWITCHED OFF AND
DISCONNECTED FROM THE POWER SUPPLY BEFORE
PERFORMING ANY OF THE FOLLOWING PROCEDURES.
7. Deck & patio cleaner
8. Rotor arm
9. Lance
10. Gun
11. High pressure hose
12. Screws & U-clip
13. Adjustable spray nozzle
14. Detergent spray bottle
15. Cleaning needle
1. Ensure power supply is
connected.
2. Ensure water supply is
connected.
3. Ensure water supply is turned on.
4. Squeeze trigger on the gun until there is a steady ow of water from
the nozzle.
1. Switch the machine On, set the On/Off
switch to position “I” (On
2. Squeeze trigger to begin spraying.
3. When nished, set On/Off switch to
position “0” (Off).
4. Release built up water pressure by
squeezing the trigger.
5. Turn water supply off.
6. Switch off the mains power supply
and remove the electrical plug.
2. To remove, actuate the
quick connection system
and remove the accessory
10
Product specificaties
| Merk: | Ozito |
| Categorie: | Hogedrukreiniger |
| Model: | PWE-1300U |
Heb je hulp nodig?
Als je hulp nodig hebt met Ozito PWE-1300U stel dan hieronder een vraag en andere gebruikers zullen je antwoorden
Handleiding Hogedrukreiniger Ozito
9 Juni 2025

9 Maart 2025

8 April 2024

12 Juni 2023

17 Mei 2023

9 Mei 2023

11 Maart 2023
Handleiding Hogedrukreiniger
- Pure Clean
- Sun Joe
- Hozelock
- Trotec
- Karcher
- Neo
- Fieldmann
- Ferm
- Baumr-AG
- Comet
- MacAllister
- Yato
- Truper
- VAX
- Meec Tools
Nieuwste handleidingen voor Hogedrukreiniger
5 Augustus 2025
5 Augustus 2025
5 Augustus 2025

5 Augustus 2025

5 Augustus 2025

5 Augustus 2025

5 Augustus 2025
5 Augustus 2025

5 Augustus 2025
5 Augustus 2025