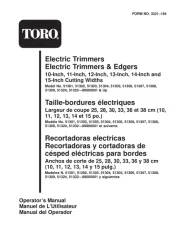
Ozito LTR-630U Handleiding
Ozito
Grastrimmer
LTR-630U
Bekijk gratis de handleiding van Ozito LTR-630U (3 pagina’s), behorend tot de categorie Grastrimmer. Deze gids werd als nuttig beoordeeld door 117 mensen en kreeg gemiddeld 4.6 sterren uit 59 reviews. Heb je een vraag over Ozito LTR-630U of wil je andere gebruikers van dit product iets vragen? Stel een vraag
Pagina 1/3

LINE
TRIMMER
600W 320mm
ORIGINAL INSTRUCTIONS
SPECIFICATIONS
Power: 600W
No Load Speed: 9,300/min
Cutting Diameter: 320mm
Line Diameter: 1.5mm
Line Feed: Automatic
Protection Class: II
Weight: 3.92kg
LTR-630U
WHAT’S IN THE BOX
Line Trimmer
Safety Guard
Adjustable Handle
Assembly Screws
Edging Wheel
LINE TRIMMER SAFETY WARNINGS
0917
Read the complete operating manual with due care.
Acquaint yourself with the controls and how to use the tool.
This appliance is not intended for use by persons(including children) with reduced physical, sensory or mental capabilities, or lack
of experience and knowledge, unless they have been given supervision or instruction concerning use of the appliance by a person
responsible for their safety. Children should be supervised to ensure that they do not play with the appliance.
Important!
For safety reasons the grass trimmer is not to be used by children, young people under 16 years
of age, or any other persons who are not acquainted with these directions for use.
Keep the instruction manual in a safe place for later use.
¥ Examine the grass trimmer each time before you use it. Do not use the trimmer if any safety devices are damaged or worn.
¥ Never put safety devices out of operation.
¥ Do not use the grass trimmer if the cables are damaged or worn.
¥ Stop using the equipment when there are people – particularly children – or pets nearby.
¥ Use the grass trimmer only for the purpose specied in these instructions.
¥ You are responsible for safety in your work area.
¥ Inspect the items you want to cut before starting to work. Remove any foreign objects you nd. Watch out for foreign objects while
you work. If you still hit upon an obstacle while cutting, turn off the grass trimmer and remove the obstacle.
¥ Work only in good visibility.
¥ Always make sure of your footing while working. Be careful when stepping backwards. Risk of stumbling!
¥ Never leave the grass trimmer unattended at your work place. Store the trimmer in a safe place during interruptions.
¥ If you interrupt your work to move to a different position it is imperative to switch off the grass trimmer while you are moving there.
¥ Never use the grass trimmer in the rain or in moist or wet conditions.
¥ Protect the grass trimmer from the damp and rain.
¥ Before you switch on the grass trimmer, make sure that there are no stones or other objects touching the nylon line.
¥ Always wear suitable clothing to protect your head, hands and feet from injury. Wear a helmet, goggles or visor, high boots or
strong shoes, long trousers made of tough material, and work gloves.
¥ Be sure to hold the grass trimmer away from your body when it is switched on!
¥ If the grass trimmer is turned over or if it is not in working position, do not switch it on.
¥ Switch off the motor and pull out the power plug when you are not using the grass trimmer, when you leave the trimmer
unattended, when you are checking the trimmer, if the power cable is damaged, when you want to remove and replace the spool,
and when you are moving the trimmer to another location.
¥ Keep the grass trimmer away from other persons, particularly children and pets. There may be stones and other objects in the
ying cut grass.
¥ Keep at least 5 m away from other persons and animals when you are working with the grass trimmer.
¥ To prevent injury to yourself and damage to the grass trimmer, never cut against hard objects.
¥ Use the edge of the guard to keep the grass trimmer away from walls, changes of surface and fragile objects.
¥ Never use the grass trimmer without a guard.
CAUTION! The guard is vital for your safety and for the safety of others, and it is also
essential for the grass trimmer to work correctly. Failure to observe this instruction
will not only create a potential hazard, it will also result in the loss of your rights under the
warranty.
¥ Never try to stop the cutter (nylon line) with your hands. Wait until it stops by itself.
¥ It is imperative to use only the original nylon line. Never use metal wire instead of the nylon line.
¥ Beware of injuring yourself on the line cutting device.
¥ Keep the air vents clear of dirt.
¥ After use, unplug the machine and check it for damage.
¥ Never attempt to cut grass that is not growing on the ground. For example, do not try to cut grass growing on walls, rocks,
etc.
¥ Within the working radius of the grass trimmer the user is responsible for any damage caused to third persons by use of
the trimmer.
¥ Never cross roads or pebble paths with the grass trimmer switched on.
¥ When you are not using the grass trimmer, keep it in a dry place out of the reach of children.
¥ Use the grass trimmer only as described in these directions for use and always hold it vertical to the ground. All other
positions are dangerous.
¥ Check the screws regularly to see that they are properly tightened.
¥ The mains voltage must be the same as the voltage specied on the rating plate.
¥ Check the power cable regularly for signs of damage or aging. Never use the grass trimmer if the power cable is in less
than perfect condition.
¥ Power cables used with the trimmer must not be of a lighter duty class than HO7RN-F rubber insulated exible cables
according to DIN 57282 / VDE 0282 with a minimum diameter of 1.5 mm2. Plug connectors must be equipped with
earthing contacts and the coupling must be rain-water protected.
¥ If the cable is damaged during operation, disconnect it immediately from the power supply. DO NOT TOUCH THE CABLE
BEFORE IT IS DISCONNECTED FROM THE POWER SUPPLY.
¥ To prevent danger, damaged power cables must be replaced by the manufacturer or by a service company authorized by
the manufacturer to carry out the work.
¥ The equipment may only be powered via an earth-leakage circuit breaker (RCD) with a maximum operating current of 30
mA.
¥ Keep cables and other objects out of the area you want to cut.
¥ If you have to lift the grass trimmer to move it, switch off the motor and wait for the rotating tool to stop. Before you leave
the trimmer, switch off the motor and pull out the power plug.
¥ Before you connect the grass trimmer to the power supply, make sure that none of its moving parts are damaged and that
the line spool is correctly inserted and fastened.
¥ Never cut against hard objects when using the grass trimmer. This is imperative to avoid causing injury to the user and
damage to the trimmer.
¥ Use only original replacement parts for repair and maintenance purposes.
¥ Have repairs carried out only by a qualied electrician.
¥ Examine the grass trimmer for signs of wear or damage each time before you use it and after any collisions. Have
essential repairs carried out without delay.
¥ Always keep your hands and feet away from the cutting mechanism, particularly when you switch on the trimmer.
¥ After pulling out new line, always return the trimmer to normal working position before you switch it on again.
¥ Never use replacement parts or accessories which are not foreseen or recommended by the manufacturer.
¥ Pull out the power plug before carrying out any inspection, cleaning or other work on the trimmer and whenever it is not
being used.
¥ Use the equipment only in broad daylight or in well-lit conditions.
¥ Keep the extension cable away from cutting tools at all times.
Important: The nylon line continues to rotate for a few seconds after the motor is switched off.
The equipment does not start. OZITO UK Unit 9 Stadium Court, Wirral International Business Park, Plantation Road, Bromborough, Wirral, CH62 3QG
All of our products undergo strict quality checks to ensure that they reach
you in perfect condition. In the unlikely event that your device develops a
fault, please contact our service department at the address shown on this
guarantee card. You can also contact us by telephone using the customer
service number shown. Please note the following terms under which
guarantee claims can be made:
1. These warranty terms regulate additional warranty services, which the
manufacturer mentioned below promises to buyers of its new products
in addition to their statutory guarantee claims are not affected by this
guarantee. Our guarantee is free of charge to you.
2. The warranty services only covers defects due to material or
manufacturing faults on a product which you have bought from the
manufacturer mentioned below are limited to either the rectication of said
defects on the product or the replacement of the product, whichever we
prefer.
Please note that our devices are not designed for use in commercial, trade
or professional applications. A guarantee contract will not be created if the
device has been used by commercial, trade or industrial business or has
been exposed to similar stresses during the guarantee period.
3. The following are not covered by our guarantee:
- Damage to the device caused by a failure to follow the assembly
instructions or due to incorrect installation, a failure to follow the operating
instructions (for example connecting it to an incorrect mains voltage or
current type) or a failure to follow the maintenance and safety instructions
or by exposing the device to abnormal environmental conditions or by lack
of care and maintenance.
- Damage to the device caused by abuse or incorrect use (for example
overloading the device or the use or unapproved tools or accessories),
ingress of foreign bodies into the device (such as sand, stones or dust,
transport damage), the use of force or damage caused by external forces
(for example by dropping it).
- Damage to the device or parts of the device caused by normal or natural
wear or tear or by normal use of the device.
4. Your Product is guaranteed for a period of 36 months from the original
date of purchase and is intended for DIY (Do It Yourself) use only. Warranty
excludes consumable parts. Guarantee claims should be submitted
before the end of the guarantee period within two weeks of the defect
being noticed. No guarantee claims will be accepted after the end of the
guarantee period. The original guarantee period remains applicable to the
device even if repairs are carried out or parts are replaced. In such cases,
the work performed or parts tted will not result in an extension of the
guarantee period, and no new guarantee will become active for the work
performed or parts tted. This also applies if an on-site service is used.
IN ORDER TO MAKE A CLAIM UNDER THIS WARRANTY YOU MUST
RETURN THE PRODUCT TO THE PLACE OF PURCHASE WITH YOUR
REGISTER RECEIPT.
Please refer to the restrictions of this warranty concerning wearing parts,
consumables and missing parts as set out in the service information in
these operating instructions.
CUSTOMER SERVICE HELPLINE
GB: 0151 294 4488
IRL: 1850 882711
Ozito-diy.co.uk
WARRANTY
ozito-diy.co.uk
MAINTENANCE
• Keep ventilation slots of the trimmer clean at all times. Periodically clean
out the grass from the cutting head and the rim of the safety guard to ensure
efcient operation at all times.
• After each use, blow air through the tool housing to ensure it is free from all
dust, dirt, etc. Build up of dust, dirt particles may cause the tool to overheat and
shorten the life of the tool.
• If the housing of the trimmer requires cleaning, do not use solvents but a
moist soft cloth or soft brush only.
• Never let any liquid get inside the tool, never immerse any part of the tool into
liquid.
• No lubrication is necessary as the tool has sealed bearings.
• When not in use, the line trimmer should be stored in a dry, frost free location
not within the reach of children.
Note: Ozito Industries will not be responsible for any damage or injuries caused
by the repair of the line trimmer by an unauthorised person or by mishandling
of the line trimmer. This tool is designed for DIY use - use in commercial or
industrial environments will void the warranty.
1. While holding the tabs on
either side of the spool,
remove the spool cover.
1. Feed 15mm of 1.5mm or
1.6mm x 4m cutting line into
the hole in each section of the
spool.
3. Insert the rewound spool and
rotate until it is seated.
5. Push the cover onto the
housing until it snaps into
place.
Note: If the cutting lines protrude beyond the trimming blade, cut
them off so that they just reach the blade.
2. Remove the empty spool
from the housing and any
dirt or grass.
2. Wind the 2 lines neatly onto
each section of the spool in
the direction of the arrows on
the spool.
4. Unclip the ends of the cutting
lines and guide them through
the eyelets so that the line
protrudes approx. 11cm.
Replacing the Spool and Line Assembly
Winding New Line Onto Empty Spool
WARNING! ENSURE THE TOOL IS DISCONNECTED FROM
THE POWER SUPPLY BEFORE PERFORMING ANY OF THE
FOLLOWING OPERATIONS.
3. Place the end of the line into
the clips on the outside of the
spool. Leaving about 11cm
protruding from the spool.
4. Re-seat the spool as described in steps 3 - 5 of the “Replacing
the Spool and Line Assembly” section.
WARNING! When using mains-powered tools, basic safety precautions, including the
following, should always be followed to reduce risk of re, electric shock, personal injury
and material damage.
Read the whole manual carefully and make sure you know how to switch the tool off in an emergency,
before operating the tool.
Save these instructions and other documents supplied with this tool for future reference.
Before you connect the equipment to the mains supply make sure that the data on the rating plate are
identical to the mains data.
This tool is double insulated therefore no earth wire is required.
If the supply cord is damaged, it must be replaced by an electrician or a power tool repairer in order to avoid
a hazard.
Note: Double insulation does not take the place of normal safety precautions when operating this tool. The
insulation system is for added protection against injury resulting from a possible electrical insulation failure
within the tool.
Using an Extension Lead
Always use an approved extension lead suitable for the power input of this tool. Before use, inspect the
extension lead for signs of damage, wear and ageing. Replace the extension lead if damaged or defective.
When using an extension lead on a reel, always unwind the lead completely. Use of an extension lead not
suitable for the power input of the tool or which is damaged or defective may result in a risk of re and electric
shock.
GENERAL POWER TOOL SAFETY WARNINGS
ELECTRICAL SAFETY
WARNING! “Read all safety warnings, instructions, illustrations and specications
provided with this power tool.” Failure to follow the warnings and instructions may result in electric
shock, re and/or serious injury.
Save all warnings and instructions for future reference. The term “power tool” in the warnings refers
to your mains-operated (corded) power tool or battery-operated (cordless) power tool.
1. Work area safety
a. Keep work area clean and well lit. Cluttered or dark areas invite accidents.
b. Do not operate power tools in explosive atmospheres, such as in the presence of ammable
liquids, gases or dust. Power tools create sparks which may ignite the dust or fumes.
c. Keep children and bystanders away while operating a power tool. Distractions can cause you to
lose control.
2. Electrical safety
a. Power tool plugs must match the outlet. Never modify the plug in any way. Do not use any
adapter plugs with earthed (grounded) power tools. Unmodied plugs and matching outlets will
reduce risk of electric shock.
b. Avoid body contact with earthed or grounded surfaces, such as pipes, radiators, ranges and
refrigerators. There is an increased risk of electric shock if your body is earthed or grounded.
c. Do not expose power tools to rain or wet conditions. Water entering a power tool will increase the
risk of electric shock.
d. Do not abuse the cord. Never use the cord for carrying, pulling or unplugging the power tool.
Keep cord away from heat, oil, sharp edges or moving parts. Damaged or entangled cords increase
the risk of electric shock.
e. When operating a power tool outdoors, use an extension cord suitable for outdoor use. Use of a
cord suitable for outdoor use reduces the risk of electric shock.
f. If operating a power tool in a damp location is unavoidable, use a residual current device (RCD)
protected supply. Use of an RCD reduces the risk of electric shock.
3. Personal safety
a. Stay alert, watch what you are doing and use common sense when operating a power tool. Do
not use a power tool while you are tired or under the inuence of drugs, alcohol or medication. A
moment of inattention while operating power tools may result in serious personal injury.
b. Use personal protective equipment. Always wear eye protection. Protective equipment such as dust
mask, non-skid safety shoes, hard hat, or hearing protection used for appropriate conditions will reduce
personal injuries.
c. Prevent unintentional starting. Ensure the switch is in the off-position before connecting to
power source and/or battery pack, picking up or carrying the tool. Carrying power tools with your
nger on the switch or energising power tools that have the switch on invites accidents.
d. Remove any adjusting key or wrench before turning the power tool on. A wrench or a key left
attached to a rotating part of the power tool may result in personal injury.
e. Do not overreach. Keep proper footing and balance at all times. This enables better control of the
power tool in unexpected situations.
f. Dress properly. Do not wear loose clothing or jewellery. Keep your hair, clothing and gloves away
from moving parts. Loose clothes, jewellery or long hair can be caught in moving parts.
g. If devices are provided for the connection of dust extraction and collection facilities, ensure
these are connected and properly used. Use of dust collection can reduce dust-related hazards.
h) Do not let familiarity gained from frequent use of tools allow you to become complacent and
ignore tool safety principles. A careless action can cause severe injury within a fraction of a second.
4. Power tool use and care
a. Do not force the power tool. Use the correct power tool for your application. The correct power tool
will do the job better and safer at the rate for which it was designed.
b. Do not use the power tool if the switch does not turn it on and off. Any power tool that cannot be
controlled with the switch is dangerous and must be repaired.
c. Disconnect the plug from the power source and/or remove the battery pack, if detachable, from
the power tool before making any adjustments, changing accessories, or storing power tools.
Such preventive safety measures reduce the risk of starting the power tool accidentally.
d. Store idle power tools out of the reach of children and do not allow persons unfamiliar with the
power tool or these instructions to operate the power tool. Power tools are dangerous in the hands
of untrained users.
e. Maintain power tools and accessories. Check for misalignment or binding of moving parts,
breakage of parts and any other condition that may affect the power tool’s operation. If damaged,
have the power tool repaired before use. Many accidents are caused by poorly maintained power
tools.
f. Keep cutting tools sharp and clean. Properly maintained cutting tools with sharp cutting edges are
less likely to bind and are easier to control.
g. Use the power tool, accessories and tool bits etc. in accordance with these instructions, taking
into account the working conditions and the work to be performed. Use of the power tool for
operations different from those intended could result in a hazardous situation.
h) Keep handles and grasping surfaces dry, clean and free from oil and grease. Slippery handles and
grasping surfaces do not allow for safe handling and control of the tool in unexpected situations.
5. Service
a. Have your power tool serviced by a qualied repair person using only identical replacement
parts. This will ensure that the safety of the power tool is maintained.
SPARE PARTS
Spare parts can be ordered from the Special Orders
Desk at your local Bunnings Warehouse or Homebase
store.
For further information, or any parts visit
www.ozito-diy.co.uk or contact Ozito Customer Service:
Great Britain: 0151 294 4488
Ireland: 1850 882711
E-mail: info@ozito-diy.co.uk
DESCRIPTION OF SYMBOLS
SERVICE INFORMATION
Please note that the following parts of this product are subject to normal
or natural wear and that the following parts are therefore also required
for use as consumables.
* Not necessarily included in the scope of delivery!
In the effect of defects or faults, please register the problem on the internet at
www.isc-gmbh.info. Please ensure that you provide a precise description of the
problem and answer the following questions in all cases:
• Did the equipment work at all or was it defective from the beginning?
• Did you notice anything (symptom or defect) prior to the failure?
• What malfunction does the equipment have in your opinion (main symptom)?
Describe this malfunction.
Category Example
Wear parts* Line spool holder
Consumables* Line spool
Missing parts
DECLARATION OF CONFORMITY
ADDITIONAL INFORMATION
For EU countries only
Never place any electric power tools in your household refuse.
To comply with European Directive 2012/19/EC concerning old electric
and electronic equipment and its implementation in national laws, old
electric power tools have to be separated from other waste and disposed
of in an environment-friendly fashion, e.g. by taking to a recycling depot.
Recycling alternative to the return request:
As an alternative to returning the equipment to the manufacturer, the
owner of the electrical equipment must make sure that the equipment is
properly disposed of if p1-he no longer wants to keep the equipment. The old
equipment can be returned to a suitable collection point that will dispose
of the equipment in accordance with the national recycling and waste
disposal regulations. This does not apply to any accessories or aids
without electrical components supplied with the old equipment.
The reprinting or reproduction by any other means, in whole or in part, of
documentation and papers accompanying products is permitted only with
the express consent of the iSC GmbH.
Subject to technical changes
Danger!
Sound and vibration
Sound and vibration values were measured in accordance with EN
60745.
Lpa sound pressure level: 93 dB(A)
Kpa uncertainty: 3 dB
Lwa
sound power level: 93.2 dB(A)
Kwa uncertainty: 1 dB
Wear ear-muffs.
The impact of noise can cause damage to hearing. Total vibration values
(vector sum of three directions) determined in accordance
with EN 28662-1.
Front handle:
Vibration aw = 5.10 m/s²
Vibration Uncertainty K= 2 m/s²
The specied vibration value was established in accordance with a
standardized testing method. It may change according to how the electric
equipment is used and may exceed the specied value in exceptional
circumstances. The specied vibration value can be used to compare the
equipment with other electric power tools.
The specied vibration value can be used for initial assessment of a
harmful effect.
Keep the noise emissions and vibrations to a minimum.
• Only use appliances which are in perfect working order.
• Service and clean the appliance regularly.
• Adapt your working style to suit the appliance.
• Do not overload the appliance.
• Have the appliance serviced whenever necessary.
• Switch the appliance off when it is not in use.
• Wear protective gloves.
Warning! Safety class II
Protect from moister
Wear eye protection and
ear plugs!
Read the instruction manual
before starting!
Pull out the mains plug before
checking a damaged power
cable!
Caution: Sharp blade!
Keep your hands away.
Keep other people out of the danger area!
The equipment continues to rotate!
Decibel level
Gao/Product-ManagementWeichselgartner/General-Manager
explains the following conformity according to EU directives and norms for
the following product
Electric Line Trimmer LTR-630U (Ozito)
2014/29/EU
2005/32/EC_2009/125/EC
2014/35/EU
2006/28/EC
X 2014/30/EU
2014/32/EU
2014/53/EC
2014/68/EU
90/396/EC_2009/142/EC
89/686/EC_96/58/EC
X 2011/65/EU
X 2006/42/EC
Annex IV
Notied Body:
Notied Body No.:
Reg. No.:
X 2000/14/EC_2005/88/EC
Annex V
X Annex VI
Noise: measured L
WA = 95,7 dB (A); guaranteed L
WA = 96 dB (A)
P = 0,6 KW; L/Ø = cm
Notied Body: TÜV SÜD Industrie Service GmbH (NB 0036)
2012/46/EU
Emission No.:
Standard references: EN 60335-1; EN 50636-2-91; EN 62233;
EN 55014-1; EN 55014-2; EN 61000-3-2; EN 61000-3-3
Landau/Isar, den 11.09.2017
First CE: 17 Archive-File/Record: NAPR017672
Art.-No.: 30.002.02 I.-No.: 11017 R. GehardDocuments registrar:
Subject to change without notice Wiesenweg 22, D-94405 Landau/Isar
ISC GmbH · Eschenstraße 6 · D-94405 Landau/Isar
TROUBLESHOOTING
Problem Cause Remedy
Grass wraps
around the
attachment shaft
and the trimmer
head.
Cutting tall grass
at ground level.
Make several passes from
top down.

ONLINE MANUAL
Scan this QR Code with your
mobile device to take you to
the online manual.
1. Loosen the Telescopic
Shaft Collar by rotating in
a clockwise direction.
1. Turn the trimmer upside
down and place the safety
guard over the cutting
head.
3. Align the edging wheel
with the screw holes at
the underside front of the
safety guard and secure
with the remaining supplied
screws.
2. Adjust the Telescopic
Shaft up or down to the
appropriate height.
2. Rotate the guard into the
correct position and secure
with the supplied screws.
1. Secondary Handle
2. Locking Knob
3. Edging Guide
4. On/Off Trigger
5. Rotating Head Collar
6. Telescopic Shaft Collar
7. Telescopic Shaft
8. Cord Retainer
9. Main Handle
10. Head Angle Release Button
11. Edging Wheel
12. Cutter Head
13. Safety Guard
15. Assembly Screws x 4
LINE TRIMMER
ACCESSORIES:
KNOW YOUR PRODUCT
1 2 3 4 5 6 87
14
2. ASSEMBLY 3. ADJUSTMENTS 4. CONTROLS 5. USING THE LINE TRIMMER
SETUP & PREPARATION OPERATION
Adjusting the Working Height
Fitting the Safety Guard
WARNING! ENSURE THE TOOL IS DISCONNECTED FROM
THE POWER SUPPLY BEFORE PERFORMING ANY OF THE
FOLLOWING OPERATIONS.
WARNING! NEVER USE THE LINE TRIMMER UNLESS THE
SAFETY GUARD IS PROPERLY FITTED AND SECURED.
NOTE: DO NOT CUT GRASS WHEN WET. (THE BEST RESULTS
ARE ACHIEVED ON DRY GRASS.)
NOTE: BEFORE STORING FEED EXTRA CUTTING LINE TO
AVOID LOOSING THE LINE COMPLETELY.
1. To turn on squeeze the on/
off trigger.
1. Place the adjustable
handle onto the line
trimmer so that the holes
align. The Cutter Head should be adjusted so that the trimmer can be
held in this position comfortably as shown.
1. Depress the Head Angle
Release Button.
3. Rotate the handle into the
most comfortable position
and tighten the locking
knob.
2. To turn off release the
on/off trigger.
2. Pass the bolt through the
handle and screw the
locking knob loosely onto
bolt. 2. Move the Telescopic Shaft
into the desired position
and release the Button.
8. Several passes will be
required to cut long grass.
On/Off Trigger Using the Line Trimmer
Fitting the Secondary Handle
Cutting Modes
Trimming ModeEdging Mode
Adjusting the Cutter Head Angle
CAUTION: TO REDUCE THE RISK OF ELECTRICAL SHOCK,
A RESIDUAL CURRENT DEVICE (RATED 30mA OR LESS)
SHOULD BE USED.
WARNING: MAKE SURE THAT THE WORK AREA IS FREE OF
ROCKS, DEBRIS, LINES AND OTHER FOREIGN OBJECTS.
WARNING: THE LINE TRIMMER MAY RUN FOR A FEW
SECONDS AFTER IT HAS BEEN SWITCHED OFF. LET THE
MOTOR COME TO A COMPLETE STANDSTILL BEFORE
SETTING THE TOOL DOWN.
910
131211
Lengthening the Line
This line trimmer is equipped with Automatic Line Advancement
which automatically feeds the additional line to the correct length
as it wears down.
To automatically advance the line, allow the line trimmer to •
come to a complete stop. When the head comes to a stop,
a “Click” can be heard. The line will have automatically
advanced approximately 5cm. If a longer length of line is
required, repeat the automatic line advancement instruction.
To manually advance the line, ensure the line trimmer is •
off and turn the line trimmer upside down. Push the tab on
the side of the cutter head and then pull on the end of both
pieces of line protruding from the cutter head.
3. Tighten the Telescopic Shaft Collar once adjustment is
complete.
Rotating the Cutting Head
1. Pull the Rotating Head
Collar and turn the
Telescopic shaft 180º ant-
clockwise.
Note: The head will only
rotate in one direction.
2. Release the Collar to lock
in place.
LTR-630U
1. BEFORE USE
Items Supplied
Please check that the article is complete as specied in the scope
of delivery. If parts are missing, please contact our service centre or
the sales outlet where you made your purchase at the latest within
5 working days after purchasing the product and upon presentation
of a valid bill of purchase. Also, refer to the warranty table in the
service information at the end of the operating instructions.
• Open the packaging and take out the equipment with care.
• Remove the packaging material and any packaging and/or
transportation braces (if available).
• Check to see if all items are supplied.
• Inspect the equipment and accessories for transport damage.
• If possible, please keep the packaging until the end of the
guarantee period.
Danger!
The equipment and packaging material are not toys. Do not let
children play with plastic bags, foils or small parts. There is a
danger of swallowing or suffocating!
Proper Use
The equipment is designed for cutting lawns and small areas of
grass in private and hobby gardens.
Equipment designed for use in private and hobby gardens is
regarded as unsuitable for use in public facilities, parks and
sports centers, along roadways, or in agriculture and forestry. The
operating instructions as supplied by the manufacturer must be kept
and referred to in order to ensure that the equipment is properly
used and maintained.
Important. This equipment must not be used for composting
purposes (shredding) as this could result in injury or damage
to property.
The equipment is to be used only for its prescribed purpose. Any
other use is deemed to be a case of misuse. The user / operator
and not the manufacturer will be liable for any damage or injuries of
any kind caused as a result of this.
Please note that our equipment has not been designed for use in
commercial, trade or industrial applications. Our warranty will be
voided if the machine is used in commercial, trade or industrial
businesses or for equivalent purposes.
Caution!
Residual risks
Even if you use this electric power tool in accordance with
instructions, certain residual risks cannot be rules out.
The following hazards may arise in connection with the
equipment’s construction and layout:
1. Lung damage if no suitable protective dust mask is used.
2. Damage to hearing if no suitable ear protection is used.
3. Health damage caused by hand-arm vibrations if the equipment
is used over a prolonged period or is not properly guided and
maintained.
CAUTION: DO NOT CONTINUALLY TAP, BUMP OR HOLD
THE SPOOL HOLDER ON THE GROUND AS THIS MAY
RESULT IN DAMAGE TO THE SPOOL HOLDER OR
OVERLOAD THE UNIT.
1. Wear eye protection and stout shoes at all times while operating the
line trimmer.
2. Start cutting nearest the mains power source and work away to
make it easier to avoid the extension cord.
3. Do not push the line against hard material (rocks or concrete) during
cutting as this may result in damaged line.
4. Never use the line trimmer without its safety devices.
5. Do not cut grass that is wet (The best results are achieved on dry
grass).
6. Wait until the line trimmer reaches full speed before cutting the
grass
7. Keep the line trimmer away from hard objects in order to avoid
unnecessary wear to the line.
9. To prevent the line from breaking ensure you approach the edge/
object slowly.
10. Watch out for kickbacks in the event of impact with hard objects
11. After nishing the cutting
operation, keep the head
close to ground level, release
the switch and allow the
motor to come to a complete
standstill. Unplug and place
the line trimmer on the
ground.
12. Keep ventilation slots of the trimmer clean at all times. Periodically
clean out the grass from the cutting head and the rim of the safety
guard to ensure efcient operation at all times.
6. TRIMMING AND EDGING
Trimming
Move the line trimmer from side to side as you walk forward, holding
it at an angle of approx. 30° (Light cuts are better than heavy cuts as
they allow the cut grass to fall away from the cutting head).
Edging
Place the edging wheel along the ground and roll the line trimmer
along the edge of the path.
Product specificaties
| Merk: | Ozito |
| Categorie: | Grastrimmer |
| Model: | LTR-630U |
Heb je hulp nodig?
Als je hulp nodig hebt met Ozito LTR-630U stel dan hieronder een vraag en andere gebruikers zullen je antwoorden
Handleiding Grastrimmer Ozito

3 Juli 2025

16 Maart 2024

16 Maart 2024

13 December 2023

17 Juni 2023

5 Juni 2023

12 Mei 2023

12 Mei 2023

11 Mei 2023

19 April 2023
Handleiding Grastrimmer
- MacAllister
- Craftsman
- Truper
- Levita
- Greenworks
- Partner
- Stihl
- Powerblade
- McCulloch
- Karcher
- Kress
- Florabest
- AYCE
- WOLF-Garten
- Challenge
Nieuwste handleidingen voor Grastrimmer

10 September 2025

8 September 2025

7 September 2025

2 September 2025
2 September 2025
2 September 2025

2 September 2025

2 September 2025

2 September 2025
2 September 2025