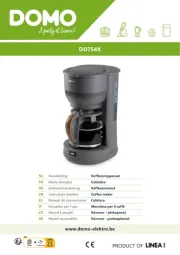
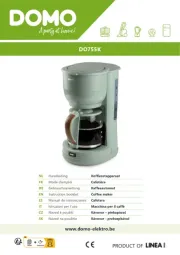
Newco AKH-LDA Handleiding
Newco
Koffiezetapparaat
AKH-LDA
Bekijk gratis de handleiding van Newco AKH-LDA (4 pagina’s), behorend tot de categorie Koffiezetapparaat. Deze gids werd als nuttig beoordeeld door 45 mensen en kreeg gemiddeld 4.7 sterren uit 23 reviews. Heb je een vraag over Newco AKH-LDA of wil je andere gebruikers van dit product iets vragen? Stel een vraag
Pagina 1/4

Prelim E Series pn 120725 iss 20091211
N E W C O E N T E R P R I S E S
INSTALLATION and OPERATION MANUAL
For AKH Autofill E - SERIES BREWERS
BREWER SPECIFICATIONS
Model Width Length Height
AKH-TC-A 8-1/2 17-11/16 17-1/2
AKH-LD-A 8-1/2 17-11/16 21-1/16
AKH-AP-A 8-1/2 17-11/16 23-5/16
AKH-D-A 8-1/2 17-11/16 27-3/16
Water Connection Note:
All models have ¼” flare plumbing connection unless specified otherwise.
Electrical Connection Note:
All units are intended to operate on a 15 A, 120 V ac circuit unless specified otherwise. Check units serial tag.

2
E SERIES SYSTEM ADVANTAGES
The E Series/AKH Line offers several advantages over a traditional commercial brewer with a hot water reservoir.
Since the water that is poured in, is the water used to brew, a fresher brewed product is produced.
No energy is wasted maintaining a tank of water at a near boiling temperature. Water is heated on demand, as it is
poured in. The energy savings will vary as a percentage based on the number of brews per day but the AKH can save
$85 or more per year just based on the brewer standby (or idle time). .15 per kWH assumed.
A hotter brew temperature is maintained throughout the brew cycle resulting in superior extraction.
PLUMBER'S INSTALLATION INSTRUCTIONS
CAUTION: Power to brewer must be OFF before proceeding with plumbing installation.
1) Flush water line before installing brewer. Brewer should be connected to COLD WATER LINE only.
2) Water pressure should be at least 20 lbs. For less than a 25 ft run, use 1/4" copper tubing and connect to 1/2"
or larger water line. For longer runs, use 3/8" copper tubing & connect to 1/2" or larger water line and provide
an adapter fitting for connection to the brewer.
3) If installed with saddle valve, the valve should have a minimum of 1/8" port hole for up to 25 ft run, and 5/16"
port hole for over 25 ft runs.
4) Connect incoming water line to the flow control fitting extending from the elbow on the back of the brewer. Flow
control/strainer must be in place. Manufacturer recommends connecting to copper tubing.
5) Ensure that tank heater switch on the rear of brewer is in the off position. Connect brewer to appropriate
electrical supply as indicated on serial tag.
INSTALLATION INSTRUCTIONS
WARNING: - Read and follow installation instructions before plugging or wiring in machine to electrical circuit.
Warranty will be void if machine is connected to any voltage the name plate/serial tag. other than that specified on
1) Plug or wire brewer to appropriate voltage circuit as indicated on serial tag. Turn the power switch on front of
brewer to the On position.
2) (AKH warmer model), make sure warmer switches are in the OFF position. Place one of the empty decanters
on the warmer located below the brew basket. For (AKH thermo model) pump style airpots, remove the pump
stem. Place the empty dispenser into position below the brewbasket.
3) Press the brew start button or raise the top evaporation cover and pour ONE decanter (on AKH warmer model)
or pitcher (on AKH thermo model) of water through the pour-in grid into basin.
4) NOTE: Float assembly will prevent heat pump from activati the basin. This first pot ng if water is not present in
will be a few ounces short due to some water retention in the system.
5) Optional Step: Empty decanter and place back in position. Depress the brew start switch and run a brew cycle
to check for proper volume. Adjust the timer located behind plate on left side of brewer to increase or decrease
volume as required. Use small adjustments and verify results.
6) Machine is now ready to use and will yield a full pot on following brew cycles.
OPERATION NOTE
This brewer is equipped with an automatic ll system. The brewer also incorporates a backup manual fill option for
brewing in case there is a problem with the water supply. To utilize the manual pour over fill option, simply raise the top
evaporation cover and pour the appropriate amount of water in to brewer for the vessel being brewed into. Do not
exceed the max fill level noted on the pour in grid.

3
COFFEE PREPARATION PROCEDURES
1) Place the lter into brew basket.
2) Place the appropriate amount of ground coffee into the filter for the volume of coffee to be brewed.
3) Slide the brew basket into holder.
4) For warmer units:
Place empty decanter on warmer located directly under the brew basket
Turn corresponding warmer switch to ON position.
For airpots or other dispensers
Remove any non brew thru lids or pump stems
Place airpot under brew basket.
Turn the power switch on.
5) Depress the brew start switch.
6) For manual brewing, raise the top evaporation cover and pour ONE decanter(warmer model) or pitcher(therm
model) of COLD water through the pour in grid into the basin. Ensure that lower warmer/power switch is in the
ON position to start the brew cycle.
7) To cancel brew cycle turn the lower warmer switch for warmer models, or power switch for thermo models, to
the off position. Some hot water will continue to drain from the system.
8) NOTE: Never pour hot water into the brewer. This brewer features a European style brewing system which
heats only the water for coffee when you pour it into the brewer. This type of system does not have a tank to
store hot water. Do not overfill unit by pouring in more than one decanter of water at a time.
9) Hot water will be delivered through the sprayhead. This distributes the hot water evenly over the coee bed
within the brew basket. After heating stops, coffee will continue to drain from the brew basket into the decanter
below.
10) The unique thermal brew system takes a little longer to brew than tank systems, which allow the stored water to
become stale, but the result is better tasting and hotter coffee.
11) (AKH warmer model) TURN OFF WARMERS WHEN NOT IN USE. Red light in switch indicates when warmer
is ON.
12) To clean brew basket simply remove from brew rails and dump filter into waste basket. The brewing process,
as described above, can now be started again.
If unit will not brew, check the following before calling for service:
Is it plugged in?
Is there water in the receiving pan? Water activates the float switch, allowing the unit to brew.
(Warmer model) Is the lower warmer switch in the ON position?
(Thermal model) Is the power switch in the ON position?
WARRANTY
Newco coffee brewers are warranted against defects in workmanship or materials, under normal use, for one year
from the date of purchase.
Liability in all events is limited to the purchase price paid and liability under the aforesaid warranty is limited to
replacing or repairing any part or parts which are defective in material or workmanship, and returned to our factory,
shipping cost prepaid. No warranty expressed or implied, other than the aforesaid is made or authorized by Newco
Enterprises, Inc.
Prompt disposition will be made if item Before returning any item, write or proves to be defective, within warranty.
call Newco, or the dealer from whom the product was purchased, giving model number, serial number, and date of
purchase, and describe nature of the defect. If damage was incurred during transit to you, file claim with the carrier.
Product specificaties
| Merk: | Newco |
| Categorie: | Koffiezetapparaat |
| Model: | AKH-LDA |
Heb je hulp nodig?
Als je hulp nodig hebt met Newco AKH-LDA stel dan hieronder een vraag en andere gebruikers zullen je antwoorden
Handleiding Koffiezetapparaat Newco

17 November 2024

8 Augustus 2023

3 Juli 2023

21 Juni 2023

21 Juni 2023

21 Juni 2023

19 Juni 2023

19 Juni 2023

16 Juni 2023

16 Juni 2023
Handleiding Koffiezetapparaat
- Koenig
- Flytek
- PowerXL
- Bauknecht
- Mystery
- Gourmia
- Egro
- Quintezz
- Silvercrest
- Arcelik
- Logik
- Sanyo
- JennAir
- Philips
- Termozeta
Nieuwste handleidingen voor Koffiezetapparaat
5 Augustus 2025
5 Augustus 2025

5 Augustus 2025
5 Augustus 2025
5 Augustus 2025
4 Augustus 2025

4 Augustus 2025
4 Augustus 2025

4 Augustus 2025

4 Augustus 2025