Monogram ZKR42N Handleiding
Monogram Niet gecategoriseerd ZKR42N
Bekijk gratis de handleiding van Monogram ZKR42N (2 pagina’s), behorend tot de categorie Niet gecategoriseerd. Deze gids werd als nuttig beoordeeld door 14 mensen en kreeg gemiddeld 4.8 sterren uit 7 reviews. Heb je een vraag over Monogram ZKR42N of wil je andere gebruikers van dit product iets vragen? Stel een vraag
Pagina 1/2
31-1000194 Rev. 0 09-19 GEA
Installation
Instructions
ZKR42N - 42” Trim Retro Kit
ZKR48N- 48” Trim Retro Kit
Before you begin - Read these instructions completely and carefully.
Note to Installer: Be sure to leave these instructions with the Consumer.
Note to Consumer:Keep these instructions with your Installation Instructions for future reference.
This kit provides for the installation of trim retro kit components needed for 2 Column models side by side in a 41-1/2”
or 47-1/2” opening which is 24” deep.
Parts List:
- Water line jumper
- Water fitting tee
- 2 power cords
- RH and LH Case side trims
- 42” or 48” Case top trim
- #8 Phillips head trim screws
- 2 corner keys
- #6 Phillips head corner key screws
Tools and Materials Required:
- Adjustable wrench
- #2 Phillips screwdriver
- 1/4” driver / socket
INSTALL WATER LINE JUMPER/TEE
Ŷ Connect the jumper water line from the ZKR42N or
ZKR48N Trim Retro Kit to the house cold water line.
Tighten the compression nut hand tight, then tighten
one additional turn with a wrench. Overtightening can
cause leaks!
Ŷ Connect the other end of the jumper water line to the
water fitting tee supplied in the trim retro kit. Tighten
the compression nut hand tight, then tighten one
additional turn with a wrench. Overtightening can
cause leaks!
CHANGE POWER CORD
Longer power cords are required for retro fit installation.
Power cords are included in 42” ZKR42N and 48”
ZKR48N.
Replace power cords on both units. Both units can be
plugged into the same electrical supply receptacle.
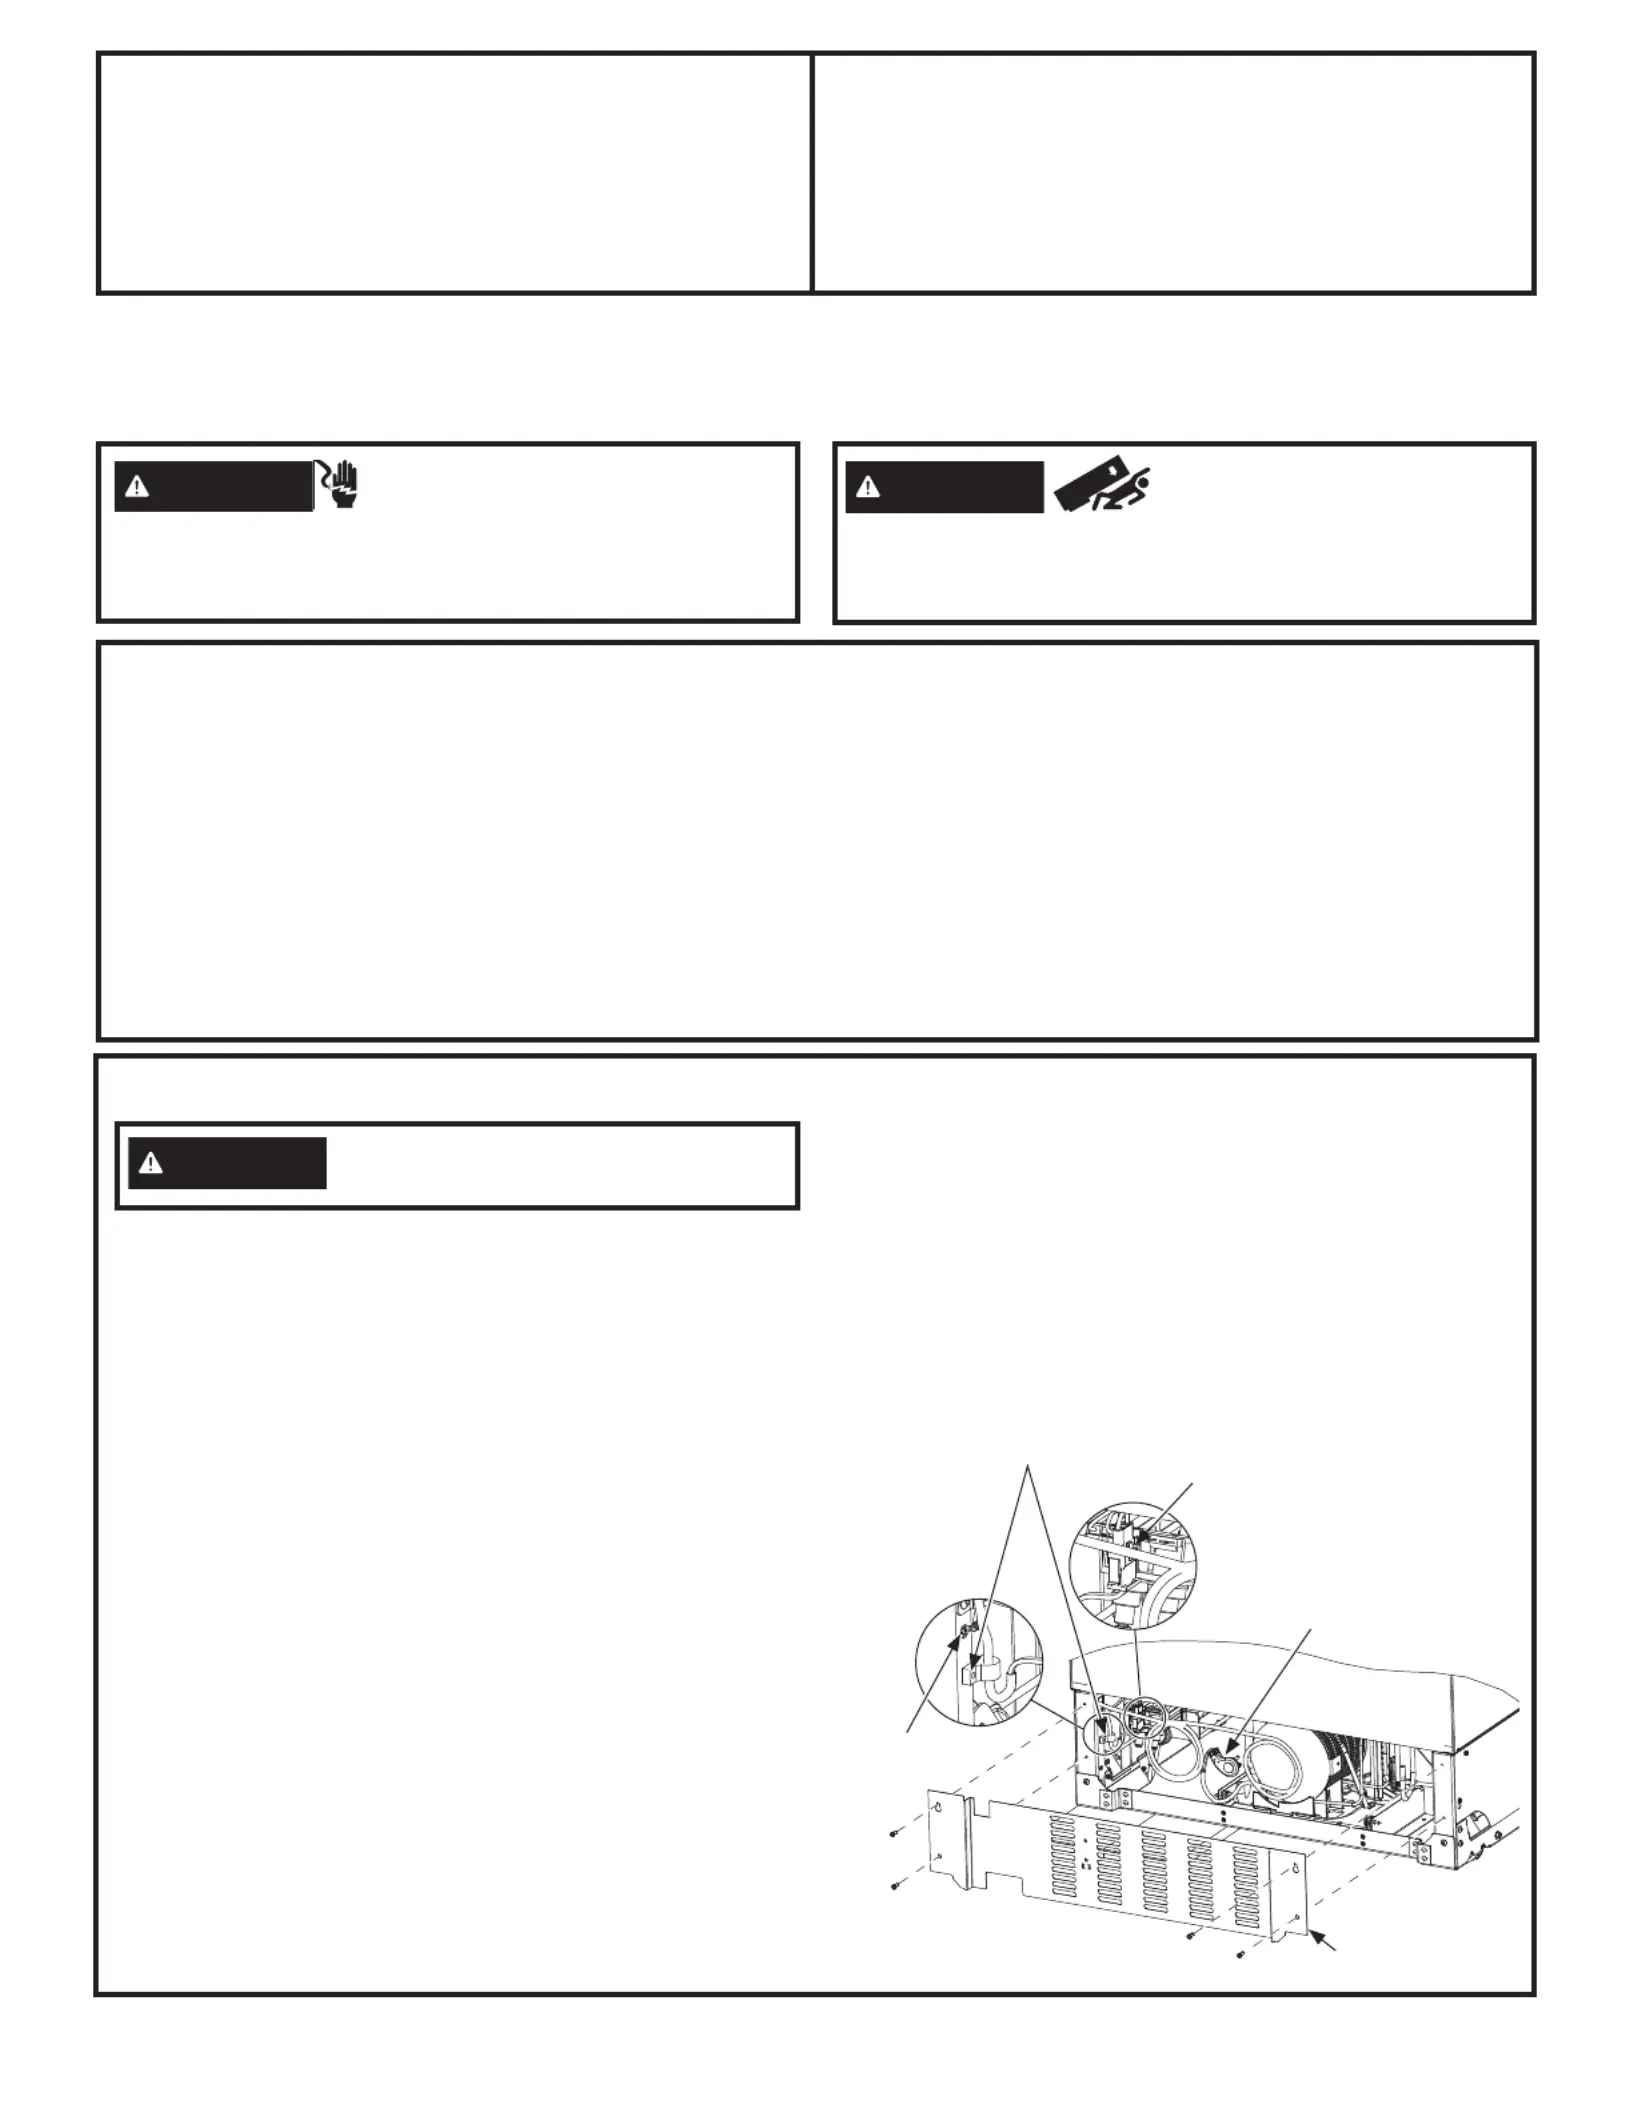
Remove existing short power cord with string
assembly:
ŶRemove 1/4” hex screws attaching rear access cover.
1. Unplug 3-pin power cord connector inside the
machine compartment (press on sides to release
locking tabs).
2. Remove power cord green ground 1/4” hex screw.
3. Remove strain relief 1/4” hex screw.
WARNING
Electrical Shock Hazard.
To avoid the risk of electric shock, make sure the power
cord is not plugged into the wall outlet.
WARNING
Tip Over Hazard. This
appliance is top heavy. Use extreme caution with moving
to prevent tipping over which could result in death or
serious injury.
WARNING
Connect to potable water supply
only.
Power
Cord
Rear Access
Cover
Strain Relief
Screw
Step 3
3-Pin
Power Cord
Connector
Step 1
Green Ground
Screw
Step 2
Product specificaties
| Merk: | Monogram |
| Categorie: | Niet gecategoriseerd |
| Model: | ZKR42N |
Heb je hulp nodig?
Als je hulp nodig hebt met Monogram ZKR42N stel dan hieronder een vraag en andere gebruikers zullen je antwoorden
Handleiding Niet gecategoriseerd Monogram

25 Februari 2026
5 Augustus 2025
5 Augustus 2025
5 Augustus 2025
5 Augustus 2025
5 Augustus 2025
5 Augustus 2025
5 Augustus 2025
5 Augustus 2025
5 Augustus 2025
Handleiding Niet gecategoriseerd
Nieuwste handleidingen voor Niet gecategoriseerd
8 Juni 2026
8 Juni 2026
8 Juni 2026
7 Juni 2026
7 Juni 2026
7 Juni 2026
7 Juni 2026
7 Juni 2026
6 Juni 2026
6 Juni 2026