Metra 91-3520P Handleiding
Metra Niet gecategoriseerd 91-3520P
Bekijk gratis de handleiding van Metra 91-3520P (3 pagina’s), behorend tot de categorie Niet gecategoriseerd. Deze gids werd als nuttig beoordeeld door 38 mensen en kreeg gemiddeld 4.6 sterren uit 7 reviews. Heb je een vraag over Metra 91-3520P of wil je andere gebruikers van dit product iets vragen? Stel een vraag
Pagina 1/3
Pontiac
11864
1
1864
FM
FM
102.7
1
02.7
IMPORTANT
Installation Kit
120 91-3520P
Before starting, compare items on your invoice with items
received.Carefully check through packaging material.
If an item is missing, please call:
Crutchfield
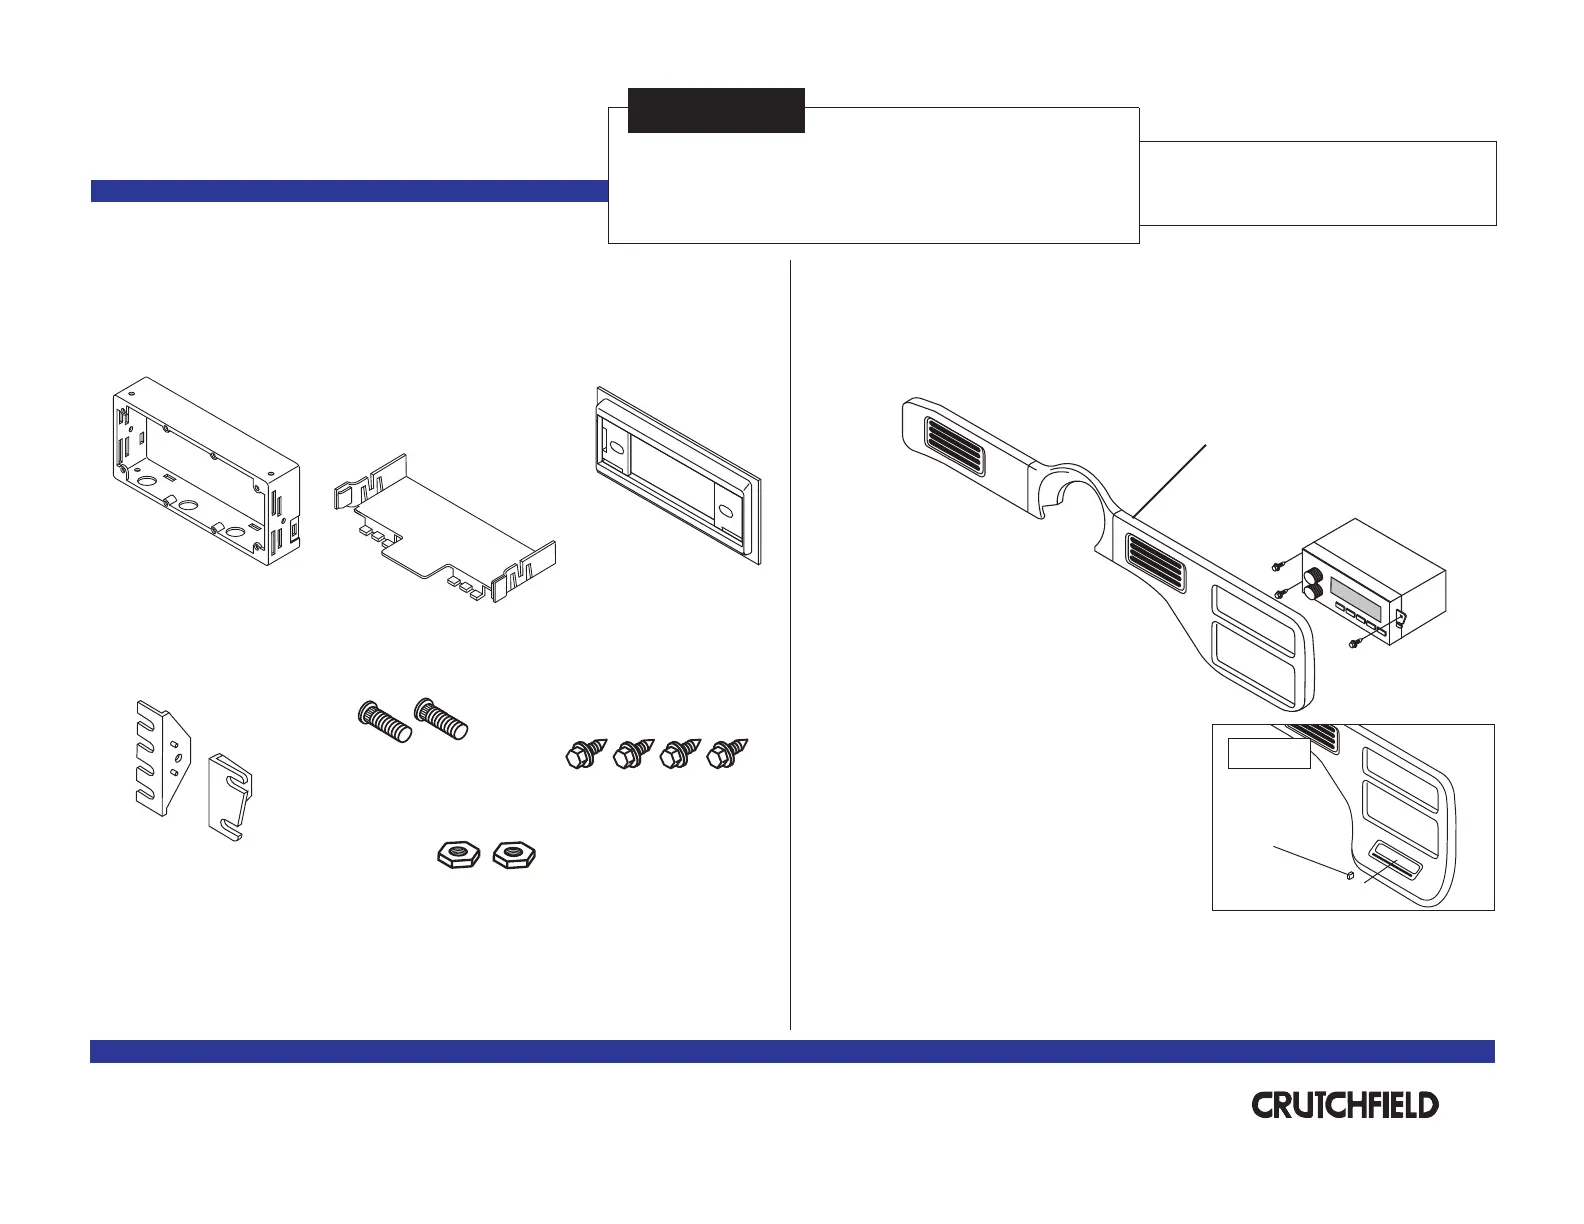
Parts Supplied:
Kit Frame
Support Tray
Revision 10/31/03
Kit assembly instructions are on the following pages.
Page 1 of 3
®
Copyright 2003 Crutchfield Corporation
*120913520P*
Mounting Brackets
Left
Right
(2) Studs
(2) 3/8”Nuts
(4) 1/4”Hex Screws
Trimplate
Factory Radio Removal:
1.Disconnect negative battery
cable to prevent any electrical short.
2.Move column shift down for better
access to receiver trimpanel.Tilt
steering wheel to lowest position.
3.Pull out edges of receiver trimpanel to
release retaining clips.If SSEi version:
Remove knoband disconnect sub gain
switch(Inset).Remove trimpanel.
4.Remove three (3) 9/32”screws securing
radio to dash.
5.Pull out radio, disconnect and remove.
Receiver Trimpanel
SSEi version
Sub Gain Switch
Knob
INSET
at1-888-955-6000
Product specificaties
| Merk: | Metra |
| Categorie: | Niet gecategoriseerd |
| Model: | 91-3520P |
Heb je hulp nodig?
Als je hulp nodig hebt met Metra 91-3520P stel dan hieronder een vraag en andere gebruikers zullen je antwoorden
Handleiding Niet gecategoriseerd Metra

6 November 2025
5 November 2025
5 November 2025
4 November 2025
4 November 2025
4 November 2025
3 November 2025
31 Oktober 2025
30 Oktober 2025
28 Oktober 2025
Handleiding Niet gecategoriseerd
Nieuwste handleidingen voor Niet gecategoriseerd
8 Juni 2026
8 Juni 2026
8 Juni 2026
8 Juni 2026
8 Juni 2026
8 Juni 2026
8 Juni 2026
8 Juni 2026
8 Juni 2026
8 Juni 2026