Metra 90-3057P Handleiding


Lees hieronder de 📖 handleiding in het Nederlandse voor Metra 90-3057P (3 pagina's) in de categorie Niet gecategoriseerd. Deze handleiding was nuttig voor 12 personen en werd door 2 gebruikers gemiddeld met 4.5 sterren beoordeeld

Pagina 1/3
IMPORTANT
Installation Kit
120 90-3057P
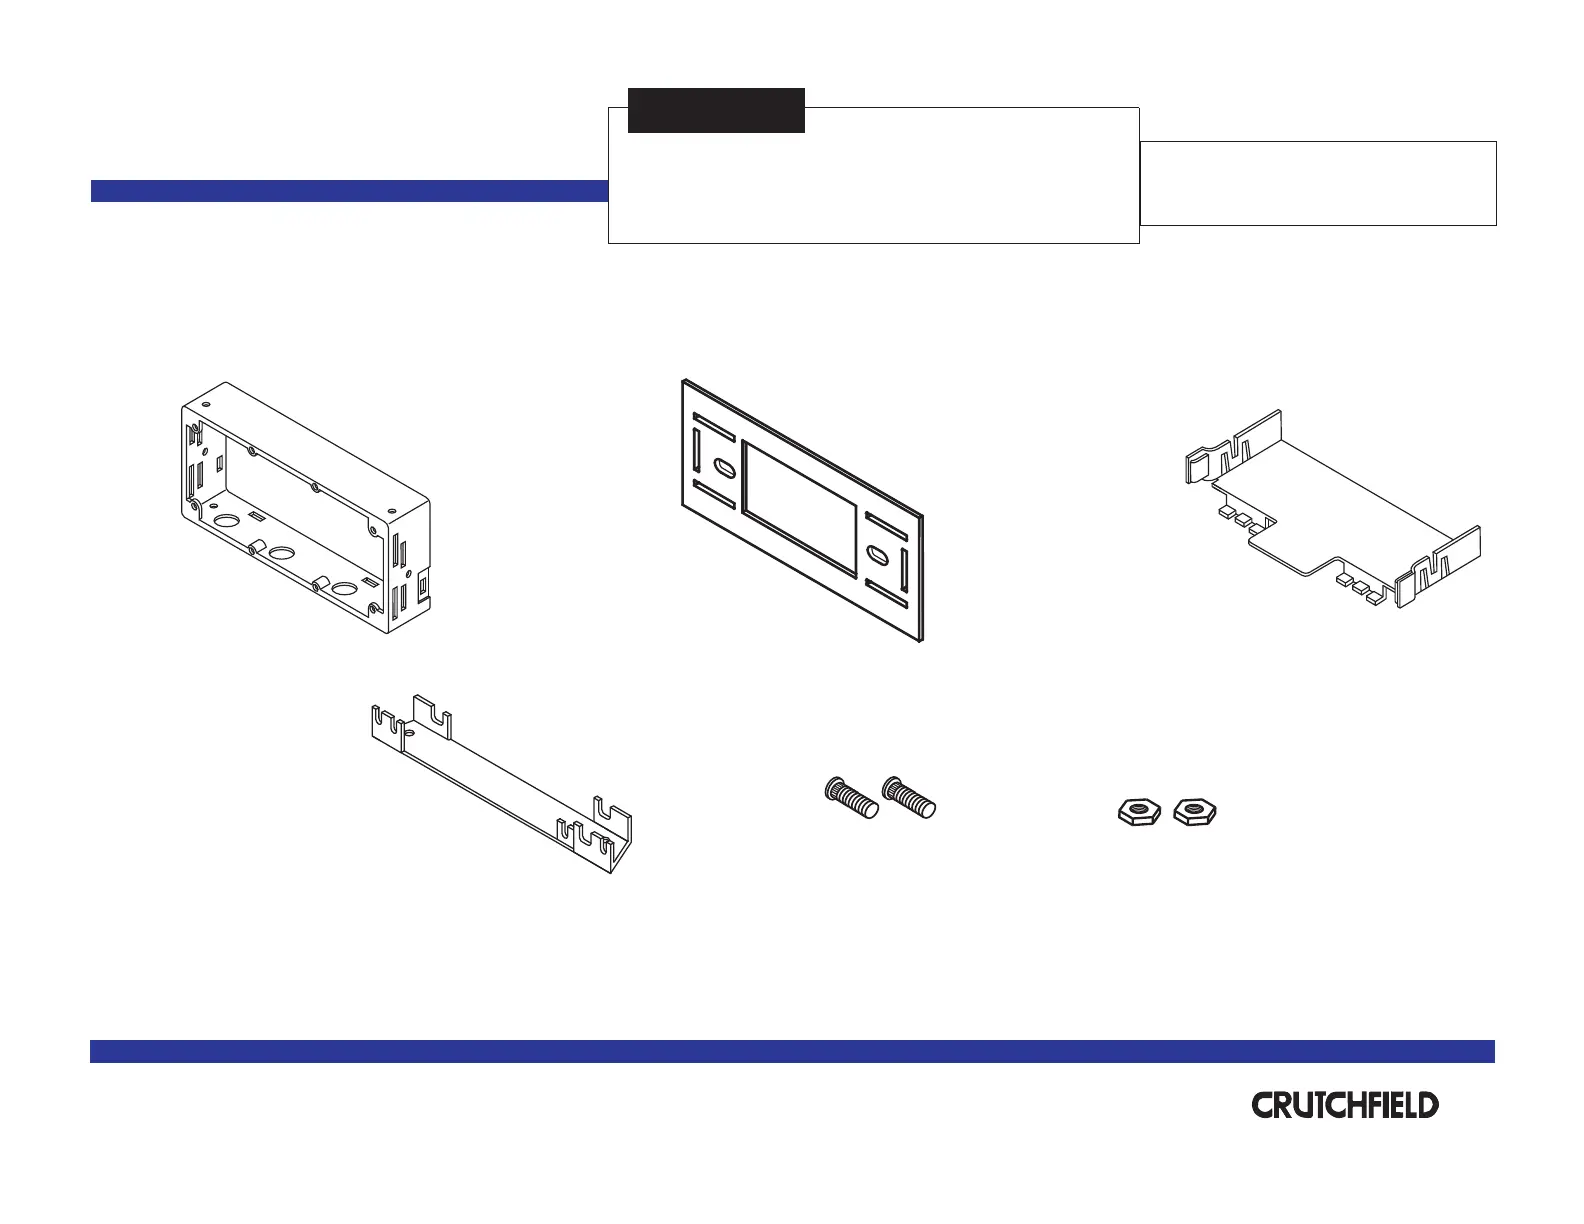
Before starting, compare items on your invoice with items
received. Carefully check through packaging material.
If an item is missing, please call:
Crutchfield
Parts Supplied:
Kit Frame
Support Tray
Saturn
Revision 09/17/03
Kit assembly instructions are on the following pages.
(2) Studs (2) 3/8” Nuts
Page 1 of 3
®
Copyright 2003 Crutchfield Corporation
*120903057P*
Trimplate
Mounting Bracket
at 1-888-955-6000
Installation Kit
Tools Required
120 90-3057P
Saturn
1. Press posts on trimplate into holes on kit frame to snap
parts together and secure (Figure 1).
2. Use a utility knife to cut out in trimplate to shaft supports
create a DIN opening (Figure 2).
3. Push clips on into slots on rear of kit frame to support tray
secure (Figure 1).
4. Use pliers to break off all tabs on mounting bracket that
are shown as shaded (Figure 3). Tabs labeled “A” should
be the only remaining tabs.
5. Secure mounting bracket to top of kit frame with studs
and nuts supplied (Figure 1).
6. Remove DIN sleeve from receiver and slide into opening in
trimplate. Secure sleeve to trimplate by bending the
securing tabs (Figure 4).
7. Slide receiver into sleeve/kit assembly.
DIN Receiver Assembly
Utility
Knife
2
®
Copyright 2003 Crutchfield Corporation
FIGURE 4
Securing Tabs
DIN Sleeve
Bend tabs after sleeve
is inside assembly.
Small Flat Blade
Screwdriver
FIGURE 1
Trimplate
Kit Frame
Support Tray
Mounting Bracket
Stud
Nut
FIGURE 2
Shaft Supports
3/8” Socket
FIGURE 3
Pliers Break off shaded tabs
Mounting Bracket
“A” Tab “A”Tab
Installation Kit
120 90-3057P
Saturn
Spacers
(supplied with
your order)
1. Press posts on trimplate into holes on kit frame to snap parts
together and secure (Figure 1).
2. Push clips on into slots on rear of kit frame support tray
to secure (Figure 1).
3. Use pliers to break off all tabs on mounting bracket that are
shown as shaded (Figure 2). Tabs labeled should be the “A”
only remaining tabs.
4. Secure mounting bracket to top of kit assembly with studs and
nuts supplied (Figure 1).
5. Choose the proper spacers (supplied with your order) to
allow receiver nosepiece to extend 1/8” to 1/4” beyond
face of trimplate (Figure 3).
6. Insert receiver shafts (with spacers in place) through openings
in trimplate. Secure receiver and faceplate with shaftnuts
supplied with receiver.
7. Attach control knobs.
1/8” -1/4”
Spacer
Shaft Receiver Assembly
3
FIGURE 3
Shaftnuts
®
Copyright 2003 Crutchfield Corporation
FIGURE 1
Trimplate
Kit Frame
Support Tray
Mounting Bracket
Faceplate
Control Knobs
Stud
Nut
FIGURE 2
Break off shaded tabs
Tools Required
3/8” Socket
Pliers
Deep Socket
(size depends upon receiver)
Mounting Bracket
“A” Tab “A”Tab


Product specificaties

Merk: Metra
Categorie: Niet gecategoriseerd
Model: 90-3057P

Heb je hulp nodig?

Als je hulp nodig hebt met Metra 90-3057P stel dan hieronder een vraag en andere gebruikers zullen je antwoorden


Handleiding Niet gecategoriseerd Metra

Handleiding Niet gecategoriseerd

Nieuwste handleidingen voor Niet gecategoriseerd