Metra 70-7863 Handleiding
Metra Niet gecategoriseerd 70-7863
Bekijk gratis de handleiding van Metra 70-7863 (2 pagina’s), behorend tot de categorie Niet gecategoriseerd. Deze gids werd als nuttig beoordeeld door 72 mensen en kreeg gemiddeld 4.8 sterren uit 3 reviews. Heb je een vraag over Metra 70-7863 of wil je andere gebruikers van dit product iets vragen? Stel een vraag
Pagina 1/2
In order to retain the factory AUX input, the new
receiver must have an AUX input connection. An
adaptor may be needed with receivers that have a
3.5mm AUX input.
Receiver Wiring Adaptor
120 70-7863
Revision 11/10/16
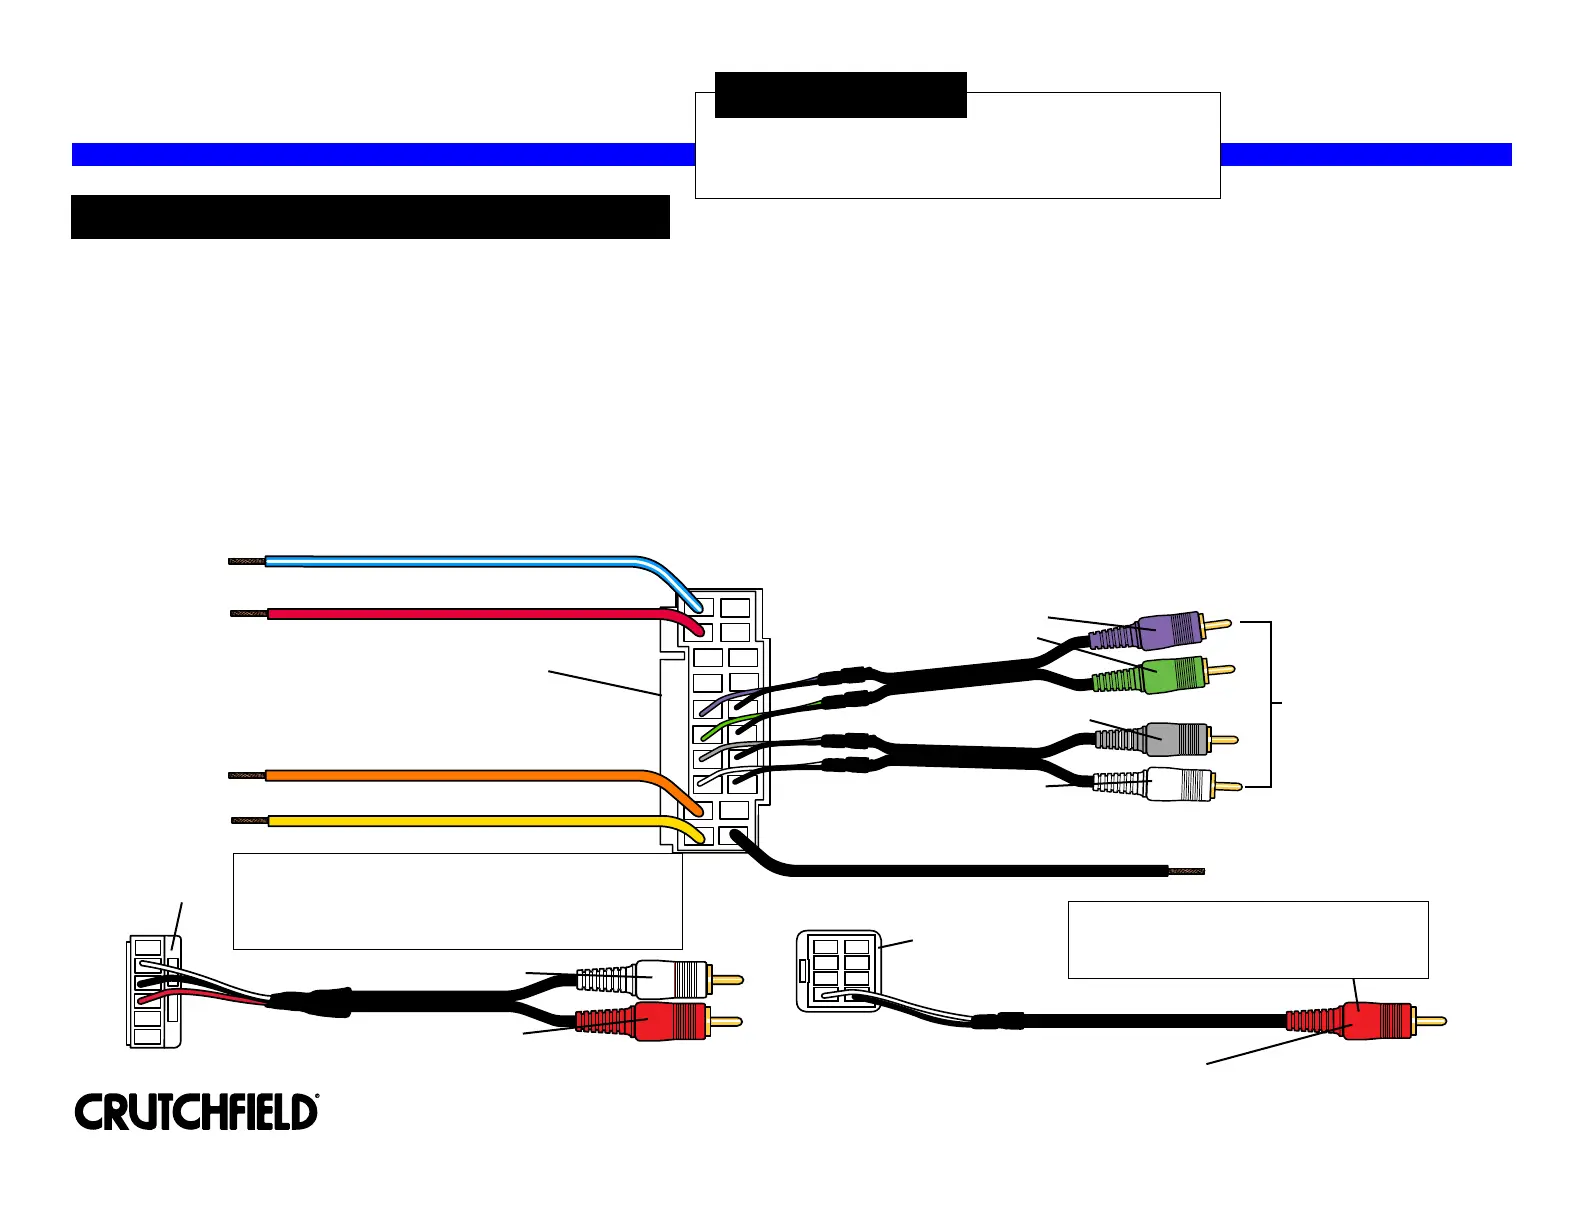
STEP 1 -- MATCH & CONNECT WIRES
*120707863*
IMPORTANT
Before starting, compare items on your invoice with items
received. Thoroughly check packing materials. If an item
is missing, please call
Crutchfield at 1-888-955-6000.
Copyright 2016 Crutchfield Corporation
Match wires below to the matching function of each wire on your receiver (refer to instructions supplied with receiver). The wire colors of your
new receiver may, or may not, match the wire colors of the adaptor. Match adaptor and receiver wires by function, disregarding color.
Connect the illumination wire from the new receiver to the Orange illumination wire in the wiring adaptor. If the new receiver does not have an
illumination wire, tape off the illumination wire in the wiring adaptor.
Tape off any unused wires.
Make final wiring connections following instructions on the next page.
A.
B.
C.
D.
Red - 12 Volts Switched Power
Yellow - 12 Volts Constant Power
Orange - Illumination
Black - Chassis Ground
Blue/White - Power Antenna and Amplifier Remote
(connect to Amp Remote of new receiver)
MAIN HARNESS
AUX INPUT
HARNESS
White - Left Channel
Red - Right Channel
Subwoofer Input
SUBWOOFER
HARNESS
Violet - Right Rear Signal Input
Green - Left Rear Signal Input
White - Left Front Signal Input
Gray - Right Front Signal Input
For best results, this RCA plug should
be connected to the subwoofer preamp
output on the new receiver.
Connect to
RCA outputs
on new receiver.
This plug might be white in some packages.
If so, please disregard. It serves the same
function as indicated.
Product specificaties
| Merk: | Metra |
| Categorie: | Niet gecategoriseerd |
| Model: | 70-7863 |
Heb je hulp nodig?
Als je hulp nodig hebt met Metra 70-7863 stel dan hieronder een vraag en andere gebruikers zullen je antwoorden
Handleiding Niet gecategoriseerd Metra

6 November 2025
5 November 2025
5 November 2025
4 November 2025
4 November 2025
4 November 2025
3 November 2025
31 Oktober 2025
30 Oktober 2025
28 Oktober 2025
Handleiding Niet gecategoriseerd
Nieuwste handleidingen voor Niet gecategoriseerd
8 Juni 2026
8 Juni 2026
8 Juni 2026
8 Juni 2026
8 Juni 2026
8 Juni 2026
8 Juni 2026
8 Juni 2026
8 Juni 2026
8 Juni 2026