Integra HD-BRX1 Handleiding
Integra
Niet gecategoriseerd
HD-BRX1
Bekijk gratis de handleiding van Integra HD-BRX1 (2 pagina’s), behorend tot de categorie Niet gecategoriseerd. Deze gids werd als nuttig beoordeeld door 8 mensen en kreeg gemiddeld 4.9 sterren uit 4.5 reviews. Heb je een vraag over Integra HD-BRX1 of wil je andere gebruikers van dit product iets vragen? Stel een vraag
Pagina 1/2

HDBaseT Receiver
F1711-0SN29355998
*29355998*
Instruction Manual
HDB-RX1
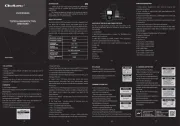
1 Screw hole for wall attachment: Fix with the supplied screw for wall
attachment when installing on a wall.
2 12V 1A INPUT jack: When connecting to a device that does not
support Power over Cable
(PoC, refer to the back cover)
, connect the
supplied AC adapter.
3 Power indicator: Lights when the power of this unit is on.
4 HDBaseT jack: Use an Ethernet cable to connect to the HDBaseT
TM
OUT jack on one of our AV receivers to receive video signals, audio
signals, control signals, etc.
• As they are covered with a seal when shipped, remove it when you
use the jack.
• Use one of the following Ethernet cables to connect.
ーWhen using Power over Cable (PoC, refer to the back cover)
Cat6 (Category 6) cable: AWG23 cable or better, 50 m or less in
length
Cat5e (Category 5e) cable: AWG24 cable or better, 45 m or less in
length
ーWhen not using Power over Cable (PoC, refer to the back cover
Cat6 (Category 6) cable: AWG23 cable or better, 100 m or less in
length
Cat5e (Category 5e) cable: AWG24 cable or better, 90 m or less in
length
• It is recommended to use shielded single Ethernet cable.
• Do not connect this port to the Ethernet ports of network devices.
5 HDMI OUT jack: Transmit video signals and audio signals with a HDMI
cable connected to a monitor such as a TV or projector.
6 ACTIVE/SERVICE switch: Use in the "ACTIVE" position. ("SERVICE"
is for servicing)
7 RS232 port: Used when connecting to a home control system.
• Use a straight cable.
8 IR IN/OUT jacks: Used when connecting to a multiroom remote control
kit.
• Refer to the instruction manual of the IR receiver for the types of
cables required for connection.
Part Names
HDMI
Supported
Deep Color, x.v.Color™, LipSync, 3D, 4K 60 Hz, Extended
Colorimetry (sYCC601, Adobe RGB, Adobe YCC601),
Content Type, HDR
HDCP
Revision 1.4, 2.2
Maximum Video Resolution
4k 60 Hz (YCbCr 4:4:4)
Output jacks
HDMI OUT : 1
Other jacks
HDBaseT IN : 1
RS232 : 1 (Path through)
IR IN : 1 (Path through)
IR OUT : 1 (Path through)
General
Power Supply
AC 100 - 240 V, 50/60 Hz
Power Consumption
11.2 W (AC adaptor)
Dimensions (W × H × D)
205 mm × 35 mm × 89 mm
8-1/16" × 1-3/8" × 3-1/2"
Weight
0.45 kg (1 lb)
• Specifications and features are subject to change without
notice.
• We will not accept responsibility for damage arising from the
connection of equipment manufactured by other companies.
189
205
64
89
35
Unit : mm
What’s in the Box
Main unit (1)
AC adaptor (1)
Cushions (4)
Screws for wall attachment (4)
Label for HDBaseTTM cable (2)
Label for AC adaptor cord (2)
Instruction Manual (this document)
®
The terms HDMI and HDMI High-Definition Multimedia Interface, and the HDMI Logo
are trademarks or registered trademarks of HDMI Licensing LLC in the United States
and other countries.
HDBaseT
TM and the HDBaseT Alliance logo are trademarks of the HDBaseT Alliance.
A
ll other trademarks are the property of their respective owners.
En

Wheninstallingontheoor
When installing on the floor, use the supplied cushions to
help prevent damage to the floor.
When installing on a wall
Fix this unit with the supplied screws for wall attachment
when installing on a wall.
• Do not attach to the ceiling.
• After attaching, check that the fitting is secure. We accept
no responsibility for damage or injury that arises due to
incorrect attachment.
(C) Copyright 2017 Onkyo & Pioneer Corporation Japan. All rights reserved.
Printed in Malaysia
Installation Basic& Connections
• Use an Ethernet cable to connect the HDBaseT
TM OUT jack on one of the following of our AV receivers to the HDBaseT jack on this unit to transfer video, audio, and control signals.
(DRX-4/DRX-5/DRX-7/DRX-R1/DRC-R1/DRX-7.1/DRX-R1.1/DRC-R1.1, and models supporting HDBaseT
TM OUT sold in 2018 and thereafter)
• When using one of our AV receivers that supports Power over Cable (PoC), it is also possible to supply this unit with power over the Ethernet cable.
Cushions
Screws for wall
attachment
RS232 Connections
This is an example of connecting to a home control system with an RS232 cable.
Also read the instruction manual supplied with the connected device.
IR Connections
This is an example of connection to an IR receiver.
Also read the instruction manual supplied with the connected device.
Home control system TV, etc.
RS232 cable RS232 cable
AV Receiver Ethernet cable
IR Receiver
TV, etc.
IR system cable
AV Receiver Ethernet cable
5.
2.
1.
ᴧ
3. 4.
Ethernet cable
AV Receiver
AC adaptor
TV, Projector
HDMI cable
Other Connections
1. Connect this unit to a monitor such as a TV or projector using an HDMI cable.
2. Connect this unit to one of our AV receivers using an Ethernet cable.
3. Set the ON/OFF switch on the rear of the AV receiver to ON.
4, 5. Connect the AC adaptor.
*
If a device that does not support Power over Cable (PoC) is connected, connect the
AC adaptor to the 12V 1A INPUT jack on the rear of the unit.
Only when using
a device that
supports PoC
Product specificaties
| Merk: | Integra |
| Categorie: | Niet gecategoriseerd |
| Model: | HD-BRX1 |
Heb je hulp nodig?
Als je hulp nodig hebt met Integra HD-BRX1 stel dan hieronder een vraag en andere gebruikers zullen je antwoorden
Handleiding Niet gecategoriseerd Integra

2 Juli 2023

23 Oktober 2022
Handleiding Niet gecategoriseerd
- POWEROWL
- Cosatto
- Blomus
- UPM
- IOptron
- A4tech
- Mermade Hair
- Babyzen
- Trelock
- Phoenix Technologies
- SPC
- Duravit
- Silicon Power
- Streetz
- Dahle
Nieuwste handleidingen voor Niet gecategoriseerd

13 September 2025

13 September 2025

13 September 2025

13 September 2025

13 September 2025

13 September 2025

13 September 2025

13 September 2025

13 September 2025

13 September 2025