GVM WX-1D Handleiding
GVM Niet gecategoriseerd WX-1D
Bekijk gratis de handleiding van GVM WX-1D (2 pagina’s), behorend tot de categorie Niet gecategoriseerd. Deze gids werd als nuttig beoordeeld door 60 mensen en kreeg gemiddeld 4.6 sterren uit 3 reviews. Heb je een vraag over GVM WX-1D of wil je andere gebruikers van dit product iets vragen? Stel een vraag
Pagina 1/2
5 6
7 8
9 10
11 12
14
16
13
15
1817
MOTORIZED SLIDER
VMG
Great Video Maker
WX-1D
battery1battery charger*1*
2. Install a charged battery to the pan head. (As shown below)
1 2
3The product can be installed on tripod and photographic slide track..
1 2
1Steps for installing pan head in photography slider. (As shown below))
Packing list
WX 1D1- *
2Steps for installing pan head in tripod. (As shown below))
1 2
3 4
GVM Slider
GVM Slider
1 2 3
4 5 6
VMG
Great Video Maker
The WX-1D Motorized Pan Head is an easy-to-use device that can be controlled by
mobile phone APP for adding 360° panning motion to your real-time and time-lapse
videos. It can be powered by lithium battery for easy outdoor shooting. The body is
made of aluminum alloy , light and portable. It can be installed on tripod or slider to
meet different shooting needs.
Product Introduction
1 Please charge the wireless controller and battery before using this product..
Mounting the pan head and camera
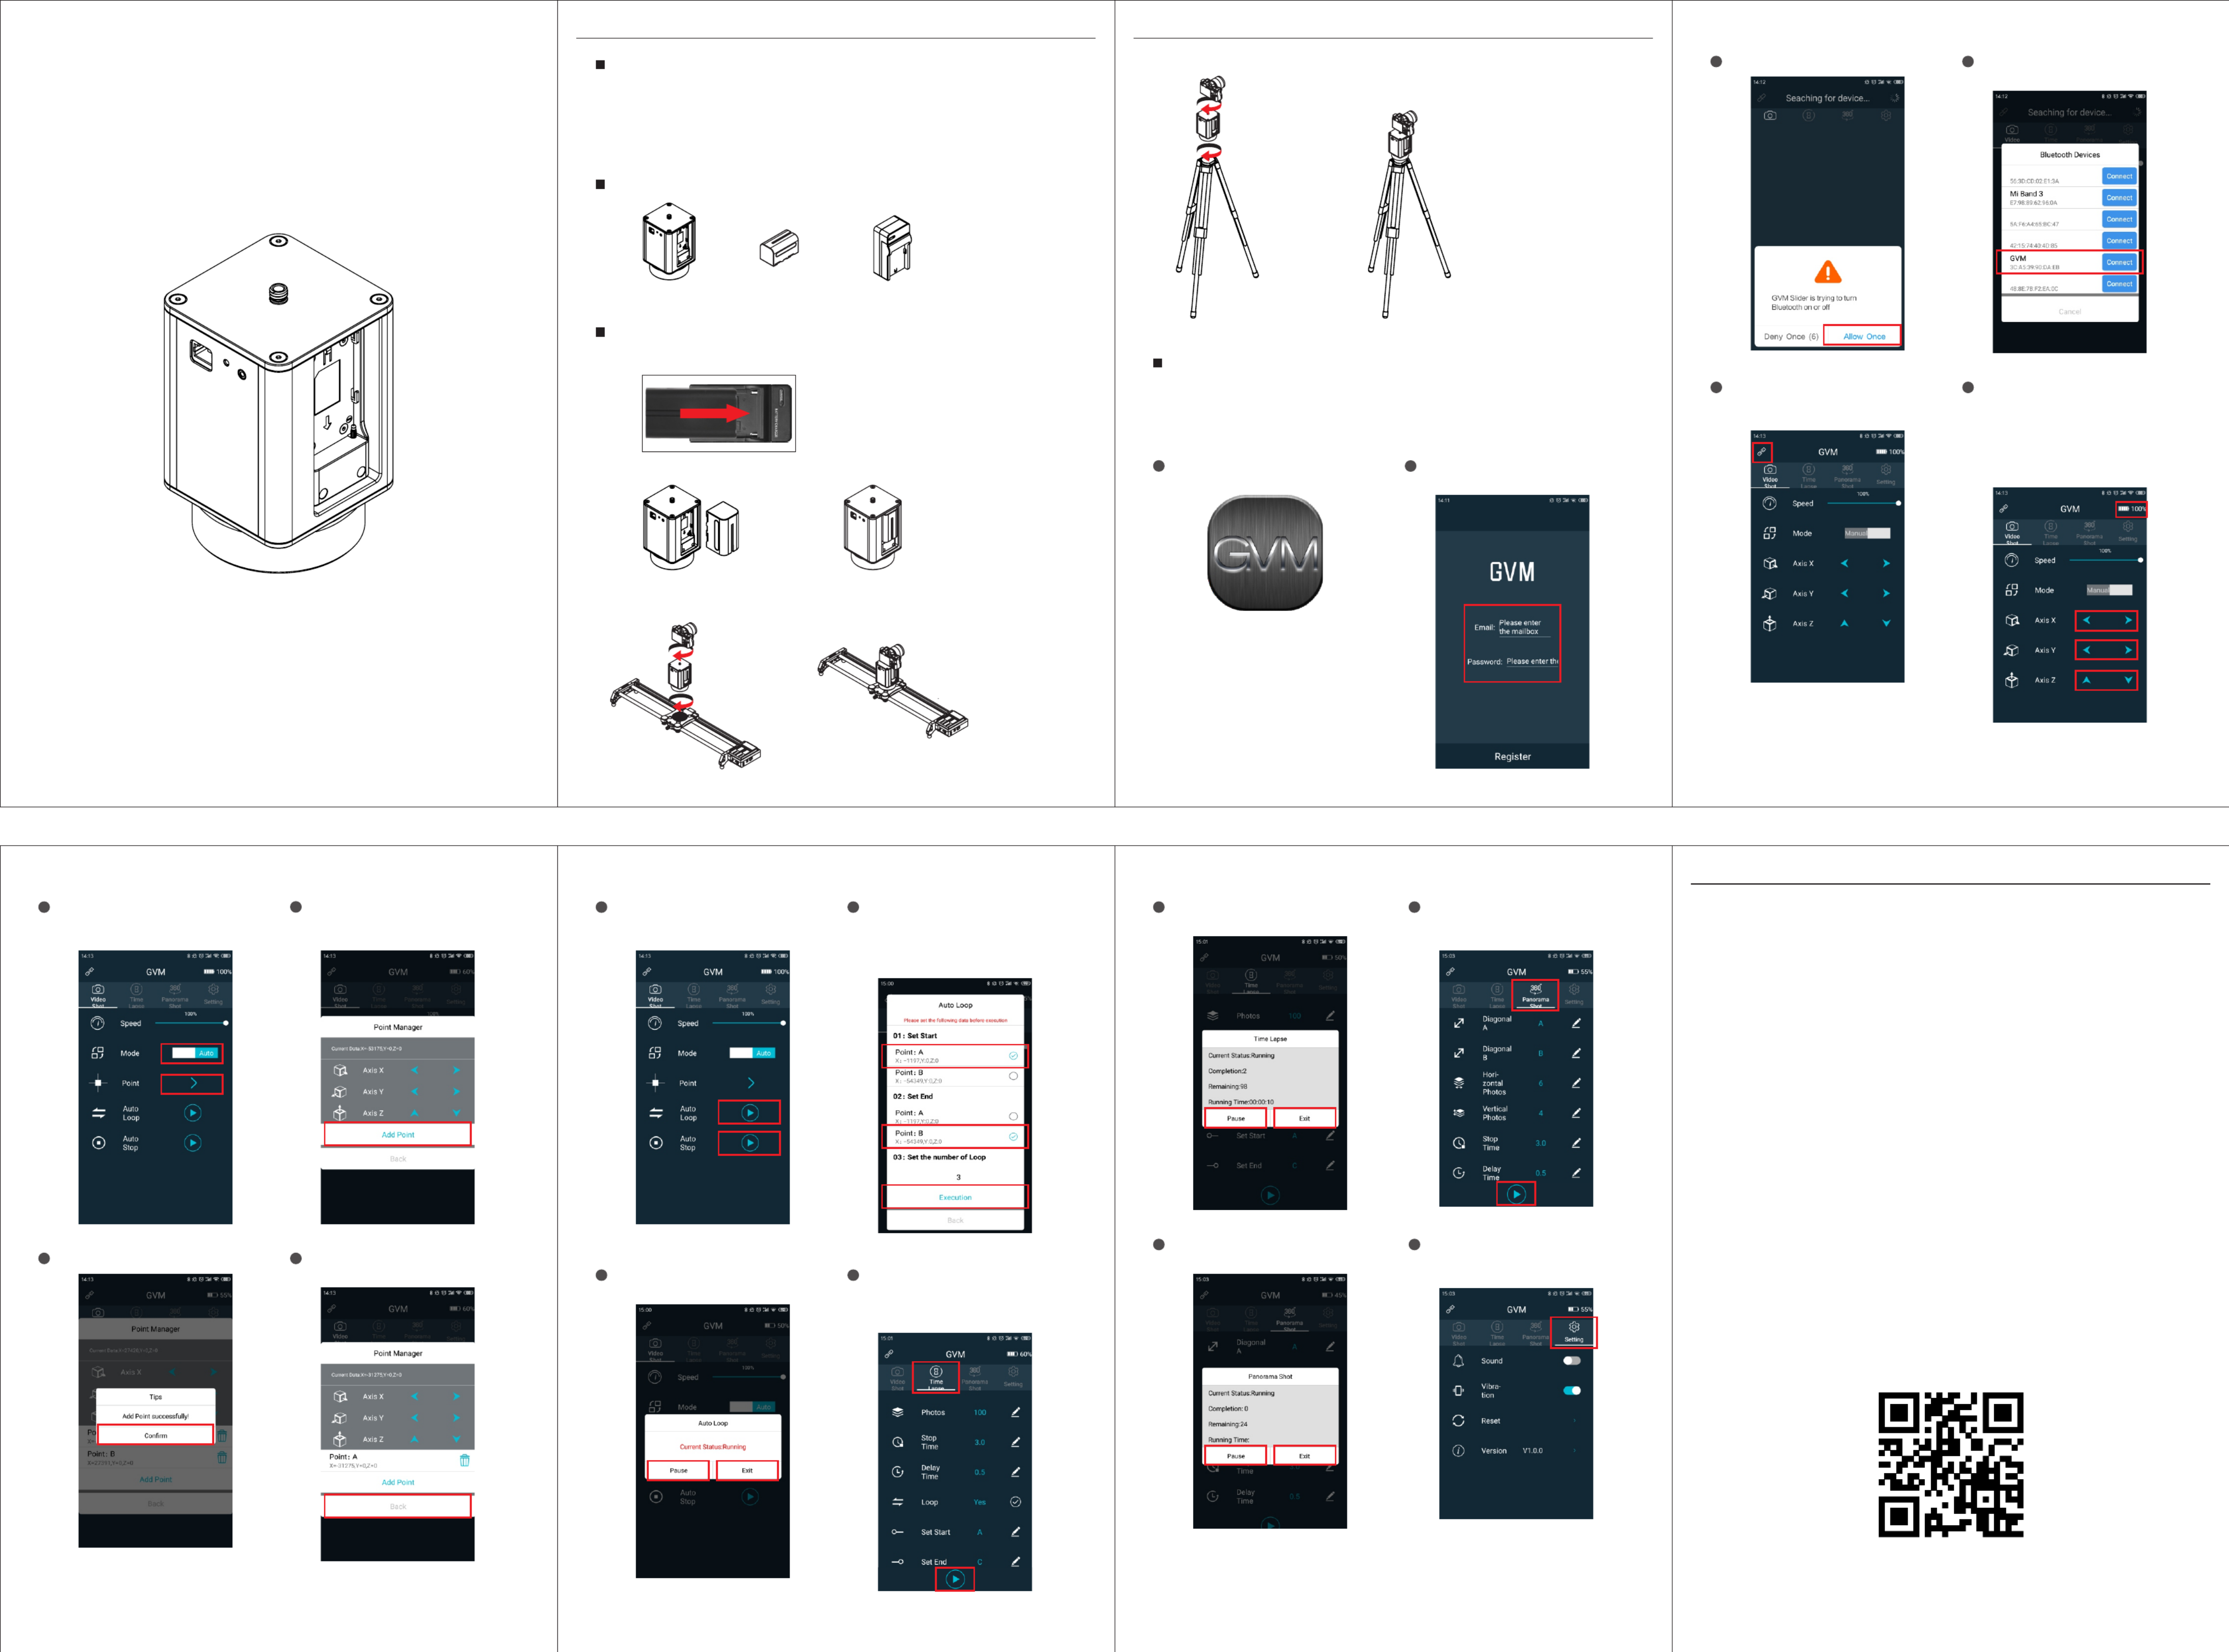
APP Intelligent Control System
This slider has mobile APP control function, available for your smart mobile device
(Android 4.0 or above, IOS 9.0 or above) Search in major APP stores (such as Apple
store/Google Play, etc.) to download the GVM Slider APP program, or scan the code
on GVM official website (www:gvmled.com) to download.
21
If connected, the current battery
capacity of the device will appear in
the upper right corner. At this time, the
control interface is in the manual
state, you can try to click the button of
the corresponding axis, and the
device can start working.
Switch the automatic mode through
the button, and set the key points you
needed.
If you cannot connect, click the
connect button in the upper left corner
to research the connection.
Choose the device name GVM to
connect.
Prompt to turn on Bluetooth, click allow.
Click on the installed APP.
Increase the key points by moving the
axes of the device to the desired
position.
Key points increase success.After adding the key point, return to the
previous interface.
At this time, you can choose automatic
round trip or stop to enter the next
choice.
Select the key point where the start /
end point is located (Note: the start / end
point cannot be the same point key), and you
can start running after setting the
number of round trips required.
During operation, you can pause or
exit to return to the previous menu.
In the time-lapse shooting mode, set
the required number of sheets and
time, then set the start / end point, and
swipe down to start running.
During operation, you can pause or
exit to return to the previous menu.
In the panoramic shooting mode, set
the required parameters and click the
arrow keys to start running.
During operation, you can pause or
exit to return to the previous menu.
The setting can switch the sound /
vibration of the button and reset the
APP parameters.
Register your account and password
first.
Add: 338 N Canal St, #20, South San Francisco,CA94080, USA
Web: www.gvmled.com
Email: support@gvmled.com
Scan the code to download the APP
Product specificaties
| Merk: | GVM |
| Categorie: | Niet gecategoriseerd |
| Model: | WX-1D |
Heb je hulp nodig?
Als je hulp nodig hebt met GVM WX-1D stel dan hieronder een vraag en andere gebruikers zullen je antwoorden
Handleiding Niet gecategoriseerd GVM

24 Juni 2026
10 November 2025
9 November 2025
15 November 2024
28 Mei 2024
8 Juni 2023
11 Mei 2023
7 Mei 2023
5 Mei 2023
29 April 2023
Handleiding Niet gecategoriseerd
Nieuwste handleidingen voor Niet gecategoriseerd
23 Juli 2026
23 Juli 2026
23 Juli 2026
22 Juli 2026
22 Juli 2026
22 Juli 2026
22 Juli 2026
22 Juli 2026
22 Juli 2026
21 Juli 2026