Furuno TZTBB Handleiding
Furuno Niet gecategoriseerd TZTBB
Bekijk gratis de handleiding van Furuno TZTBB (16 pagina’s), behorend tot de categorie Niet gecategoriseerd. Deze gids werd als nuttig beoordeeld door 17 mensen en kreeg gemiddeld 4.3 sterren uit 9 reviews. Heb je een vraag over Furuno TZTBB of wil je andere gebruikers van dit product iets vragen? Stel een vraag
Pagina 1/16
www.furuno.com
This guide provides the basic operating procedures for this equipment. For detailed information,
see the Operator's Manual.
The brand and product names mentioned in this guide are trademarks, registered trademarks or
service marks of their respective holders.
Most of the screenshots in this manual are for TZT9/TZT14.
Controls.................................................................................................................................... 1
Chart Plotter..............................................................................................................................3
Radar ........................................................................................................................................6
AIS (Automatic Identification System)....................................................................................10
Fish Finder..............................................................................................................................11
Wireless LAN Setting..............................................................................................................14
MULTI FUNCTION DISPLAY
TZT9/TZT14/TZTBB
User's Handbook
Table of Contents
Key control
Key control
Key control
Key control
Key control
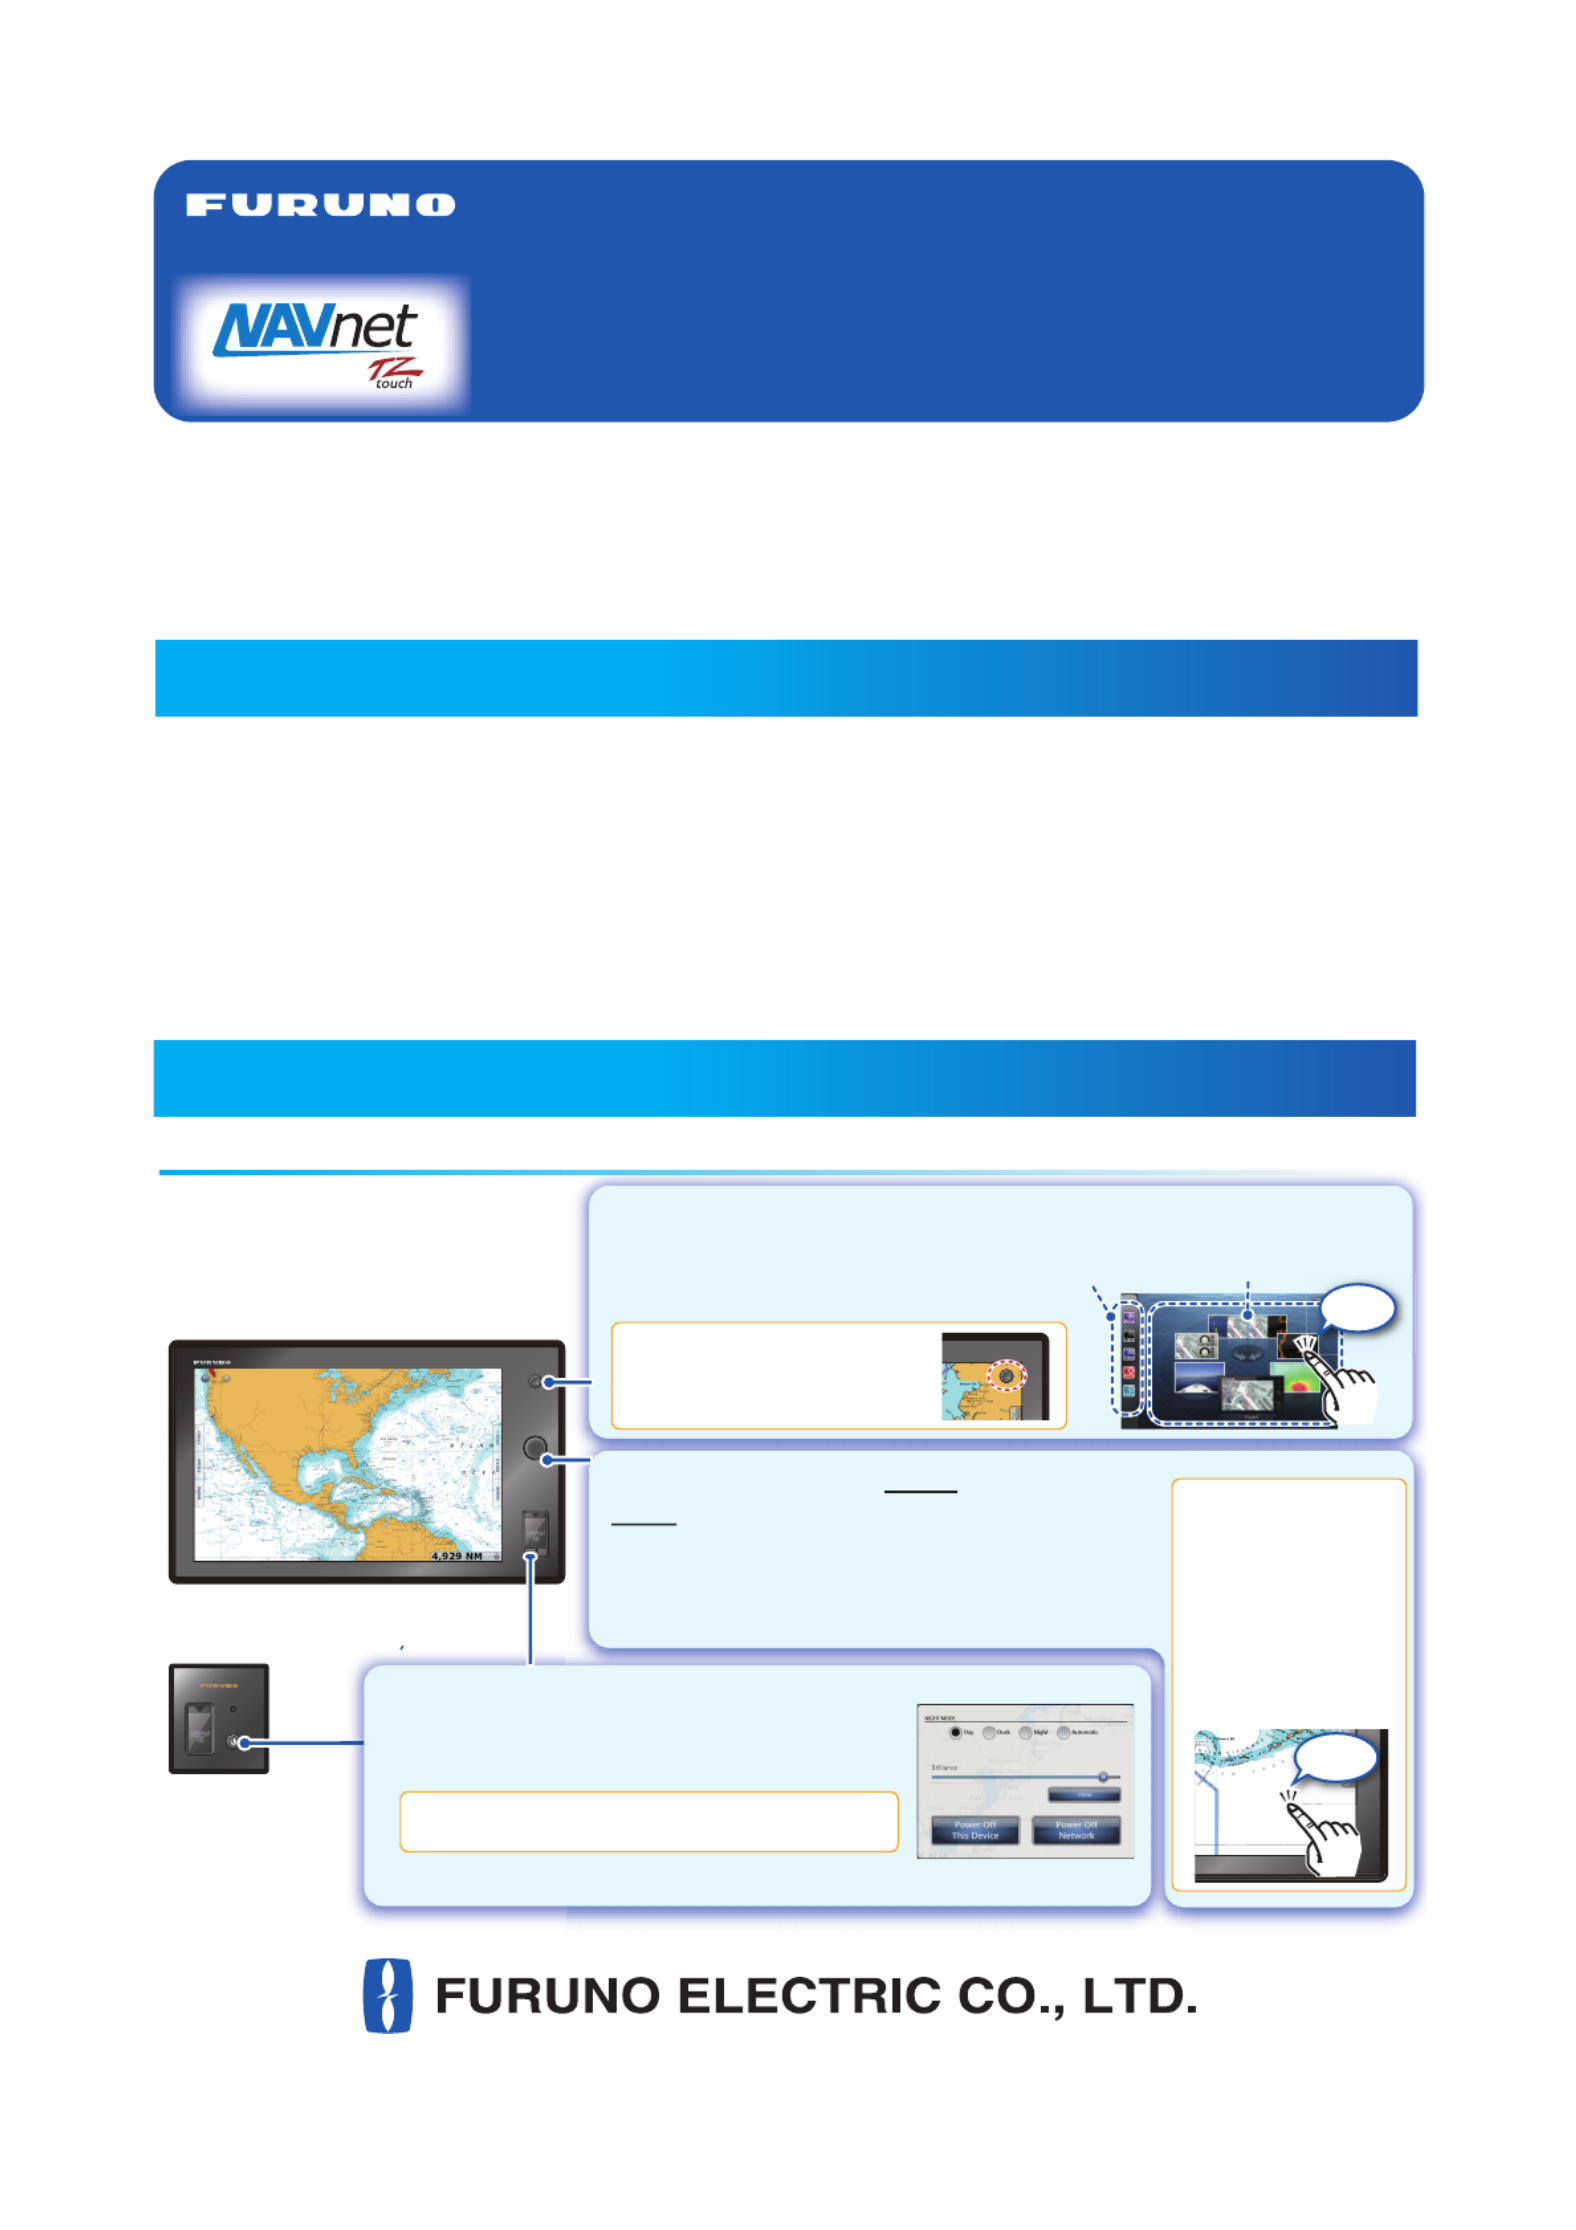
Controls
TZT9/TZT14TZT9/TZT14
TZTBB
(Switch box)
TZTBB
(Switch box)
Home key
- Opens the display selection window.
- Displays the menu icon bar.
Displayed on the screen
as an icon.
For TZTBB:
For TZTBB:
For TZTBB:
For TZTBB:
For TZTBB:
For TZTBB:
For TZTBB:
For TZTBB:
For TZTBB:
For TZTBB:
For TZTBB:
For TZTBB:
For TZTBB:For TZTBB:
))
RotoKeyTM
Push:
Opens the RotoKey
menu or validates the
selected item.
Rotate:
- Selects an item on the
RotoKey menu.
- Selects the range scale
on the chart plotter or
the radar screen.
Tap the screen to
display the RotoKey
menu. If the menu
you are looking for
is not shown, select
[More...] (then drag
the menu items)
then tap it to select.
For TZTBB:
For TZTBB:
For TZTBB:
For TZTBB:
For TZTBB:
For TZTBB:
For TZTBB:
For TZTBB:
For TZTBB:
For TZTBB:
For TZTBB:
For TZTBB:
For TZTBB:For TZTBB:
- Turns the power off. (Device or Network)
Adjusts the brilliance of the power indicator.
For TZTBB:
For TZTBB:
For TZTBB:
For TZTBB:
For TZTBB:
For TZTBB:
For TZTBB:
For TZTBB:
For TZTBB:
For TZTBB:
For TZTBB:
For TZTBB:
For TZTBB:For TZTBB:
1
111
11111
1
1111
A 1
1
A
A
A
11
1
1
1
1
1
A 1
A
RADAR
AD
AD
A
A
A
A
AA
T
AT
AAA
AAA
AA
DA
D
Tap
Powerkey
- Turns the power on.
- Adjusts the brilliance of the display.
Display selection
window
Tap
Menu
icon bar
Product specificaties
| Merk: | Furuno |
| Categorie: | Niet gecategoriseerd |
| Model: | TZTBB |
Heb je hulp nodig?
Als je hulp nodig hebt met Furuno TZTBB stel dan hieronder een vraag en andere gebruikers zullen je antwoorden
Handleiding Niet gecategoriseerd Furuno

4 Mei 2026
28 November 2025
26 November 2025
28 September 2025
22 September 2025
22 September 2025
22 Juli 2025
22 Juli 2025
22 Juli 2025
22 Juli 2025
Handleiding Niet gecategoriseerd
Nieuwste handleidingen voor Niet gecategoriseerd
8 Juni 2026
8 Juni 2026
8 Juni 2026
8 Juni 2026
8 Juni 2026
8 Juni 2026
8 Juni 2026
8 Juni 2026
7 Juni 2026
7 Juni 2026