Forte Lighting 7116-05 Handleiding
Forte Lighting Verlichting 7116-05
Bekijk gratis de handleiding van Forte Lighting 7116-05 (1 pagina’s), behorend tot de categorie Verlichting. Deze gids werd als nuttig beoordeeld door 13 mensen en kreeg gemiddeld 4.7 sterren uit 4 reviews. Heb je een vraag over Forte Lighting 7116-05 of wil je andere gebruikers van dit product iets vragen? Stel een vraag
Pagina 1/1
7116-05
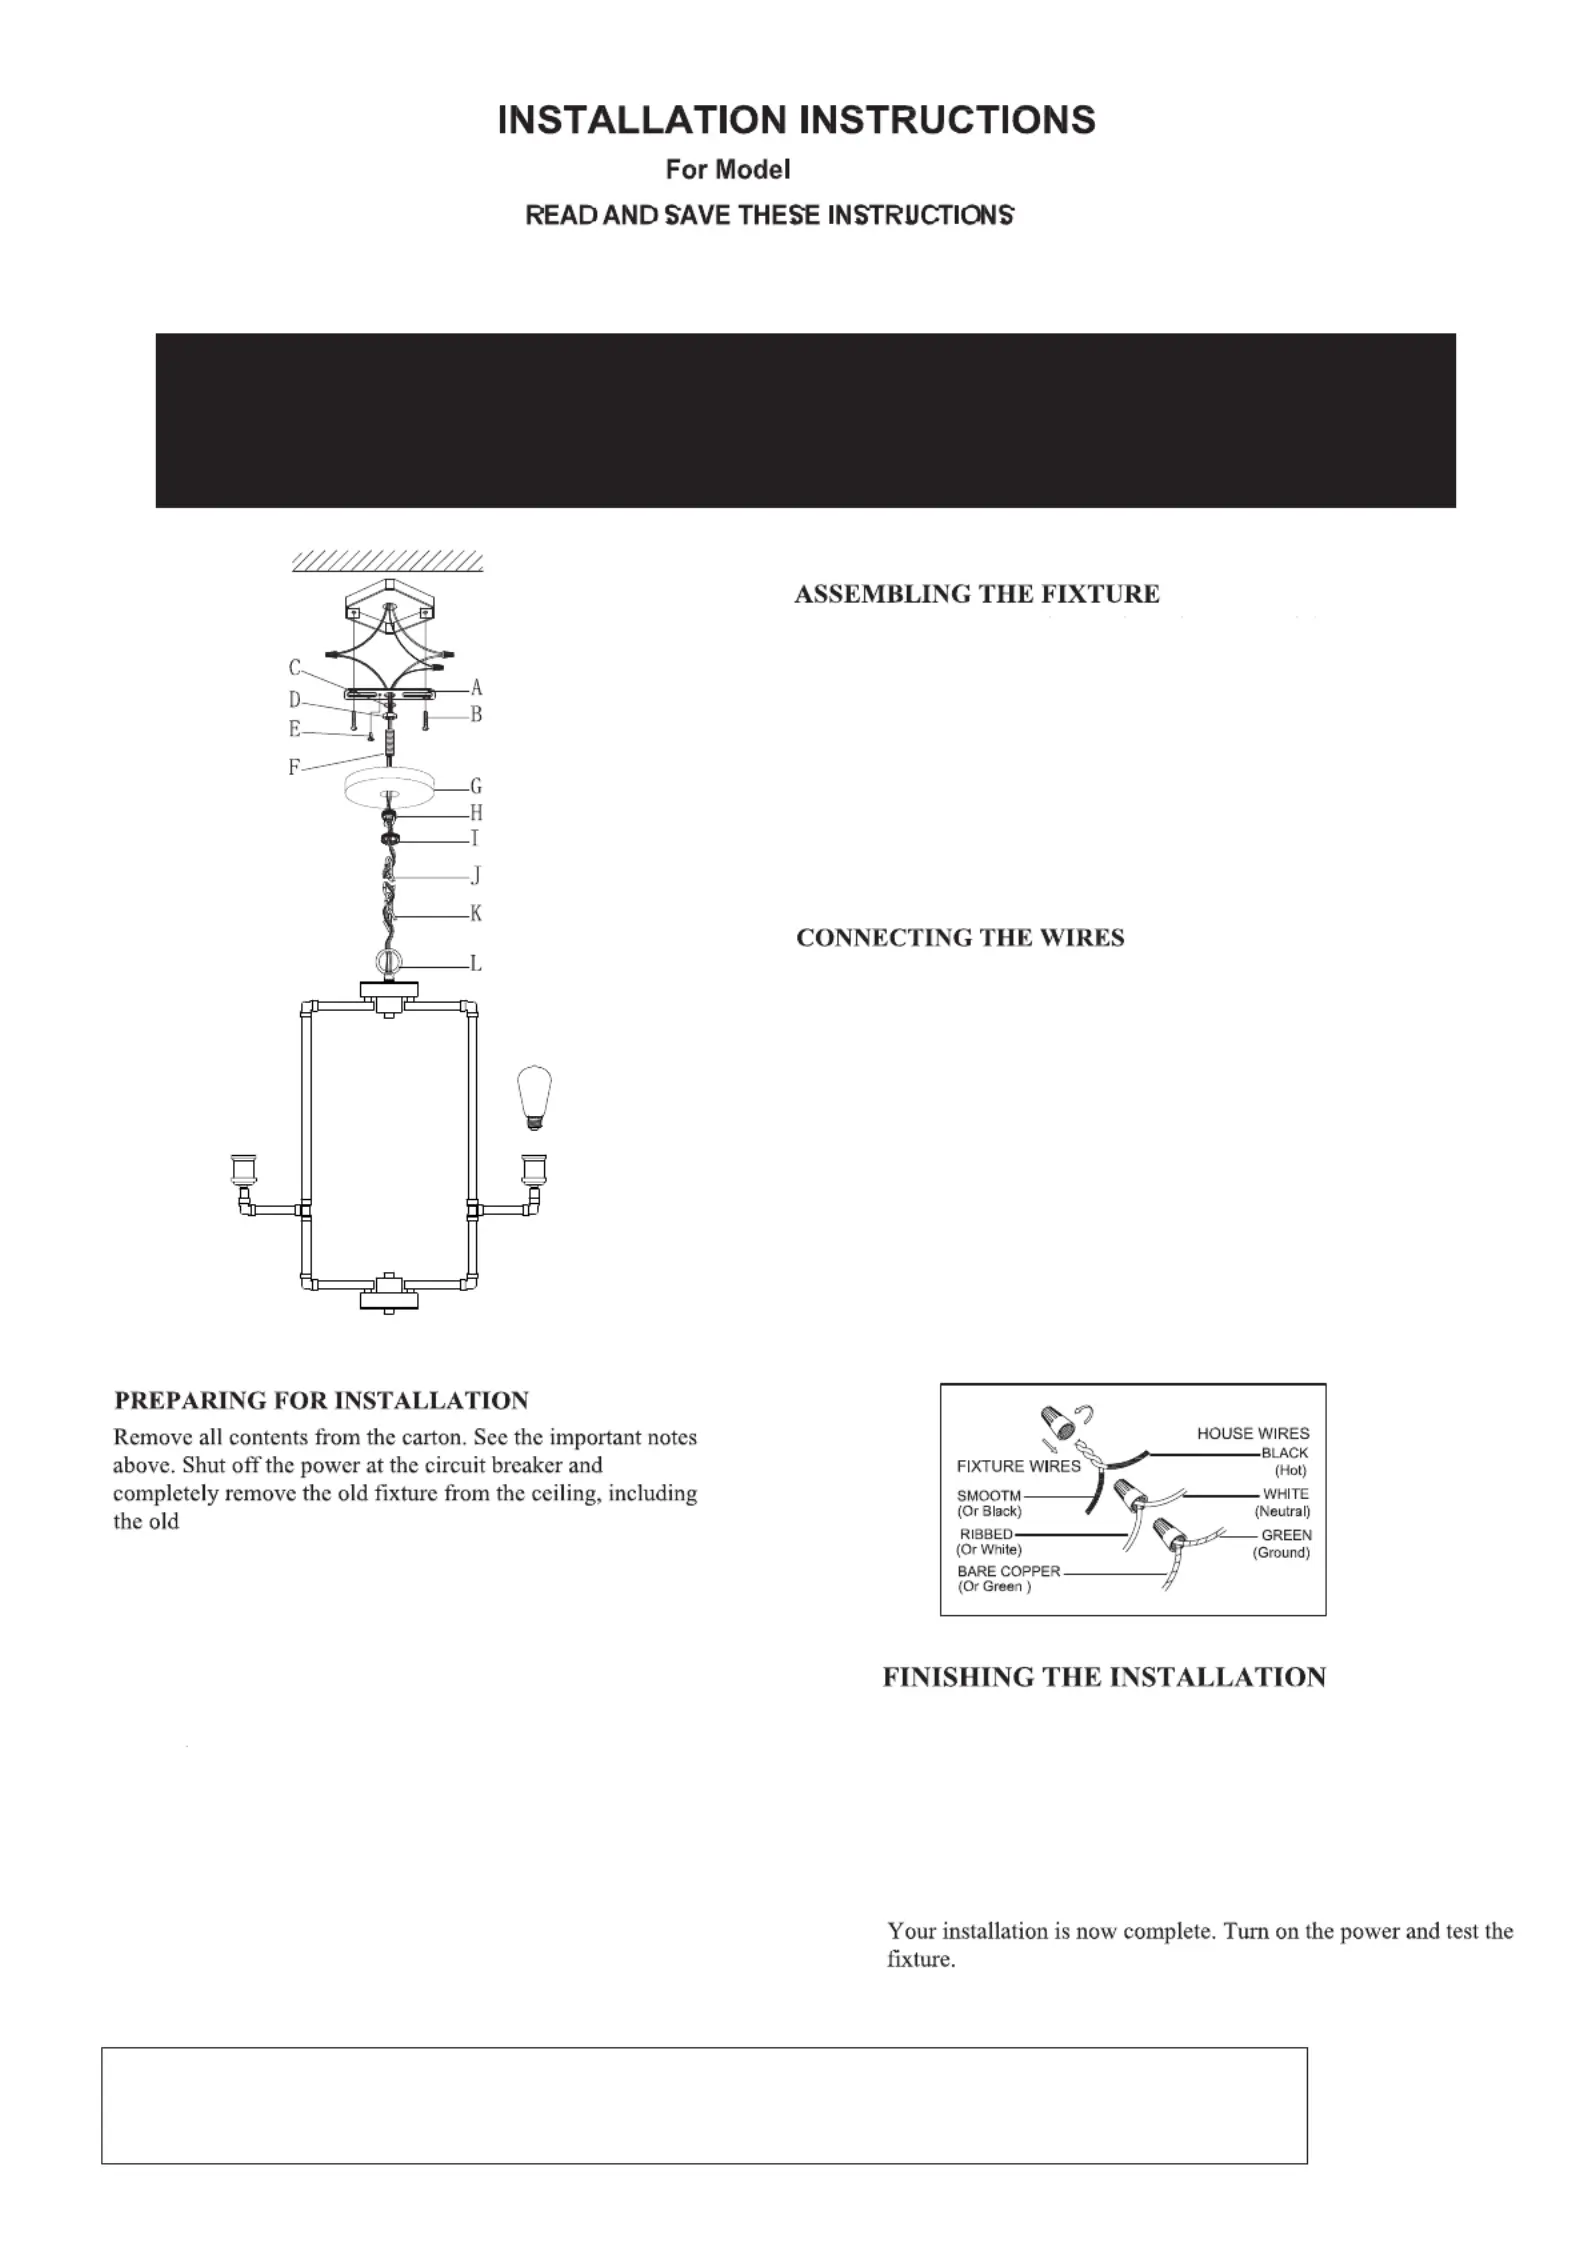
Install light bulb(s) (not included) in accordance with the fixture’s
specifications. Do not exceed the maximum recommended wattage.
mounting bracket.
W A R N I N G! S H U T POWER OFF AT FUSE OR CIRCUIT BREAKER
BEFORE INSTALLATION
AVERTISSEMENT! COUPER LE COURANT AU NIVEAU DES FUSIBLES OU DU DIS JONCTEUR.
CLEANING TIPS
Treat the fixture gently! Regular cleaning will reduce the need of deep cleaning. For regular cleaning, turn off the lighting and wipe down
the fixture with a clean lint-free cotton or microfiber cloth. Never spray cleaner directly onto the fixture.
Remove the mounting bracket kits from the bag. One end of
t
he nipple (F) should be attached to the mounting bracket (A)
w
ith the washer (C) and the hex nut (D) in place. The other
e
nd should have canopy loop (H) attached.
Attach mounting bracket (A) to the junction box by securely
t
ightening the mounting screws (B). Unscrew canopy loop
r
ing (I) from canopy loop (H). Pass canopy (G) over the
c
anopy loop (H) so that it’s against the ceiling. Adjust
t
he position of nipple (F) om mounting bracket (A) so that
c
anopy (G) covers at least half exterior threads on the canopy
l
oop (H) while it’s securely connected to nipple (F). Once an
i
deal position of nipple (F) is determined, tighten up the washer
(
C) and hex nut (D) on the nipple (F) right underneath the
Mounting bracket (A) to secure the nipple in place.
These instructions are provided for your safety. It is very important to read them carefully and completely before beginning
installation of the lighting fixture.We strongly suggest that all direct-wired fixture be installed by a qualified and licensed
electrician.
Determine the correct number of chains links needed for a
p
roper hanging height. Use a pair of pliers to open and remove
o
r add any extra chains. Screw fixture loop (L) onto the nipple
a
t the top of the fixture body. Lace the fixture’s wires through
t
he chain (every threelinks or so and pull until it is taut. Once
a
n ideal chain/wire length is achieved, attached the top end of
t
he chain (J) to the canopy loop (H)with a pair of pliers.
C
onnect the other end of chain (J) to the fixture loop (L). Let
the canopy (G) and the canopy loop ring (I) rest on the fixture body.
Have an assistant support the weight of the fixture while working
o
n the wiring. Remove the extra wires. Thread wires through
c
anopy loop (H) and nipple (F). Attach the fixture’s wires to the
p
ower supply wires from the junction box. Connect black to black
(
or smooth); the white wire with the white (or ribbed); the ground
w
ire with the ground (green or copper). Twist the end of the wire
p
airs together and twist on a wire connector. Make sure all twists
a
re in the same direction. If there is no ground wire(green or copper)
f
rom the junction box, locate a ground screw (E) on the mounting
b
racket (A) and wrap the fixture’s ground wire around the green
g
round screw (E). Use a screwdriver to tighten the ground
s
crew (E) onto the crossbar (B). Tuck all wires neatly into the
junction box.
Push the canopy (G) up to the ceiling and slide canopy collar
l
oop (I) up beneath the canopy. Tightly thread the canopy
c
ollar loop (I) onto canopy loop (H) to secure the canopy (G)
in place.
Product specificaties
| Merk: | Forte Lighting |
| Categorie: | Verlichting |
| Model: | 7116-05 |
Heb je hulp nodig?
Als je hulp nodig hebt met Forte Lighting 7116-05 stel dan hieronder een vraag en andere gebruikers zullen je antwoorden
Handleiding Verlichting Forte Lighting

11 Februari 2026
9 Februari 2026
30 December 2026
29 December 2026
29 December 2026
28 December 2025
28 December 2025
28 December 2025
28 December 2025
28 December 2025
Handleiding Verlichting
Nieuwste handleidingen voor Verlichting
2 April 2026
2 April 2026
2 April 2026
2 April 2026
2 April 2026
2 April 2026
2 April 2026
1 April 2026
1 April 2026
1 April 2026