Forte Lighting 2738-03 Handleiding
Forte Lighting Verlichting 2738-03
Bekijk gratis de handleiding van Forte Lighting 2738-03 (1 pagina’s), behorend tot de categorie Verlichting. Deze gids werd als nuttig beoordeeld door 15 mensen en kreeg gemiddeld 4.7 sterren uit 8 reviews. Heb je een vraag over Forte Lighting 2738-03 of wil je andere gebruikers van dit product iets vragen? Stel een vraag
Pagina 1/1
ASSEMBLINGINSTALLATIONINSTRUCTIONS &
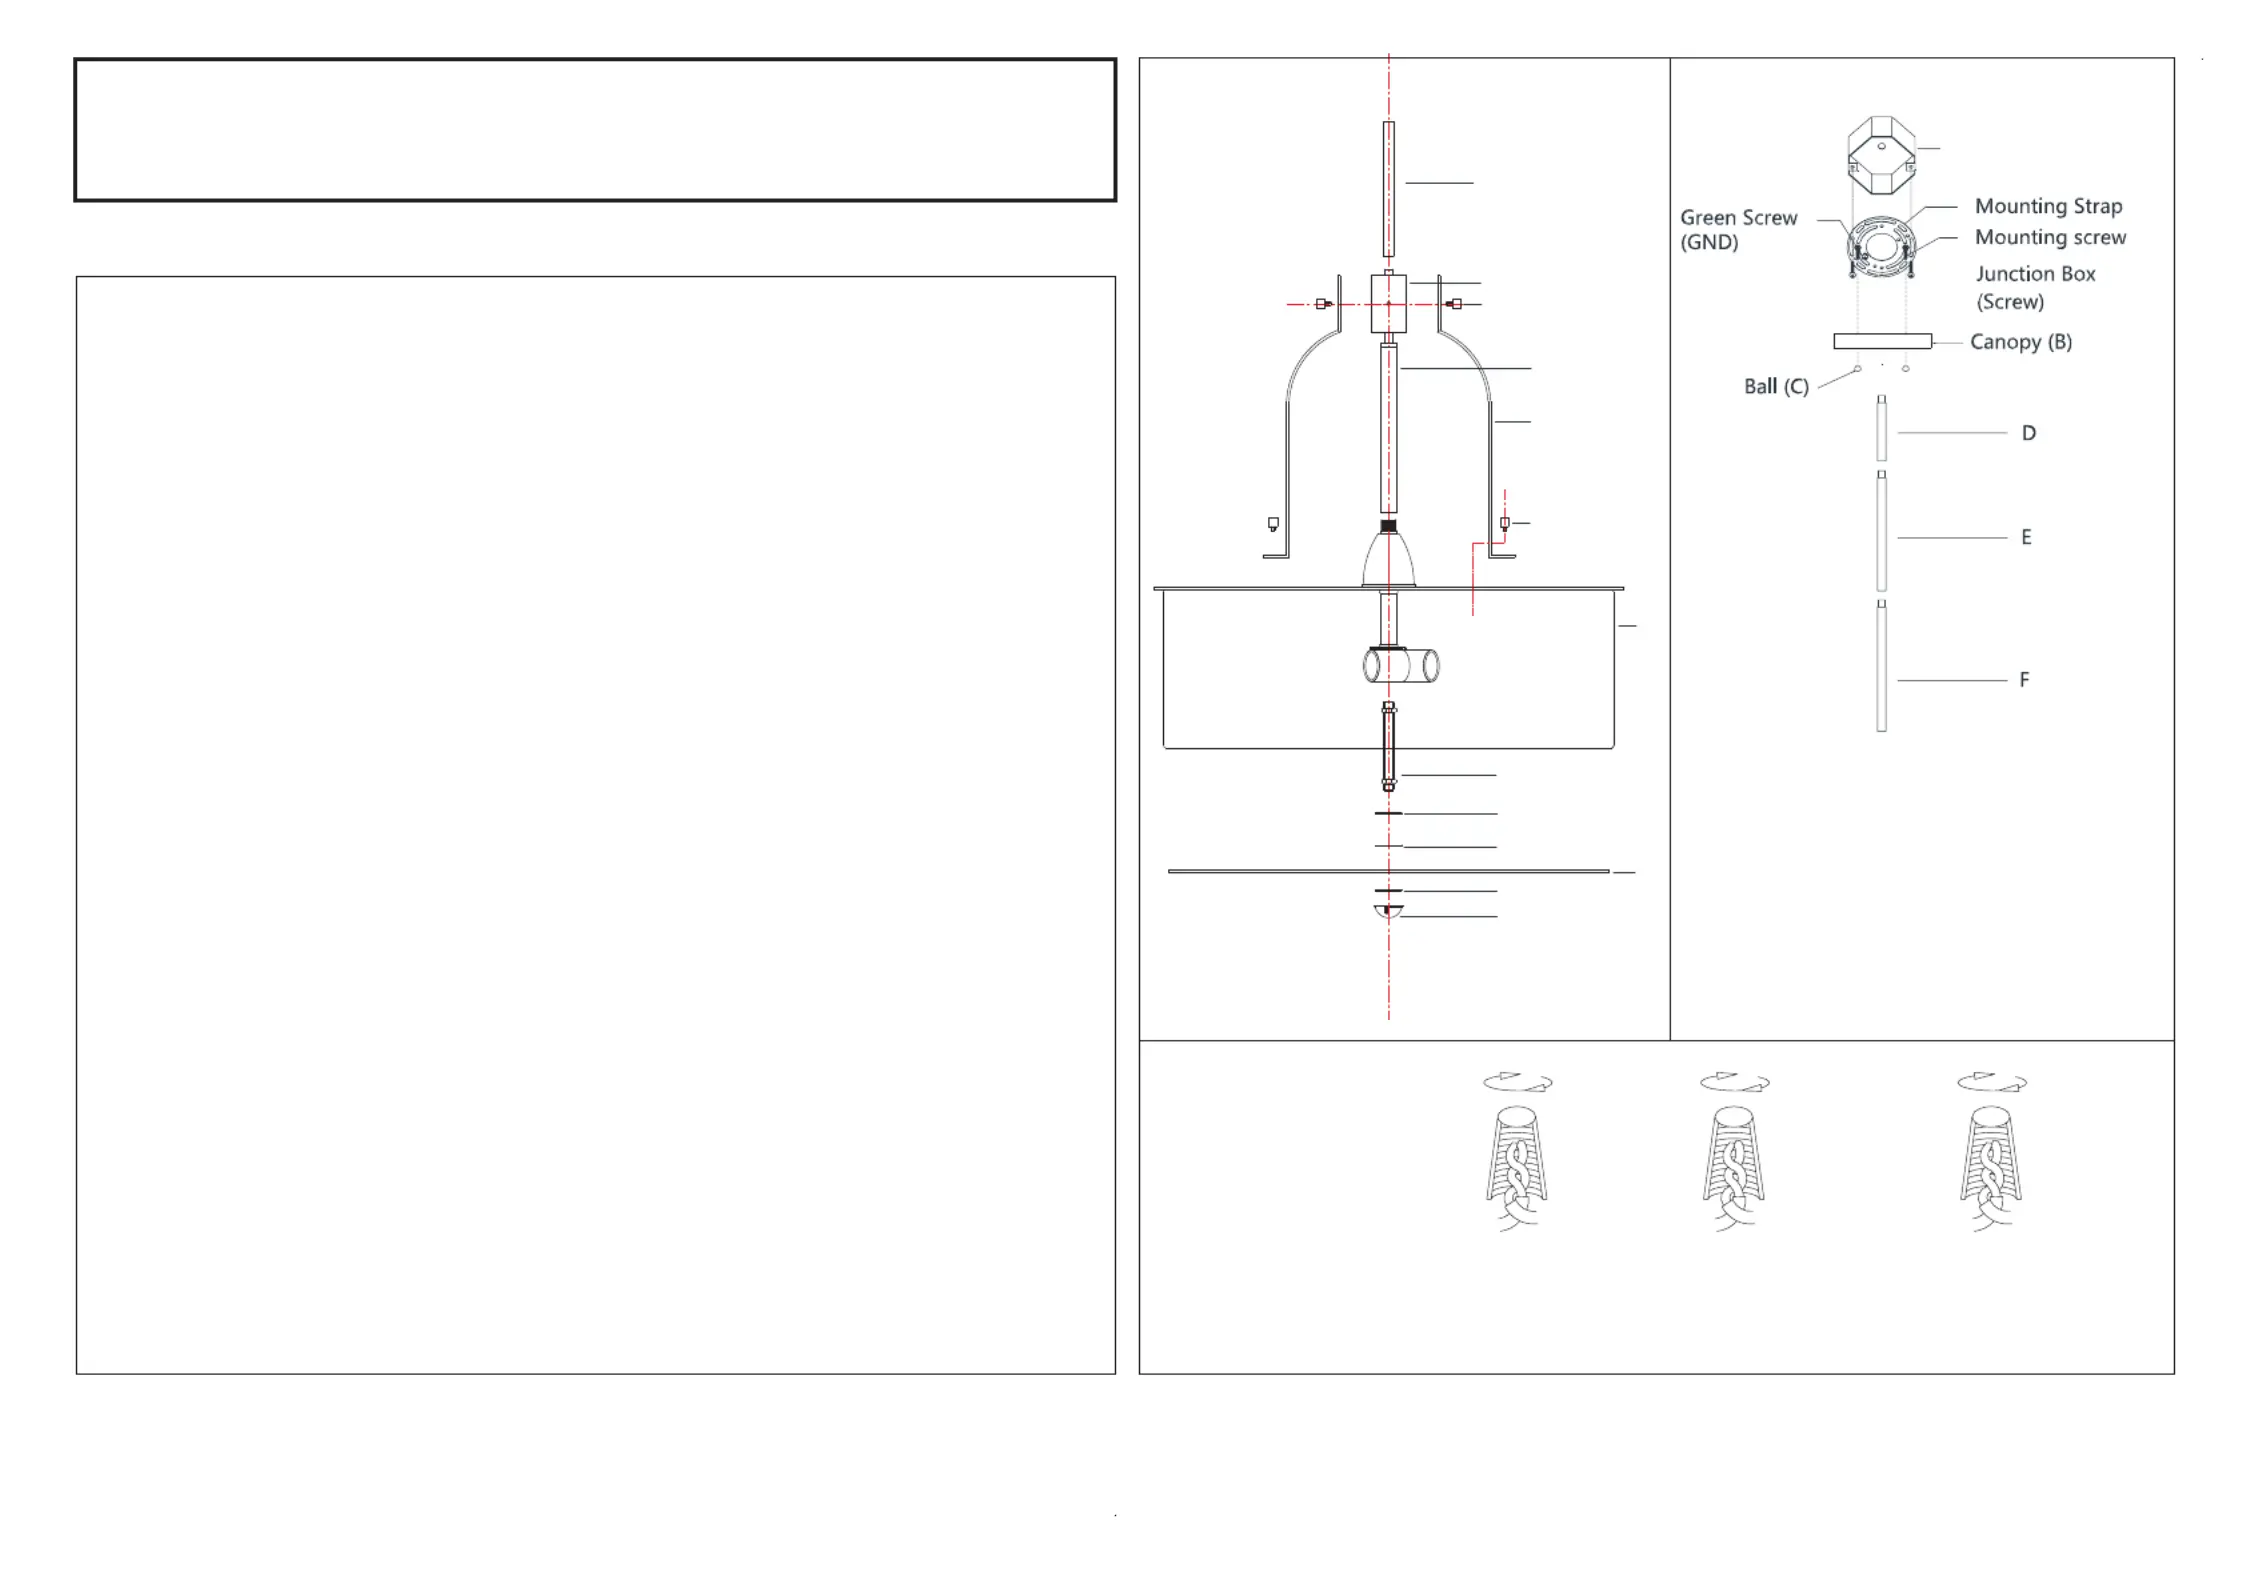
Thedrawingshownmaynotexactlymatchtheproductenclosed .
Howeverthe installation instructionsdo applytothisproduct, .
2738-03
WARNINGSHUT POWEROFFAT FUSE OR CIRCUIT BREAKER! .
ATTENTIONCOUPERLECOURANTAUFUSIBLEOUUNDISJONCTEUR! .
ASSEMBLINGTHEFIXTUREFig1 (.)
.
FIXTURE
WIRES
Black or
Smooth
HOUSE
WIRES
BlackHot()
FIXTURE
WIRES
Whiteor
Ribbed
FIXTURE
WIRES
Bare
Copper
()Ground
HOUSE
WIRES
White
()Neutral
HOUSE
WIRES
GreenorBare
CopperGround()
FIG.3
FIG.2
Junction box
( notincluded)
F
G
H
I
J
H
K
L
M
N
N
P
O
FIG.1
1.Shut off the power at the circuit breaker box. Remove old fixture and all hardware from
Junction Box. Carefully unpack your new fixture and lay out all the parts on a clear
area. Be careful not to lose any small parts necessary for installation.
2.Slide the electrical wires through the tube (I), and the housing (G). Turn the tube (I)
clockwise until tight.
3.Screw the housing (G) to the nipple on tube (I). Secure decorative bars (J) by screwing
decorative nuts (H) tightly.
HANG THE FIXTURE (Fig.2)
4.Determine the appropriate hanging height. There are a 6” (D), a 12” (E) and an 18” (F)
rod included in the package for height adjustment.
5.Slide the electrical wires through the tubes(D), (E), or (F), turn them clockwise until
tight.
6.Secure two mounting screws downward on the mounting plate by tightening the nuts.
Make sure the space between them is the same space between the holes on the
canopy (B). The side of the mounting plate that contained “GND” should be facing
down.
7.Secure the mounting plate to the junction box (not included) by aligning another two
mounting screws upward with the holes on the junction box. Tightening the screws with
a screw driver.
8.Have someone to support the weight of the light. Connect the electrical wires as shown
in . Make sure all wire nuts are securely twisted. You may wrap the connectionsFig. 3
with electrical tape. If your outlet does not have a copper (ground) wire, please wrap
the fixture's ground wire around the green screw (GND) on the mounting plate and
tighten the green screw.
9.Raise the canopy (B) to the junction box. Feed the two downward mounting screws
through the two holes on the canopy (B). Secure with decorative nuts (C).
10.Install light bulbs (not included) in accordance with the fixture's specifications.
NOTE: DO NOT EXCEED THE SPECIFIED WATTAGE!
ASSEMBLING THE REFLECTOR(Fig.1)
11.Install the nipple(L) on the coupler, and secure it using the hex nuts. Put the flat
washer(M),plastic washer(N) through the nipple. Raise the round glass reflector(O) to
the fabric shade, and secure it with the washer(N),bottom finial(P).
Your installation is now complete. Return power to the Junction box
and test the fixture.
Product specificaties
| Merk: | Forte Lighting |
| Categorie: | Verlichting |
| Model: | 2738-03 |
Heb je hulp nodig?
Als je hulp nodig hebt met Forte Lighting 2738-03 stel dan hieronder een vraag en andere gebruikers zullen je antwoorden
Handleiding Verlichting Forte Lighting

11 Februari 2026
9 Februari 2026
30 December 2026
29 December 2026
29 December 2026
28 December 2025
28 December 2025
28 December 2025
28 December 2025
28 December 2025
Handleiding Verlichting
Nieuwste handleidingen voor Verlichting
2 April 2026
2 April 2026
2 April 2026
2 April 2026
2 April 2026
2 April 2026
2 April 2026
1 April 2026
1 April 2026
1 April 2026