Elro AS80CA11A Handleiding
Elro Beveiliging AS80CA11A
Bekijk gratis de handleiding van Elro AS80CA11A (23 pagina’s), behorend tot de categorie Beveiliging. Deze gids werd als nuttig beoordeeld door 18 mensen en kreeg gemiddeld 4.7 sterren uit 4 reviews. Heb je een vraag over Elro AS80CA11A of wil je andere gebruikers van dit product iets vragen? Stel een vraag
Pagina 1/23
1
AS80CA11A
1080P IP Camera
Installation Instructions
General Introduction
The IP Camera is designed to monitor the premise where it is installed at in real
time, and send the images to the Gateway. The recording function will be
activated if an event is triggered under warning conditions. Its great compatibility
with our U-Netfamily security products makes it suitable for smart home cloud
based platform.
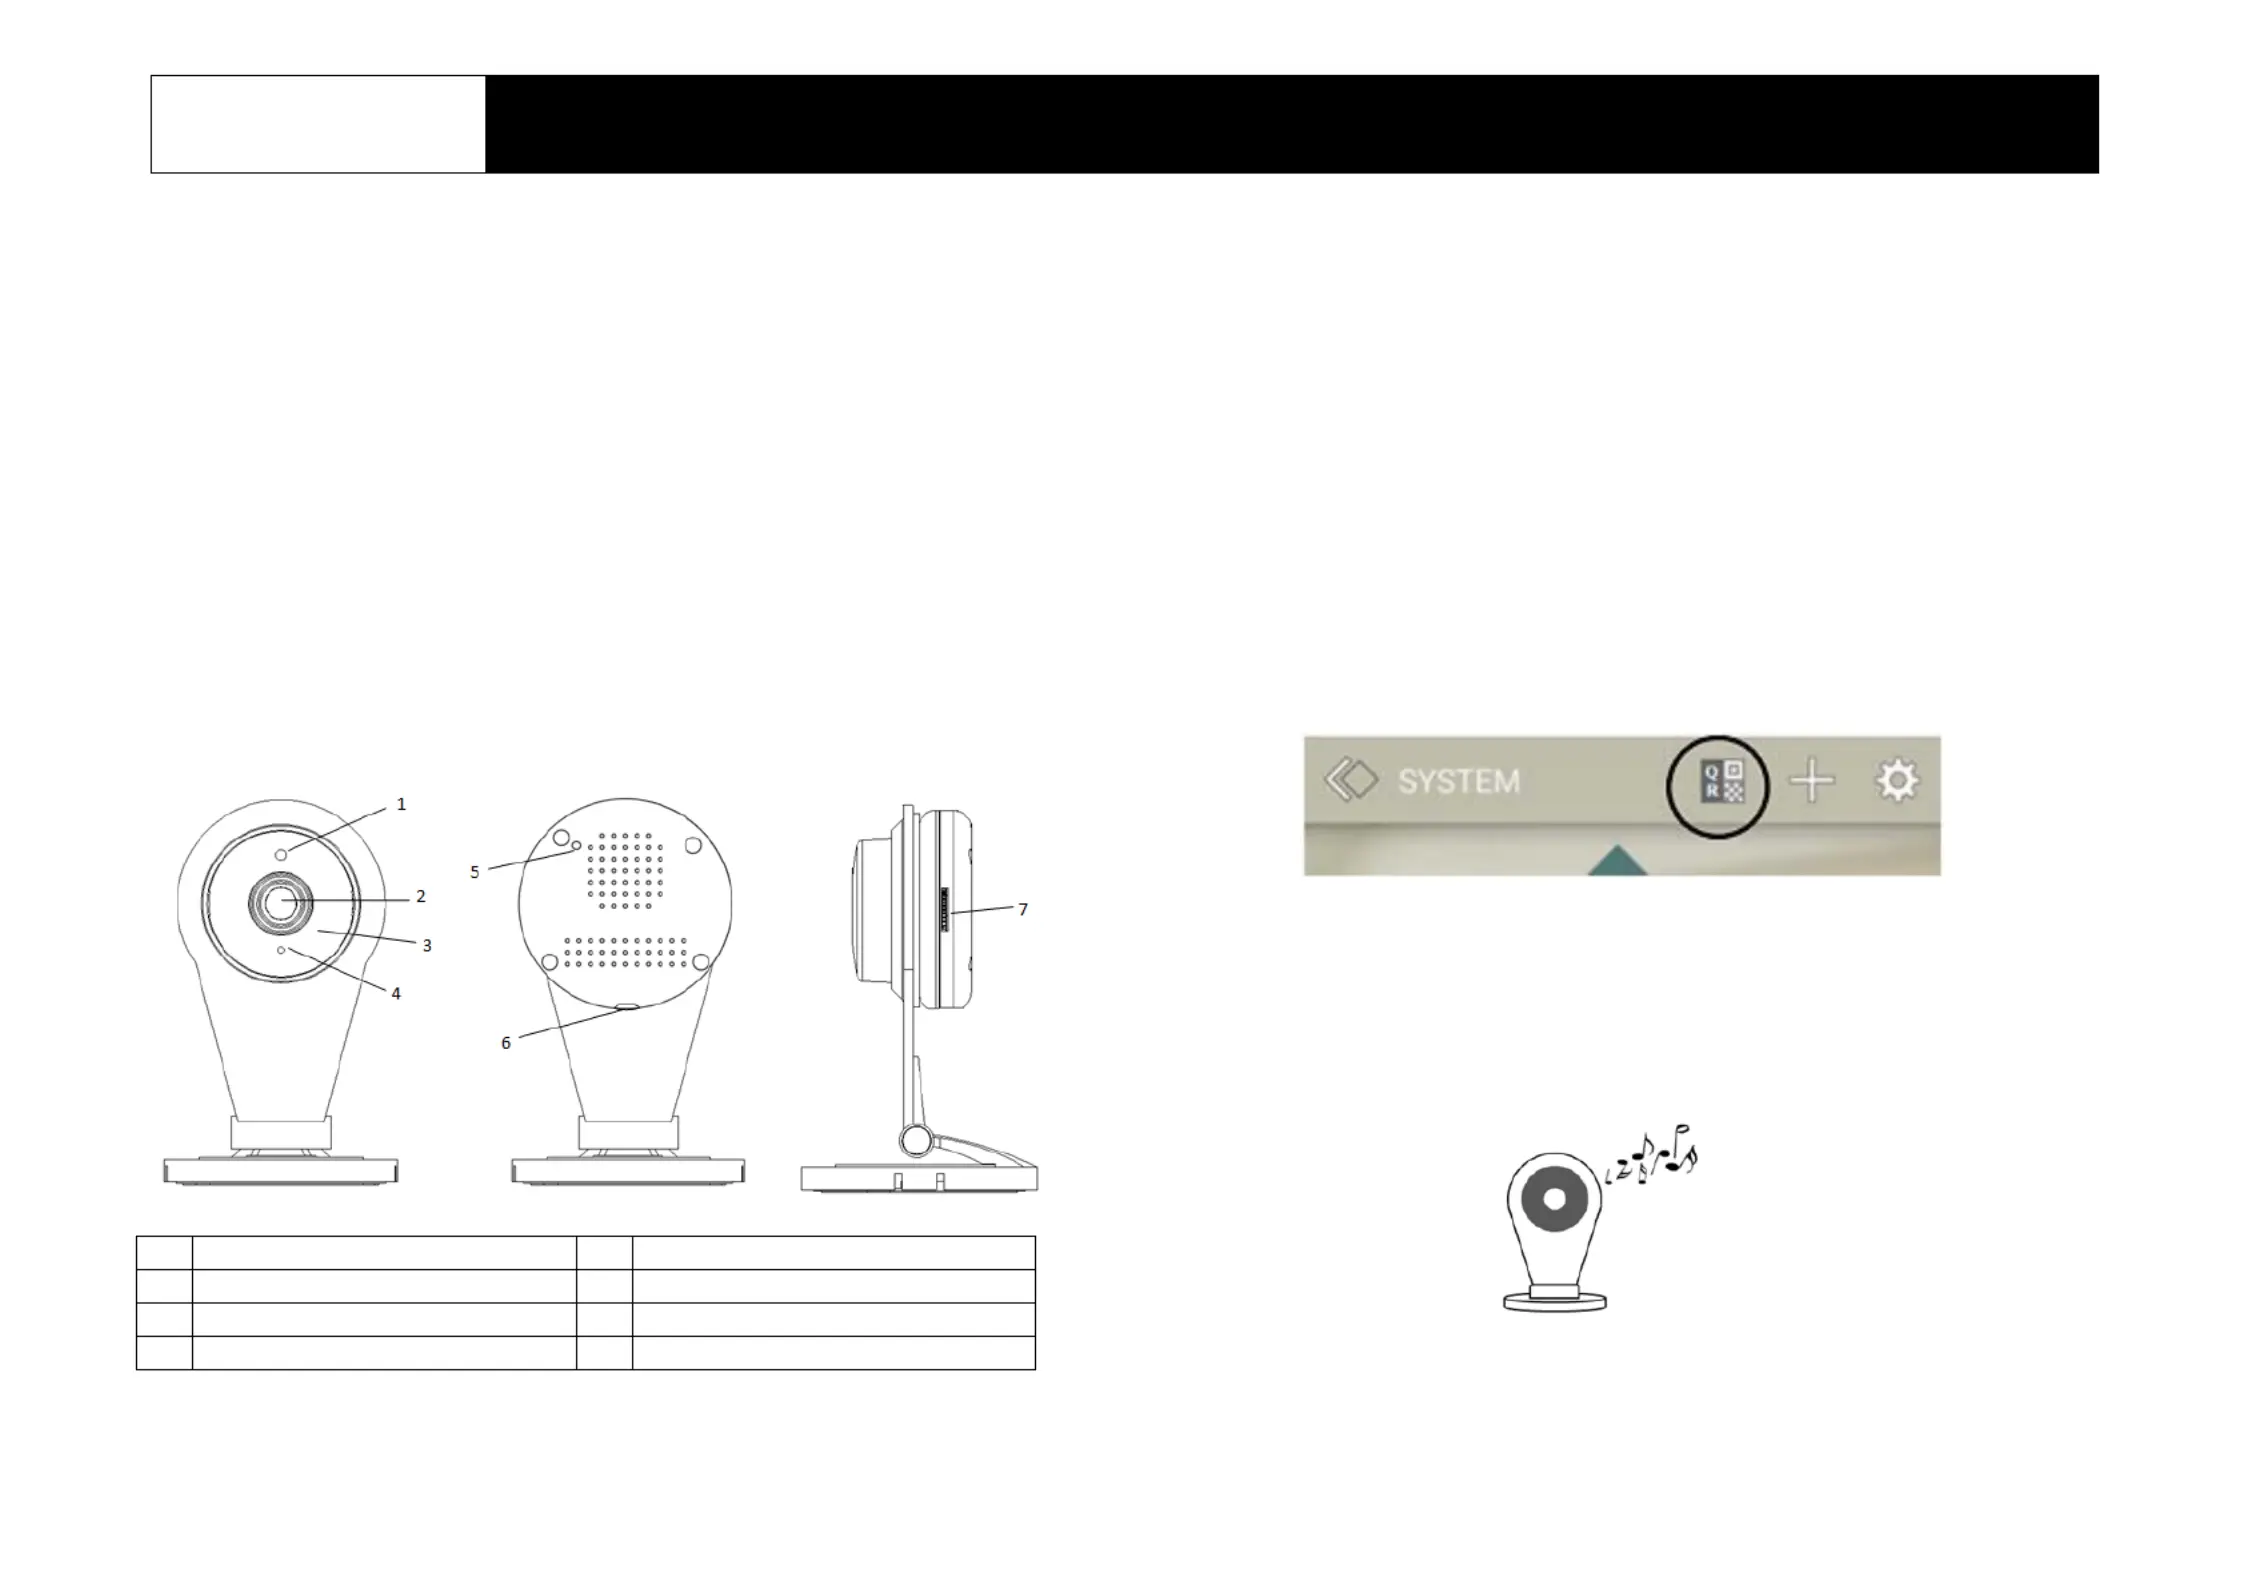
Product Layout
Front view Rear view Side view
Connecting camera to home Wi-Fi
The camera first needs to connect to your home Wi-Fi network. There are two
methods to do this
Method 1: By QR codesetup. A smartphone installedwith ELRO Smart Home
Alarm App is required.
1.On the ELRO Smart Home Alarm App, go to System page and tap the QR
code icon on the top bar.
2.Enter your home Wi-Fi network and yourWi-Fi password, if any.
3.The App will then generate a large size QR code image. Leave the App on
that page.
4.Power up the camera using the supplied power adaptor and wait for a
musical tone.This usually takes about 30 seconds.
The musical tone indicates the camera is ready to scan the QR code created
earlier bythe App.
1
Microphone
2
Lens
3
IR LED (hidden)
4
LED indicator
5
Reset/WPS button
6
Power jack
7
Micro-SD card slot
Product specificaties
| Merk: | Elro |
| Categorie: | Beveiliging |
| Model: | AS80CA11A |
Heb je hulp nodig?
Als je hulp nodig hebt met Elro AS80CA11A stel dan hieronder een vraag en andere gebruikers zullen je antwoorden
Handleiding Beveiliging Elro

2 Februari 2023
2 Februari 2023
2 Februari 2023
2 Februari 2023
2 Februari 2023
2 Februari 2023
2 Februari 2023
2 Februari 2023
2 Februari 2023
2 Februari 2023
Handleiding Beveiliging
Nieuwste handleidingen voor Beveiliging
6 Maart 2024
4 Februari 2024
29 December 2023
29 December 2023
23 November 2023
16 Oktober 2023
16 Oktober 2023
16 Oktober 2023
16 Oktober 2023
16 Oktober 2023