Digi WR44-M8F1-AE1-RF Handleiding

Digi Niet gecategoriseerd WR44-M8F1-AE1-RF

Lees hieronder de 📖 handleiding in het Nederlandse voor Digi WR44-M8F1-AE1-RF (2 pagina's) in de categorie Niet gecategoriseerd. Deze handleiding was nuttig voor 29 personen en werd door 2 gebruikers gemiddeld met 4.5 sterren beoordeeld

Pagina 1/2
Quick Start Guide
TransPort® WR44 R
Welcome to your Digi product
Get started: This guide helps you with initial product setup. Need more? Find additional product
support at www.digi.com/support/TransPortWR44R. Or connect to the online documentation by
scanning this code:
Digi Technical Support: Digi offers multiple support plans to help you get the most out of your
product. For information on Technical Support plans and pricing, contact us at 877.912.3444 or visit
www.digi.com/support.
Documentation Feedback: To provide feedback on this documentation, send your comments to
techcomm@digi.com.
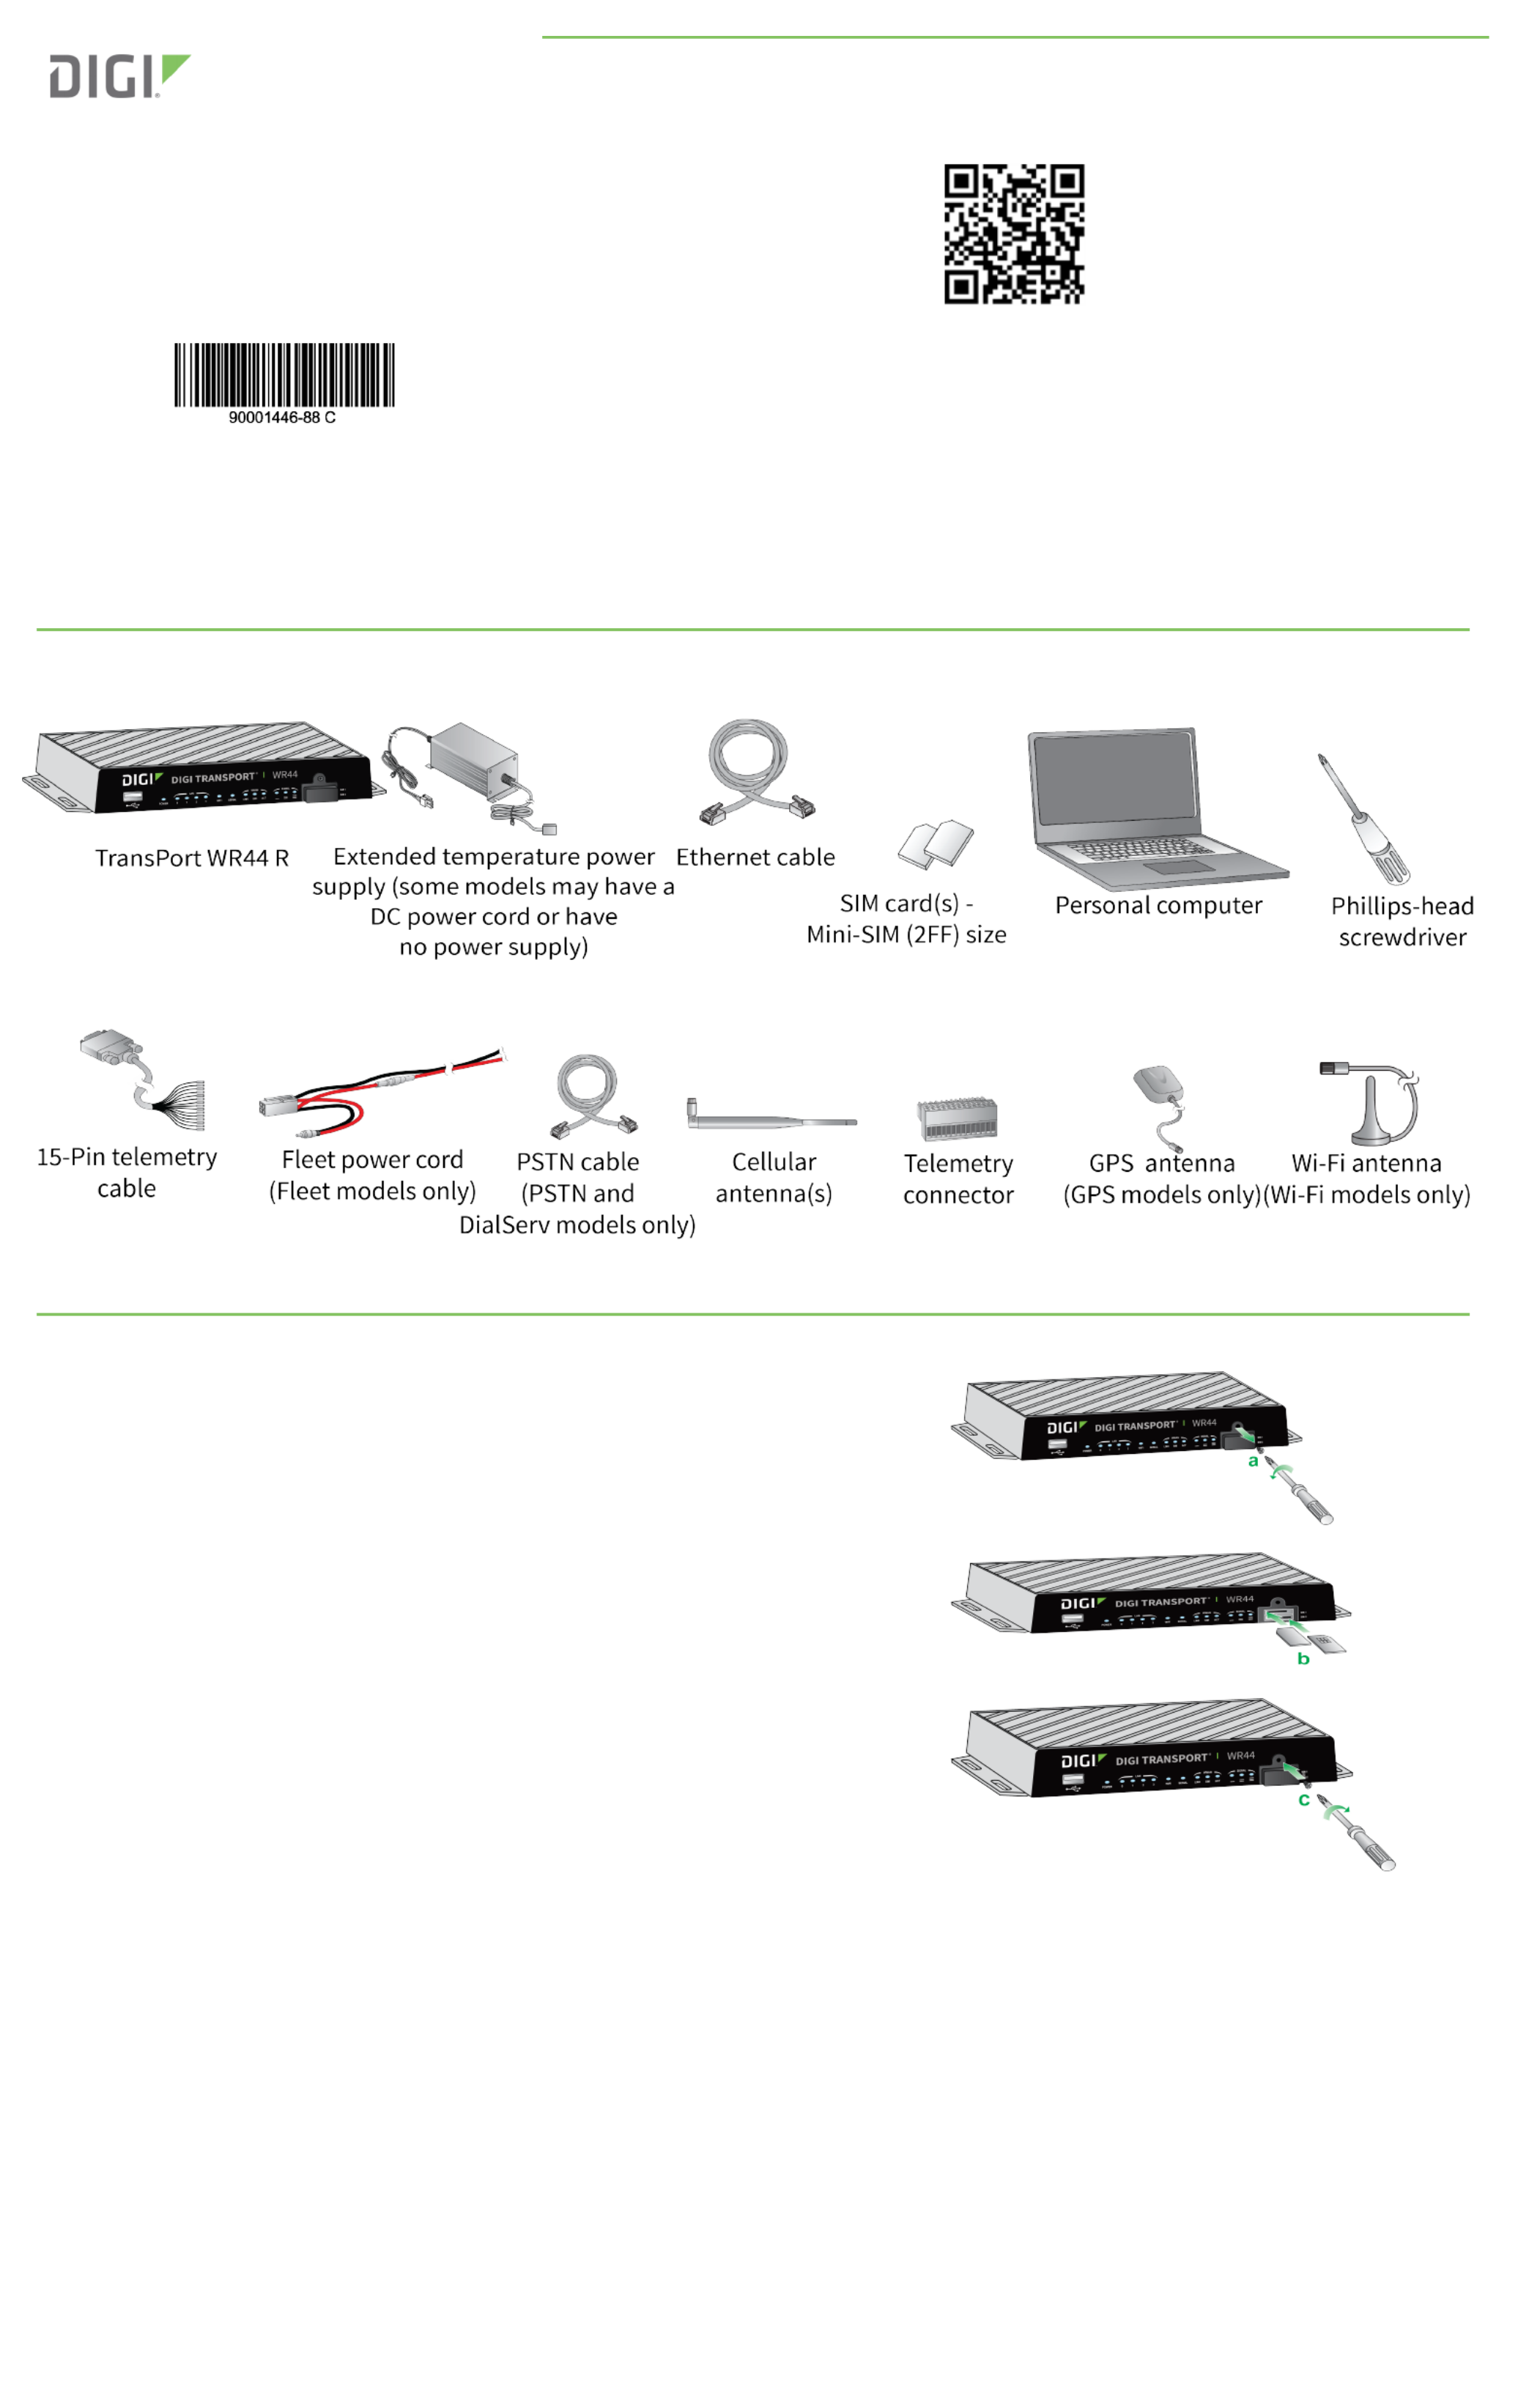
1Verify your components
Included equipment Required equipment
Optional equipment Depending on model, the box may contain additional components.
Verify that you have all included equipment. If any item is missing or damaged, contact your supplier.
2Connect the hardware
a. Using a screwdriver, remove the SIM slot cover.
b. Insert the SIM card(s) into the SIM sockets. For , the contacts must be face down. ForSIM 1
SIM 2, the contacts must be face up. Insert the ends of the SIM cards with the chamfered
corner first.
c. To meet environmental specifications, after installing the SIM cards, re-attach the
TransPort WR44 R SIM cover.
© 2017 Digi International Inc.
Digi, Digi International, and the Digi logo are trademarks or registered trademarks in the United States and other countries worldwide. All other trademarks mentioned in this
document are the property of their respective owners.
d. Connect the cellular antenna to the WWAN PRIMARY connector on the unit. If the unit is
equipped with a secondary cellular antenna connector, connect it to the WWAN
SECONDARY connector.
e. Wi-Fi models only: Connect the Wi-Fi antennas to the WIFI PRIMARY WIFIand
SECONDARY antenna connectors.
f. Connect one end of the Ethernet cable to the LAN port on the unit and the other end to a
LAN port on a PC.
g. Connect the power supply. Depending on model, the unit comes with an AC power supply,
a 4-pin DC power cord, or a fleet power cord. Instructions for all options follow.
AC power supply: Connect the 4-pin connector of the power supply to the AUX connector
on the unit, and plug the other end into a wall outlet.
4-Pin DC power cord: Connect the 4-pin connector of the cord to the connector on theAUX
unit, and wire the four bare wires according to your needs. The red and black wires provide
basic DC power input. The blue and green wires are programmable signal lines.
Warning Only use one of the power connectors. Never apply power to both the MAIN
and ports at the same time.AUX
Fleet power cord: Connect the 4-pin connector to the MAIN MAINport on the unit. Connect the locking barrel jack to the connector on the
unit. Wire the two bare wires according to your needs.
For sample wiring diagrams and pinout information, see the 4-Pin DC Power Cord User Guide Digi TransPort Fleet Card User Guideand , online at
www.digi.com.
Tip Position the Digi TransPort WR44 R on a flat, level surface or via wall-mount or rackmount in a location with adequate ventilation. The
unit is designed for indoor use. Do not expose the unit to extreme heat or cold, strong magnetic fields, or liquids.
3Run the Getting Started Wizard
If your PC is configured to automatically get an IP address, it can obtain the IP address from the TransPort WR44 R. Otherwise, make sure your PC can
connect to the network 192.168.1.0 (255.255.255.0).
a. Enter 192.168.1.1 into the address bar of the web browser.
b. The first page of the Getting Started Wizard appears. This wizard guides you through initial configuration of your TransPort device.
n To run the wizard, click Get Started.
nTo manually configure the TransPort device, click Skip Wizard.
Note The default username and password to log in to the TransPort device are username passwordand .
4View the TransPort LEDs and startup states
n POWER LED:
Off: No power
Green: TransPort device is powered
n LANLEDs: Illuminate steady when there is a network connection to the LAN port and flash when data is transmitted or received.
n WIFI LED (Wi-Fi models only): Illuminates steady if Wi-Fi activity is present.
n SERIAL LED: Illuminates steady if a terminal is connected to the SERIAL port and the DTR signal is on. Flashes when data is transmitted or received.
n LINKLED: Illuminates steady when a wireless WANdata connection has been established.
n SIMLED: Illuminates steady when a valid SIM card is installed.
n ACTLED: Flashes to indicate that data is being transferred over the wireless WAN network.
n SIGNALLEDs: Indicate the strength of the cellular signal.
3 LEDs: Excellent
2 LEDs: Good
1LED: Fair
0 LEDs: Poor or no signal
5Next steps
After the Getting Started Wizard completes, the TransPort web interface appears. For additional configuration, use the web interface and refer to the Digi
TransPort User Guide and Application Notes on the Digi Transport WR44 R page at www.digi.com/support/TransPortW44R.


Product specificaties

Merk: Digi
Categorie: Niet gecategoriseerd
Model: WR44-M8F1-AE1-RF

Heb je hulp nodig?

Als je hulp nodig hebt met Digi WR44-M8F1-AE1-RF stel dan hieronder een vraag en andere gebruikers zullen je antwoorden


Handleiding Niet gecategoriseerd Digi

Handleiding Niet gecategoriseerd

Nieuwste handleidingen voor Niet gecategoriseerd