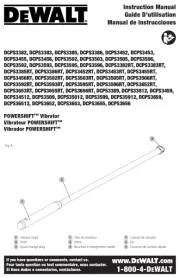
DeWalt DW4055 Handleiding
DeWalt
Niet gecategoriseerd
DW4055
Bekijk gratis de handleiding van DeWalt DW4055 (2 pagina’s), behorend tot de categorie Niet gecategoriseerd. Deze gids werd als nuttig beoordeeld door 126 mensen en kreeg gemiddeld 4.1 sterren uit 63.5 reviews. Heb je een vraag over DeWalt DW4055 of wil je andere gebruikers van dit product iets vragen? Stel een vraag
Pagina 1/2

DW4055 Integrated Sanding Frame
and Inversion Stand
WARNING: For your own safety, read the tool instruction manual
before using any accessory. Failure to heed these warnings may result
in personal injury and serious damage to the tool and the accessory.
When servicing this tool, use only identical replacement parts.
FOR USE ONLY WITH THE DW432/433 BELT SANDER
The inversion stand allows the belt sander to be used like a small
stationary sander. It is best when used to sand small pieces of material
that need to maintain a 90-degree edge and cannot easily be sanded
with a hand-held sander.
WARNING: BE SURE THE UNIT IS TURNED OFF AND NOT
ATTACHED TO A POWER SOURCE WHILE INSTALLING THE
SANDING FRAME OR INVERSION STAND. Before reconnecting the
tool, depress and release the trigger switch to ensure that the tool is off.
WARNING: AVOID CONTACTING THE ROTATING BELT ON THE
INVERSION STAND WITH FINGERS OR HANDS. HARSH ABRA-
SIONS COULD RESULT.
TO ATTACH THE SANDING FRAME TO THE BELT SANDER
1. Place the front handle in the top position (A) of the belt sander.
2. Use the hardware provided to attach the sanding frame brace to the
front of the belt sander. Tighten the knob (B) to secure the sander
into the sanding frame (Fig. 1).
3. Seat the tabs (C) on the back end of the sander onto the rod (D)
located on the sanding frame (Fig. 2).
4. Use the angle dial (E) to adjust the belt relative to the work locating
surface as shown in Figure 1.
TO ATTACH SUPPORT BRACE
CAUTION: Support brace must be attached to the inversion stand or
damage may occur.
NOTE: Two support braces are included. Use the appropriate brace
depending on orientation used.
1. Align the holes (L) in the support brace with the inside holes (M) on
the feet.
2. Use the hardware provided to attach the brace to the feet and
secure (Fig. 3).
TO CREATE THE INVERSION STAND
NOTE: The belt sander cannot be properly positioned on the stand with
the dust bag attached. The dust collection system is not operable when
the belt sander is in this mode.
1. Remove dust bag and close the dust collector valve (see tool man-
ual).
2. Use the hardware provided to attach the legs (F) to the sanding
frame to create the working orientation desired, vertical (Fig. 4) or
horizontal (Fig. 5).
3. Use the hardware provided to attach the fence (G) to the sanding
frame.
WARNING: Leave no more than 1/16" (2mm) between the sand-
ing belt and the fence. Pinching and possible injury could result dur-
ing use.
WARNING: Do not allow the fence to touch the sanding belt.
Resulting sparks may ignite dust particles.
4. For Horizontal Sanding Only:
Attach the guard (I) by loosening the wing nut (J) on the left side of
the fence (G). Place the guard between the wing nut and fence.
Rotate the guard into the slot on the frame (K). Tighten wing nut.
5. Clamp or screw the feet to a workbench or flat work surface for sta-
bility using the screw holes (H) in the feet.
6. Adjust the fence to the desired angle and lock in place with the wing
nuts provided.
7. Plug in the sander.
8. Depress the trigger and engage the lock button so the sander is
running.
DEWALT Industrial Tool Co., 701 East Joppa Road, Baltimore, MD 21286 (OCT03) Form No. 619656-01 DW4055 Copyright © 2003
The following are trademarks for one or more DEWALT power tools: the yellow and black color scheme; the “D” shaped air intake grill; the array of pyramids on the handgrip; the kit box
configuration; and the array of lozenge-shaped humps on the surface of the tool.
I
FIG. 4
FIG. 1
FIG. 5
C
D
EFIG. 2
F
H
G
B
A
K
J
G
F
9. When you are finished sanding, pull the trigger to disengage the
lock and stop the rotation of the belt.
WARNING: If the belt sander in the inversion stand is in the hori-
zontal position, be sure guard (I) is covering the space between the belt
and the rear of the housing as shown in Figure 5. Otherwise, serious
injury could result.
WARNING: If the belt sander in the inversion stand is in the
horizontal position, hold wood firmly during sanding. The belt may
pull the material away from you resulting in injury.
M
FIG. 3
L
H
DW4055 Cadre de ponçage et
support d’inversion intégré
AVERTISSEMENT : Pour assurer sa propre sécurité, l’utilisa-
teur doit lire le guide d’utilisation de l’outil avant de se servir d’un
accessoire, et doit suivre à la lettre tous les avertissements afin
d’éviter de se blesser grièvement ou d’endommager sérieusement
l’outil ou ses accessoires. Lors de l’entretien, n’utiliser que des
pièces de rechange identiques.
CONÇU POUR LA PONCEUSE À COURROIE DW432/433
Le support d’inversion permet d’utiliser la ponceuse à courroie comme
une petite ponceuse fixe, ce qui convient particulièrement au ponçage
de petites pièces devant être maintenues à un angle de 90 degrés,
tâche qui peut se révéler difficile avec une ponceuse à main.
AVERTISSEMENT : S’ASSURER QUE L’OUTIL EST EN POSI-
TION D’ARR T ET QU’IL EST DÉBRANCHÉ DE LA SOURCE D’ALI-
MENTATION ÉLECTRIQUE AVANT D’INSTALLER LE CADRE DE

PONÇAGE OU LE SUPPORT D’INVERSION. Avant de rebrancher
l’outil, enfoncer puis relâcher la gâchette afin de s’assurer que l’outil est
en position d’arrêt.
AVERTISSEMENT : ÉVITER TOUT CONTACT ENTRE LES MAINS
ET LA COURROIE DU SUPPORT D’INVERSION; SA SURFACE EST
TRÈS ABRASIVE.
FIXATION DU CADRE DE PONÇAGE À LA PONCEUSE À
COURROIE
1. Placer la poignée avant de la ponceuse en position supérieure (A).
2. Utiliser les ferrures fournies pour fixer le renfort du cadre de
ponçage à l’avant de la ponceuse. Serrer le bouton (B) pour arrimer
la ponceuse au cadre (fig. 1).
3. Ancrer les languettes (C) situées à l’arrière de la ponceuse à la tige
(D) du cadre de ponçage (fig. 2).
4. Utiliser le bouton d’inclinaison (E) pour régler la position de la
courroie par rapport à la surface de travail (fig. 1).
FIXATION DU RENFORT
MISE EN GARDE : Afin d’éviter les dommages, fixer le renfort au
support d’inversion.
REMARQUE : Deux renforts sont fournis; utiliser le renfort approprié
selon l’orientation choisie.
1. Aligner les trous (L) du renfort avec les trous intérieurs (M) des
pattes.
2. Utiliser les ferrures fournies pour fixer le renfort aux pattes; serrer
fermement (fig. 3).
INSTALLATION DU SUPPORT D’INVERSION
REMARQUE : La ponceuse à courroie ne pourra être correctement
fixée au cadre si le sac à poussière y est fixé; cet accessoire n’est pas
fonctionnel lorsque la ponceuse est utilisée avec le support.
1. Retirer le sac à poussière puis fermer la soupape d’évacuation (se
reporter au guide d’utilisation de l’outil).
2. Utiliser les ferrures fournies pour fixer les pattes (F) au cadre.
de ponçage de manière à obtenir l’orientation de travail voulue, soit
à la verticale (fig. 4) ou à l’horizontale (fig. 5).
3. Utiliser les ferrures fournies pour fixer le guide (G) au cadre.
AVERTISSEMENT : L’espace entre la courroie et le guide ne doit
pas dépasser 1/16" (2 mm), sinon l’utilisateur risque de se blesser ou de
se pincer.
AVERTISSEMENT : S’assurer que le guide ne touche pas la cour-
roie, puisque cela pourrait causer.des étincelles qui risqueraient d’en-
flammer des particules de poussière.
4. Ponçage horizontal seulement :
Fixer le dispositif de protection (I) en desserrant l’écrou à oreilles (J)
situé du côté gauche du guide (G). Placer le dispositif entre l’écrou
à oreilles et le guide, puis le tourner dans la fente du cadre (K).
Serrer l’écrou.
5. Fixer ou visser les pattes à un banc d’établi ou sur une surface
plane afin d’assurer la stabilité du cadre en utilisant les trous (H)
prévus à cet effet.
6. Régler le guide à l’angle voulu et le verrouiller au moyen des écrous
à oreilles prévus à cet effet.
7. Brancher la ponceuse.
8. Appuyer sur la gâchette et enclencher le bouton de verrouillage afin
de faire démarrer la ponceuse.
9. Une fois le ponçage terminé, tirer sur la gâchette pour dégager le
bouton de verrouillage et arrêter la rotation de la courroie.
AVERTISSEMENT : Si la ponceuse à courroie est utilisée à l’hor-
izontale dans le support d’inversion, s’assurer que le dispositif de
protection (I) protège l’espace entre la courroie et l’arrière du boîtier
(fig. 5), sinon, l’utilisateur risque de subir de graves blessures.
AVERTISSEMENT : Si la ponceuse à courroie est utilisée en posi-
tion horizontale dans le support d’inversion, tenir fermement la pièce
pendant le ponçage, puisque la courroie pourrait repousser le matériau
et causer de graves blessures.
DW4055 Marco de lijado integrado
o base de inversión
ADVERTENCIA: Para su propia seguridad, lea el manual de
instrucciones de la herramienta antes de usar cualquiera de los
accesorios. El no hacer caso de estas advertencias podría resultar
en lesiones corporales y daños serios a la herramienta y al accesorio.
Al darle servicio a esta herramienta, utilice únicamente refacciones
idénticas.
PARA EL USO SOLAMENTE CON LA LIJADORA DE BANDA
DW432/433
La base de inversión permite usar la lijadora como una pequeña
lijadora estacionaria. Es de mayor utilidad cuando se lijan piezas
pequeñas de un material que necesita mantener un borde de 90
grados y no se puede lijar fácilmente con una lijadora portátil.
ADVERTENCIA: ASEGÚRESE QUE LA UNIDAD ESTÁ APAGA-
DA Y DESCONECTADA DEL TOMACORRIENTE CUANDO INSTALA
EL MARCO DE LIJADO O BASE DE INVERSIÓN. Antes de volver a
conectar la herramienta, oprima y suelte el interruptor de disparo para
asegurarse de que la herramienta está apagada.
ADVERTENCIA: EVITE QUE LOS DEDOS O LAS MANOS
HAGAN CONTACTO CON LA BANDA EN ROTACIÓN CUANDO LA
LIJADORA ESTÁ SOBRE LA BASE DE INVERSIÓN. PODRÍA
OCASIONAR ABRASIONES FUERTES.
INSTALACIÓN DEL MARCO DE LIJADO EN LA LIJADORA
DE BANDA
1. Coloque el mango delantero en la posición superior (A) de la
lijadora.
2. Use el herraje que viene adjunto para unir el soporte del marco de
lijado a la parte delantera de la lijadora. Apriete la perilla (B) para
afianzar la lijadora dentro del marco (Fig. 1).
3. Asiente las lengüetas (C) del extremo posterior de la lijadora sobre
la barra (D) ubicada en el marco de lijado (Fig. 2).
4. Use el cuadrante de ángulo (E) para ajustar la correa con relación
a la superficie localizada de la pieza de trabajo según la ilustra la
Figura 1.
PARA CONECTAR EL SOPORTE
ATENCIÓN: El soporte debe ser conectado a la base de inversión.
De lo contrario podría dañar la unidad.
NOTA: Vienen incluidos dos soportes. Use el soporte adecuado
dependiendo de la orientación utilizada.
1. Alinee los orificios (L) del soporte con los orificios internos (M) de
las patas.
2. Use el herraje incluido para conectar el soporte a las patas y fíjelo
(Fig. 3).
CREACIÓN DE LA BASE DE INVERSIÓN
NOTA: La lijadora no se puede colocar correctamente sobre la base
cuando la bolsa de polvo está conectada. El sistema colector de polvo
no funciona cuando la lijadora está en esta modalidad.
1. Quite la bolsa de polvo y cierre la válvula del colector de polvo (ver
el manual de la herramienta).
2. Utilice las herramientas proporcionadas y adjunte las patas (F)
al marco de lijado para crear la orientación de trabajo deseada,
vertical (Fig. 4) u horizontal (Fig. 5).
3. Utilice las herramientas proporcionadas y adjunte el tope limitador
(G) al marco de lijado.
ADVERTENCIA: No deje más de 1/16" (2mm) entre la lijadora y el
tope limitador. Podría resultar en pellizco y posible lesión durante la
operación.
ADVERTENCIA: No deje que el tope toque la banda lijadora. Las
chispas resultantes podrían incendiar las partículas de polvo.
4. Para Enarenar Horizontal Solamente:
Una a protector (I) aflojando la tuerca de ala (J) en el lado izquierdo
de la cerca (G). Ponga a protector entre la tuerca de ala y la cerca.
Rote a protector en la ranura en el marco (K).
5. Prense o atornille las patas a un banco de trabajo o superficie de
trabajo para estabilidad, utilizando los huecos de atornillar (H) de
las patas.
6. Ajuste el tope al ángulo deseado e inmovilícelo en su lugar con las
tuercas de ala suministradas.
7. Enchufe la lijadora.
8. Oprima el interruptor de disparo y accione el botón de fun-
cionamiento continuo de la lijadora para su activación.
9. Después de terminar el lijado, tire del interruptor de disparo para
desactivar el funcionamiento continuo y parar la rotación de la
banda.
ADVERTENCIA: Si la lijadora está en la posición horizontal en su
base de inversión, asegúrese de que la barra protectora (I) cubre el
espacio entre la banda y la parte posterior de la envoltura, como lo ilus-
tra la Figura 5. De lo contrario, podría resultar en lesión grave.
ADVERTENCIA: Si la lijadora está en la posición horizontal en su
base de inversión, mantenga la madera con mano firme durante el
lijado. La banda podría arrancarle el material lo cual podría ocasionarle
lesiones.
Product specificaties
| Merk: | DeWalt |
| Categorie: | Niet gecategoriseerd |
| Model: | DW4055 |
Heb je hulp nodig?
Als je hulp nodig hebt met DeWalt DW4055 stel dan hieronder een vraag en andere gebruikers zullen je antwoorden
Handleiding Niet gecategoriseerd DeWalt

27 Augustus 2025

26 Augustus 2025

26 Augustus 2025

26 Augustus 2025

26 Augustus 2025

25 Augustus 2025

3 Augustus 2025
3 Augustus 2025

3 Augustus 2025

29 Juli 2025
Handleiding Niet gecategoriseerd
- Vaude
- IQAir
- Itechworld
- GAO
- Schellenberg
- Ecoteck
- Oklahoma Sound
- Reishunger
- SingularXYZ
- Mission Air
- Carson
- Max
- Ozone
- Extron
- Stamony
Nieuwste handleidingen voor Niet gecategoriseerd

14 September 2025

14 September 2025

13 September 2025

13 September 2025

13 September 2025

13 September 2025

13 September 2025

13 September 2025

13 September 2025

13 September 2025