CTA Digital PAD-SCGS9 Handleiding
CTA Digital Niet gecategoriseerd PAD-SCGS9
Bekijk gratis de handleiding van CTA Digital PAD-SCGS9 (1 pagina’s), behorend tot de categorie Niet gecategoriseerd. Deze gids werd als nuttig beoordeeld door 35 mensen en kreeg gemiddeld 4.7 sterren uit 4 reviews. Heb je een vraag over CTA Digital PAD-SCGS9 of wil je andere gebruikers van dit product iets vragen? Stel een vraag
Pagina 1/1
loosen completely and remove from top
PAD-SCGS9
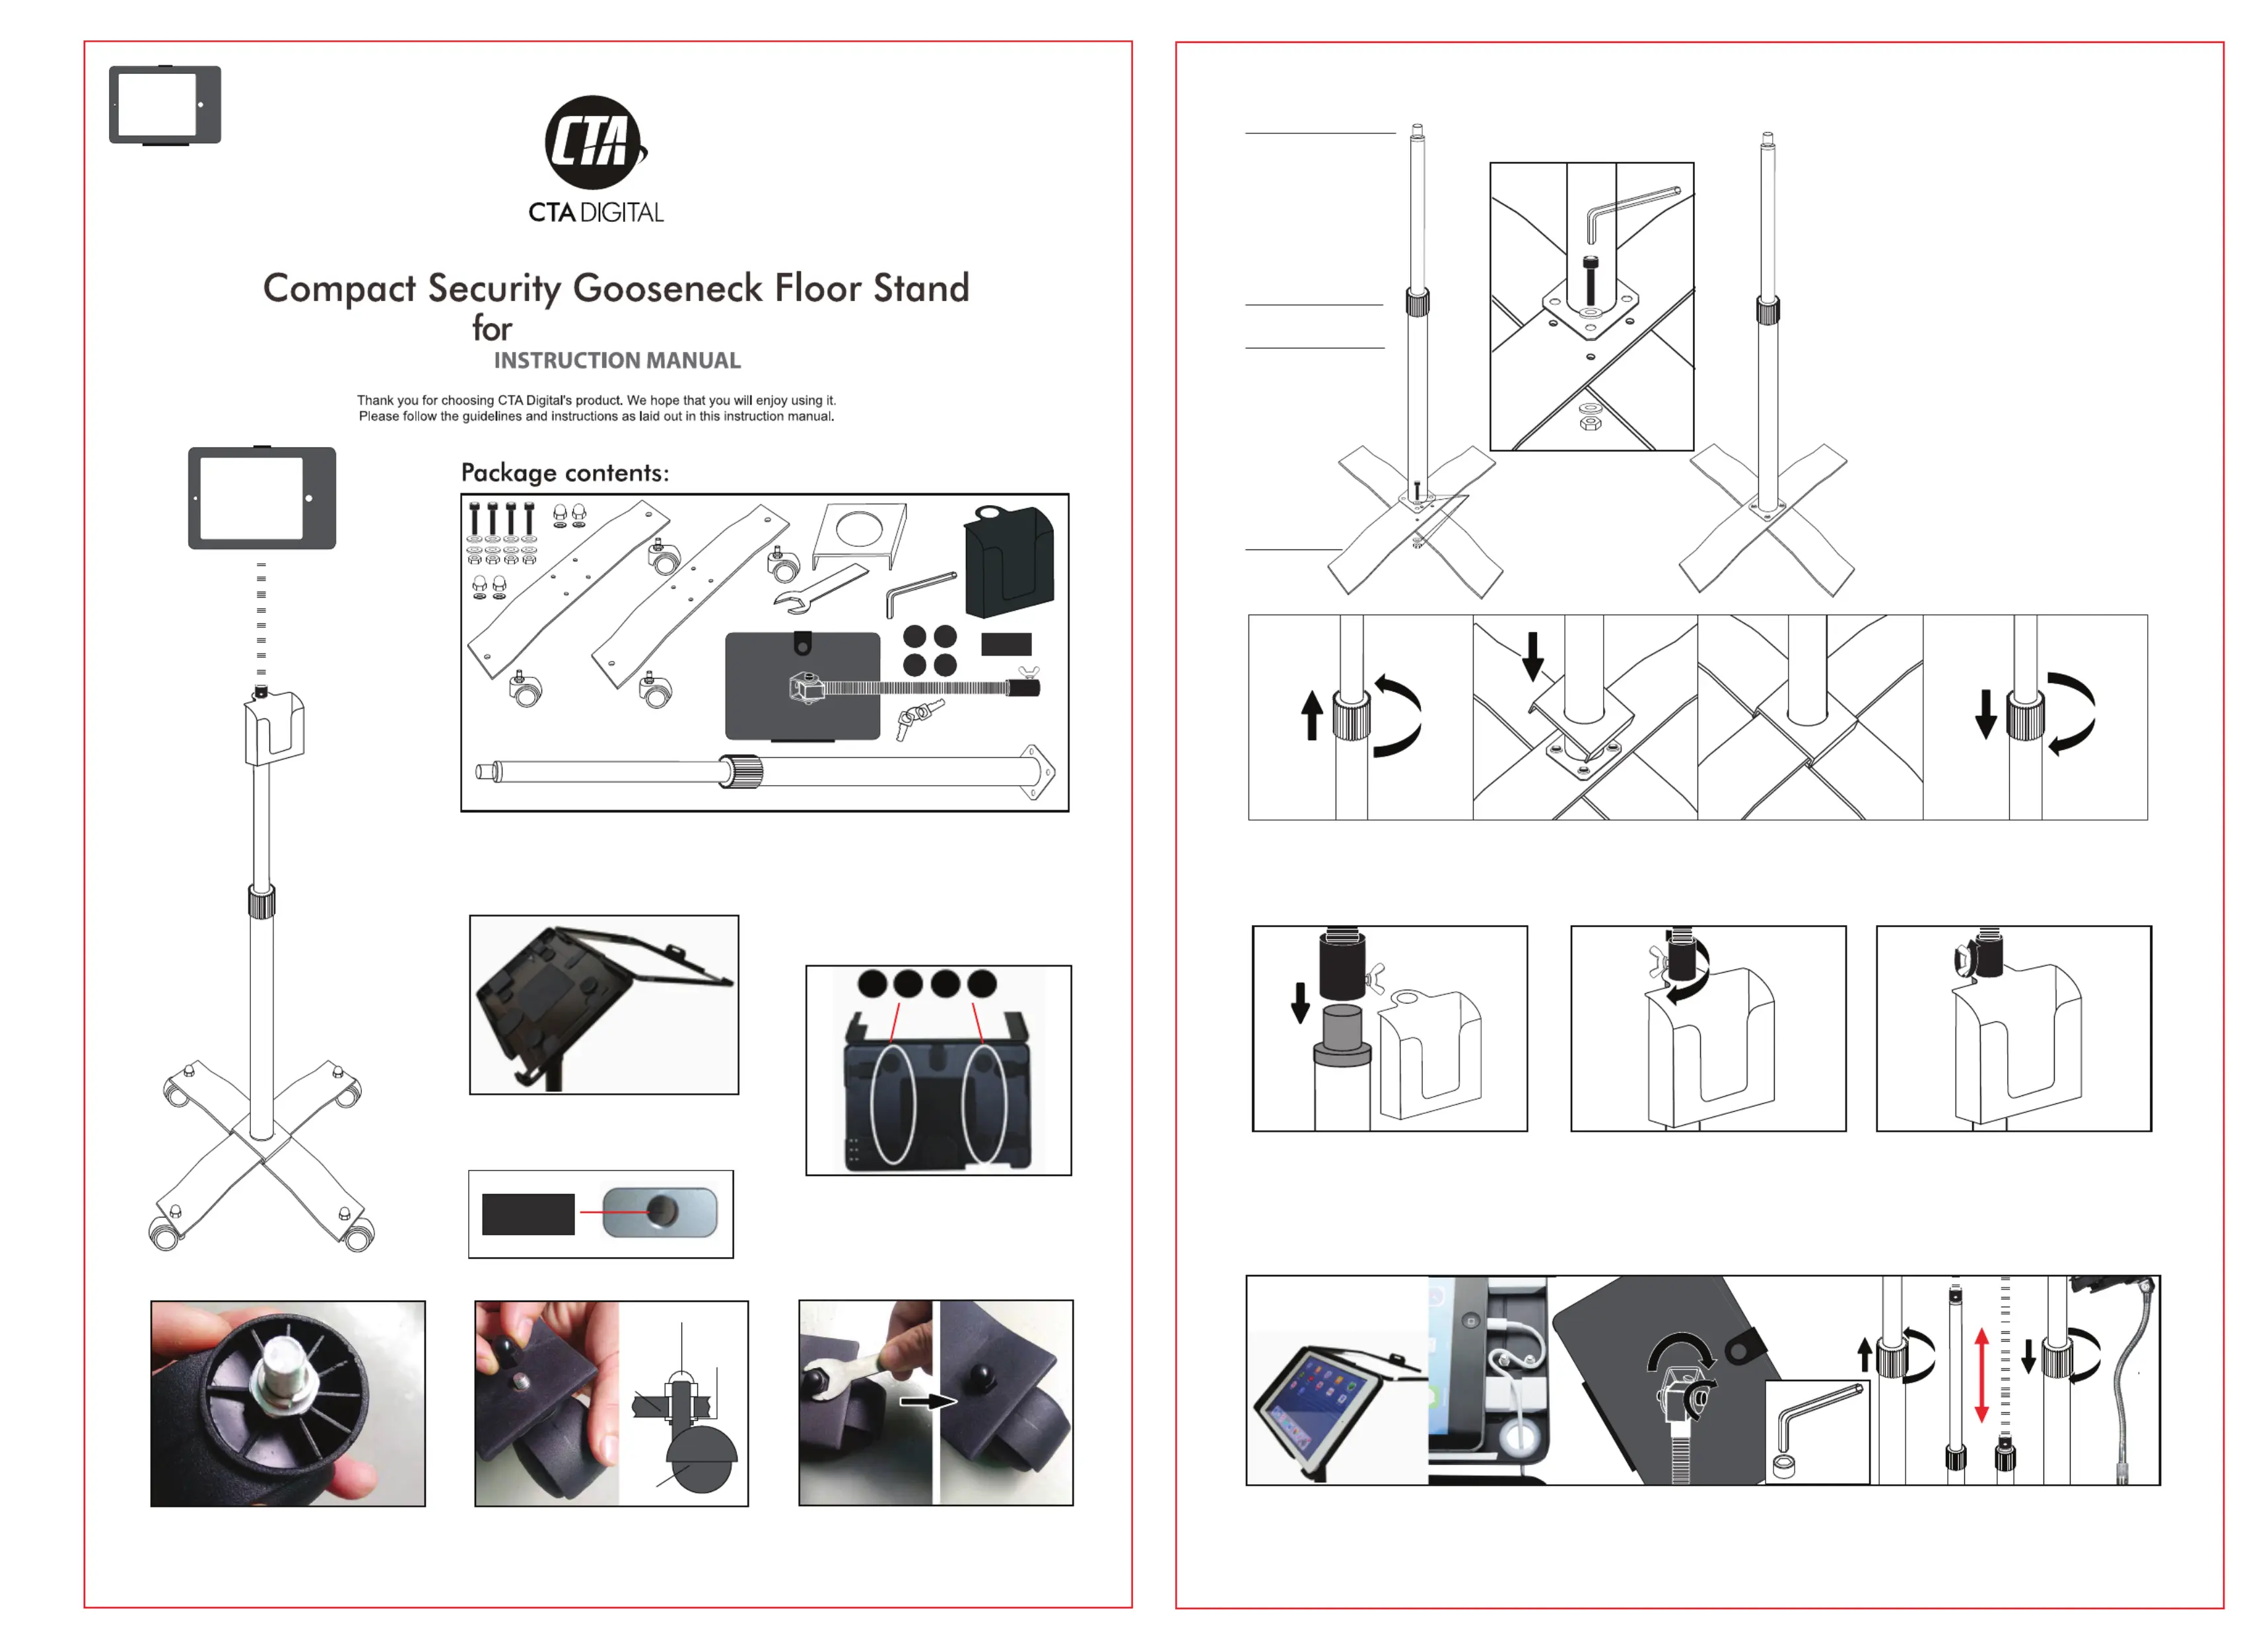
3. Base Assembly and Connecting the Metal Cover:
METAL CONNECTION
HEIGHT
ADJUSTMENT
KNOB
POLE
METAL
CROSS BASE X 2
CONNECTION SCREW BOLT,
WASHERS AND NUT
Pole Assembly and Pole Nut
Cross Base Sections (2)
Allen Key
2. Installing the Wheels
Wheel
Place a spring washer over the screw
bolt on the wheel.
Place the screw bolt from each wheel through the metal base, then place a nut cover
over the top of each. Screw down clockwise by hand, then use wrench to tighten
further.
Screw Nut Cover
Spring
Washer
Metal
Base
1)Place the metal base pieces with the higher
piece on top of the cross base. Align the holes
at the bottom of the pole with the holes on the
cross base.
2)Insert a screw bolt with a washer into each
of 4 holes. Place another washer on the
underside of each screw bolts.
3)Grip the nut on the underside with one hand,
and use the other to tighten each screw with
the Allen key. Repeat to tighten all four
screw bolts.
4.Rotate the grip counter clockwise to
of pole.
5.Place the square metal cover over
the top of the pole and slide down to
stand base.
6.Place grip back over stand pole
and tighten.
4. Connecting the Tablet gooseneck holder & Battery Case
5. Installing your Device and Adjusting the Floor Stand:
3. Turn the Y screw clockwise to
tighten the connection.
Gooseneck
Metal
Connection
Y Screw
Battery Case
1. Place battery case over top of
metal connection.
Note: if Y screw is already in,
unscrew before attaching gooseneck.
2. Screw the gooseneck onto the
metal connection of the pole by
turning clockwise. Be sure that the
battery case is on the opposite side
of the pole as the Y screw.
iPad 9.7”
iPad Air
iPad Air 2
iPad Pro 9.7
iPad Gen. 5 (2017)
iPad Gen. 6 (2018)
iPad 9.7”
Instructions:
1. Attaching EVA Pads to
Tablet Enclosure
For iPad Air and iPad 9.7 Gen 5,use the
casing holder directly.
Use keys to open and
lock tablet enclosure.
Clockwise for locking,
counter-clockwise for
unlocking.
Attach included metal home button cover if desired.
For iPad Air 2 and iPad Pro 9.7,label with
the included adhesive EVA pads inside
case for a snug fit as the following:
3. Rotate plastic grip to adjust pole
to desired height.
Flex the gooseneck freely to adjust
your favorite view angle.
2.Use included Allen key to tighten and
loosen the gooseneck to holder
connection screw to adjust ease of
rotation.
1.Unlock the enclosure,insert tablet, attach
charge cable,then thread charge cable
through the cutout at the rear of the tablet.
Close and lock the enclosure.
270
rotation
o
360 rotation
o
Allen Key
SUPPORT@CTADIGITAL.COMSUPPORT@CTADIGITAL.COM
Product specificaties
| Merk: | CTA Digital |
| Categorie: | Niet gecategoriseerd |
| Model: | PAD-SCGS9 |
Heb je hulp nodig?
Als je hulp nodig hebt met CTA Digital PAD-SCGS9 stel dan hieronder een vraag en andere gebruikers zullen je antwoorden
Handleiding Niet gecategoriseerd CTA Digital

22 Juni 2026
22 Juni 2026
22 April 2026
22 April 2026
19 April 2026
26 Maart 2026
26 Maart 2026
26 Maart 2026
25 Maart 2026
25 Maart 2026
Handleiding Niet gecategoriseerd
Nieuwste handleidingen voor Niet gecategoriseerd
22 Juni 2026
22 Juni 2026
22 Juni 2026
22 Juni 2026
22 Juni 2026
22 Juni 2026
22 Juni 2026
22 Juni 2026
22 Juni 2026
22 Juni 2026