CRUX SWRTY-61J Handleiding
CRUX Niet gecategoriseerd SWRTY-61J
Bekijk gratis de handleiding van CRUX SWRTY-61J (6 pagina’s), behorend tot de categorie Niet gecategoriseerd. Deze gids werd als nuttig beoordeeld door 46 mensen en kreeg gemiddeld 4.8 sterren uit 3 reviews. Heb je een vraag over CRUX SWRTY-61J of wil je andere gebruikers van dit product iets vragen? Stel een vraag
Pagina 1/6
SWRTY-61J
Radio Replacement with Steering Wheel Control Retention for
LEXUS & TOYOTA Vehicles with JBL Systems
Crux Interfacing Solutions • Chatsworth, CA 91311
phone: (818) 609-9299 • fax: (818) 996-8188 • www.cruxinterfacing.com
RAD REPLATIOCEMEN
SWC ENTRETION
+
R
INTERFACING SOLUTIONS
PRODUCT FEATURES:
-Pre-programmed to retain factory Steering Wheel Controls.
-Retains factory backup camera (if present).
-Retains OEM 3.5mm Auxiliary Audio Input.
-Supports Pick Up/End Call, Pick up and Toggle between 1st and 2nd incoming call, AVRCP Track, Seek.
removing the radio.
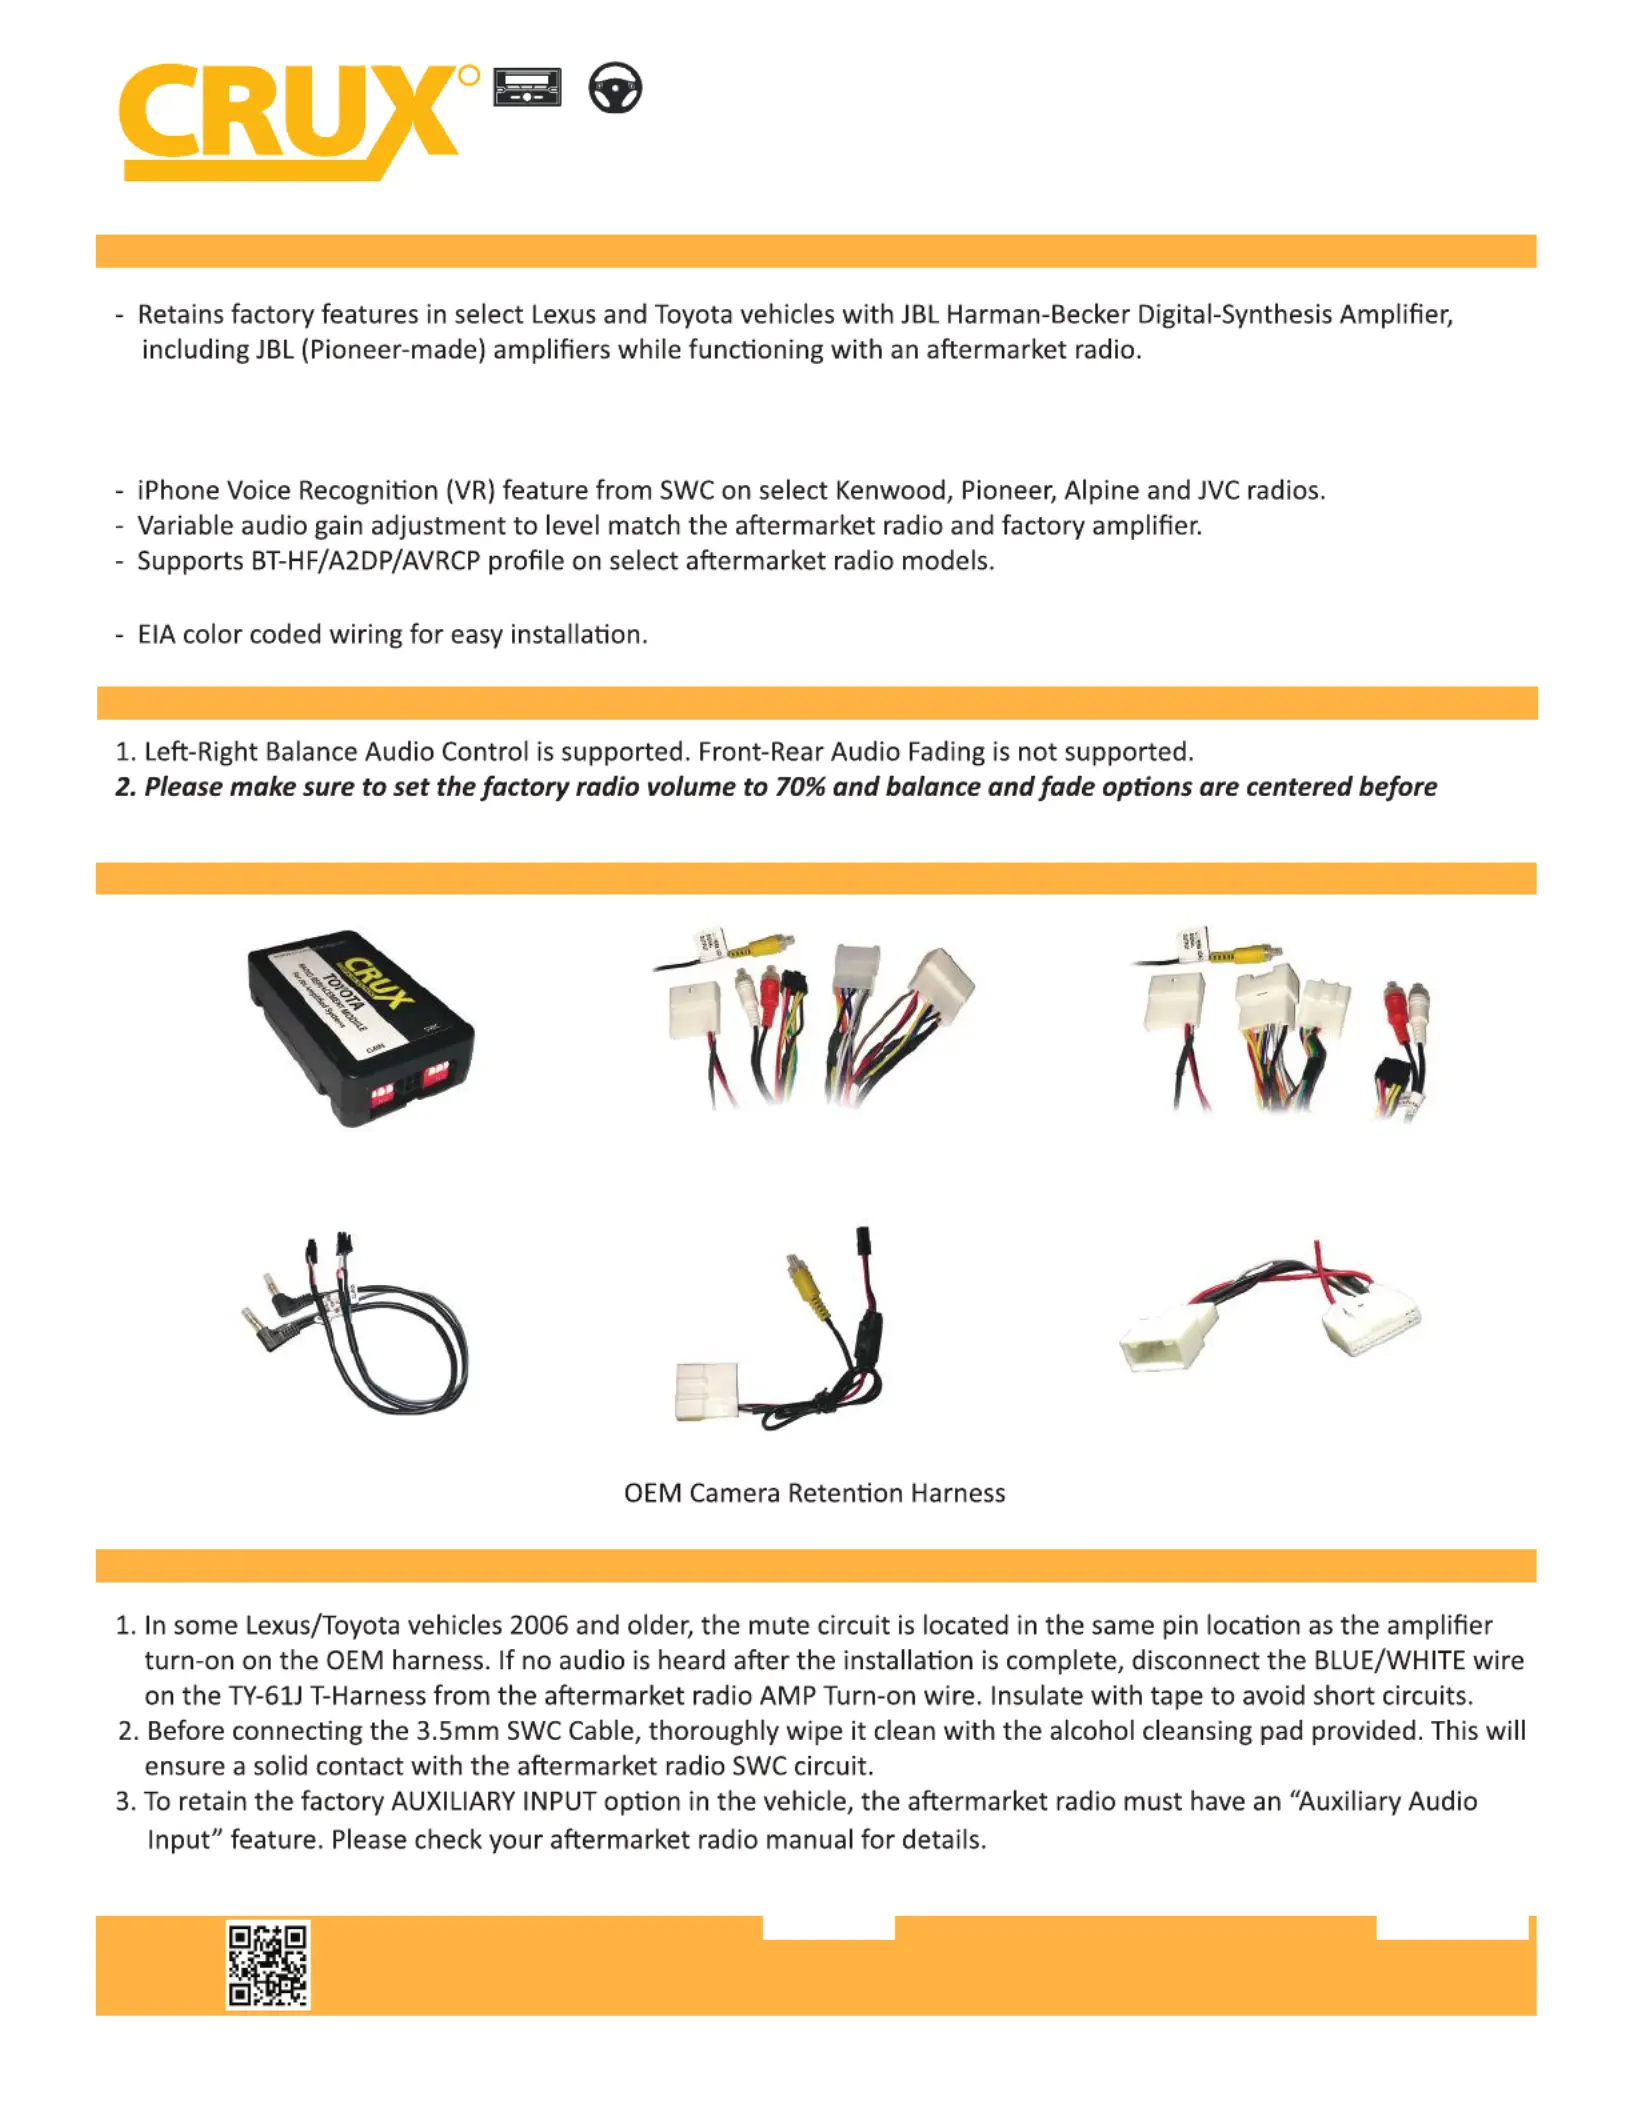
PARTS INCLUDED:
SWRTY-61J ModuleTY-A Harness
(For Newer Models)
TY-B Harness
(For Older Models)
3.5MM to 4-pin SWC Cables
16 to 24 Pin Camera Adapter
IMPORTANT INSTALLATION NOTES:
rev.090924
1 of 6
NOTES:
Product specificaties
| Merk: | CRUX |
| Categorie: | Niet gecategoriseerd |
| Model: | SWRTY-61J |
Heb je hulp nodig?
Als je hulp nodig hebt met CRUX SWRTY-61J stel dan hieronder een vraag en andere gebruikers zullen je antwoorden
Handleiding Niet gecategoriseerd CRUX

13 Januari 2026
13 Januari 2026
13 Januari 2026
10 Maart 2025
10 Maart 2025
10 Maart 2025
10 Maart 2025
9 Maart 2025
9 Maart 2025
9 Maart 2025
Handleiding Niet gecategoriseerd
Nieuwste handleidingen voor Niet gecategoriseerd
8 Juni 2026
8 Juni 2026
8 Juni 2026
8 Juni 2026
8 Juni 2026
8 Juni 2026
8 Juni 2026
8 Juni 2026
8 Juni 2026
8 Juni 2026