Casio PQ-75 Handleiding
Bekijk gratis de handleiding van Casio PQ-75 (3 pagina’s), behorend tot de categorie Horloge. Deze gids werd als nuttig beoordeeld door 12 mensen en kreeg gemiddeld 5.0 sterren uit 6.5 reviews. Heb je een vraag over Casio PQ-75 of wil je andere gebruikers van dit product iets vragen? Stel een vraag
Pagina 1/3

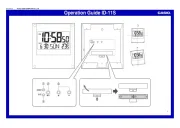
Operation Guide PQ-75
1
MA1310-EA
© 2013 CASIO COMPUTER CO., LTD.
•••A•sticker•is•affixed•to•the•glass•of•the•clock•when•you•purchase•it.•Be•sure•to•remove•the•sticker•before•using•
the•clock.
•••Depending•on•the•clock•model,•its•configuration•may•differ•somewhat•from•that•shown•in•the•illustration.
Alarm Off
Current time (Hour, minutes, seconds)
Current temperature
PM indicator
Date (month - day - day of the week)
Alarm time
Alarm on indicator
Snooze Alarm On
General Guide
1
SNOOZE/LIGHT button
••••Press•this•button•to•illuminate•the•display•for•about•five•seconds.
••••Pressing•this•button•while•the•alarm•is•sounding•stops•the•alarm.
2
ALARM SNZ/ON/OFF, KEY LOCK switch
••••Use•this•switch•to•switch•the•alarm•between•snooze,•on,•and•off.
••••This•switch•is•also•used•to•lock•buttons•to•disable•their•operations.
Important!
When•buttons•are•locked,•operation•of•all•buttons•except•for•the• •( )•is•disabled.RESET button 7
3
LIGHT ON/AUTO/OFF switch
Use•this•switch•to•switch•the•LED•flashlight•between•on,•auto,•and•off.
4
+ / – buttons
Use•these•buttons•to•change•the•alarm•time•or•the•setting•that•is•flashing•on•the•display.
5
DEMO button
Press•to•test•the•alarm•tone.
To test the alarm tone
Press•the• •( )•to•sound•the•alarm•tone.•Pressing•the• •( )•again•while•the•alarm•DEMO button 5DEMO button 5
tone•is•sounding•will•stop•it.
6
SET button
Use•this•button•when•setting•the•current•time.
7
RESET button
Press•this•button•to•reset•the•clock•after•replacing•its•batteries.
8
LED Flashlight
Stand (included with clock)
Use•the•stand•to•hold•the•clock•vertically•
upright.
•••Buttons•marked•“INVALID”•have•no•function.
3
5
8
2
4
1
7
6
1
2
LED flashlight batteries
Pilas para la linterna LED
Pilhas da lanterna LED
Clock batteries
Pilas del reloj
Pilhas do relógio

Operation Guide PQ-75
2
Locking Clock Buttons
You•can•lock•the•buttons•of•the•clock•to•protect•against•unintentional•operation•when•packing•the•clock•in•a•bag,•
or•while•using•the•clock’s•LED•light•for•illumination,•etc.
Slide•the• •(ALARM SNZ/ON/OFF, KEY LOCK switch
2)•to•the•KEY•LOCK•position.
•••The• •(RESET button
7)•remains•enabled•while•clock•buttons•are•locked.
2
Using the LED Flashlight for Illumination
You•can•select•the•LED•flashlight•mode•using•the• •( ).LIGHT ON/AUTO/OFF switch 3
To have the LED light turn on whenever the clock is removed from the stand
Set•the• •( )•in•the•AUTO•position•and•place•the•clock•onto•the•stand.LIGHT ON/AUTO/OFF switch 3
3
Remove•the•clock•from•the•stand•will•cause•the•LED•light•to•light•for•about•two•minutes.
•••If•you•want•the•LED•light•to•remain•on•longer•than•two•minutes,•set•the• •( )•in•LIGHT ON/AUTO/OFF switch 3
the•ON•position.
Note•that•the•LED•light•will•turn•on•even•if•the•clock•accidentally•tips•over•from•a•vertical•position.•Be•sure•to•use•
the•stand•when•standing•up•the•clock•in•a•vertical•position.
To keep the LED light lit
Slide•the• •( )•to•the•ON•position.LIGHT ON/AUTO/OFF switch 3
3
•••Do•not•forget•to•turn•off•the•LED•light.•Leaving•the•LED•light•on•not•only•shortens•battery•life,•it•can•also•cause•
its•batteries•to•leak•and•damage•the•clock.
•••If•the•LED•flashlight•does•not•turn•on•when•expected,•replace•its•batteries•as•soon•as•possible.
Caution!
LED Flashlight Precaution
Do•not•look•directly•into•the•LED•flashlight.•Doing•so•can•cause•eye•injury.
To disable the LED light
Slide•the• •( )•to•the•OFF•position.LIGHT ON/AUTO/OFF switch 3
USING THE CLOCK
1.•Press•the• •( )•to•cycle•through•the•setting•screens•as•shown•below.SET button 6
Normal Timekeeping Screen 12-hour/24-hour Timekeeping
Screen
Time Setting Screen
Month and Day Setting
Screen
Year Setting Screen

Operation Guide PQ-75
3
2.•While•the•screen•you•want•is•displayed,•use•the• •and• •( )•to•change•the•flashing•digits.+ – buttons 4
Press to decrease the flashing digits. Press to increase the flashing digits.– +
•••Holding•down• •or• •changes•the•flashing•digits•at•high•speed.+ –
•••You•can•set•the•year•in•the•range•of•2000•to•2099.•The•day•of•the•week•is•set•automatically•in•accordance•
with•the•date•setting.
•••Pressing• •or• •while•the•Time•Setting•Screen•is•on•the•display•causes•the•seconds•count•to•be•reset•to•00.+ –
•••Each•press•of• •or• •while•the•12-hour/24-hour•Timekeeping•Screen•is•on•the•display•toggles•between•+ –
12-hour•and•24-hour•timekeeping.
3.•After•making•the•settings•you•want,•use•the• •(SET button
6)•to•display•the•Normal•Timekeeping•Screen.
•••The•clock•automatically•returns•to•the•Normal•Timekeeping•Screen•if•you•leave•a•setting•screen•on•the•
display•for•about•five•minutes•without•performing•any•operation.
USING THE ALARM
The•alarm•sounds•when•the•alarm•time•you•set•is•reached.•You•can•also•use•the•ALARM SNZ/ON/OFF, KEY
LOCK switch•(
2)•to•select•the•snooze•alarm•feature.
Setting the Alarm Time
Use•the• •and• •( )•to•set•the•alarm•time.•+ – buttons 4
Pressing•the• •and• •(+ – buttons
4)•causes•the•alarm•time•to•appear•in•place•of•the•date•on•the•display.
•••Holding•down• •or• •changes•the•digits•at•high•speed.+ –
Turning the Alarm On and Off
Use•the• •( )•on•the•side•of•the•clock•to•turn•the•alarm•on•and•off,•and•ALARM SNZ/ON/OFF, KEY LOCK switch 2
to•select•the•snooze•feature.
ALARM SNZ/ON/OFF, KEY LOCK switch
Description
SNZ
The•alarm•sounds•at•the•preset•time•for•one•minute,•and•
up•to•seven•more•times•every•five•minutes•thereafter.•Even•
if•you•stop•the•alarm•by•pressing•the•SNOOZE/LIGHT
button•( ),•the•alarm•sounds•again•five•minutes•later.1
•••The•indicator•
•flashes•on•the•display•to•indicate•that•
the•snooze•feature•is•activated.
ON
The•alarm•sounds•at•the•preset•time•for•one•minute.
OFF
The•alarm•does•not•sound.
•••The•alarm•time•appears•in•place•of•the•date•on•the•display•whenever•the•ALARM SNZ/ON/OFF, KEY LOCK
switch•(
2)•is•set•to•ON•or•SNZ.
•••The•alarm•sound•changes•over•four•levels•as•it•sounds.
Stopping the Alarm
•••When•alarm•is•sounding,•press•the• •( )•to•stop•it.•When•the•snooze•feature•is•turned•SNOOZE/LIGHT button 1
on,•the•alarm•will•sound•again•in•about•five•minutes.
•••To•turn•off•the•snooze•feature,•slide•the• •(ALARM SNZ/ON/OFF, KEY LOCK switch
2)•to•OFF.
USING THE LIGHT
Pressing•the• •( )•turns•on•the•light•and•illuminates•the•display•for•easy•reading•in•the•SNOOZE/LIGHT button 1
dark.
Important!
•••Overuse•of•the•light•can•shorten•battery•life.
THERMOMETER FUNCTIONS
•••A•built-in•sensor•measures•temperature•and•shows•the•measured•value•on•the•display.
•••The•temperature•display•shows•“LL”•for•temperatures•below•–20°C•and•“HH”•for•temperatures•above•50°C.
•••Though•temperature•readings•are•displayed•up•to•0°C•and•greater•than•41°C,•note•that•such•readings•are•
actually•outside•the•guaranteed•temperature•range•of•this•clock.
BATTERY REPLACEMENT
Replace•batteries•whenever•the•display•of•the•clock•becomes•dim•and•difficult•to•read.
1.•Open•the•battery•compartment•cover•as•shown•in•the•illustration.
2.•Remove•all•of•the•old•batteries.
3.•Load•a•full•set•of•new•batteries.•Make•sure•that•their•positive•( )•and•negative•( )•ends•face•in•the•correct•+ –
directions.•If•you•load•batteries•incorrectly,•they•can•burst•and•damage•the•clock.
4.•Press•the• •(RESET button
7 7).•Be•sure•to•press•the• •(RESET button )•after•replacing•batteries.
5.•Replace•the•battery•compartment•cover.
Battery precautions
•••Keep•batteries•out•of•the•reach•of•small•children.•If•a•battery•is•accidentally•swallowed,•contact•your•physician•
immediately.
•••Be•sure•to•load•the•batteries•with•their•positive•( )•and•negative•( )•ends•facing•correctly.+ –
•••Never•mix•old•and•new•batteries,•or•batteries•of•different•brands.
•••Never•charge•the•batteries•that•come•with•the•clock.
•••Should•batteries•ever•leak•while•in•the•clock,•wipe•out•the•fluid•with•a•cloth,•taking•care•not•to•let•any•get•onto•
your•skin.
•••Replace•the•batteries•at•least•once•a•year,•even•if•the•current•batteries•are•working•properly.
•••The•batteries•that•come•with•the•clock•lose•some•of•their•power•during•transport•and•storage.
SPECIFICATIONS
Accuracy at normal temperature:•±30•seconds•a•month
Calendar system:•Auto-calendar•pre-programmed•from•the•year•2000•to•2099
Alarm:•Setting•unit:•minutes;•Alarm•duration:•1•minute
Alarm beeper:••Daily•alarm
Snooze•alarm:••(Alarm•sounds•up•to•7•times•at•5-minute•intervals.)
Demo•alarm•(alarm•tone•test)
Thermometer Functions:••Measuring•range:•0°C•to•40°C•
Though•temperature•readings•are•displayed•up•to•0°C•and•greater•than•41°C,•note•that•such•readings•are•
actually•outside•the•guaranteed•temperature•range•of•this•clock.
Temperature Sensor Precision:••±2°C•in•range•of•0°C•to•40°C
Other:••12/24-hour•timekeeping;•LED•face•illumination;•LED•flashlight
Included•accessories:••Stand
Operating temperature:••0°C•to•40°C
Clock batteries:••2•AAA-size•manganese•batteries•(R03)
LED•flashlight•batteries:•2•AAA-size•manganese•batteries•(R03)
Clock battery life:••Approximately•1•year•(5•seconds•of•face•illumination•per•day;•1•minute•of•alarm•sound•per•
day)
LED•flashlight•battery•life:•Approximately•12•hours•continuous•operation
Product specificaties
| Merk: | Casio |
| Categorie: | Horloge |
| Model: | PQ-75 |
Heb je hulp nodig?
Als je hulp nodig hebt met Casio PQ-75 stel dan hieronder een vraag en andere gebruikers zullen je antwoorden
Handleiding Horloge Casio
18 Juni 2025
17 Juni 2025
17 Juni 2025
16 Juni 2025

16 Juni 2025
16 Juni 2025
16 Juni 2025
16 Juni 2025
16 Juni 2025
16 Juni 2025
Handleiding Horloge
- Danish Design
- Polar
- Nedis
- Fossil
- Omega
- Edox
- Lotus
- Stuhrling
- Lynx
- GC Watches
- Maurice Lacroix
- Topcom
- Velleman
- Raketa
- Alessi
Nieuwste handleidingen voor Horloge

5 Juli 2025

5 Juli 2025
4 Juli 2025

4 Juli 2025

4 Juli 2025

4 Juli 2025
4 Juli 2025

2 Juli 2025
1 Juli 2025

21 Juni 2025