Bretford EC2741-GM Handleiding
Bretford Multimedia kar EC2741-GM
Bekijk gratis de handleiding van Bretford EC2741-GM (3 pagina’s), behorend tot de categorie Multimedia kar. Deze gids werd als nuttig beoordeeld door 147 mensen en kreeg gemiddeld 4.4 sterren uit 9 reviews. Heb je een vraag over Bretford EC2741-GM of wil je andere gebruikers van dit product iets vragen? Stel een vraag
Pagina 1/3
EC2741
COMPUTER WORK STATION /
PROJECTOR TABLE
Assembly Instructions
Parts List
Qty.Part No.Description
1022-2014Top Section Assembly
(with Modesty Panel/Wire Bin)
1022-2013Leg Assembly with CPU Shelf
1022-1694Leg Assembly
1010-2336Cross Brace
1010-3273CPU Side Bracket - Stationary
1010-3058CPU Side Bracket - Adjustable
2015-00024" Swivel Caster-Rear
2015-00034" Swivel Caster with Brake-Front
Hardware List
Qty.Ref.Part No.Description
2AA030-03075/16-18 x 5/8" Hex Head Bolt
2BB030-04215/16-18 Hex Nylock Nut
8CC030-02531/4-20 x 3/4" Combo Head Screw
8DD030-01201/4-20 Square Nut
2EE030-02721/4-20 x 1/2" Carriage Bolt
2FF030-03251/4-20 x 1/2" Combo Truss Screw
4GG030-02561/4-20 Flange Nut
2HH031-1822Velcro - Hook
2 I I031-1823Velcro - Loop
Tools Required
Phillips Screw Driver
1/2" Open End Wrench
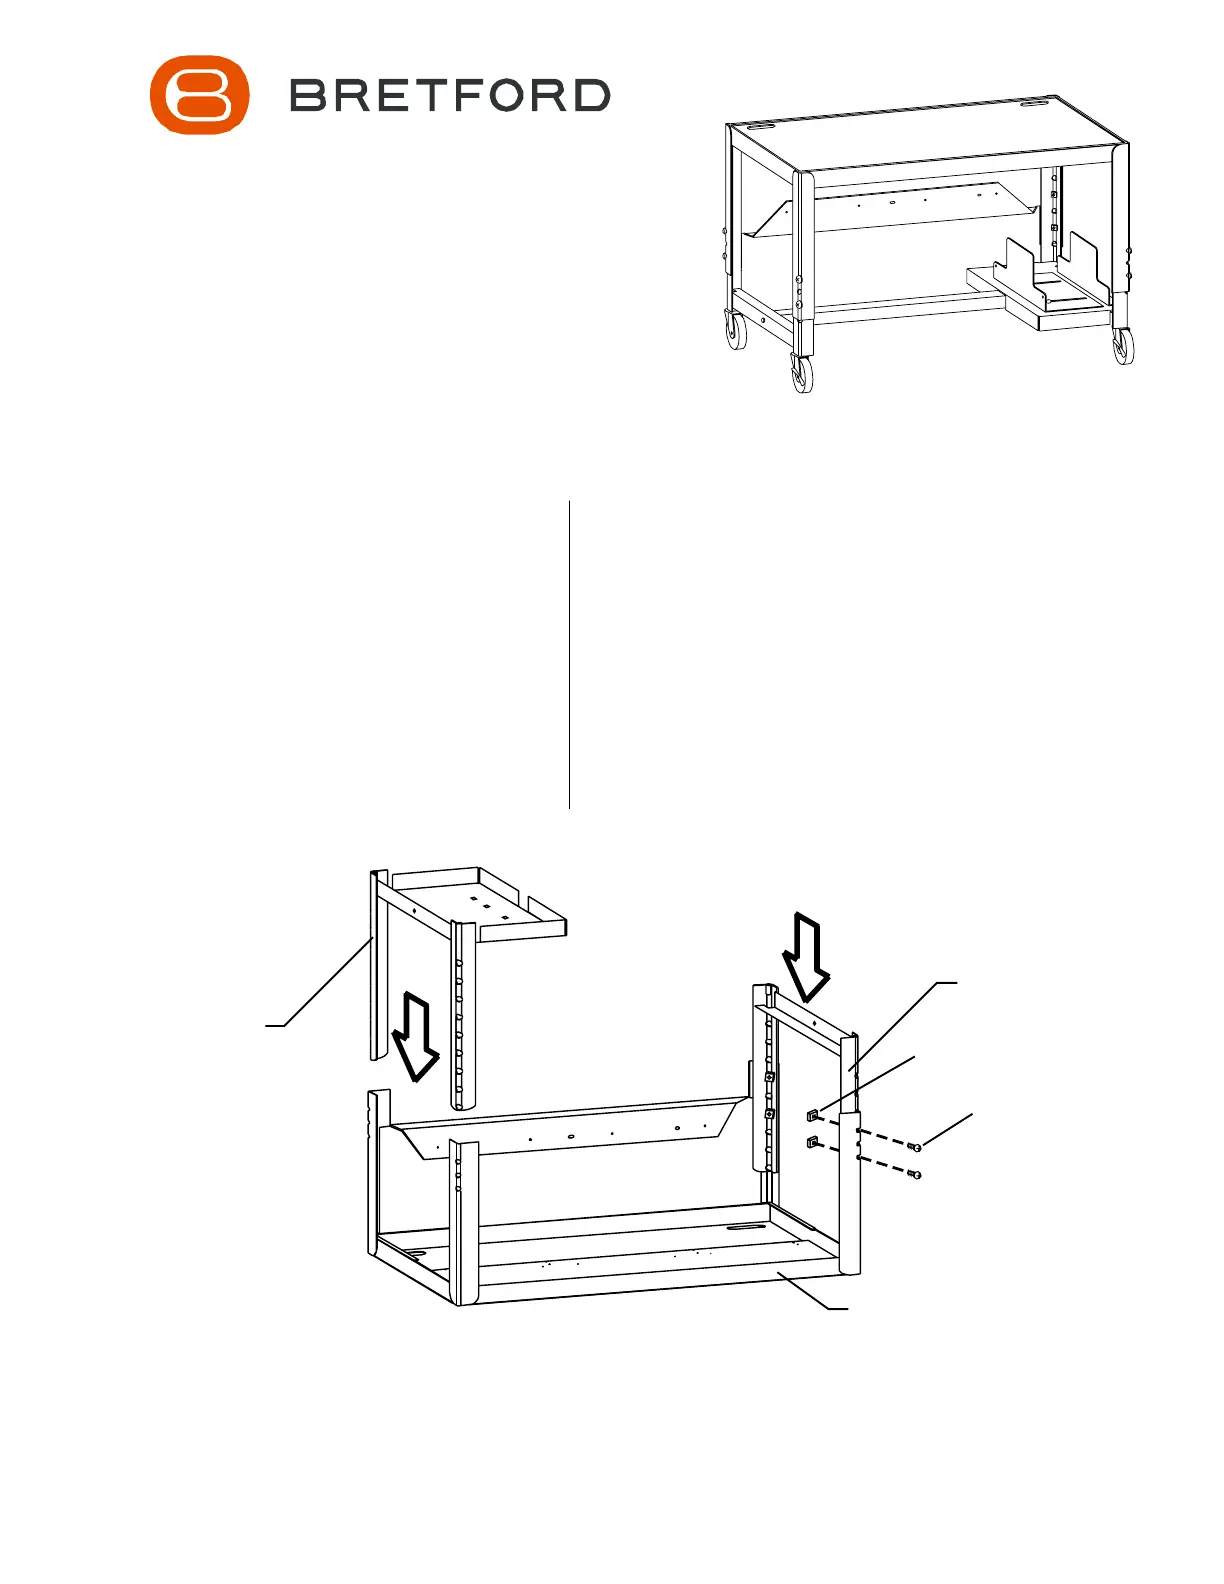
Step 1
With the top section assembly placed face down on a carpeted surface (or cardboard), position the modesty
panel toward the rear. Then determine whether the leg assembly with the cpu shelf will be located on the left or
right side of your table (when turned over upright). The above view shows a right hand shelf location. Slide one leg
assembly into the leg extensions from the top section assembly as shown. Align the mounting holes until the
desired height is achieved. Note: the table height is adjustable from 27" to 41" when casters are installed.
Once the height is set, install 1/4-20 screws (CC) and 1/4-20 nuts (DD). Install the second leg the same as the
first leg. Tighten securely.
Leg Assembly
w/ CPU Shelf
Leg Assembly
DD
CC
Top Section Assembly
Product specificaties
| Merk: | Bretford |
| Categorie: | Multimedia kar |
| Model: | EC2741-GM |
| Kleur van het product: | Grijs |
| Breedte: | 939.8 mm |
| Diepte: | 571.5 mm |
| Hoogte: | 1041.4 mm |
| Soort: | Multimediawagentje |
| In hoogte verstelbaar: | 355.6 mm |
| Afmetingen verpakking (BxDxH): | 508 x 635 x 990.6 mm |
| Materiaal: | Staal |
| Maximale schermgrootte: | 24 " |
Heb je hulp nodig?
Als je hulp nodig hebt met Bretford EC2741-GM stel dan hieronder een vraag en andere gebruikers zullen je antwoorden
Handleiding Multimedia kar Bretford

8 Februari 2024
8 Februari 2024
8 Februari 2024
8 Februari 2024
8 Februari 2024
8 Februari 2024
8 Februari 2024
8 Februari 2024
8 Februari 2024
7 Februari 2024
Handleiding Multimedia kar
Nieuwste handleidingen voor Multimedia kar
5 Augustus 2025
2 April 2025
2 April 2025
2 April 2025
2 April 2025
2 April 2025
2 April 2025
2 April 2025
2 April 2025
2 April 2025