Black Diamond HiLight 3P Handleiding
Black Diamond
Tent
HiLight 3P
Bekijk gratis de handleiding van Black Diamond HiLight 3P (2 pagina’s), behorend tot de categorie Tent. Deze gids werd als nuttig beoordeeld door 113 mensen en kreeg gemiddeld 4.9 sterren uit 57 reviews. Heb je een vraag over Black Diamond HiLight 3P of wil je andere gebruikers van dit product iets vragen? Stel een vraag
Pagina 1/2

HILIGHT
TENT
© Black Diamond Equipment, Ltd. 2018
M13352_A
[EN]
INSTRUCTIONS FOR USE
BLACK DIAMOND HILIGHT
SET UP
1. Spread your tent out and open the door completely. Unfold the
shock-corded poles, making sure all joints are fully engaged.
2. Install the awning pole first. Insert one end of the short pole
through the grommet above the door zipper (under the awning).
Slide the pole through and along the inside of the tent, putting
the end through an identical grommet at the opposite side. Put
each pole end into the small grommets on the corresponding
awning loop. Do not use the awning loops or grommets as stak-
ing points—they are only to hold the pole in place.
3. Insert one end of a long pole through the door and into the cor-
ner (snap) at the back of the tent (A). Fasten the pole to the first
hook-and-loop closure nearest the door with the tent lying flat.
Flex the pole toward the ceiling and insert the other end of the
pole into the front corner (B).
4. Insert the second long pole into the other rear corner. Flex the
pole and bring the end into the remaining front corner (C & D).
5. Inside the tent, make sure all four pole ends are set securely into
their corner snaps. Secure each pole along the canopy using the
hook-and-loop fasteners.
6. Anchor the tent securely to the ground immediately, every time
you set it up. The slightest breeze can blow it away, potentially
causing severe damage.
Optional Vestibule
7. Spread your vestibule out and unfold the shock-corded pole,
making sure all joints are fully engaged.
8. Take the pole and put the end tip into the grommet in the black
nylon strap and flex it so the other end goes into the grommet
on the other side, forming an arch with the pole. NEVER over
flex the pole when putting the end tips in the grommet. The pole
will flex easily if you push one end against the ground or the side
of your foot for control while putting the other end tip in the sec-
ond grommet. Be sure the nylon strap is untwisted especially
at the grommeted ends. Use the hook-and-loop fasteners to
secure the pole in place.
9. Note : You can leave the hook-and-loop fastened and then
thread the pole through on subsequent set ups.
10. With your tent set up and securely anchored, position the ves-
tibule in front of the tent doorway and sit in the tent to hook the
vestibule to the web loops just outside the zipper, under the
awning. (If you stand outside the tent and try to hook the vesti-
bule it will be harder to see what you are doing.)
11. Once the vestibule is attached to the tent, stake it out securely.
The loops closest to the tent should be staked out to the same
stakes as the tent corners. Simply slip the vestibule corner loop
over the tent corner loop and then stake out the tent corner
loop. Use two stakes to stake out the front.
VENTILATION
Maintain adequate ventilation at all times. Leave the back zipper
vent open, unless it is extremely windy. The top of the door may
also be left open.
ATTACHING OPTIONAL GROUND CLOTH
A fitted ground cloth is available for the HiLight tent. Along the
edges of the ground cloth are reinforced grommets. These can be
used to attach the ground cloth to the tent. Tie a short loop of cord
through each of the ground cloth corner grommets. Slip this loop
over the tent corner webbing when staking out the tent. The ground
cloth can also be used as a tarp—use the grommets along the
edges to suspend or anchor it.
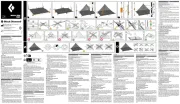
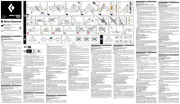
(See accompanying illustrations)
CARE AND MAINTENANCE
(See accompanying illustrations)
STORAGE AND TRANSPORT
(See accompanying illustrations)
WARNING
Black Diamond Equipment is not responsible for the consequenc-
es, whether direct, indirect, or accidental, or for any other type of
damage arising or resulting from the use of its products. You are
responsible for your actions and activities and for any consequenc-
es that may result from them.
LIMITED WARRANTY
We warrant for one year from purchase date and only to the orig-
inal retail buyer (Buyer) that our products (Products) are free from
defects in material and workmanship. For headlamps our warranty
is for three years. If Buyer discovers a covered defect, Buyer
should return the Product to the place of purchase. In the event
that this is not possible, return the Product to us at the address
provided. The Product will be repaired or replaced at our discre-
tion. That is the extent of our liability under this Warranty and,
upon expiration of the applicable warranty period, all such liability
shall terminate. We reserve the right to require proof of purchase
for all warranty claims.
Warranty Exclusions:
We do not warranty Products against normal wear and tear (such
as ski edge cuts and abrasions, outsole wear, etc.), unauthorized
modifications or alterations, improper use, improper maintenance,
accident, misuse, negligence, damage, or if the Product is used
for a purpose for which it was not designed. This Warranty gives
you specific rights, and you may also have other rights which vary
from state to state. Except for expressly stated in this Warranty,
we shall not be liable for direct, indirect, incidental, or other types
of damages arising out of, or resulting from the use of Product.
This Warranty is in lieu of all other warranties, express or implied,
including, but not limited to, implied warranties of merchantability
or fitness for a particular purpose (some states do not allow the
exclusion or limitation of incidental or consequential damages
or allow limitations on the duration of an implied warranty, so the
above exclusions may not apply to you).
[FR]
INSTRUCTIONS D’UTILISATION
BLACK DIAMOND HILIGHT
MONTAGE
1. Déployez votre tente et ouvrez complètement la porte. Dépliez
les arceaux et assurez-vous que tous les segments sont bien
emboîtés. Les segments mal emboîtés peuvent se rompre. Ne
pas lancer les arceaux par terre pour les ouvrir ! Les segments
peuvent endommager les embouts au moment où ils se déplient
et s’emboîtent.
2. Installez en premier l’arceau le plus petit (faîtière) du dôme.
Insérez une extrémité du petit arceau dans l’œillet situé au-des-
sus de la fermeture à glissière (sous le rabat). Glissez l’arceau
à l’intérieur le long de la toile jusqu’à un autre œillet identique
dans lequel vous insérez l’extrémité de l’arceau. Insérez chaque
extrémité de l’arceau dans les petits œillets prévus pour la
faîtière. Ne pas utiliser les boucles du rabat ou les œillets
comme points de haubanage de la tente : leur fonction est
seulement de maintenir l’arceau en place.
3. Insérez l’extrémité d’un des grands arceaux par la porte et
insérez-la dans un coin (oeillet) arrière de la tente (A). Attachez
l’arceau au premier clip de fixation le plus près de la porte tout
en laissant la tente à plat. Courbez l’arceau vers le plafond puis
insérez l’autre extrémité de l’arceau dans le coin avant (B).
4. Insérez le second grand arceau dans l’autre coin arrière.
Courbez l’arceau et amenez l’extrémité dans le coin avant
restant (C, D).
5. À l’intérieur de la tente, assurez-vous que vos quatre extrémités
d’arceaux sont solidement mises en place dans les œillets des
coins. Accrochez chaque arceau le long de la toile à l’aide des
clips de fixation prévus à cet effet.
6. Amarrez immédiatement et solidement votre tente au sol à
chaque montage. La moindre brise peut emporter la tente et
sérieusement l’endommager.
Instructions de Montage des Absides en Option
7. Déployez votre abside et dépliez l’arceau fourni, en vous assur-
ant que tous les segments sont bien emboîtés. Les segments
d’arceaux dont les embouts sont mal emboîtés peuvent se rom-
pre. NE JETEZ PAS L’ARCEAU PAR TERRE AFIN DE L’OUVRIR !
L’arceau peut être endommagé au moment où les segments se
déplient et s’emboîtent brusquement.
8. Prenez l’arceau et introduisez son extrémité dans l’œillet cousu
dans la languette en nylon noir et courbez-le de manière à intro-
duire l’autre extrémité dans l’oeillet opposé, l’arceau formant
une arche. NE COURBEZ JAMAIS l’arceau de manière exces-
sive au moment d’introduire l’extrémité dans l’oeillet. L’arceau
se courbera facilement si vous vous poussez une de ses
extrémités contre le sol ou contre le bord de votre chaussure
tout en insérant l’extrémité libre dans le second oeillet. Assurez-
vous que les pattes en nylon munies d’oeillets ne vrillent pas.
Utilisez les attaches velcro pour maintenir l’arceau en place.
REMARQUE : Lors de montages consécutifs, vous pouvez laisser
les velcros attachés puis passer l’arceau dedans.
9. Une fois votre tente montée et solidement haubanée, installez
l’abside en face de la porte d’entrée de la tente et asseyez-
vous dans la tente pour accrocher l’abside aux boucles de
sangle situées juste sur la bordure extérieure de la fermeture
à glissière, sous le rabat de la porte. (Si vous restez debout à
l’extérieur de la tente pour accrocher l’abside, il vous sera plus
difficile de voir ce que vous faites.)
10. Une fois que l’abside est fixée à la tente, haubanez-la solide-
ment. Les boucles les plus proches de la tente doivent être hau-
banées aux mêmes piquets que les coins de la tente. Passez
simplement la boucle du coin de l’abside dans la boucle du coin
de la tente puis haubanez la boucle du coin de la tente. Utilisez
deux piquets pour haubaner la partie avant.
VENTILATION
Maintenir une ventilation suffisante à chaque utilisation. Laisser
ouverte la ventilation de la fermeture arrière, sauf en cas de vent
violent. La partie supérieure de la porte peut également rester
ouverte.
POUR ATTACHER LE TAPIS DE SOL EN OPTION
Un tapis de sol est disponible en option pour la tente Hilight. Les
bords de ce tapis de sol sont munis d’œillets renforcés que vous
pouvez utiliser pour attacher le tapis de sol à la tente. Attachez
une petite boucle de corde à chacun des œillets situés aux coins
du tapis de sol. Au moment d’amarrer la tente, enfilez cette boucle
par-dessus la patte d’amarrage de chaque coin de la tente. Le
tapis de sol peut également être utilisé comme bâche – utilisez
les œillets situés le long des bords pour la suspendre ou l’amarrer.
PRÉCAUTIONS D’UTILISATION ET ENTRETIEN
(Voir les iIlustrations jointes)
STOCKAGE ET TRANSPORT
(Voir les illustrations jointes)
AVERTISSEMENT
Black Diamond Equipment décline toute responsabilité quant aux
conséquences directes, indirectes ou accidentelles, ou quant à
tout autre type de dommage découlant ou résultant de l’utilisation
de ses produits. Vous êtes responsable de vos actes et de vos
activités ainsi que de toutes conséquences pouvant en résulter.
LIMITES DE GARANTIE
Nous garantissons pour une durée de un an à partir de la date
d’achat et seulement à l’Acheteur d’origine (Acheteur) que nos
produits (Produits) sont exempts de défauts de matériau et de
fabrication. Pour les lampes frontales, notre garantie est de trois
ans. Dans le cas où l’Acheteur découvrirait un vice caché, l’Ache-
teur devra renvoyer le Produit à l’adresse d’achat. Si cela n’est
pas possible, renvoyez-nous le Produit à l’adresse indiquée. Ce
Produit sera réparé ou échangé gratuitement. L’étendue de notre
responsabilité se limite à la présente Garantie et prend fin au terme
de la période de garantie applicable. Nous nous réservons le droit
d’exiger une preuve d’achat pour toutes les demandes d’applica-
tion de la Garantie.
Exclusions de garantie :
Sont exclus de cette Garantie l’usure normale du Produit (rayure
et abrasion des carres, usure des semelles, etc.), les modifications
ou les transformations non autorisées, l’utilisation incorrecte, l’en-
tretien inadéquat, les accidents, l’emploi abusif, la négligence, les
dommages, ou l’utilisation du Produit à des fins pour lesquelles il
n’a pas été conçu. La présente Garantie vous confère des droits
spécifiques et ne fait pas obstacle à l’application de la garan-
tie légale prévue par le Code Civil. À l’exception des clauses
expressément décrites dans la présente Garantie, nous déclinons
toute responsabilité en cas de dommages directs, indirects, acces-
soires, ou autres types de dommages découlant ou résultant de
l’utilisation du Produit. La présente Garantie exclut toute autre
garantie, explicite ou implicite, notamment, mais non limitative-
ment, toute garantie de qualité marchande ou d’adaptation à un
usage particulier (certains États/juridictions n’autorisent pas l’ex-
clusion ou la limitation de dommages accessoires ou consécutifs
ni la restriction de garantie implicite. Par conséquent, les exclu-
sions mentionnées ci-dessus peuvent ne pas vous concerner).
[DE]
GEBRAUCHSANLEITUNG
BLACK DIAMOND HILIGHT
AUFBAU
1. Breiten Sie das Zelt aus und öffnen Sie den Eingang vollständig.
Legen Sie die Stangen mit elastischem Schnappzug vor sich auf
BlackDiamondEquipment.com
North America: Black Diamond Equipment, Ltd.
2084 East 3900 South
Salt Lake City, UT 84124
Europe: Black Diamond Equipment AG
Hans-Maier-Straße 9
6020, Innsbruck, Austria
+
-
70º C (158º F)
-62º C (-80º F)
SILICONE
Front/Avant
2
3
AA
D
B
C
1
2
3
4
5
6
1
Small grommet in tent wall/
Oeillet dans la toile de la tente
Small grommet in tent floor/
Oeillet dans le plancher de la tente
den Boden und stellen Sie sicher, dass alle Steckverbindungen
vollständig eingerastet sind. Nicht vollständig eingerastete
Steckverbindungen können brechen. Öffnen Sie das Gestänge
nicht gewaltsam! Die einschnappenden Teile könnten die
Stangen beschädigen.
2. Stellen Sie zuerst die Stange für das Vordach auf. Stecken
Sie ein Ende der kurzen Stange durch die Schlaufe über dem
Reißverschluss des Eingangs unter dem Vordach. Führen Sie
die Stange am Innenzelt entlang und stecken Sie sie durch die
gleiche Schlaufe an der gegenüberliegenden Seite des Zeltes.
Stecken Sie beide Stangenenden durch die entsprechenden
kleinen Schlaufen am Vordach. Verwenden Sie die Ringe oder
Schlaufen am Vordach nicht für tragende Zeltstangen, sie
dienen nur dazu, die Stangen in Position zu halten.
3. Führen Sie ein Ende einer langen Stange durch den Eingang
bis zur Ecke an der Rückseite des Zeltes (A), wo sie einrastet.
Lassen Sie das Zelt flach liegen und befestigen Sie die Stange
mit dem dem Eingang nächstliegenden Klettverschluss. Biegen
Sie die Stange in der Mitte nach oben und befestigen Sie das
vordere Ende an der vorderen Ecke (B).
4. Stecken Sie die zweite lange Stange in die andere hintere Ecke.
Biegen Sie auch diese Stange in der Mitte nach oben und steck-
en Sie sie in die noch freie vordere Ecke (C,D).
5. Vergewissern Sie sich, da ss alle vier Stangenenden im
Inneren des Zeltes sicher in den dafür vorgesehenen Laschen
eingera stet sind. Befestig en Sie beide Stang en mit den
Klettverschlüssen entlang der Zeltoberseite.
6. Verankern Sie das Zelt bei jedem Aufbau sofort sorgfältig mit
Heringen im Boden. Schon der leichteste Windstoß könnte es
wegwehen und schweren Schaden anrichten.
Anleitungen zum Aufstellen für Optionale Windfänge
7. Breiten Sie den Windfäng aus und falten Sie die mit einer
Zugschnur zusammengehaltenen Stangensegmente ausein-
ander. Achten Sie darauf, dass alle Segmente richtig einras-
ten. Nicht vollständig eingerastete Segmente können brech-
en. FALTEN SIE DIE STANGENSEGMENTE NICHT IN EINER
WURFBEWEGUNG AUSEINANDER. Die Zeltstange kann bes -
chädigt werden, wenn Segmente ruckartig einrasten.
8. Nehmen Sie die Stange und platzieren Sie das eine Ende in
der Tülle im schwarzen Nylonband. Biegen Sie die Stange in
einem Bogen, so dass Sie das andere Ende in die Tülle auf der
gegenüberliegenden Seite einsetzen können. Biegen Sie die
Stange nicht zu stark, wenn Sie die Enden in die Tüllen einset-
zen. Die Stange lässt sich einfach biegen, wenn Sie das eine
Ende gegen den Boden oder die Seite Ihres Fußes drücken,
während Sie das andere Ende in die zweite Tülle einsetzen.
Stellen Sie sicher, dass das Nylonband vor allem am Ende mit
den Tüllen nicht verdreht ist. Verwenden Sie die Haken und
Schlaufen, um die Zeltstange zu fixieren.
HINWEIS: Sie können die Haken und Schlaufen für eine zukünftige
Verwendung des Zeltes geschlossen lassen, um die Zeltstange
einfach durchzufädeln.
9. Nachdem Sie Ihr Zelt aufgestellt und sicher abgespannt haben,
positionieren Sie den Windfang vor dem Zelteingang und set-
zen Sie sich in das Zelt hinein, um den Windfang mit dem
Reißverschluss oder den Haken an den Gurtbandschlaufen
direkt hinter dem Reißverschluss des Eingangs unter der
Markise zu befestigen. (Wenn Sie hierbei vor dem Zelt stehen,
ist es schwieriger zu sehen, was Sie tun.)
10. Nachdem Sie den Windfang am Zelteingang angebracht haben,
spannen Sie ihn sicher ab. Die Schlaufen in der Nähe der
beiden Zeltecken am Eingang sollten mit denselben Heringen
angepflockt werden. Legen Sie einfach die Schlaufe an der
Ecke des Windfangs über die Schlaufe der Zeltecke, und befes-
tigen Sie beide mit einem Hering. Verwenden Sie zwei Heringe
zum Befestigen der Vorderseite.
BELÜFTUNG
Gewährleisten Sie stets eine ausreichende Belüftung des Zeltes.
Lassen Sie den hinteren Belüftungsreißverschluss immer offen
und schließen Sie ihn nur bei starkem Wind. Der obere Teil des
Eingangs kann ebenfalls offen bleiben.

BEFESTIGUNG DER ALS ZUBEHÖR ERHÄLTLICHEN
ZELTUNTERLAGE
Für das Modell Hilight ist eine passende Zeltunterlage als Zubehör
erhätlich. An den Ecken der Zeltunterlage befinden sich verstärk-
te Befestigungsschlaufen, mit denen die Zeltunterlage am Zelt
fixiert werden kann. Ziehen Sie eine Kordelschlaufe durch die
Befestigungsschlaufen an den Ecken der Unterlage und legen Sie
diese beim Aufstellen über die Heringschlaufen an den Ecken des
Zeltes. Die Zeltunterlage kann auch als Bodenplane verwendet
werden. Spannen oder verankern Sie diese dafür mit Hilfe der
Befestigungsschlaufen an den Ecken.
PFLEGE UND WARTUNG
(Siehe Abbildungen)
LAGERUNG UND TRANSPORT
(Siehe Abbildungen)
WARNUNG
Black Diamond kann nicht verantwortlich gemacht werden für
direkte, indirekte oder zu fällig e Auswirkungen oder jedwede
möglichen Schäden, die aus dem Gebrauch unserer Produkte
hervorgehen. Sie sind selbst verantwor tlich für Ihr Handeln
und Ihre Unternehmungen and alle evtl. daraus resultierenden
Konsequenzen.
BEGRENZTE GEWÄHRLEISTUNG
Wir gewährleisten dem ursprünglichen Käufer, der das Produkt
au s dem Einzelhandel erworben hat (Kä ufer) für ein Jahr ab
Kaufdatum, dass unsere Produkte (Produkte) frei von Defekten
an Material und Ausführungsqualität sind. Die Garantie für unsere
Stirnlampen beträgt drei Jahre ab Kaufdatum. Entdeckt der Käufer
einen Defekt, sollte der Käufer das Produkt unverzüglich an das
Geschäft, in dem es erworben wurde, zurückgeben und keines-
falls weiterverwenden. Sollte dies nicht möglich sein, sollte der
Käufer das Produkt unverzüglich an die angegebene Adresse
schicken. Das Produkt wird nach unserem Ermessen entweder
repariert oder ersetzt. Dies ist der gemäss dieser Garantie gültige
Haftungsumfang. Nach Ablauf der gültigen Garantiefrist wird jegli-
che Haftung ausgeschlossen. Wir behalten uns das Recht vor, für
alle Gewährleistungsansprüche einen Kaufnachweis anzufordern.
Gewährleistungsausschluss:
Wir bieten keine Garantie gegen normale Abnutzung und
Verschleiss unserer Produkte (z. B. jegliche Abnutzung von
Skikanten, Schuhsohlen usw.). Bei unerlaubten Veränderungen,
unsachgemässer Verwendung und Wartung sowie bei Unfällen,
Missbrauch, Vernachlässigung, Beschädigung oder wenn das
Produkt zu einem Zweck verwendet wird, für den es nicht entwick-
elt wurde, ist jegliche Haftung ausgeschlossen. Gemäss dies-
er Gewährleistung haben Sie bestimmte Rechte, die je nach
Land, Staat oder Provinz variieren können. Über die in dieser
Gewährleistung ausdrücklich aufgeführte Haftung hinaus über-
nehmen wir keine Haftung für direkte, indirekte, zufällige oder
sonstige Schäden und Folgeschäden, die aus oder aufgrund der
Verwendung unserer Produkte entstehen. Diese Gewährleistung
gilt anstelle aller anderen Gewährleistungen, ausdrücklich oder
stillschweigend, einschliesslich aber nicht begrenzt auf die
implizierte Gewährleistung für die Handelsüblichkeit oder die
Verwendungsfähigkeit für einen bestimmten Zweck. (Einige
Länder, Staaten oder Provinzen lassen den Ausschluss oder die
Beschränkung der Haftung für direkte, indirekte, zufällige oder
sonstige Schäden und Folgeschäden nicht zu, so dass die oben-
genannten Ausschlussklauseln für Sie möglicherweise nicht oder
nicht in vollem Umfang zutreffen.)
[IT]
ISTRUZIONI PER L’USO
BLACK DIAMOND HILIGHT
SET UP
1. Stendete la tenda all’esterno ed aprite completamente la porta.
Svolgete le palerie che sono collegate tra loro con cordini
elastici, ed inserite tra loro gli inserti accertandovi che siano
ben collegati. Giunzioni collegate male, possono rompersi. Non
lanciate le palerie aperte! Gli inserti sbattendo tra loro potreb-
bero rompersi.
2. Installate per primi i pali del soffitto. Inserite una delle due parti
finali del palo corto, nell’asola sopra la zip della porta (sotto
il soffitto). Fate scorrere all’interno il palo fino a raggiungere
l’asola opposta al lato opposto infilandola. Non utilizzate queste
asole come punti di fissaggio al terreno, sono solo per le palerie.
3. Inserite ora la parte finale del palo lungo all’interno da un angolo
alla base della tenda nella parte posteriore (A). Fissate il palo
al primo gancio di fissaggio vicino alla porta. Flettete il palo
passandolo sotto il soffitto ed inseritelo nell’ angolo opposto (B).
4. Inserite il secondo palo lungo nell’altro angolo anteriore.
Flettetelo allo stesso modo ed infilatelo nell’angolo opposto
(C, D).
5. All’interno della tenda, accertatevi che tutti i terminali dei quat-
tro pali siano inseriti all’interno delle proprie asole di bloccaggio
sugli angoli. Controllate che ciascun palo sia ben fissato con i
ganci di bloccaggio al telo.
6. Fissate sempre la tenda al terreno immediatamente, ogni volta
che la montate. Anche un vento leggero, potrebbe trascinarla
via danneggiandola.
Istruzioni Per Il Montaggio dell’Abside Opzionale
7. Aprite l’abside e spiegate il palo dotato di cordini elastici,
assicurandovi che tutti I punti di giuntura siano impegnati.
Giunture non pienamente impegnate possono rompersi. NON
SCUOTERE O LANCIARE IL PALO QUANDO È MONTATO.
Il palo può danneggiarsi se le sezioni si uniscono e scattano
emettendo un suono simile ad un “crack”.
8. Prendete il palo e infilate l’estremità nel foro posto sulla fet-
tuccia nera in nylon e piegate il palo in modo che anche l’altra
estremità possa essere inserita nel foro dall’altro lato, for-
mando così un arco. Non piegate MAI eccessivamente il palo
quando mettete le estremità nei fori. Il palo si piega facilmente
spingendo un’estremità contro il terreno o il lato dei vostri piedi
per mantenere così il grado di flessibilità stabile mentre si infila
l’altra estremità. Assicuratevi che la fettuccia in nylon non sia
attorcigliata, soprattutto in corrispondenza dei fori. Utilizzate i
ganci e gli anellini di fissaggio per agganciare il palo.
Nota bene: Potete lasciare I ganci e gli anellini fissati e poi infilare il
palo successivamente.
9. Con la tenda montata e ben fissata, posizionate l’abside di
fronte all’apertura della tenda e sedetevici dentro per aggan-
ciare l’abside agli anellini posti giusto all’esterno della cerni-
era, sotto il telo. ( Se state al di fuori della tenda e tentate di
agganciare l’abside sarà difficile riuscire a vedere cosa state
facendo).
10. Una volta che l’abside è agganciato alla tenda, fissatelo per
bene. Gli anellini più vicini alla tenda dovrebbero essere fissati
allo stesso picchetto degli angoli della tenda. Semplicemente,
dovete far scivolare l’anellino d’angolo dell’abside sopra l’anel-
lino d’angolo della tenda e fissare quest’ultimo. Utilizzate due
picchetti per fissare il davanti.
VENTILAZIONE
Mantenete sempre all’interno della tenda una ventilazione ade-
guata. Lasciate sempre la zip della porta aperta, ad eccezione
delle giornate con vento forte. La parte alta della tenda può essere
lasciata aperta.
COME COLLEGARE IL PAVIMENTO OPZIONALE
Per la HiLight è disponibile un telo a pavimento opzionale. Lungo
l’orlo di questo pavimento sono disponibili delle asole rinforzate.
Queste vengono usate per collegare il catino alla tenda. Legate
gli angoli della tenda col pavimento utilizzando le fettucce corte.
Lasciate fuoriuscire queste fettucce all’esterno quando fissate i
picchetti alla tenda. Il pavimento può essere utilizzato anche come
riparo d’emergenza tipo tela cerata o tetto volante.
CURA E MANUTENZIONE
(Vedi le illustrazioni allegate)
CONSERVAZIONE E TRASPORTO
(Vedi illustrazioni allegate)
AVVERTENZE
Black Diamond Equipment non si ritiene responsabile di eventuali
conseguenze dirette, indirette o accidentali o qualsiasi altro tipo di
danneggiamento risultante dall’uso dei suoi prodotti. Siete voi gli
unici responsabili per ogni azione o attività inerente all’utilizzo o da
quello che ne deriva dall’utilizzo.
GARANZIA LIMITATA
Garantiamo per un anno dalla data di acquisto e solo nei confronti
di un originale acquirente , che i nostri prodotti sono esenti da
difetti nel materiale e nella lavorazione. Per le frontali la nostra
garanzia è di 3 anni. Se l’acquirente scopre un difetto, deve spe-
dire il prodotto al luogo d’acquisto. Nel caso ciò non sia possibile,
rispedisci a noi il prodotto all’indirizzo fornito. Il prodotto sarà
riparato e sostituito a nostra discrezione. Questa è l’estensione
della nostra responsabilità nell’ambito di questo tipo di garanzia, e
dopo il termine del periodo di applicazione della garanzia, questa
responsabilità si esaurisce. Ci riserviamo il diritto di richiedere
prove dellìacquisto per tutte le richieste di garanzia.
Esclusioni di Garanzia:
Non garantiamo i nostri prodotti per quanto riguarda il normale
logorio (tagli nelle lamine e abrasioni, logorio delle suole esteriori,
etc…). modifiche o alterazioni non autorizzate, utilizzo improprio,
impropria manutenzione, incidenti, negligenza, danni, o se il pro-
dotto è utilizzato per fini per i quali non è stato progettato. Questa
garanzia fornisce il cliente di specifici diritti legali; inoltre egli può
essere soggetto ad altri diritti che variano da stato a stato. Eccetto
i casi citati in tale garanzia, la Black Diamond non è responsa-
bile per danni diretti, indiretti, accidentali o di altro tipo derivanti
dall’utilizzo del prodotto. Questa garanzia sostituisce tutte le altre
garanzie, implicite o esplicite, incluse, ma non limitate a, implicite
garanzie di commerciabilità o idoneità per scopi particolari ( alcuni
stati non permettono l’esclusione o limitazione di danni incidentali/
consequenziali oppure permettono limitazioni alla durata di una
garanzia implicita. In tutti questi casi le sovracitate esclusioni non
sono valide.)
[ES}
INSTRUCCIONES DE USO
HILIGHT DE BLACK DIAMOND
MONTAJE
1. Extiende la tienda y abre la puerta por completo. Despliega
las varillas, cuyos segmentos van unidos entre sí mediante un
cordón elástico interior, y comprueba que todas las juntas han
entrado a tope. Si una junta no entra a tope puede romperse.
No agites las varillas para que se empalmen solas, pues se
pueden dañar.
2. Empieza por instalar la varilla de los toldillos. Inserta un extremo
de la varilla corta por el ollao que hay encima de la cremallera
de la puerta (bajo el toldillo). Desliza la varilla por el interior de la
tienda y pasa el extremo por el ollao idéntico que hay en el lado
opuesto. Los toldillos llevan un trozo de cinta con un pequeño
ollao. Mete cada extremo de la varilla en su ollao correspondi-
ente. No ates vientos a las cintas ni a los ollaos de los toldillos,
pues su única función debe ser mantener la varilla en su sitio.
3. Mete por la puerta un extremo de una de las varillas largas e
insértalo en el tope de la esquina trasera de la tienda (A). Fija
esa varilla con la primera tira de velcro que veas a partir de la
puerta y con la tienda plana sobre el suelo. Flexiona la varilla
hacia el techo e inserta su otro extremo en la esquina delantera
(B).
4. Inserta la segunda varilla en la otra esquina trasera. Flexiónala y
mete su otro extremo en la esquina delantera que queda (C, D)
5. Dentro de la tienda, comprueba que los cuatro extremos de las
varillas están bien metidos en sus topes. Asegura las varillas a
la tienda con las cintas de velcro.
6. Ancla siempre la tienda con firmeza, metiendo las clavijas inme-
diatamente después de montarla. La más ligera brisa puede
llevársela volando y causar daños graves.
Instrucciones de Montaje de los Avances Opcional
7. Despliega el avance y arma la varilla extendiéndola de mane-
ra que sus segmentos encajen unos dentro de otros. Los
segmentos van unidos por dentro con cordón elástico, pero
¡NO ARMES LA VARILLA SACUDIÉNDOLA PARA QUE SUS
SEGMENTOS ENCAJEN SOLOS! Se puede dañar si sus seg-
mentos se encajan de golpe .
8. Mete un extremo de la varilla por el ollao que encontrarás en
el trozo de cinta de nylon negra y flexiónala para poder meter
el otro extremo en el ollao del lado opuesto, de manera que
la varilla forme un arco. NUNCA flexiones la varilla más de la
cuenta cuando metas sus extremos en los ollaos. Te resultará
más sencillo hacerlo si, para sujetarla, apoyas un extremo
contra el suelo o un lado de tu pie mientras metes en su ollao el
otro extremo. Comprueba que las cintas de nylon que llevan los
ollaos no están giradas. Fija la varilla en su sitio con los velcros
provistos para ello.
Nota: Puedes dejar los velcros enganchados y, en posteriores
montajes, enhebrar la varilla por los bucles que forma el velcro.
9. Con la tienda montada y bien anclada, coloca el avance delante
de la puerta de la tienda y siéntate dentro de la tienda para
enganchar el avance a los bucles de cinta que hay al otro lado
de la cremallera, bajo la solapa exterior. (Si tratas de enganchar
el avance desde fuera de la tienda te resultará más difícil ver lo
que estás haciendo.)
10. Una vez tengas el avance unido a la tienda, fíjalo bien al suelo
con piquetas. Los bucles más próximos a la tienda deben
fijarse en las mismas piquetas que las esquinas de la tienda.
Pasa el bucle del avance sobre el bucle de la esquina de la
tienda y luego mete la piqueta. Para la parte delantera usa dos
piquetas.
VENTILACIÓN
Mantén una ventilación adecuada en todo momento. Salvo en
condiciones muy ventosas, deja siempre abierta la parte alta de la
cremallera de la puerta . También se puede dejar abierta la parte
alta de la puerta.
LONAS OPCIONALES PARA EL SUELO
Existe una lona a medida para el suelo de la tienda HiLight. Dicha
lona lleva unos ollaos reforzados a lo largo de los lados que
pueden usarse para unir dicho suelo a la tienda. Ata un bucle
pequeño de cuerda a cada uno de los ollaos de las esquinas
y pasa ese bucle sobre las cintas de las esquinas de la tienda
cuando metas las clavijas. La lona del suelo también puede usarse
como toldo. Usa los ollaos del borde para colgarga o anclarla.
CUIDADOS Y MANTENIMIENTO
(Ver las ilustraciones adjuntas )
ALMACENAMIENTO Y TRANSPORTE
(Consulta las ilustraciones adjuntas)
ADVERTENCIA
Black Diamond Equipment no se hace responsable ni de los daños
ni de las consecuencias, directas, indirectas o accidentales, que
resulten del uso de sus productos. Tú eres el responsable de tus
actos y actividades, así como de sus posibles consecuencias.
GARANTÍA LIMITADA
Garantizamos por un año desde la fecha de compra y sólo al com-
prador original (Comprador) que nuestros productos (Productos)
están libres de defectos tanto de material como de monta je.
Para las linternas frontales nuestra garantía es de tres años. Si
el Comprador descubre un defecto cubierto por la garantía, el
Comprador debe devolver el producto al lugar donde lo compró.
Si eso no fuera posible, que nos devuelva el Producto a nosotros
a la dirección indicada. El Producto será reparado o sustituido a
nuestro criterio. Este es el alcance de nuestra responsabilidad bajo
esta garantía y, cuando expire el periodo de garantía aplicable, se
extinguirá dicha responsabilidad. Nos reservamos el derecho de
requerir justificante de compra para cualquier reclamación relativa
a la garantía.
Exclusiones de la garantía:
Nuestra Garantía no cubre el desgaste normal de los Productos
(como cortes y abrasiones con los cantos de los esquís, desgaste
de suelas, etc.), así como tampoco modificaciones o alteraciones
no autorizadas, uso inadecuado, mantenimiento inadecuado, acci-
dentes, abusos, negligencias, daños o que el Producto se use para
un propósito para el que no fue diseñado. Esta Garantía te otorga
derechos legales específicos y puedes tener también otros dere-
chos que varían según el estado. Salvo en los casos expresamente
mencionados en esta Garantía, no seremos responsables por
daños directos, indirectos, accidentales o de otro tipo que resulten
del uso del Producto. Esta Garantía reemplaza a todas las demás
garantías, expresas o implícitas, incluidas, pero no limitadas a,
garantías implícitas de cualidad de ser comercializado o ser apto
para una finalidad determinada (algunos estados no permiten la
exclusión o limitación de daños o accidentales o sobrevenidos, o
permiten limitaciones sobre la duración de una garantía implícita,
de manera que es posible que las exclusiones arriba indicadas no
se apliquen en tu caso).
[JP]
Product specificaties
| Merk: | Black Diamond |
| Categorie: | Tent |
| Model: | HiLight 3P |
Heb je hulp nodig?
Als je hulp nodig hebt met Black Diamond HiLight 3P stel dan hieronder een vraag en andere gebruikers zullen je antwoorden
Handleiding Tent Black Diamond

26 Maart 2025
24 Maart 2025
24 Maart 2025

4 Maart 2025

4 Maart 2025

24 Februari 2025

14 Maart 2024

13 April 2023

22 Maart 2023

4 Maart 2023
Handleiding Tent
- Nigor
- Casaria
- Easy Camp
- Helsport
- Camp Trails
- High Peak
- Black Wolf
- Thermarest
- Grand Canyon
- Cabanon
- Thermex
- De Waard
- TOOLPORT
- Asaklitt
- Vango
Nieuwste handleidingen voor Tent
15 Juli 2025
14 Juli 2025
14 Juli 2025
14 Juli 2025
14 Juli 2025

6 Juli 2025
5 Juli 2025
2 Juli 2025
2 Juli 2025
1 Juli 2025