Barco R9004683 Handleiding
Barco Niet gecategoriseerd R9004683
Bekijk gratis de handleiding van Barco R9004683 (2 pagina’s), behorend tot de categorie Niet gecategoriseerd. Deze gids werd als nuttig beoordeeld door 79 mensen en kreeg gemiddeld 4.2 sterren uit 9 reviews. Heb je een vraag over Barco R9004683 of wil je andere gebruikers van dit product iets vragen? Stel een vraag
Pagina 1/2
ImagePRO-II Jr
Quick Start Guide
Visibly yours
Quick Install and Setup
Barco Events USA
3078 Prospect Park Drive
Rancho Cordova, CA
95670 • USA
ImagePRO-II User’s Guide
For complete details on all installation and operations procedures,
please refer to the ImagePRO-II User’s Guide.
P/N 26-0904104-00, Rev. 00
Getting Started
Setting Up System Parameters and Inputs
Setting Up Outputs
1.Connect power — Ensure that power is
properly connected to the ImagePRO-II Jr.
2.Connect inputs — Connect all input sources to
the ImagePRO-II Jr.
3.Connect outputs — Connect the output(s) on
the ImagePRO-II Jr to your projector(s) or other
target devices.
4.Turn on power — Turn on power to the
ImagePRO-II Jr, your projector(s), and to all
peripheral equipment.
5.Factory reset — If you are using the
ImagePRO-II Jr for the first time, or if you are
using an ImagePRO-II Jr that has just returned
from an event, perform a full factory reset to
restore default system configurations.
6Obtain the output format .— If the primary
output is connected to a DVI-D or
HD-15 connector, obtain the output’s
preferred resolution and frame rate using the
Output Menu. This is the format the
ImagePRO-II Jr uses. (Chapter 4, “Using
EDID Auto Config” section)
7.Adjust output format — If the primary output
is connected to the SDI connector, you can
adjust the output format manually to a SMPTE
standard if necessary. (Chapter 4, “Setting
Output Format” section)
8.Test output — Turn on a test pattern, verify
that you have an image, and make any
necessary adjustments. When complete, turn
off the test pattern. (Chapter 4, “Working with
Test Patterns” section)
9.Save output configuration — After
completing output adjustments, save the
output configuration.
10Position and adjust the image .— Use the to LED Setup Menu
position the image on the LED wall or other display device, scale
the image, adjust pan and zoom settings, and save your view.
(Chapter 4, “Positioning an Image on the Display” section.)
11Adjust and save system settings . — Adjust system parameters
such as VFD brightness, Ethernet settings, and HDCP
parameters. (Chapter 4, “Using the System Menu” section.)
12. Set and adjust inputs — Select inputs and make any necessary
adjustments to color balance, timings, sizing, etc. (Chapter 4,
“Configuring Inputs” section.)
13.Save input configuration — After adjusting an input, save the
input configuration. (Chapter 4, “Saving an Input Configuration”
section.)
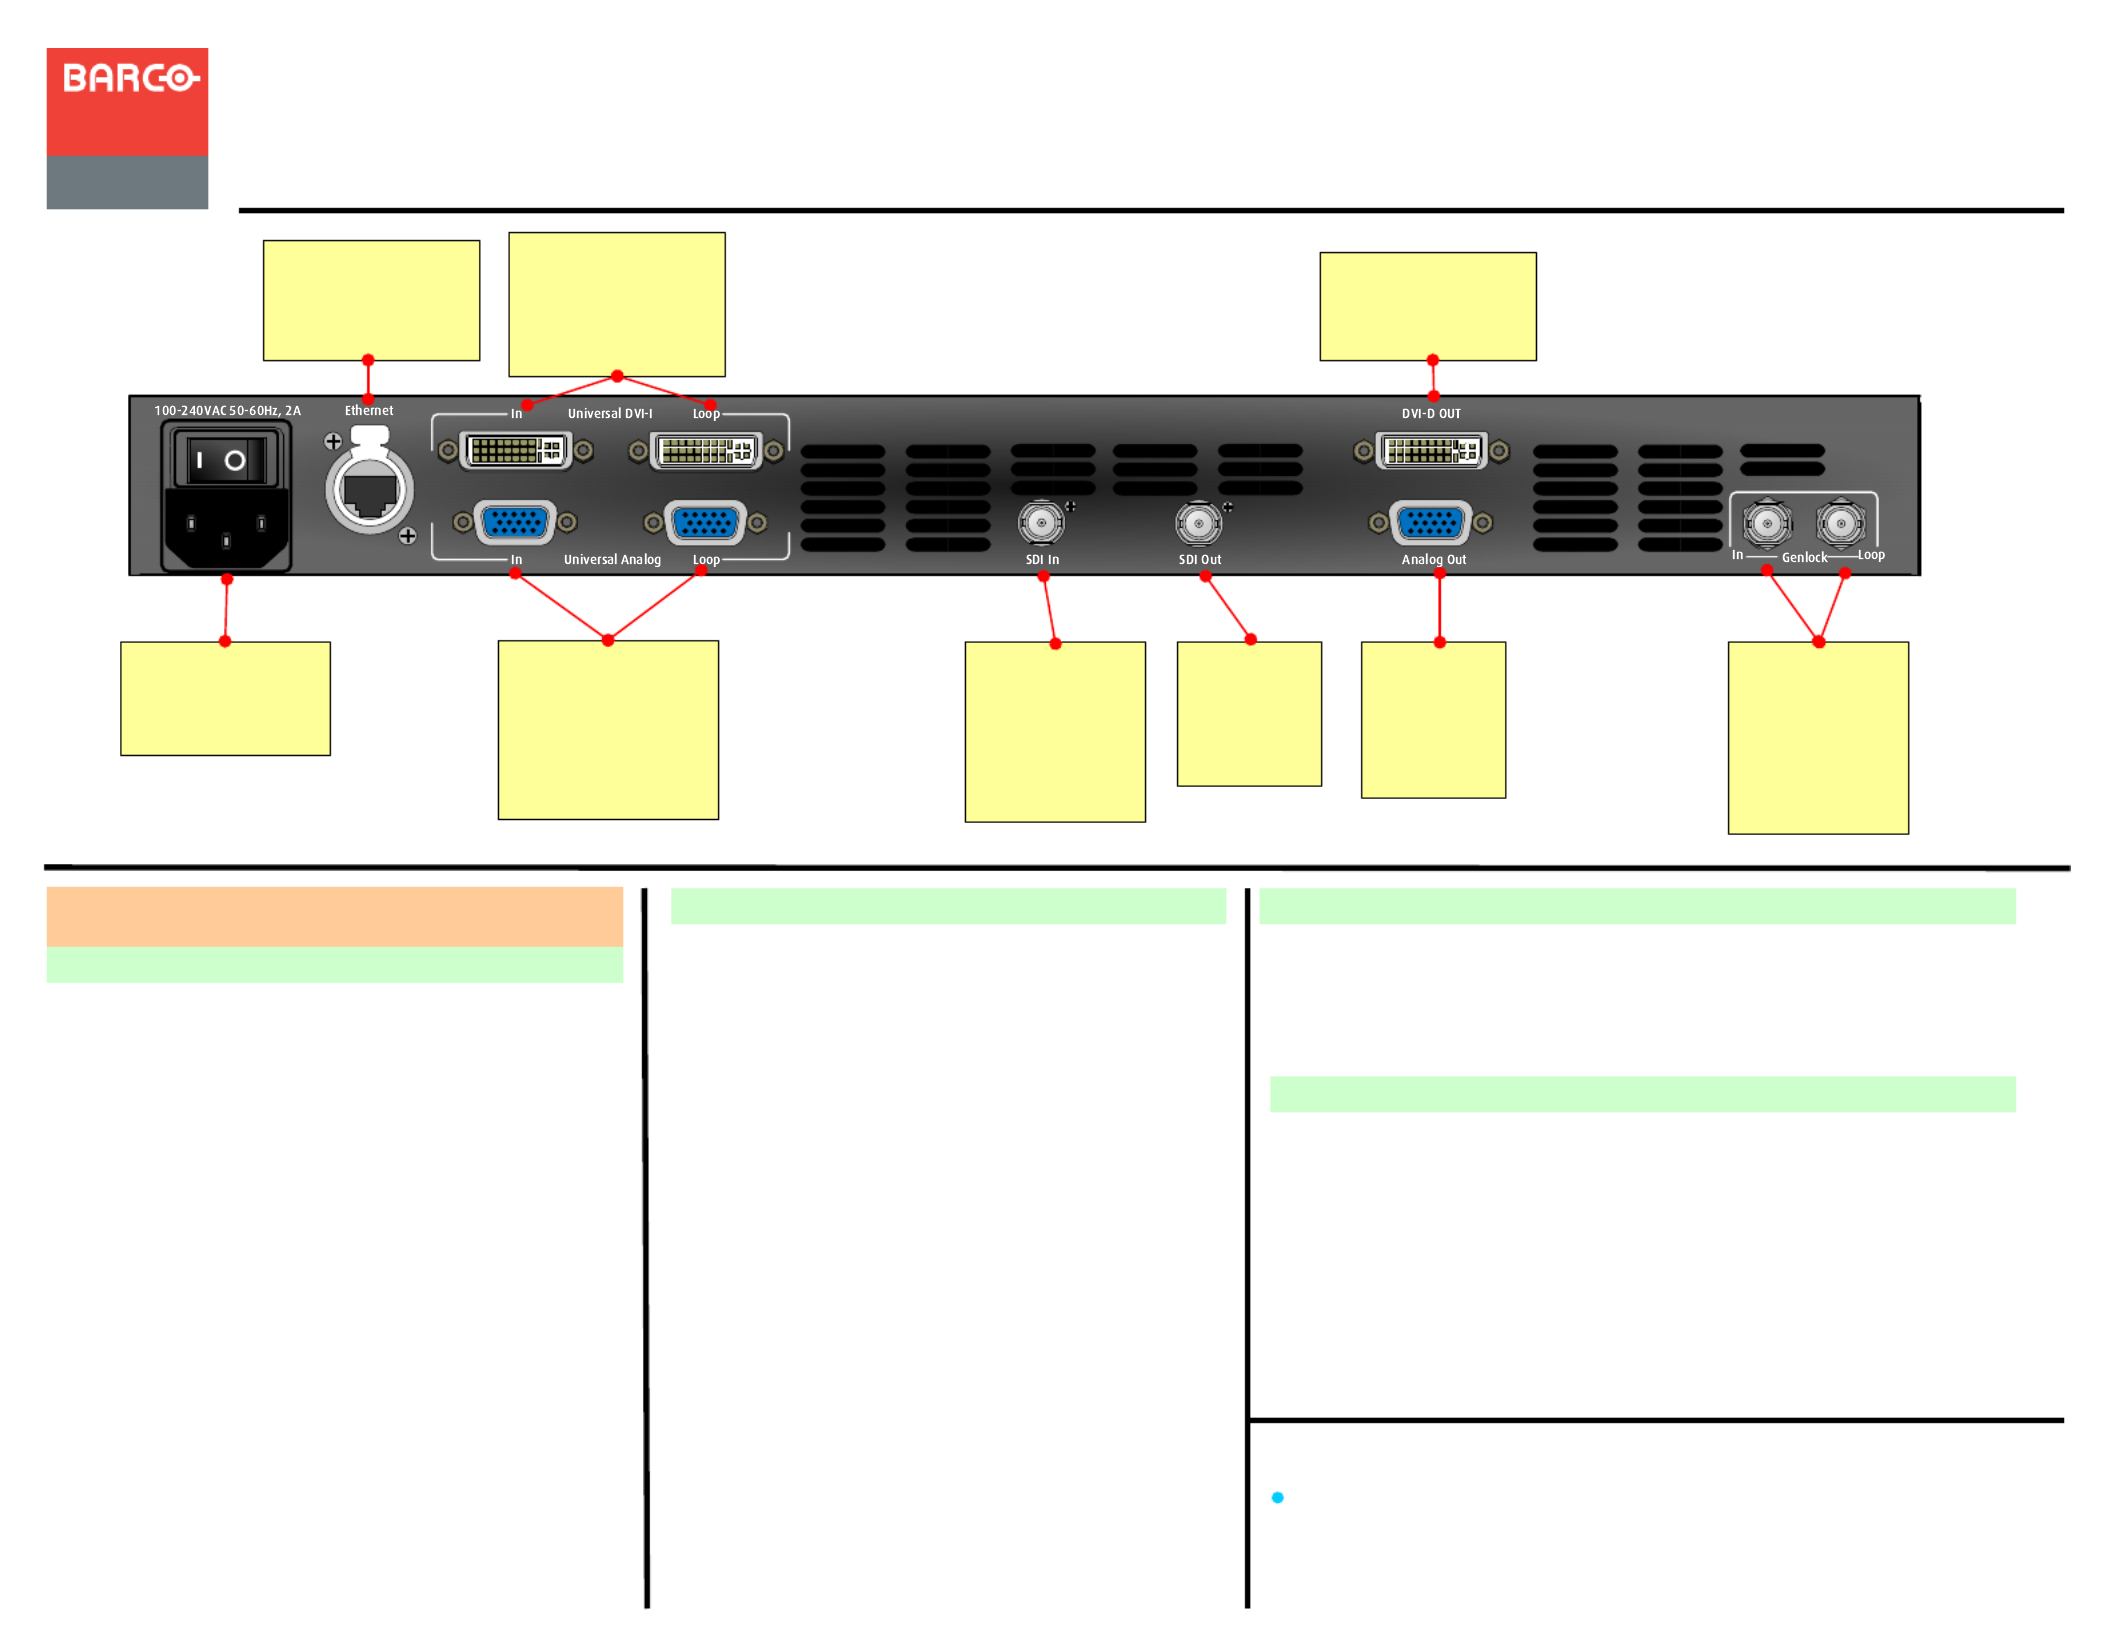
Setting up an LED Display
AC
Connect to AC
power source.
Ethernet
Connect to Web
Interface or
external controller.
Genlock
Connect a
reference signal
such as black
burst or
composite sync.
SDI Input
Connect to
SD-SDI or HD-
SDI sources.
DVI-I Input with
Loop-through
Connect to DVI
sources.
Analog Input
with Loop-
through
Connect to
HD-15 sources.
SDI
Output
Connect to
SDI display.
DVI-D Output
Connect to DVI
video display.
Analog
Output
Connect to
analog
display.
Website:
Phone:
EMEA Support
www.barco.com/support/eSupport.aspx
0800900410
Phone:
Fax:
Technical Support:
Websites:
+1 (916) 859-2500
+1 (916) 859-2515
+1 (866) 374-7878
www.barco.com
www.events.barco.com
ETHERNET
Product specificaties
| Merk: | Barco |
| Categorie: | Niet gecategoriseerd |
| Model: | R9004683 |
Heb je hulp nodig?
Als je hulp nodig hebt met Barco R9004683 stel dan hieronder een vraag en andere gebruikers zullen je antwoorden
Handleiding Niet gecategoriseerd Barco

24 Mei 2025
12 Mei 2025
12 Mei 2025
12 Mei 2025
12 Mei 2025
2 April 2025
23 Juni 2024
8 April 2024
22 Juni 2023
3 Juni 2023
Handleiding Niet gecategoriseerd
Nieuwste handleidingen voor Niet gecategoriseerd
23 Juli 2026
23 Juli 2026
23 Juli 2026
23 Juli 2026
23 Juli 2026
23 Juli 2026
22 Juli 2026
22 Juli 2026
22 Juli 2026
22 Juli 2026