Atlona AT-HDVS-CAM-HDMI Handleiding
Atlona Video conferentie systeem AT-HDVS-CAM-HDMI
Bekijk gratis de handleiding van Atlona AT-HDVS-CAM-HDMI (8 pagina’s), behorend tot de categorie Video conferentie systeem. Deze gids werd als nuttig beoordeeld door 25 mensen en kreeg gemiddeld 4.9 sterren uit 4 reviews. Heb je een vraag over Atlona AT-HDVS-CAM-HDMI of wil je andere gebruikers van dit product iets vragen? Stel een vraag
Pagina 1/8
Installation Guide
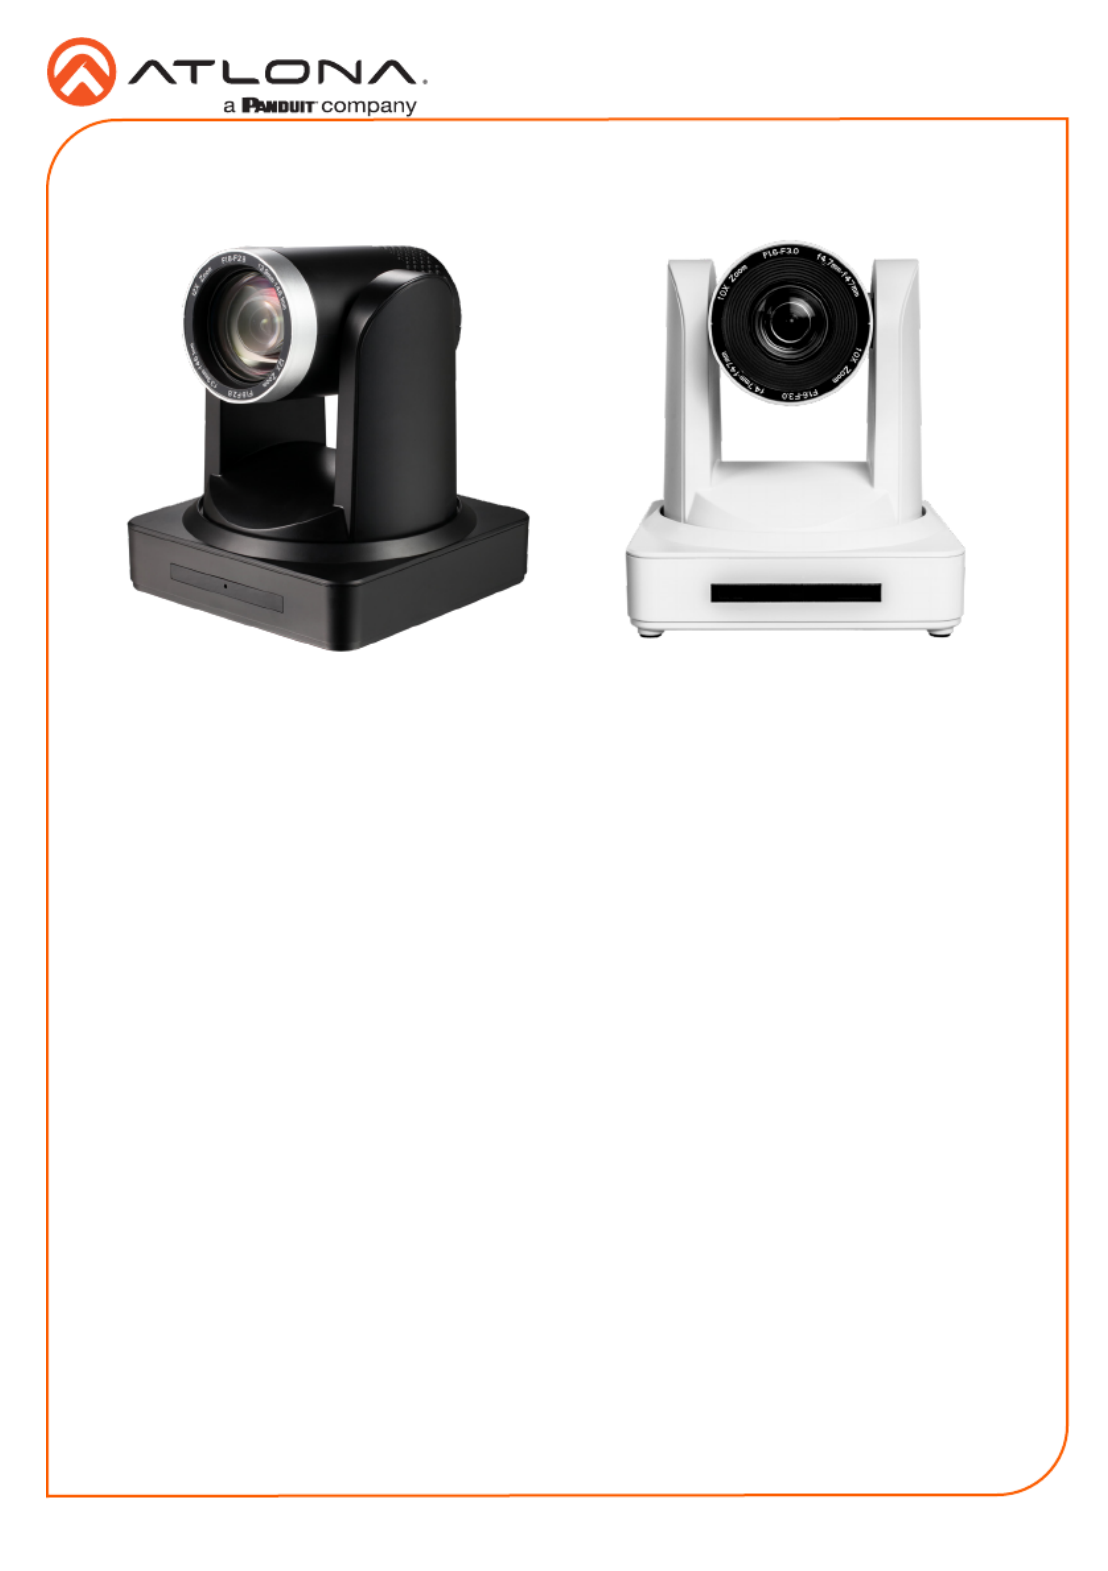
AT-HDVS-CAM-HDMI-BK and AT-HDVS-CAM-HDMI-WH
1
PTZ Camera with HDMI and USB Output
AT-HDVS-CAM-HDMI-BK and AT-HDVS-CAM-HDMI-WH
The Atlona AT-HDVS-CAM-HDMI is an enterprise-grade PTZ camera designed for use in video
conferencing and other applications such as lecture capture and distance education. It features
an HDMI output, as well as a USB 2.0 interface for video and camera control. Simultaneous
video output is available through two interfaces. Through USB, the HDVS-CAM-HDMI seamlessly
integrates with the Omega™ Series for a complete, automated conferencing system that includes
AV and USB extension. The HDMI output is ideal for use with a video conferencing codec, lecture
capture appliance, or PC equipped for video capture. The HDVS-CAM-HDMI delivers high perfor-
mance, professional-quality imaging with video resolutions up to 1080p @ 60 Hz over HDMI and
1080p @ 30 Hz for USB 2.0, as well as fast and accurate auto-focusing, and a fast yet quiet pan
and tilt mechanism. This PTZ camera is ideal for a wide range of small to medium-sized meeting
spaces, classrooms, training rooms, and many other environments. The HDVS-CAM-HDMI is
available in black or white.
1 x AT-HDVS-CAM-HDMI-BK or
AT-HDVS-CAM-HDMI-WH
1 x Wall mounting plate
1 x 1/4 20OUNC screws
1 x IR Remote Control
1 x USB A cable
1 x VISCA to RS-232 DB-9 adapter
2 x AAA battery
1 x Installation Guide
Package Contents
Product specificaties
| Merk: | Atlona |
| Categorie: | Video conferentie systeem |
| Model: | AT-HDVS-CAM-HDMI |
| Kleur van het product: | Zwart |
| Gewicht: | 1400 g |
| Breedte: | 150 mm |
| Diepte: | 150 mm |
| Hoogte: | 167.5 mm |
| Stroom: | 1 A |
| Ondersteunde video-modi: | 720p, 1080i, 1080p |
| Type stroombron: | AC |
| Minimale belichting: | 0.5 Lux |
| Maximale beeldsnelheid: | 60 fps |
| Inclusief AC-adapter: | Ja |
| Aantal USB 2.0-poorten: | 1 |
| Aantal HDMI-poorten: | 1 |
| Aantal Ethernet LAN (RJ-45)-poorten: | 1 |
| Diafragma (F-F): | 1.3 - 3 |
| Brandpuntbereik: | 4.7 - 47 mm |
| DC voltage input: | 12 V |
| Omvang optische sensor: | 1/2.8 " |
| Aansluiting voor netstroomadapter: | Ja |
| Megapixels: | 2.07 MP |
| Type beeldsensor: | CMOS |
| Maximale videoresolutie: | 1920 x 1080 Pixels |
| HD type: | Full HD |
| RS-232 port: | 1 |
| Ondersteunde grafische resoluties: | 176 x 144,320 x 180,320 x 240,352 x 288,640 x 360,640 x 480 (VGA),720 x 576,800 x 600 (SVGA),960 x 540,1024 x 576 (WSVGA),1024 x 768 (XGA),1280 x 720 (HD 720),1920 x 1080 (HD 1080) |
| Temperatuur bij opslag: | -10 - 60 °C |
| Luchtvochtigheid bij opslag: | 20 - 95 procent |
| Signaal/ruis-verhouding: | 55 dB |
| Scherpstellen: | Automatisch/handmatig |
| PTZ control: | Ja |
| Ondersteunde protocollen: | VISCA, Pelco-D, Pelco-P |
| Pan bereik: | -170 - 170 ° |
| Stroomverbruik (typisch): | 12 W |
| Bedrijfstemperatuur (T-T): | -10 - 50 °C |
| Relatieve vochtigheid in bedrijf (V-V): | 20 - 80 procent |
| Bereik kantelhoek: | -30 - 90 ° |
| Code geharmoniseerd systeem (HS): | 85258900 |
| Groothoekstand kijkhoek (normale modus): | 60.9 ° |
| Telestand kijkhoek (normale modus): | 6.43 ° |
| Tiltsnelheid (max): | 80 °/sec |
| Pansnelheid (max): | 180 °/sec |
| Tiltsnelheid (min): | 0.1 °/sec |
| Pansnelheid (min): | 0.1 °/sec |
| Vermogensverdeler afmetingen (BxDxH): | 50 x 94 x 32.05 mm |
Heb je hulp nodig?
Als je hulp nodig hebt met Atlona AT-HDVS-CAM-HDMI stel dan hieronder een vraag en andere gebruikers zullen je antwoorden
Handleiding Video conferentie systeem Atlona

25 September 2024
12 Juli 2023
12 Juli 2023
12 Juli 2023
Handleiding Video conferentie systeem
Nieuwste handleidingen voor Video conferentie systeem
1 April 2026
17 Maart 2026
12 Maart 2026
6 Maart 2026
3 Maart 2026
1 Maart 2026
23 Februari 2026
24 December 2025
23 December 2025
17 December 2025