Artusi CAEH1 Handleiding
Artusi Niet gecategoriseerd CAEH1
Bekijk gratis de handleiding van Artusi CAEH1 (2 pagina’s), behorend tot de categorie Niet gecategoriseerd. Deze gids werd als nuttig beoordeeld door 45 mensen en kreeg gemiddeld 4.8 sterren uit 2 reviews. Heb je een vraag over Artusi CAEH1 of wil je andere gebruikers van dit product iets vragen? Stel een vraag
Pagina 1/2
BUILT-IN ELECTRIC HOB
INSTALLATION AND OPERATION MANUAL
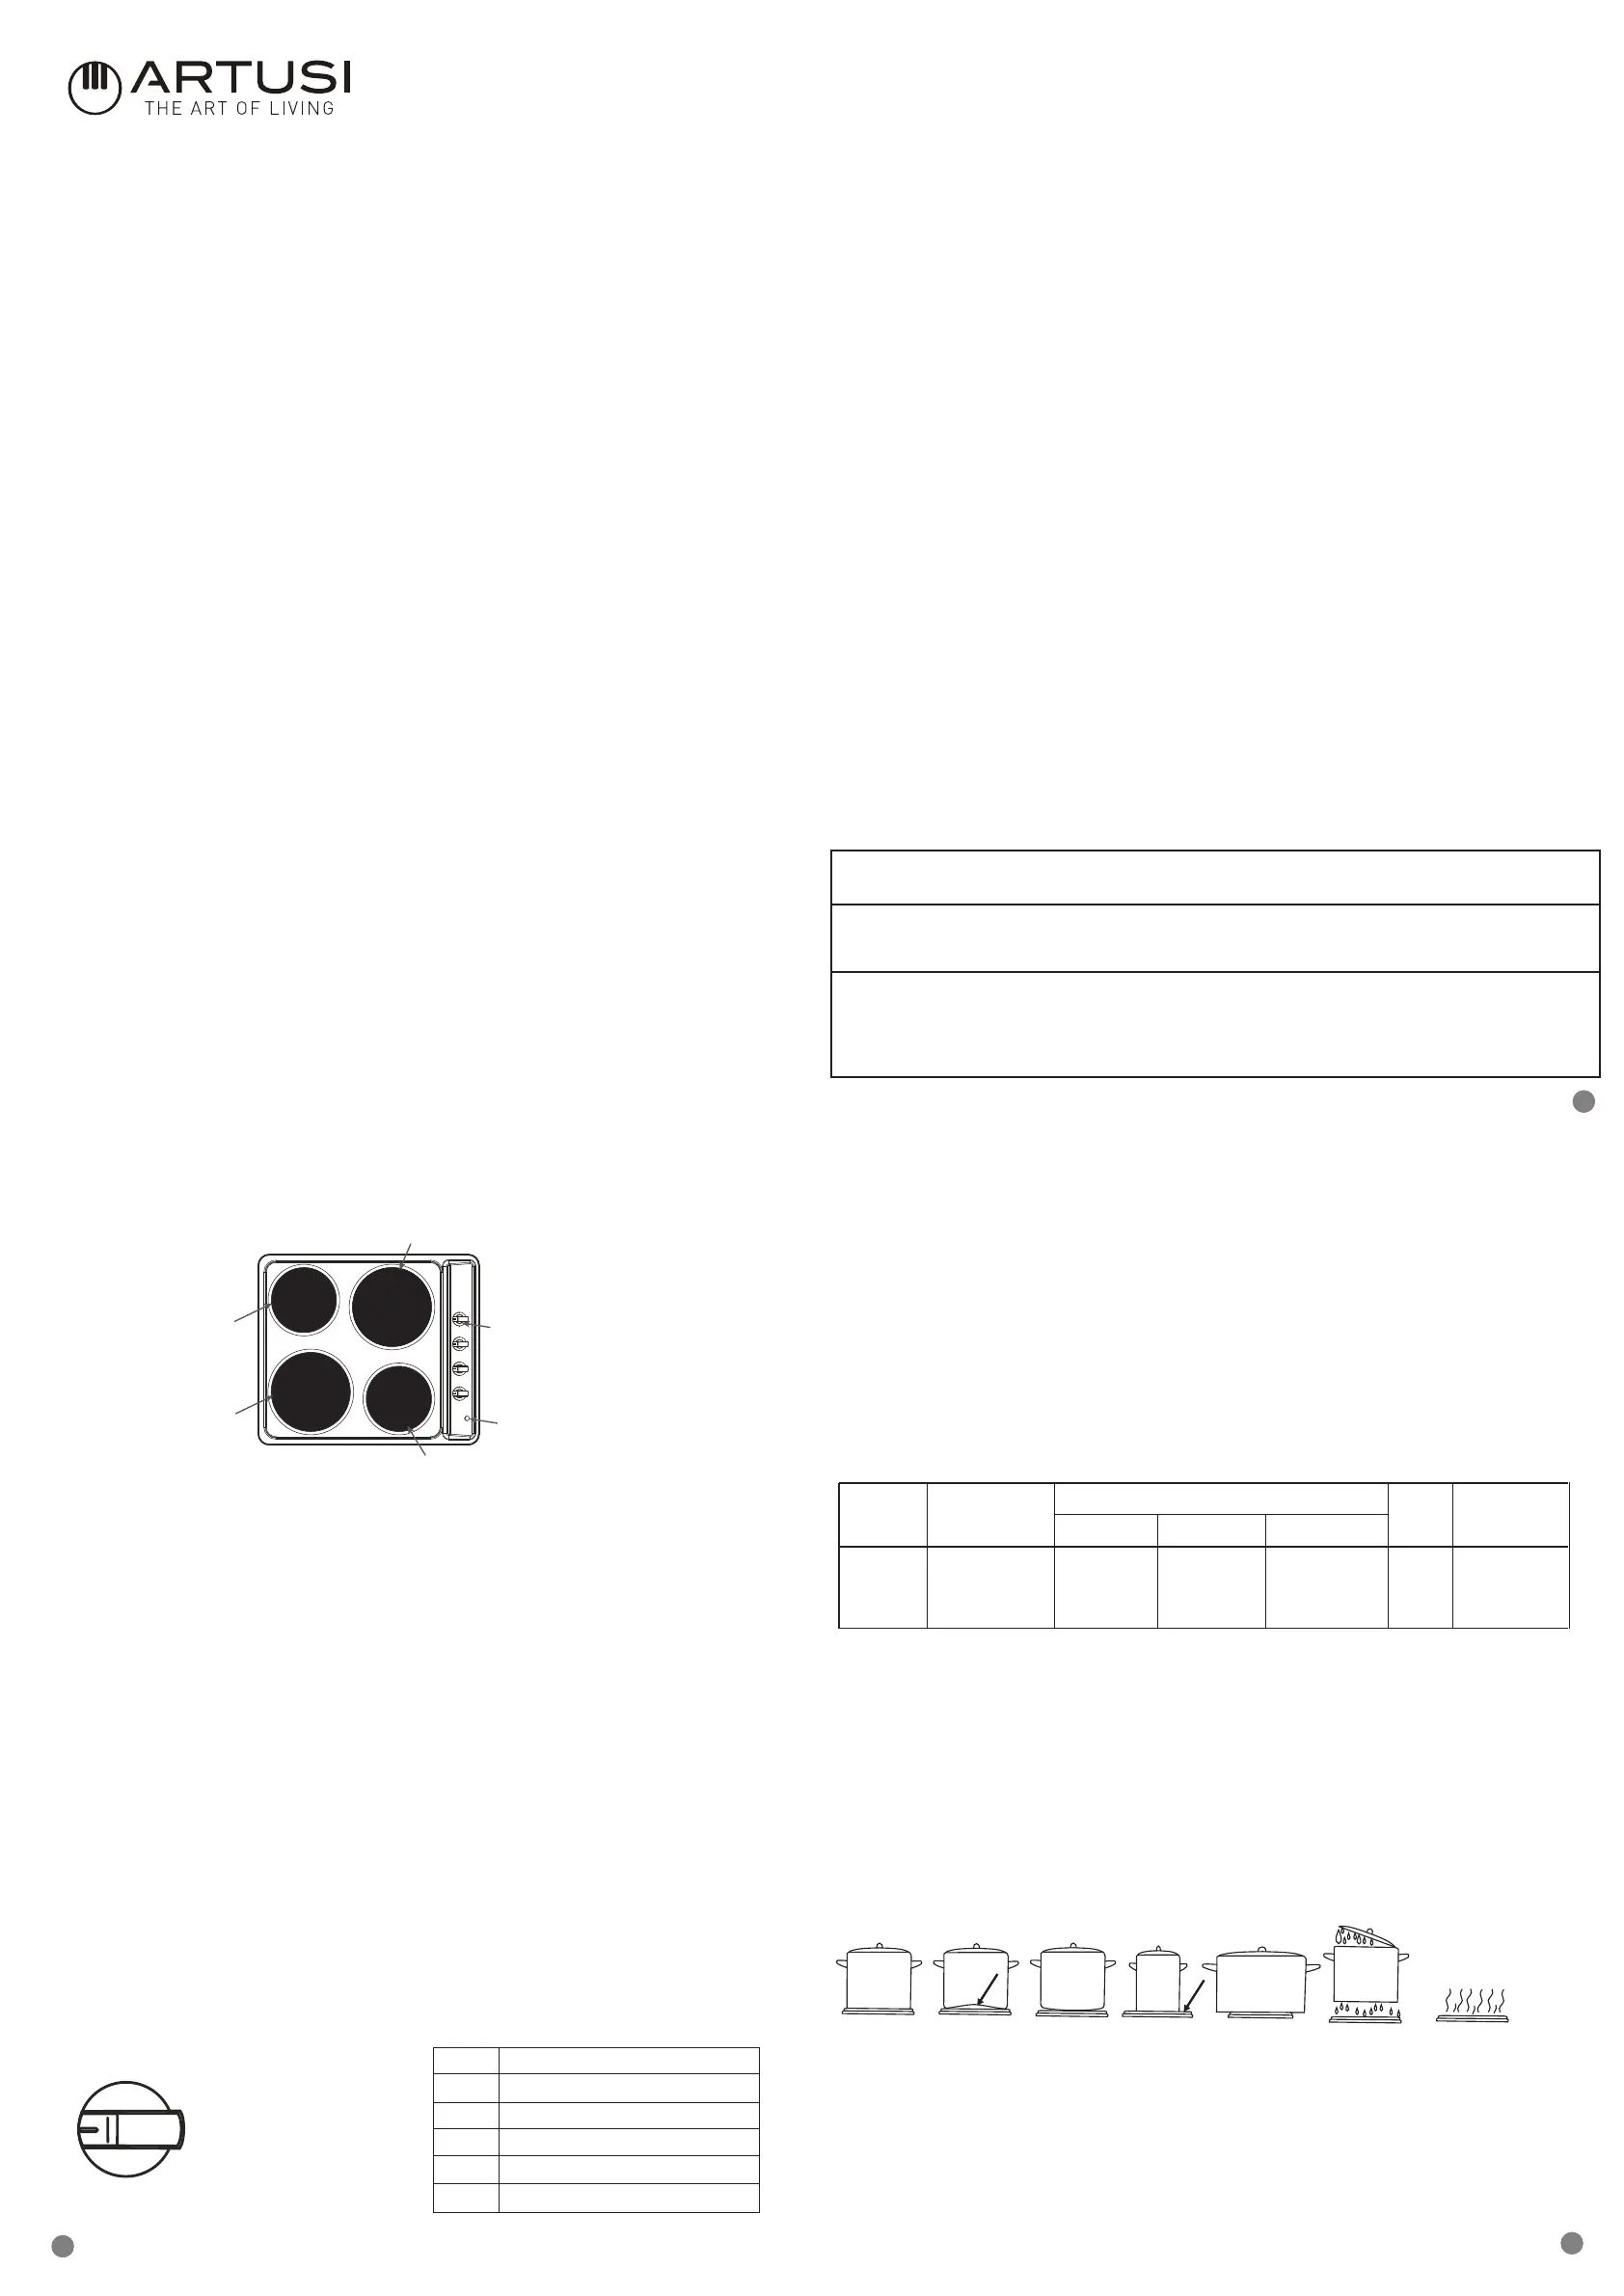
Description of the hot plates
Use
Directions for Use
Small Plate
Large Plate
Knob
Indicator Light
Red Spot
Large Plate
3 Cooking soups ,larger dishes
1 MIN.Warming up
2 Stewing vegetables,slow cooking
4 Slow frying
5-6 Grilling meat,fish
0 Switch off
Technical Data
ModelPower Supply
Electric Plate Power(W)
Size
Built-in Hole Size
1000
AC 220-240 V
50Hz
580X78
557(L)X477(W)
145mm
Small Plate
500X
2000
(Red) 185mm
1500
185mm
0
1
2
3
4
5
6
Good Bad Bad Bad Bad Bad Bad
(recessed base) (convex base) (undersize) (oversize) (moisture on hotplate) (no Pan)
Cod:0070302043
IMPORTANT NOTICE
Please register your warranty card and return the enclosed certificate of guarantee, duly
dated and signed.A duplicate data label and wiring diagram are contained in this booklet.
Please keep these in a safe place.The manufacturer shall not be held responsible for any
inaccuracies in this instruction booklet due to printing errors and the designs in the diagrams
are purely indicative.The manufacturer also reserves the right to make any modifications to
the products as may be considered necessary or useful, without jeopardising the main
function or safety features of the products.
1. Do not touch the appliance with wet hands.
2. Do not operate the appliance when barefoot.
3. Do not allow children to operate the hob.
4. Please disconnect the power supply before any maintenance and cleaning.
5. When the hob is working, the temperature of the hob top increases. Please do not touch and
keep children away from it.
6. A steam cleaner must not be used to clean the appliance.
7. The appliance is not intended to be operated by means of an external timer or separate
remote-control system.
8. The power supply should use H05VV-F.
9. The hob must be built into a heat-resistant cabinet. Smoke may be visible when first used – this
is normal. Please leave on for a few minutes to burn off excess oils used during manufacture.
Operation
The electric plates can either be standard or rapid type. The latter feature a red spot in the centre.
According to requirements, the plates can be adjusted by turning the knobs either clockwise or
anti-clockwise to any of the 6 positions besides the 0 position (Off). The higher the number, the
greater the output of heat (see table below). When using rapid plates, a thermostat automatically
reduces the power when the selected temperature is reached and the plate cycles intermittently to
keep a constant cooking temperature. The indicator light is a signal that the electric plates are
switched on.
The level of heat can be adjusted gradually by turning the appropriate knob to the right or left.
The indicator light can be found on the control panel – please see above diagrams.
An appropriately sized pan saves energy.
The correct pan should have a thick, flat base, with a diameter equal to the plate diameter,
so that heat is transferred more efficiently.
Advice on the Use of Electric Plates
Never leave the plates on without pans on them, or with empty pans and never use the
plates to heat crockery. Switch on the plates after having set the pans on them.
Once switched off, the plates remain warm for a while, do not touch.
Switch off the heating plate before removing the pans.
Pans
- Use pans with flat bottoms. Uneven or thin bottoms will waste energy and are slow to
cook.
- Smaller pans will waste energy.
- Do not use oversized pans. More than 50mm overhang can cause components to
overheat and cause fine cracks in enamel or even damage heating elements.
- Use only dry pans. Do not place wet or condensated items (eg. lids) on the hotplates.
Use
- Do not use pots and pans that are unsteady and likely to rock or overturn.
- Do not operate the hob for an extended time without a pan on the hotplate.
CAEH1
CAEH1
1
2
3
Please read the instruction manual carefully before operating your new hob.
Dear Owner: Thank you for purchasing our cooktop which is designed to give you many years of
cooking pleasure. Before using your new appliance please read the user's manual carefully and
keep it in a safe place for future reference.
THIS APPLIANCE MUST BE INSTALLED ONLY BY A QUALIFIED PERSON IN
INSTRUCTIONS PROVIDED. THE MANUFACTURER DECLINE ALL RESPONSIBILITY FOR
IMPROPER INSTALLATION WHICH MAY HARM PERSONS AND ANIMALS OR CAUSE
DAMAGE TO PROPERTY. THE APPLIANCE MUST BE USED ONLY FOR THE PURPOSE
FOR WHICH IT WAS EXPRESSLY DESIGNED. ANY OTHER USE (e.g. HEATING ROOMS) IS
CONSIDERED TO BE IMPROPER AND MANUFACTURER DECLINES ALL RESPONSIBILITY
FOR DAMAGE RESULTING FROM IMPROPER AND IRRESPONSIBLE USE.
Danger of fire: Do not store items on the cooking surfaces.
CAUTION: The cooking process has to be supervised. A short term
cooking process has to be supervised continuously.
WARNING: Unattended cooking on a hob with fat or oil can be
dangerous and may result in a fire.NEVER try to extinguish a fire
with water, but switch off the appliance and then cover flame e.g.
with a lid or a fire blanket.
SAFETY WARNING
1
. Please check the built-in electric hob's integrity after opening the package. If there are any
problems please refer to the supplier.
2. Do not throw the package materials (plastic bag, foam, nails, package etc) in a place where
children can easily access. Please dispose of packaging in an environmentally friendly
manner.
3. Do not change the wiring under any circumstances.
4. Dispose of the appliance in an environmentally friendly manner.
5. If the supply cord is damaged,it must be replaced by the manufacturer its service agent or
similarly qualified persons in order to avoid a hazard.
6. The appliance is not to be used by persons (including children) with reduced physical,
sensory or mental capabilities, or lack of experience and knowledge, unless they have been
given supervision or instruction.children being supervised not to play with the appliance.
7. Do not stare at the hob elements when the appliance is working.
8. Accessible parts may become hot during use. To avoid burns young children should be
kept away
9. WARNING: If the surface is cracked, switch off the appliance to avoid the possibility of
electric shock, for hob surfaces of glass-ceramic or similar material which protect live parts
10.Shall state a steam cleaner is not be used.
11.Metallic objects such as knives, forks, spoons and lids should not be placed on the hob
surface since they can get hot.
12. CAUTION:The surface temperature exceeds 95°C.To avoid a hazard,under bench access
must be restricted.Refer to the installation instructions.
13. WARNING:The appliance and its accessible parts become hot during use. Care should be
taken to avoid touching heating elements.Children less than 8 years of age shall be kept
away unless continuously supervised.
14.The appliance is not intended to be operated by means of an external timer or separate
remote-control system.
15.WARNING: Use only hob guards designed by the manufacturer of the cooking appliance
or indicated by the manufacturer of the appliance in the instructions for use as suitable or hob
guards incorporated in the appliance. The use of inappropriate guards can cause accidents.
V20190830
Product specificaties
| Merk: | Artusi |
| Categorie: | Niet gecategoriseerd |
| Model: | CAEH1 |
Heb je hulp nodig?
Als je hulp nodig hebt met Artusi CAEH1 stel dan hieronder een vraag en andere gebruikers zullen je antwoorden
Handleiding Niet gecategoriseerd Artusi

15 Augustus 2025
15 Augustus 2025
10 Juni 2025
10 Juni 2025
24 Maart 2025
24 Maart 2025
17 Mei 2024
17 Mei 2024
19 Maart 2024
18 Maart 2024
Handleiding Niet gecategoriseerd
Nieuwste handleidingen voor Niet gecategoriseerd
8 Juni 2026
8 Juni 2026
8 Juni 2026
8 Juni 2026
8 Juni 2026
8 Juni 2026
8 Juni 2026
8 Juni 2026
8 Juni 2026
8 Juni 2026