Amer AMRDCP100KIT Handleiding
Amer Flat panel steun AMRDCP100KIT
Bekijk gratis de handleiding van Amer AMRDCP100KIT (2 pagina’s), behorend tot de categorie Flat panel steun. Deze gids werd als nuttig beoordeeld door 25 mensen en kreeg gemiddeld 4.7 sterren uit 6 reviews. Heb je een vraag over Amer AMRDCP100KIT of wil je andere gebruikers van dit product iets vragen? Stel een vraag
Pagina 1/2
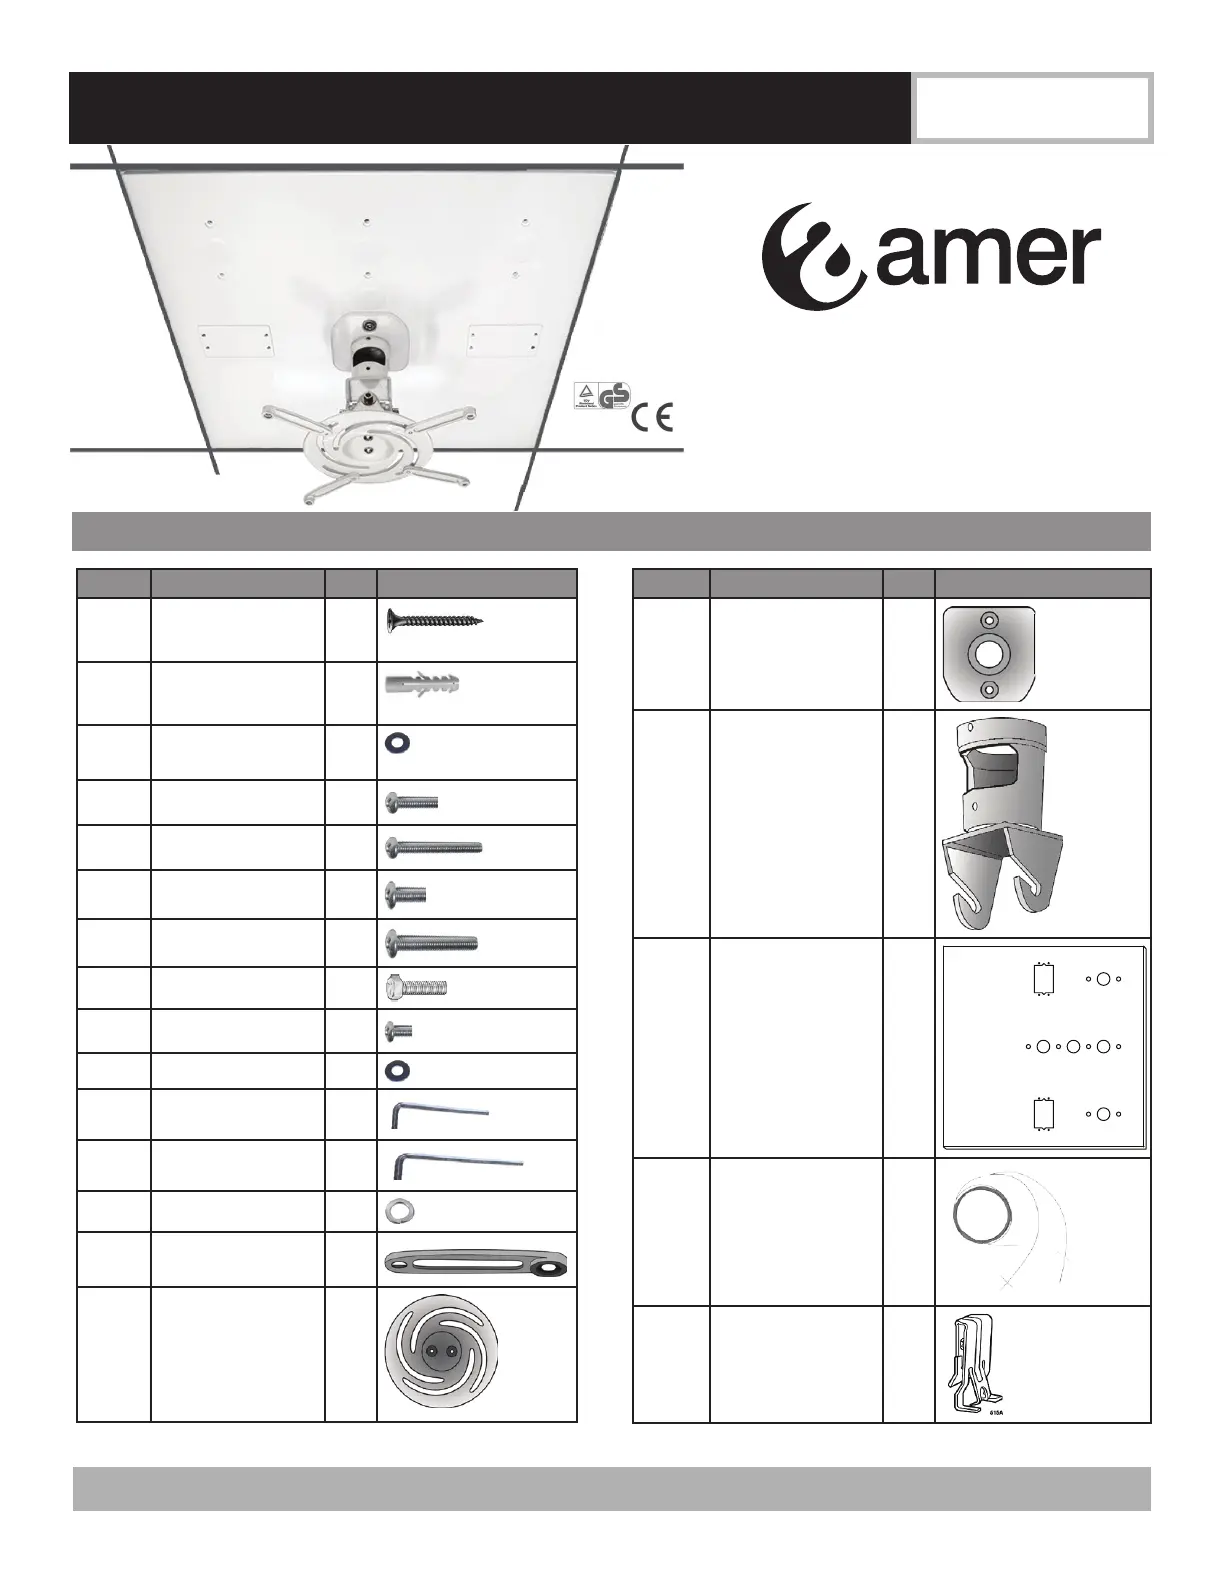
Installation & Assembly:Universal Drop Ceiling Mount
Model Number:
AMRDCP100KIT
IMPORTANT! Read instruction sheet be-
fore you start installation and assembly.
Before you start make sure all parts listed
are included with your product.
Part #Parts DescriptionQty.Part Image
AM5x45 Drywall
Screw
2
Not used with 2x2 plate
BPlastic Anchor2
Not used with 2x2 plate
CM6.5 Washer2
Not used with 2x2 plate
DM4x16 screw4
EM4x40 screw4
FM6x16 screw4
GM6x40 screw4
H8MM hex bolts2
IM5x16 arm screw4
JM5 washer4
KS=3mm Allen
wrench
1
LS=6mm Allen
wrench
1
MM5 washer4
NArm4
OUniversal Spider1
Part #Parts DescriptionQty.Part Image
PMount plate1
QMiddle Piece1
RCeiling Plate1
S
Caddy® Speed Link
1
THold Down Clips 2
Parts List
www.amer.comFor assistance, call 1-800-241-1644
Product specificaties
| Merk: | Amer |
| Categorie: | Flat panel steun |
| Model: | AMRDCP100KIT |
| Kleur van het product: | Wit |
| Gewicht: | 4070 g |
| Breedte: | 609.6 mm |
| Diepte: | 609.6 mm |
| Hoogte: | 218 mm |
| Montagewijze: | Plafond |
| Maximale gewichtscapaciteit: | 13.61 kg |
| Draaihoek: | 360 ° |
| Bereik kantelhoek: | 0 - 180 ° |
Heb je hulp nodig?
Als je hulp nodig hebt met Amer AMRDCP100KIT stel dan hieronder een vraag en andere gebruikers zullen je antwoorden
Handleiding Flat panel steun Amer

7 Februari 2024
Handleiding Flat panel steun
Nieuwste handleidingen voor Flat panel steun
10 Juli 2026
4 Juli 2026
30 Juni 2026
29 Juni 2026
29 Juni 2026
26 Juni 2026
26 Juni 2026
26 Juni 2026
26 Juni 2026
24 Juni 2026