Xantech J-BOX BLAST-IR Handleiding

Xantech Flitser J-BOX BLAST-IR

Lees hieronder de 📖 handleiding in het Nederlandse voor Xantech J-BOX BLAST-IR (4 pagina's) in de categorie Flitser. Deze handleiding was nuttig voor 6 personen en werd door 2 gebruikers gemiddeld met 4.5 sterren beoordeeld

Pagina 1/4
- 1 -
INSTALLATION INSTRUCTIONS
380-20
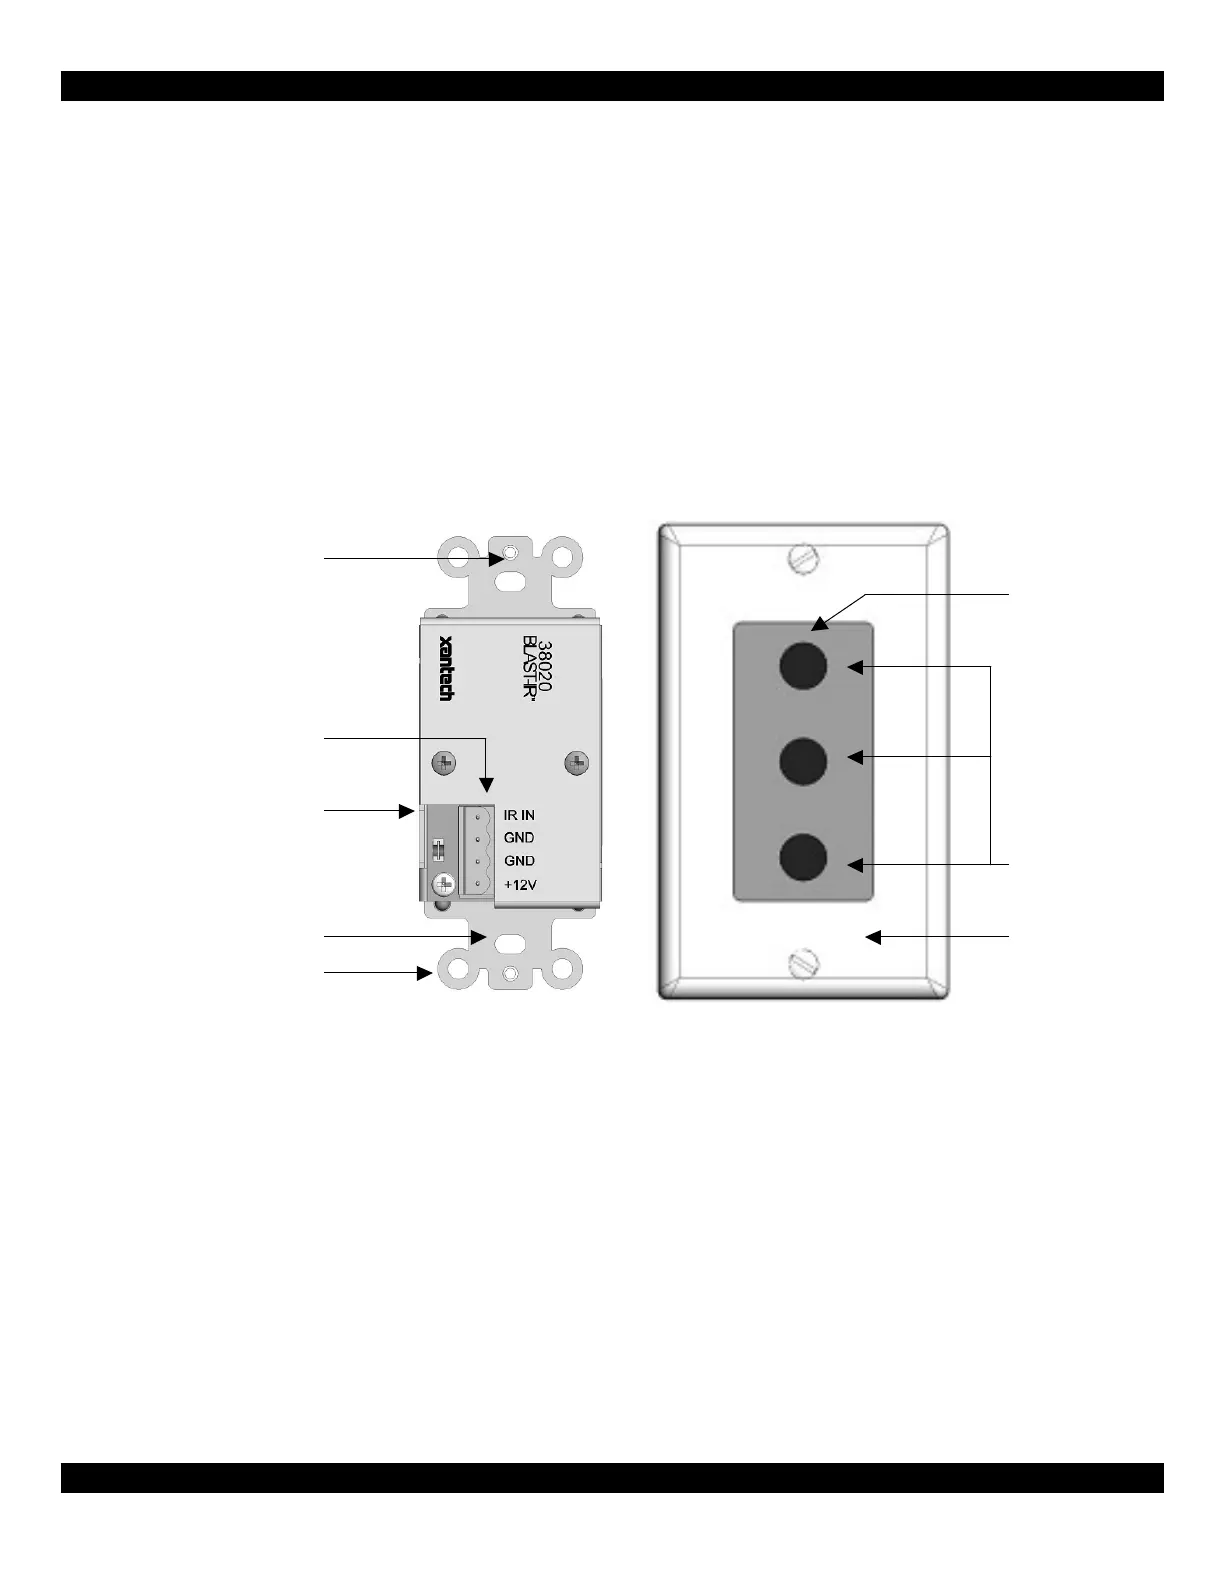
Single Gang, J-BOX, BLAST-IR™ Emitter
DESCRIPTION
The 380-20 J-BOX BLAST-IR™ contains three high-intensity Infrared LEDs housed in a metal
enclosure that can easily be mounted inside a standard, single gang, J-BOX electrical receptacle.
The benefit of the 380-20 is that it can “flood” an enclosed area with an infrared signal. The 380-20
comes with mounting screws and a Decora® style insert that can be used with the popular Decora®
faceplate.
SPECIFICATIONS
+12VDC, 200mA.
Red IR talk-back LED (internal).
Dimensions: 1-3/4” W x 4” H x 1-1/4” D.
Recommended wire requirements: 3 or 4 conductor, 22 gauge solid or stranded wire up to
600 feet (unshielded OK).
Able to achieve a distance well over 30 feet.
Breakawa
y
plaster-ears
Red IR talk-back LED
6-32 Threaded hole
(
2
)
for
Decora® -style cover plate
J-Box mountin
g
hole
(
2
)
4-Pin matin
g
plu
g
(included)
Hi
g
h-intensit
y
infrared LED
Decora
®
St
le
Insert with dark
tinted lens cover
(included)
Decora
®
st
y
le
faceplate
(not included)
- 2 -
INSTALLATION
The 380-20 is intended to be wired to the terminals of any Xantech connecting block such as the
CB12 and 789-44. Use 3 or 4 conductor cable, as specific above, to run between the connecting
block and the 380-20. The conductor cable will be used to connect the +12VDC, IR BUS, and
GROUND terminals.
While it is possible to make wired connections without a Xantech connecting block, it is not
recommended. The Xantech connecting block reduces installation time, helps to eliminate errors,
allows easy troubleshooting, and permits easy system upgrades later, if needed.
Connecting the power supply to the connecting block must be the last step. Be sure to verify all wires
are connected to the correct terminals. Incorrect connections may destroy the product. Two 380-20’s
may be connected in parallel.
Figure 1: 380-20 Basic IR Repeater System. 380-20 IR Repeater System.Figure 2:
NOTE: The 380-20 infrared intensity is so great that it is possible to place the unit in an indirect view
of the components to be controlled. This is due to the infrared waves “bouncing” off a wall and/or
object. An ideal location would be an enclosed closet where the system components are stored. It is
strongly recommended to experiment with the 380-20’s exact location before installing the single
gang box, J-Box, receptacle.
The three high-intensity infrared LEDs (light-blue) located on the front of the product are not visible to
the human eye. The red talk-back LED indicates the 380-20 is receiving an IR signal at the input.
- 3 -
Adding IR Attenuators
In the event that the infrared (IR) signal is judged to be too intense, apply the included IR attenuators
(white discs). The IR attenuators are to be placed between the 380-20 LED and the lens on the
Decora® style insert.
Simply place the white disc between the light blue LED emitter and the lens.
Power Supply
It is recommended to use a +12Vdc, 200mA power supply.
Xantechs 782-00 or 781RG power supply is acceptable for use with this product.
IR Compatibility
Due to various IR command structures, the 380-20 may not be compatible with certain brand name
components. It is highly recommended to test the 380-20 and all devices that it will control before final
installation.


Product specificaties

Merk: Xantech
Categorie: Flitser
Model: J-BOX BLAST-IR

Heb je hulp nodig?

Als je hulp nodig hebt met Xantech J-BOX BLAST-IR stel dan hieronder een vraag en andere gebruikers zullen je antwoorden