Standard Horizon BU-1 Bluetooth Adapter Unit Handleiding
Standard Horizon Hajvasaló BU-1 Bluetooth Adapter Unit
Bekijk gratis de handleiding van Standard Horizon BU-1 Bluetooth Adapter Unit (2 pagina’s), behorend tot de categorie Hajvasaló. Deze gids werd als nuttig beoordeeld door 97 mensen en kreeg gemiddeld 4.6 sterren uit 8 reviews. Heb je een vraag over Standard Horizon BU-1 Bluetooth Adapter Unit of wil je andere gebruikers van dit product iets vragen? Stel een vraag
Pagina 1/2
Installation
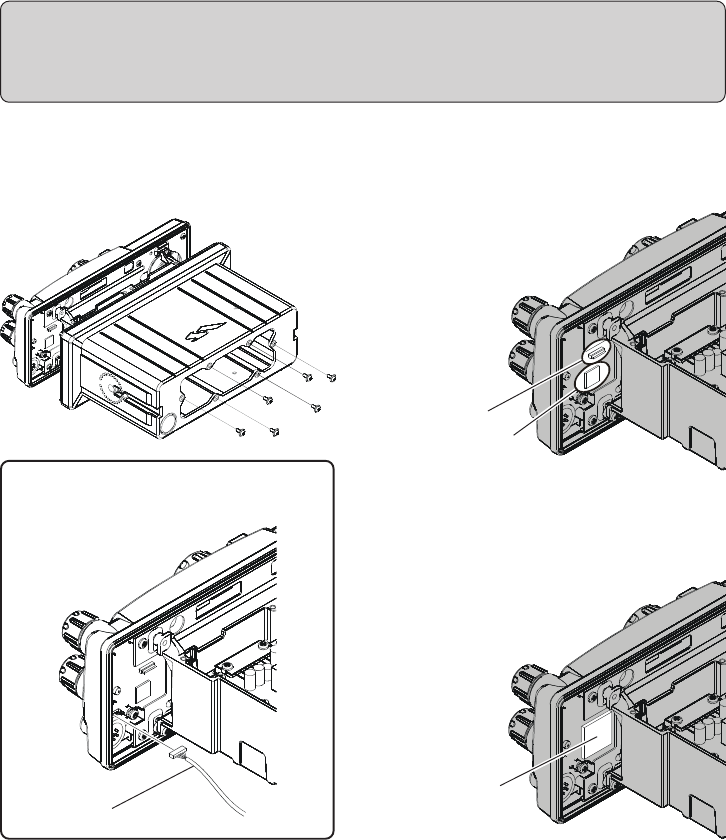
1.Remove the six screws and the washer se-
curing the Front Panel and then carefully
separate the Front Panel from the Rear case.
Connector
BU-1 Bluetooth® Adapter Unit
Please be sure to follow these safety precautions.
Turn the transceiver power off, and disconnect all cables from the transceiver.
Touch a metal place to discharge any static electricity from your body.
Double-side tape
If you use the GX5500S, disconnect the
wire from the Printed Circuit Board in the
Front Panel.
2.Locate the connector for the BU-1.
Peel the covering of the double-side tape on
the Printed Circuit Board.
3.Carefully align the connector on the BU-1
with the connector on the Printed Circuit
Board, and gently press the BU-1 into place.
4.Replace the Rear Case, using the screws and
washer removed in the first step.
Note: If you used the GX5500S, Attach the
Wire to the connector on the Printed
Circuit Board in the Front Panel.
Be certain the Rubber packing on the Rear
case is correctly installed, and the rear
case adheres and seals properly.
5.Installation is now complete.
BU-1
Wire
Product specificaties
| Merk: | Standard Horizon |
| Categorie: | Hajvasaló |
| Model: | BU-1 Bluetooth Adapter Unit |
Heb je hulp nodig?
Als je hulp nodig hebt met Standard Horizon BU-1 Bluetooth Adapter Unit stel dan hieronder een vraag en andere gebruikers zullen je antwoorden
Handleiding Hajvasaló Standard Horizon

4 September 2023
4 September 2023
4 September 2023
4 September 2023
4 September 2023
4 September 2023
4 September 2023
4 September 2023
4 September 2023
4 September 2023
Handleiding Hajvasaló
Nieuwste handleidingen voor Hajvasaló
26 Februari 2024
16 Oktober 2023
16 Oktober 2023
16 Oktober 2023
12 Oktober 2023
2 Oktober 2023
2 Oktober 2023
2 Oktober 2023
2 Oktober 2023
21 September 2023