Soundskins SSK-WJLTRUNK Handleiding
Soundskins Niet gecategoriseerd SSK-WJLTRUNK
Bekijk gratis de handleiding van Soundskins SSK-WJLTRUNK (3 pagina’s), behorend tot de categorie Niet gecategoriseerd. Deze gids werd als nuttig beoordeeld door 53 mensen en kreeg gemiddeld 4.0 sterren uit 5 reviews. Heb je een vraag over Soundskins SSK-WJLTRUNK of wil je andere gebruikers van dit product iets vragen? Stel een vraag
Pagina 1/3
Jeep JL Trunk Kit Instructions
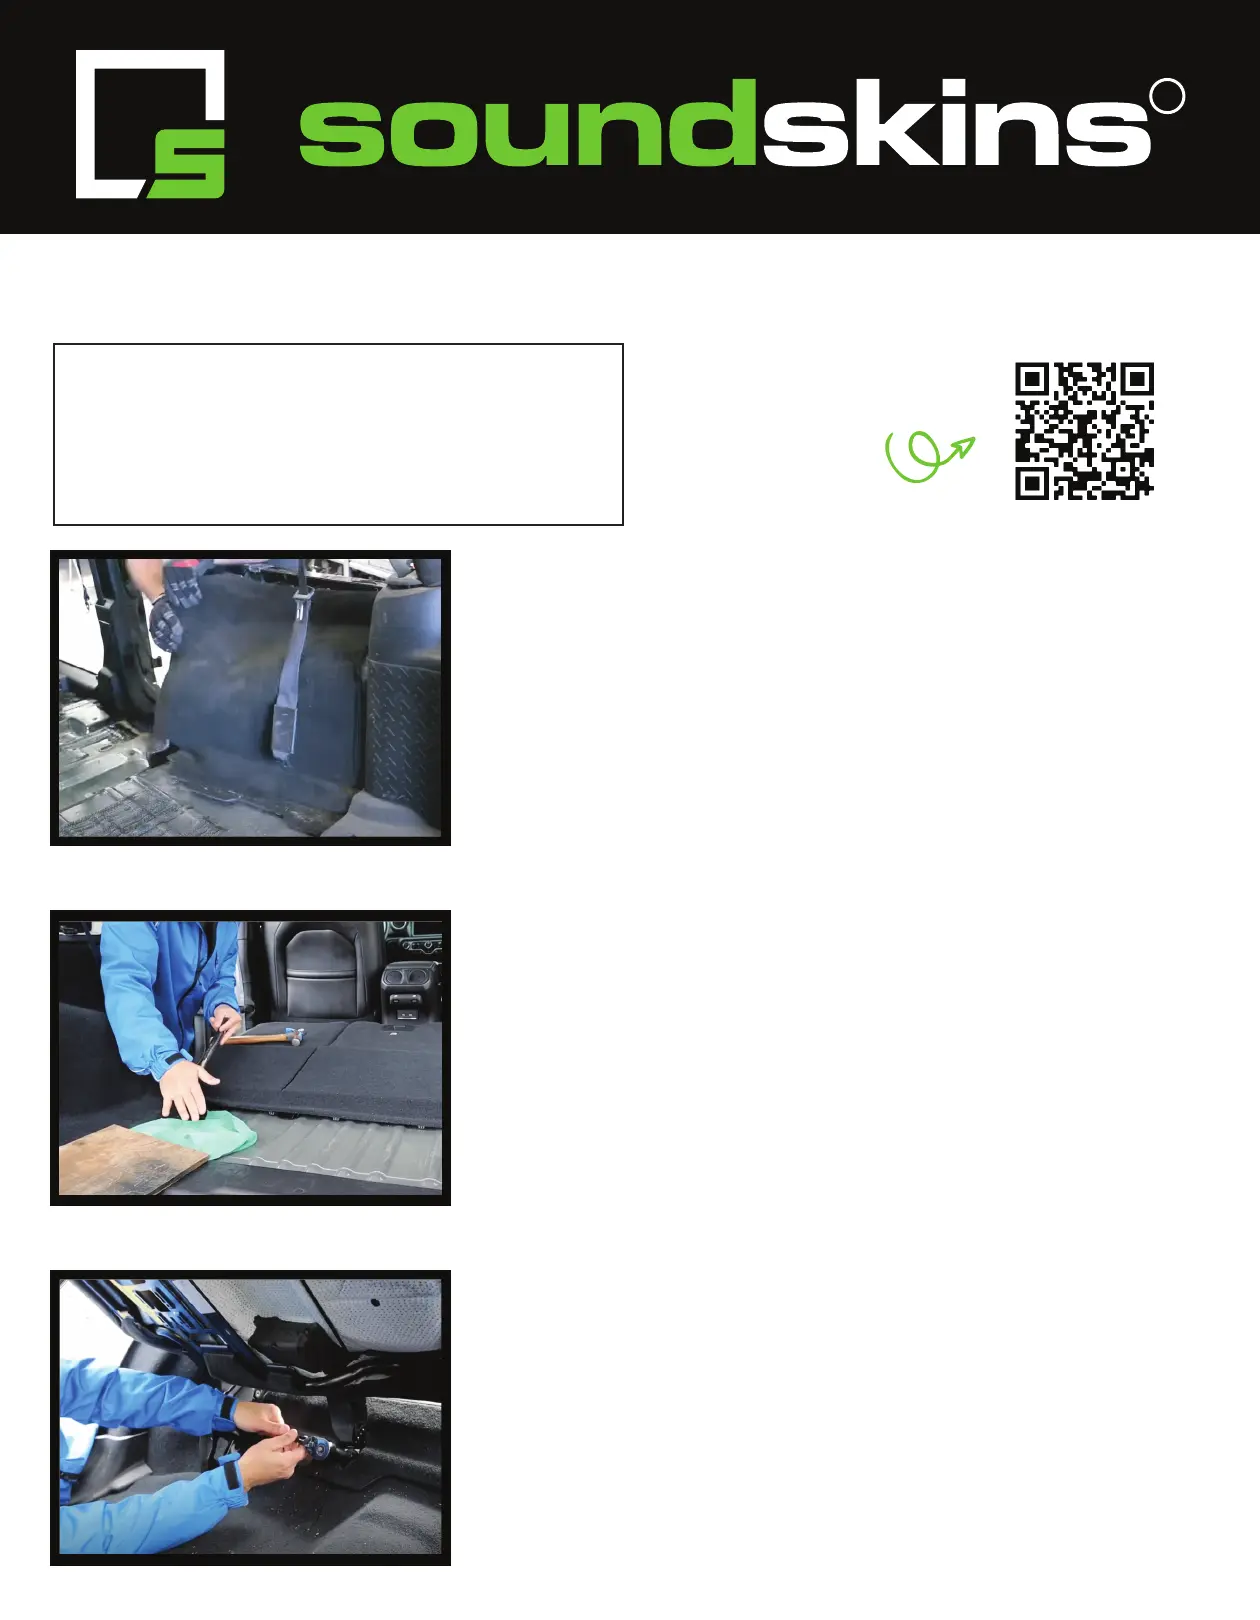
1. Start by unclipping the side panels on your wheel wells.
Begin from the top of the side panels. If you have a factory
subwoofer, remove the torque bolt at the front to unplug the
subwoofer.
Then, remove the main floor piece by sliding it back and up,
and remove the side carpet pieces by removing the 6 clips
that cover the tops of the torque bolts.
2. Next, unclip the flap/panel that sits on the back of the
backseat. It will be tight, so use a clip removal tool or the
back side of a hammer to wedge the clips out. Once this
panel is off, it will reveal the 3 bolts holding down the
backseats of the Jeep.
3. To remove the backseats, you will need an 18mm socket to
remove the bolts. Take out the 2 bolts in the back and the
bolts in front of the backseats. When all bolts are out, remove
the smaller seat first, then the larger seat. Be sure you also
remove the seatbelt bolts. Then, remove the carpet under
the backseat area.
R
Scan this code to watch the
full instructional video!
• Socket tool set & extension
• Panel/trim tool
• Roller
• Clip removal tool
• Screw driver
• Microber cloth
• Acetone or cleaning solution
• Shop vacuum
• Razor blade
Tools needed for installation:
Product specificaties
| Merk: | Soundskins |
| Categorie: | Niet gecategoriseerd |
| Model: | SSK-WJLTRUNK |
Heb je hulp nodig?
Als je hulp nodig hebt met Soundskins SSK-WJLTRUNK stel dan hieronder een vraag en andere gebruikers zullen je antwoorden
Handleiding Niet gecategoriseerd Soundskins

11 Maart 2025
11 Maart 2025
6 April 2024
6 April 2024
6 April 2024
6 April 2024
6 April 2024
6 April 2024
6 April 2024
6 April 2024
Handleiding Niet gecategoriseerd
Nieuwste handleidingen voor Niet gecategoriseerd
14 April 2026
14 April 2026
14 April 2026
14 April 2026
14 April 2026
14 April 2026
14 April 2026
14 April 2026
14 April 2026