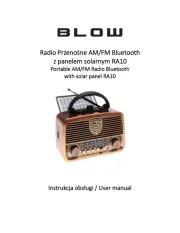
Soundmaster SCD5405 Handleiding
Soundmaster
Radio
SCD5405
Bekijk gratis de handleiding van Soundmaster SCD5405 (7 pagina’s), behorend tot de categorie Radio. Deze gids werd als nuttig beoordeeld door 82 mensen en kreeg gemiddeld 5.0 sterren uit 41.5 reviews. Heb je een vraag over Soundmaster SCD5405 of wil je andere gebruikers van dit product iets vragen? Stel een vraag
Pagina 1/7

WARNING
CLASS 1 LASER PRODUCT
This product contains a low power laser device.
CLASS 1 LASER PRODUCT
APPAREIL Á LASER DE CLASSE 1
PRODUCTO LASER DE CLASE 1
CAUTION
INVISIBLE LASER RADIATION
WHEN OPEN AND INTERLOCKS
DEFEATED.
AVOID EXPOSURE TO BEAM
PRECAUTIONS
Follow the advice below for safe and appropriate operations.
ON PLACEMENT
• Do not use the unit in places which are extremely hot, cold, dusty, or humid.
• Placetheunitonaatandevensurface.
• Donotrestricttheairowoftheunitbyplacingitinaplacewithpoorairow,bycoveringitwithacloth,
orbyplacingitonacarpet.
ON SAFETY
• WhenconnectinganddisconnectingtheACcord,griptheplugandnotthecorditself.Pullingthecordmaydamageit
and create hazard.
• Whenyouarenotgoingtousetheunitforalongperiodoftime,disconnecttheACpowercord.
ON AC VOLTAGE
• Beforeuse,checkthattheratedvoltageofyourunitmatchesyourlocalvoltage.
ON CONDENSATION
• When left in a heated room where it is warm and damp, water droplets or condensation may form inside the
CD player.
• When there is condensation inside the unit, the unit may not function normally.
• Letitstandfor1to2hoursbeforeturningthepoweron,orgraduallyheattheroomupanddrytheunitbeforeuse.
* Ensureaminimumdistanceof5cmaroundtheapparatusforsufcientventilation.
* Ensurethattheventilationisnotimpededbycoveringtheventilationopeningswithitems,
such as newspapers, table-cloths, curtains, etc..
* Donotplacenakedamesources,suchaslightedcandlesontheapparatus.
* Take attention to the environmental aspects of battery disposal.
* Use the apparatus only in moderate climates (not in tropical climates).
* Donotexposetheapparatustodrippingorsplashing.
* Donotplaceobjectslledwithliquids,suchasvases,ontheapparatus.
Should any trouble occur, disconnect the AC power cord and refer servicing to qualied personnel.
Warning: Do not touch the lens.
DO NOT THROW BATTERIES IN FIRE !
Incaseofmisfunctionduetoelectrostaticdischargetheapparatushastoberesetbydisconnectingitfrommainssupply.
THE MARKING PLATE IS LOCATED AT THE BACK OF ENCLOSURE OF THE APPARATUS.
ATTENTION : To reduce the risk
of electric shock, do not remove the
cover. There are no user serviceable
partsinsidetheunit.Referallservicing
toqualiedpersonnel.
The exclamation point within
thetriangleisawarningsign
alertingtheuserofimportant
instructions accompanying
the product.
The lig h te n in g fl ash
with arrowhead symbol
within the triangle is a
warn ing si gn ale rting
the userof " dangerous
voltage" insi de theunit.
CAUTION
RISK OF ELECTRIC SHOCK
DO NOT OPEN

15. TUNING CONTROL
16. SPEAKER
17. CD PLAY / PAUSE BUTTON
18. CD STOP BUTTON
19. CASSETTE DOOR
20. CD NEXT BUTTON
21. CD PROG/CLOCK-ADJ/
PLAY MODE BUTTON
22. POWER BUTTON
23. CD BACK BUTTON
24. PHONES JACK
25. TELESCOPIC ANTENNA
26. BATTERY COMPARTMENT
27. AC SOCKET
1. VOLUME CONTROL
2. FUNCTION SWITCH
3. CARRYING HANDLE
4. CASSETTE PAUSE
5. CASSETTE STOP/EJECT
6. CASSETTE F.FWD
7. CD OPEN BUTTON
8. CD DOOR
9. CASSETTE REWIND
10. CASSETTE PLAY
11. FM STEREO INDICATOR
12. DIAL SCALE
13. BAND SWITCH
14. CD DISPLAY
GB 1
LOCATION OF CONTROLS

USING HOUSE CURRENT
Beforeuse,checkthattheratedvoltage
ofyourunitmatchesyourlocalvoltage.
Note:Plugisusedasthedisconnectdevice.
The disconnect device shall remain readily
operable.
USING BATTERIES
Disconnect the AC power cord from the AC inlet of the
unit. Battery power is cut automatically by the cord while
it is connected.
InserteightUM-2(sizeC)batteries.battery door
When the volume decrease, or the sound distorts, replace
all of the batteries with new ones.
To AC socket
To AC outlet
ADJUSTING THE SOUND
WHEN RECORDING
The VOLUME control may be adjusted with no effect on
therecordedsignal.
FOR PRIVATE LISTENING
Plug in headpho nes (ø3 .5 mm stereomini- plug) to th e
PHONES jack.
Whenheadphonesarepluggedin,thespeakersare
automatically disconnected.
TO ADJUST THE VOLUME
MIN. MAX.
VOLUME
POWER SUPPLY
GB 2
TURN ON / OFF THE SYSTEM
POWER
Press the POWER button to turn the audio on.
TochangetheaudiomodebetweenCD,RADIOANDTAPE,
set the FUNCTION switch while the power is on.
The audio mode is displayed.
TurnofftheunitbypressingthePOWERbutton.
" OFF " word will be shown on the display and then resume
the current time.
LCD display
The clock is displayed on LCD display at standby mode.on LCD display at standby mode.
1. Press and hold the PROG / CLOCK-ADJ./PLAY MODE button,
2. Press the NEXT or BACK to select 12 hours or 24 hours display.
3. Press the PROG / CLOCK-ADJ./PLAY MODE button,
the hour digit ash.thehourdigitash.
4. PresstheNEXTorBACKtoadjusthourdigit.
5. Press the PROG / CLOCK-ADJ./PLAY MODE button,
theminutedigitash.
6. PresstheNEXTorBACKtoadjustminutedigit.
7. PressthePROG/CLOCK-ADJ./PLAYMODEbuttonagain,
the correct time is shown on display.
CLOCK ADJUSTMENT
CLOCK-ADJ.
LCD display
Product specificaties
| Merk: | Soundmaster |
| Categorie: | Radio |
| Model: | SCD5405 |
Heb je hulp nodig?
Als je hulp nodig hebt met Soundmaster SCD5405 stel dan hieronder een vraag en andere gebruikers zullen je antwoorden
Handleiding Radio Soundmaster

20 Februari 2025
15 Januari 2025

17 Juni 2024

27 Juli 2023

15 Juni 2023

15 Juni 2023

7 Juli 2023

20 Juni 2023

15 Juni 2023

12 Juni 2023
Handleiding Radio
- MOOOV
- Teufel
- Intek
- Lenco
- Nevir
- Yamaha
- Omnitronic
- GPO
- Acoustic Solutions
- Furrion
- Milwaukee
- Esky
- Black And Decker
- Kayinow
- NGS
Nieuwste handleidingen voor Radio
16 September 2025
15 September 2025
15 September 2025
15 September 2025
13 September 2025

13 September 2025
12 September 2025
9 September 2025
8 September 2025
8 September 2025