Shark NeverChange5 HP300 Handleiding
Shark
Luchtreiniger
NeverChange5 HP300
Bekijk gratis de handleiding van Shark NeverChange5 HP300 (10 pagina’s), behorend tot de categorie Luchtreiniger. Deze gids werd als nuttig beoordeeld door 51 mensen en kreeg gemiddeld 4.1 sterren uit 26 reviews. Heb je een vraag over Shark NeverChange5 HP300 of wil je andere gebruikers van dit product iets vragen? Stel een vraag
Pagina 1/10

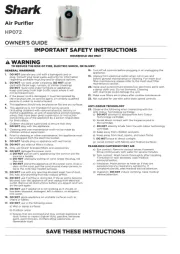
Air Purifier
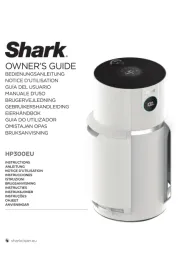
HP300
OWNER’S GUIDE
IMPORTANT SAFETY INSTRUCTIONS
HOUSEHOLD USE ONLY
WARNING
TO REDUCE THE RISK OF FIRE, ELECTRIC SHOCK, OR INJURY:
GENERAL WARNINGS
1. DO NOT operate any unit with a damaged cord or
plug. Consult your local waste authority for information
regarding available recycling and/or disposal options.
2. DO NOT DO NOT run cord under carpeting. cover
cord with throw rugs, runners, or similar coverings.
DO NOT route cord under furniture or appliances.
Keep cord away from high-traffic areas where it will
not be tripped over.
3. If the power cord is damaged, it must be replaced by
the manufacturer, its service agent, or similarly qualified
persons in order to avoid a hazard.
4. This appliance should only be placed on flat and dry surfaces.
5. This appliance is not intended for use by anyone
(including children) with reduced physical, sensory or
mental capabilities, or lack of experience and knowledge,
unless they have been given supervision or instruction
concerning use of the appliance by a person responsible
for their safety.
6. Children should be supervised to ensure that they
DO NOT play with the appliance.
7. Cleaning and user maintenance shall not be made by
children without supervision.
8. Prior to cleaning or other maintenance, the appliance must
be unplugged from the electrical outlet.
9. DO NOT handle plug or appliance with wet hands.
10. DO NOT use without filters in place.
11. Only use Shark® branded filters and accessories.
12. DO NOT damage the power cord:
a) DO NOT pull or carry appliance by the cord or use the
cord as a handle.
b) DO NOT unplug by pulling on cord. Grasp the plug, not
the cord.
c) DO NOT stand the appliance on the power cord, close a
door on the cord, pull the cord around sharp corners, or
leave the cord near heated surfaces.
13. DO NOT use with any opening blocked; keep free of dust,
lint, hair, and anything that may reduce airflow.
14. DO NOT use if airflow is restricted. If the air paths become
blocked, turn the appliance off and unplug from electrical
outlet. Remove all obstructions before you plug in and turn
on the unit again.
15. DO NOT use if appliance is not working as it should, or
has been dropped, damaged, left outdoors, or dropped
into water.
16. DO NOT place appliance on unstable surfaces such as
chairs or tables.
17. DO NOT use in the following areas:
a) Wet or damp surfaces
b) Outdoor areas
c) Spaces that are enclosed and may contain explosive or
toxic fumes or vapors (lighter fluid, gasoline, kerosene,
paint, paint thinners, mothproofing substances, or
flammable dust)
18. Turn off all controls before plugging in or unplugging the
appliance.
19. Unplug from electrical outlet when not in use and
before general maintenance or cleaning. For mesh dust
filter maintenance, please refer to the mesh dust filter
maintenance section.
20. Hand wash exterior/hard plastic/non-electronic parts with
a damp cloth only. Do not immerse. Cleaning
with chemicals could damage the unit.
21. Make sure filters are in place after routine maintenance.
ANTI-ODOUR TECHNOLOGY
22. Observe the following when interacting with the
Anti-Odour Technology cartridge.
a) DO NOT attempt to disassemble Anti-Odour
Technology cartridge.
b) Avoid direct contact with the fragrance pod in
the cartridge.
c) DO NOT directly inhale from the anti-odour technology
cartridge.
d) Keep away from children and pets.
e) Keep away from heat, sparks, and open flame.
f) place in direct sunlight.DO NOT
g) Avoid contact with fabrics and finished surfaces.
FRAGRANCE CARTRIDGE FIRST AID
a) Eye contact: Remove contact lenses if present.
Rinse continuously with water for several minutes
b) Skin contact: Wash hands thoroughly after handling.
If irritation or rash develops, seek medical
advice/attention.
c) Inhalation: Move person to fresh air if they are
experiencing any respiratory symptoms. If
symptoms persist, seek medical advice/attention.
d) Ingestion: induce vomiting. Seek medical DO NOT
advice/attention.
23. Dispose of batteries properly. Keep batteries away
from children at all times. Even used batteries can
cause injury.
WARNING: Chemical Burn Hazard. Keep batteries away
from children.
This product contains a lithium button/coin cell battery.
If a new or used lithium button/coin cell battery is
swallowed or enters the body, it can cause severe internal
burns and can lead to death in as little as 2 hours. When
not changing batteries, keep the battery compartment
completely closed. If the battery compartment does not
close securely, stop using the product, remove the batteries,
and keep them away from children. If you think batteries
might have been swallowed or placed inside any part of the
body, seek immediate medical attention.
SAVE THESE INSTRUCTIONS

SETTING UP YOUR AIR PURIFIER
Parts:
1. Air Output Vents
2. Anti-Odour Technology Dial
3. Control Panel
4. Front Display
5. Air Purifier Body
6. Air Intake Vents
7. Mesh Dust Filters
8. HEPA Filter
9. HEPA Filter Door
1. DO NOT plug in the air purifier. First,
carefully turn the air purifier upside
down and place it on a level floor surface.
Rotate the filter door counterclockwise
to unlock it, then lift it o to access the
HEPA filter.
2. Take the HEPA filter out of its plastic
packaging. Reinstall the HEPA filter in
either orientation.
3. With the HEPA filter reinstalled, rotate
the filter door clockwise until it clicks
into place.
4. Set up the air purifier on a flat, level,
floor surface, at least 3 inches (8 cm)
away from walls and objects.
If Anti-Odour Technology is included
with your air purifier, find the odour
cartridge and follow the instructions to
install it.
5. Carefully remove the yellow sticker on
the top of the air purifier to access the
control panel.
Plug the air purifier into an electrical
outlet and press the power button on
the top control panel.
6. When the air purifier power is on, the
air purifier will begin to analyse the air
quality, indicated by the rotating lights.
After a few seconds, the air purifier will
display the current air purification status.
32
Remove
HEPA filter
from plastic
packaging
5 6
1
TIPS FOR SETTING
UP YOUR AIR PURIFIER
• Make sure the front panel of the air purifier
faces away from the closest wall.
• Do not move the unit while it is running. Turn
o the power and unplug the air purifier before
moving it.
• Make sure the air intake vents are not blocked.
• Do not place anything on the air purifier.
• Do not place the air purifier near heaters
or radiators.
• Keep the air purifier out of direct sunlight and
away from water or other liquid.
• Keep all nearby doors and windows closed
when operating the air purifier.
• Avoid using in very humid environments.
Note: Anti-Odour Technology is not included
on all Shark HP300 series products.
Note: HEPA Filter Technology allows up to 5 years* of use out of a single HEPA filter.
*Tested to GB/T18801-2015 P.CCM, based on 50% CADR decline, 28 sq. m cleaning area and 12 hours daily operation on MAX fan speed.
Remove sticker
then power on
6.
5.
7.
3. 1.
9.
8.
2.
4.
8cm
minimum
Insert
Anti-Odour
Technology
Cartridge
Anti-Odour cartridge is optional.
Does not need to be inserted for the
Air Purifier to function.
4

CONTROL PANEL
There is a control panel on the top of the air purifier and a display screen on the front.
TOP CONTROL PANEL
FRONT DISPLAY SCREEN
Displays the current air purification status based on the Air Info
mode selected on the top control panel.
TOP CONTROL PANEL BUTTONS
On/O: Press to turn the power on or o.
Auto Mode: Press to turn on Auto Mode. In this setting the fan
speed automatically adjusts based on real-time air purification
readings. As the air purification improves, the fan speed will
decrease. If it worsens, the fan speed will increase. Leave your unit
in Auto Mode for optimal filter life and performance.
Leave your unit in Auto Mode for optimal filter life
and performance.
Fan Speed: Adjusts the speed of the fan. Select one of 5 settings:
1 Quiet, 2 Low, 3 Medium, 4 High, 5 Maximum. Select by using the
arrows on the control panel. Note: If fan speed is manually changed,
Auto Mode will be deactivated. For tips and more information, see
the Optimising Fan Speed section.
Air Info: Press to switch between air purification display options.
See the Air Info Settings section for more information.
Shut-O Timer: Set the number of hours for the air purifier
to run before it automatically shuts o. Timer can be set from
1 to 12 hours.
Brightness: Adjusts the brightness of both the front display
screen and the top control panel. Switch between 3 options:
full brightness, partially dim, fully dim. In fully dim mode, the
air purifier will continue to run with the LED light o—perfect
for nighttime.
Dust Filter Life: Press to show the remaining life of the mesh dust
filters before additional maintenance is required. When Dust Filter
Life reaches 0%, the filter icon will flash to indicate the mesh dust
filters need to be checked for debris buildup. See Mesh Dust Filter
Maintenance section for more information.
Child Lock: Press and hold for two seconds to lock the top control
panel buttons. To unlock, press and hold for two seconds again.
Tips and Tricks:
Optimise Performance in Eco Mode: If 100% air purification status
is achieved for 5 minutes in Auto Mode, your air purifier will enter Eco
Mode. Your unit’s filter life will be optimised.
Turn O Beeping: To turn o notification sounds, press and
hold the Air Info and Child Lock buttons at the same time for
two seconds. To resume, press and hold both buttons again.
AIR INFO SETTINGS
The built-in sensor detects your air purification status to give you real-time information. Use the button to switch between air AIR INFO
status display options.
INFO FRONT DISPLAY
SCREEN REAL-TIME READING
% STATUS
Displays the air purification status rating:
• Poor: 0%–69%• Fair: 70%–84%• Good: 85%–100%
% STATUS uses particulate matter (PM) air purification standards as determined by the
EPA (United States Environmental Protection Agency) to calculate the status rating.
PARTICLE SIZES
The PM (particulate matter) value is the amount of particulate in
your air, measured in micrograms ( g) per cubic metre. Your air μ
purifier measures three particle sizes, PM1, PM2.5, and PM10.
PM1 Displays the number of PM1-sized particles
in your air, including ultra-fine allergens.
PM2.5 Displays the number of PM2.5-sized particles
in your air, including smoke.
PM10 Displays the number of PM10-sized particles in your air, including dust, and pollen.
Product specificaties
| Merk: | Shark |
| Categorie: | Luchtreiniger |
| Model: | NeverChange5 HP300 |
Heb je hulp nodig?
Als je hulp nodig hebt met Shark NeverChange5 HP300 stel dan hieronder een vraag en andere gebruikers zullen je antwoorden
Handleiding Luchtreiniger Shark
24 Maart 2025
26 Februari 2025

1 December 2024

5 Maart 2024

4 Maart 2024

1 Juli 2023

26 Mei 2023

21 April 2023

15 April 2023

22 Februari 2023
Handleiding Luchtreiniger
- Gastroback
- Infiniton
- Frigidaire
- TaoTronics
- Moneual
- Soler And Palau
- Uniprodo
- Teco
- Alen
- Aluratek
- Karcher
- LightAir
- Hanseatic
- Blueair
- TruSense
Nieuwste handleidingen voor Luchtreiniger
29 Juli 2025
29 Juli 2025
29 Juli 2025
29 Juli 2025
29 Juli 2025
29 Juli 2025
29 Juli 2025
28 Juli 2025
28 Juli 2025
28 Juli 2025