Sangean DDR-7X Handleiding
Bekijk gratis de handleiding van Sangean DDR-7X (2 pagina’s), behorend tot de categorie Radio. Deze gids werd als nuttig beoordeeld door 207 mensen en kreeg gemiddeld 5.0 sterren uit 104 reviews. Heb je een vraag over Sangean DDR-7X of wil je andere gebruikers van dit product iets vragen? Stel een vraag
Pagina 1/2

The Bluetooth® word mark and logos are
registered trademarks owned by Bluetooth SIG,
Inc. and any use of such marks by SANGEAN
ELECTRONICS INC. is under license.
Important safety instructions
1. Do not install near any heat sources such
as radiators, heat registers, stoves or
other apparatus (including amplifiers) that
produce heat.
That can result in an explosion or the
leakage of flammable liquid or gas.
2. Do not puncture, crush, modify, or cause
any unnecessary shock to the battery. The
battery may present a risk of fire, explosion
or chemical burn if mistreated.
3. Only use attachments / accessories specified
by the manufacturer.
4. To reduce the risk of fire or electric shock, do
not expose this appliance to rain or moisture.
5. Apparatus shall not be exposed to dripping
or splashing and no objects filled with liquids,
shall not be placed on the apparatus.
6. The batteries shall not be exposed to excessive
heat such as sunshine, fire or the like.
7. Any changes or modifications not expressly
approved by the party responsible for
compliance could void the user’s authority
to operate the equipment and warranty.
8. CAUTION
Risk of explosion if the battery is replaced
by an incorrect type.
9. Do not allow your radio to be exposed to
water, steam or sand.
10. Do not leave your radio
where e x cessiv e heat
could cause damage.
11. The battery should be used
or stored at an air pressure above 11.6kPa,
otherwise it may cause the battery to explode
or leak flammable liquids and gases.
12. If safety relevant, the following information
should be included as far as applicable:
●minimum distances around the apparatus
for sufficient ventilation;
●the ventilation should not be impeded by
covering the ventilation openings with
items, such as newspaper, table-cloths,
curtains, etc.;
●no naked flame sources, such as lighted
candles, should be placed on the apparatus;
●at ten ti on sh ou ld b e draw n to the
environmental aspects of battery disposal;
●the use of apparatus in tropical and / or
moderate climates.
13. CAUTION
Danger of explosion if battery is incorrectly
replaced. Replace only with the same or
equivalent type. .
14. If an apparatus is provided with a replaceable
lithium battery, the following applies:
●if the battery is intended to be replaced by
the user, there shall be a warning close
to the battery or in both the instruction for
use and service instructions;
●if the battery is not intended to be replaced
by the user, there shall be a warning close
to the battery or in the service instructions.
Controls
1Speaker
2Battery charging indicator
3Bluetooth LED indicator
4LCD display
5Tuning up / Previous track / Rewind button
6Mode button
7Volume up button
8Select / Menu / Info button
9Tuning down / Next track / Fast-forward button
10 Volume down button
11 Power button
12 DC IN 5V / 2.4A USB charging socket
13 Auxiliary input socket
14 External antenna socket
15 Lock switch
16 Passive speaker
Charging the radio
The radio operates on a built-in Lithium-ion
battery that can be recharged either using the
USB charging port or from a USB power adaptor
(not included) with a rated output of DC 5V, 2.4A.
Reduced power, distortion, stuttering sounds or
battery power indicator in low are all signs
that the battery needs to be recharged.
Before operating the radio for the first time
please fully charge the battery.
●Connect only devices which are compatible
with DC 5V, 2.4A power source to the USB
power supply port. Otherwise it may cause
malfunction to the product.
●Connect the USB cable (supplied) with the
USB power supply port of the product. And
then connect the other end of the cable
with the device.
●When the battery is charging, the charging
indicator lights up in red. When the battery
is fully charged, the red charging indicator
will turn off.
NOTE
Listening to DAB radio
Tuning into DAB stations
To tune into DAB radio stations, follow these steps:
1. Insert the (supplied) external antenna plug
into the external antenna socket located on
the rear of your radio.
2. Turn on the radio using the Power button.
3. Select the DAB radio mode by repeatedly
pressing the Mode button.
4. If this is the first time the DAB radio mode is
being used, the radio will automatically perform
a full scan in order to find all available DAB radio
stations. If the radio has been used before the
last used station will be selected.
5. During the scanning process, as new stations
are detected the station counter will increase
and the stations will be added to the list which
is stored in the radio. The bar graph indicates
the progress of the scan.
6. When the scanning is completed the first
station (in numeric-alpha order 0...9...A....Z)
will be selected.
7. Press the Tuning up or Tuning down button to
scroll through the list of stations and press the
Select button to tune into a station.
8. Use the Volume up / down button to set the
sound level as needed.
NOTE
If after selecting a station the station does not
tune it may be necessary to relocate your radio
to a position giving better reception.
The DAB radio menu
You can open the DAB radio menu by pressing
and holding the Select button while the radio is
in the DAB radio mode.
Use the Tuning up or Tuning down button to
select one of the options and then press the
Select button to confirm your choice.
The radio's default and recommended settings
are indicated using an asterisk.
The DAB radio menu offers the following options:
●[Favorite Station]: Select this option to enter
the “Favorite Station” menu settings (refer to
the chapters "Presetting stations in DAB and
FM modes" and “Recalling a preset in DAB
and FM” for details).
●[Station List]: Select this option display all
DAB radio stations that were found and tune
into one of the stations.
●[Manual Tune]: Select this option to manually
tune into a DAB channel / frequency.
●[Full Scan]: Select this option to perform a
full scan and store all DAB radio stations that
were found in the station list.
●[Prune Station]: Select this option to delete all
unavailable stations from the station list.
●[Station Order]: Select this option and
subsequently [Alphanumeric] to sort the station
list alphanumerically or select [Ensemble] to
sort the station list by DAB multiplex or select
[Valid] to show only those stations for which a
signal can be found.
●[DRC Value]: Dynamic Range Control (also
known as DRC) can make quieter sounds
easier to hear when your radio is used in a
noisy environment by reducing the dynamic
range of the audio signal.
0201 0403
05 06
Select this option and then use the Tuning
up or Tuning down button to highlight the
required DRC setting:
[Off]: DRC is switched off. Broadcast DRC
will be ignored.
[Low]: DRC level is set to 1 / 2 that sent by
broadcaster.
[High]: DRC is set as sent by broadcaster.
Press the Select button to confirm the setting.
NOTE
Not all DAB broadcasts use the DRC
function. If the broadcast does not provide
DRC information, then the DRC setting in
the radio will have no effect.
●[System Setup]: Select this option to go to the
system menu settings and configure the radio
(refer to the chapter "Using the System setup
menu" for details).
●[Back]: Select this option to go back one step
in the radio's menus or return to the previous
screen.
Showing DAB information on the
display
When listening to a DAB radio broadcast,
repeatedly press the Select button to cycle
through the following information on the radio's
display:
Scrolling text, Program type, Multiplex name,
Date, Frequency, Bit rate and audio type,
Coding information, Title, Artist, Signal strength.
Listening to FM radio
Tuning into FM stations
To tune into FM radio stations, follow these steps:
1. Insert the (supplied) external antenna plug
into the external antenna socket located on
the rear of your radio.
2. Turn on the radio using the Power button.
3. Select the FM radio mode by repeatedly
pressing the Mode button.
4. Press and hold the Tuning up or Tuning
down button to automatically tune into an
FM station with a higher or lower frequency
respectively. Your radio will stop scanning
when it finds a station of sufficient strength.
The display will show the frequency of
the signal which has been found. If RDS
information is available, after a few seconds
the display will show the radio station name.
5. Press the Tuning up or Tuning down button to
fine-tune the frequency with steps of 0.05MHz
if needed.
6. Repeat the steps 4 and 5 to tune into other
radio stations.
7. Use the Volume up / down button to set the
sound level as needed.
The FM radio menu
You can open the FM radio menu by pressing
and holding the Select button while the radio is
in the FM radio mode.
Use the Tuning up or Tuning down button to
select one of the options and then press the
Select button to confirm your choice.
The radio's default and recommended settings
are indicated using an asterisk.
The FM radio menu offers the following options:
●[Scan]: Select this option to cause your radio
to scan from low frequency to high frequency.
When it finds a station of sufficient strength, the
frequency will flash 6 seconds on the display and
then the radio will continue to scan. To tune to
the station or stop the scanning, press the Select
button.
●[Favorite Station]: Select this option to enter
the “Favorite Station” menu settings (refer to
the chapters "Presetting stations in DAB and
FM modes" and “Recalling a preset in DAB
and FM” for details).
●[FM Scan Zone]: Select this option to
configure if the radio should only look for strong
signals(“Local”) or all signals(“Distant”) when
using the automatic tuning feature.
●[System Setup]: Select this option to go to the
system menu settings and configure the radio
(refer to the chapter "Using the System setup
menu" for details).
●[Back]: Select this option to go back one step
in the radio's menus or return to the previous
screen.
Showing FM information on the
display
When listening to a FM radio station that is
also broadcasting RDS data, repeatedly press
the Select button to cycle through the following
information on the radio's display:
Radio text, Program type, Date, Frequency.
●[Factory Reset]: Select this option to
reset the radio to the default factory
settings. After confirmation, all user
settings and preset stations will be
erased.
●[SW Version]: Select this option to
view the software version of the radio.
To exit the software display, press the
Select button.
●[Back]: Select this option to go back
one step in the radio's menus or return
to the previous screen.
Listening to music via
Bluetooth streaming
You need to pair your Bluetooth device with
your DDR-7X before you can auto-link to
play / stream Bluetooth music through your
DDR-7X. Pairing creates a ‘bond’ so the
two devices can recognize each other.
Pairing and playing your
Bluetooth device for the first time
1. With your radio switched on, press the
Mode button to select Bluetooth function.
“Bluetooth Pairing” will show on the
display. The Bluetooth LED indicator on
the radio will flash a fast blue to show the
radio is discoverable.
NOTE
When the radio is not connected to a
Bluetooth device in Bluetooth mode, it will
automatically turn off after 15 minutes.
2. Activate Bluetooth on your device
according to the device’s user manual
to link to the radio. Locate the Bluetooth
device list and select the device named
“DDR-7X” (With some Smartphone’s that
are equipped with earlier versions than
BT2.1 Bluetooth device, you may need to
input the pass code “0000”).
3. Once connected, there will be a confirmation
tone sound and the name of your connected
Bluetooth device will show on the display.
The Bluetooth LED indicator will turn a solid
blue. You can simply select and play any
music from your source device.
4. The volume control can be adjusted from
your source device, or directly from the
radio. Use the controls on your Bluetooth-
enabled device or on the radio to play /
pause and navigate tracks.
●If 2 Bluetooth devices are pairing for
the first time, both will search for your
radio, it will show its availability on
both devices. However, if one device
links with this unit first, then the other
Bluetooth device will not find it on the list.
●If you take your source device out of
range, the connection will be temporarily
disconnected to your radio. Your radio
will automatically reconnect if the source
device is brought back in range. Be aware
that during the period of disconnection, no
other Bluetooth device can pair or link with
your radio.
●If “DDR-7X” shows in your Bluetooth
device list but your device cannot
connect with it, please delete the item
from your list and pair the device with
the radio again following the steps
described previously.
●The effective operation range between
the system and the paired device is
approximately 10 meters (30 feet). Any
obstacle between the system and the
device can reduce the operational range.
●Bluetooth connectivity performance
may vary depending on the connected
Bluetooth devices. Please refer to the
Bluetooth capabilities of your device
before connecting to your radio. All
features may not be supported on some
paired Bluetooth devices.
●With some mobile phones, making /
receiving calls, text messages, e-mails
or any other activities unrelated to audio
streaming may mute the Bluetooth audio
streaming or even temporarily disconnect
from your device. Such behavior is a
function of the connected device and does
not indicate a fault with your DDR-7X.
NOTE
Playing audio files in Bluetooth
mode
When you have successfully connected your
radio with the chosen Bluetooth source device
you can start to play your music using the
controls on your connected Bluetooth device.
1. Once playing has started, the volume can
be adjusted both on the radio using the
Volume buttons and on the Bluetooth device
using the volume control of the device.
2. Use the controls on your Bluetooth device
to play / pause and navigate tracks.
Alternatively, control the playback using Play /
Pause, Next track, Previous track buttons on
your radio.
3. Press and hold the Fast-forward or Rewind button
to move through the current track. Release the
button when the desired point is reached.
NOTE
Not all player applications or devices may
respond to all of these controls.
If your connected device can provide information
from the track being played, your radio can display
the following in Bluetooth mode:
Device Name, Title, Artist, Album.
Press the Select button to cycle through the
various options.
Please note that the availability of information
depends on the specific media format.
Reconnecting a previously-paired
Bluetooth source device
The radio can memorize up to 8 sets of paired
Bluetooth devices, when the memory exceeds
this amount, the earliest paring device will be
overwritten from the device.
If your Bluetooth device already paired with the radio
previously, the unit will memorize your Bluetooth
device and it attempts to reconnect with a Bluetooth
device in memory which is last connected.
Disconnecting your Bluetooth device
1. Press and hold the Select button to enter the
Bluetooth menu.
2. Press the Tuning up or Tuning down button
to select “Cancel Pair”. Then press the Select
button.
3. To disconnect with your Bluetooth device, use
the Tuning up or Tuning down button to select
“Yes” and then press the Select button. There
will be a confirmation tone sound and the
Bluetooth LED indicator on the radio will flash
a fast blue to show the radio is discoverable
again for pairing. Selecting “No” or “Back” will
not disconnect your Bluetooth device. Press
the Select button to confirm your choice.
4. Alternatively, you can press the Mode button to
select any mode other than Bluetooth mode or
turn off Bluetooth on your Bluetooth device to
disable the connection.
.
Deleting Bluetooth paired device
memory
1. Press and hold the Select button to enter the
Bluetooth menu.
2. Press the Tuning up or Tuning down button to
select “Clear Pairing”. Then press the Select
button.
3. To clear the memory of all paired devices,
use the Tuning up or Tuning down button to
select “Yes” and then press the Select button.
Selecting "No" or "Back" will not clear the
memory of all paired devices. Press the Select
button to confirm your choice.
The True Wireless Stereo (TWS)
feature
True wireless stereo (also known as TWS) is
a feature that allows one device to wirelessly
connect with another device. Your DDR-7X can be
wirelessly connected to a second DDR-7X and play
music through both speakers at the same time.
Setting up the first speaker
1. Make sure the first speaker is in Bluetooth
mode and connect to a Bluetooth device.
2. Press and hold the Select button to enter the
Bluetooth menu.
3. Press the Tuning up or Tuning down button
to select the “TWS Pair”.
4. Press the Select button to enter the TWS
pairing mode.
Setting up the second speaker
1. Make sure the second speaker is in Bluetooth
mode and that it has not connected to a
Bluetooth device.
2. Press and hold the Select button to enter the
Bluetooth menu.
3. Press the Tuning up or Tuning down button
to select the “TWS Pair”.
4. Press the Select button to enter the TWS
pairing mode.
After the speakers have suc c es s fully
connected, the first speaker will display “Main:
Mono” and the name of the Bluetooth device.
The second speaker will display “Sub: Mono”.
●Set up the second speaker within 1 minute
of the first one, otherwise the setting of the
first speaker will be canceled.
●When both speakers are connected to the
same Bluetooth device, the True Wireless
Stereo (TWS) feature cannot be set. In this
case, you need to disconnect the Bluetooth
connection of one of the speakers to set up
the TWS feature.
NOTE
Presetting stations in DAB and
FM modes
There are 10 presets each for DAB and FM
radio. They are used the same way for each
operating mode.
1. Press the Power button to switch on your
radio.
2. Tune to the required radio station as
previously described.
3. Press and hold the Select button to open
the menu for the current mode.
4. Press the Tuning up or Tuning down
button to select “Favorite Station”. Press
the Select button to enter the setting.
5. Press the Tuning up or Tuning down button
to select “Preset station”. Press the Select
button.
6. Press the Tuning up or Tuning down
button to scroll through the preset list until
you reach an unused preset or a preset
that you wish to change.
7. Press Select button to store the preset.
“Preset 2 Saved” for example will be
shown on the display.
8. Repeat this procedure as needed for
the remaining presets. Stations which
are already stored in the presets may
be overwritten by following the above
procedure. The radio station presets are
retained in memory when the radio is
switched off.
Recalling a preset in DAB and
FM modes
1. Press the Power button to switch on your
radio.
2. Select the required operating mode using
the Mode button.
3. Press and hold the Select button to open
the menu for the current mode.
4. Press the Tuning up or Tuning down
button to select “Favorite Station”. Press
the Select button to enter the setting.
5. Press the Tuning up or Tuning down button
to select “Recall station”. Press the Select
button.
6. Press the Tuning up or Tuning down button
to select the desired preset station. Press
the Select button. Your radio will then tune
to the station stored in the selected preset
memory. The chosen preset number is
also shown on the display, e.g. “P2”.
Using the System setup menu
The System setup menu can be used to
configure the radio. Follow these steps to
access the system settings:
1. Turn on the radio using the Power button.
2. Press and hold the Select button to open
the menu for the current mode.
3. Use the Tuning up or Tuning down button
to select and press the [System Setup]
Select button to open the menu.
The Sys tem setup menu offers the
following options:
Use the Tuning up or Tuning down button
to select one of the options and then press
the Select button to confirm your choice.
The radio's default and recommended
settings are indicated using an asterisk.
●[Sleep]: The radio can be set to turn off
after a preset time has elapsed. Select
this option to enter the sleep timer menu.
Press the Tuning up or Tuning down
button to select the desired sleep time.
The sleep timer can be set from 15 to 120
minutes or select “Sleep off” to cancel the
sleep timer. Press the Select button to
confirm the setting.
An active sleep timer is shown using
a sleep timer indicator on the playing
display. To view the remaining time of
an active sleep timer setting, follow the
steps above to select [System Setup]
and then select . Press the [Sleep]
Select button to view the remaining time
of an active sleep timer on the display.
To cancel the sleep time before the
preset time has elapsed and to turn off
the radio, press the Power button to
turn the radio off manually.
●[Contrast]: Select this option to adjust
the contrast of the display. Use the Tuning
up or Tuning down button to adjust the
contrast level and press the Select button
to confirm.
●[Time Update]: Select this option
to select a source for automatically
updating the time and date.
●[Language]: Select this option to
configure the language in which the
radio's menus are shown.
07 08 1009
11 12 13 14 15 16
17 18 19
Starting playback
1. Start playback on the connected Bluetooth device
and adjust the volume on the Bluetooth device or
one of the speakers for comfortable listening.
NOTE
Volume setting of one speaker is reected
on the other.
2. Use the controls on your Bluetooth device to play
/ pause and navigate tracks. Alternatively, control
the playback using Play / Pause, Next track and
Previous track buttons on either speaker.
3. Press and hold the Next track or Previous
track button on either speaker to fast forward
or rewind within the current track. Release
the button when the desired point is reached.
NOTE
Not all player applications or devices may
respond to all of these controls.
Switching the audio mode
When using two speakers, you can switch
between “Mono”, “Stereo L” and “Stereo R”
mode.
1. Press and hold the Select button to enter the
Bluetooth menu.
2. Press the Tuning up or Tuning down button
to select the “TWS Setting”. Then press the
Select button to enter the setting.
3. Press the Tuning up or Tuning down button
to select “Mono-Pairing”, “Stereo L / R” or
“Stereo R / L”. Then press the Select button
to confirm your choice. The display will show
the following modes:
“Mono” mode: Both speakers play the same
sound. This is the default setting.
“Stereo L” and “Stereo R” mode: One
speaker plays the sound on the left channel,
while the other speaker plays the sound on
the right channel for stereo playback between
the speakers.
Disconnecting the True Wireless
Stereo (TWS) connection
1. Press and hold the Select button to enter the
Bluetooth menu.
2. Press the Tuning up or Tuning down button
to select the “TWS Cancel”. Then press the
Select button to disconnect TWS feature.
Key lock
The key lock function is used to prevent
unintentional operation of the radio.
1. With your radio switched on, slide the lock
switch on the rear of the radio to the left. The
lock symbol will appear on the display.
All buttons will be disabled.
2. To release the lock, slide the Lock switch to
the right. The lock symbol will disappear
on the display.
Auxiliary input socket
A 3.5mm stereo Auxiliary Input socket is
provided on the rear of your radio to permit
an audio signal to be fed into the unit from an
external audio device such as iPod, MP3 or CD
player.
1. With your radio switched on, press the Mode
button until “Aux In” is displayed.
2. Connect an external audio source (for
example, iPod, MP3 or CD player) to the
Auxiliary Input socket.
3. Adjust the volume setting on your iPod,
MP3 or CD player to ensure an adequate
signal level from your device. Then adjust
the Volume on the radio as needed for
comfortable listening.
La marque et le logo Bluetooth® sont des
marques déposées appartenant à Bluetooth
SIG, Inc. et toute utilisation de ces marques par
SANGEAN ELECTRONICS INC. est faite sous
licence.
INSTRUCTIONS
IMPORTANTES
CONCERNANT LA SÉCURITÉ
1. Ne l’installez pas à proximité de sources
de chaleur telles que des radiateurs, des
appareils de chauffage, poêles ou autres
appareils (y compris les amplificateurs) qui
produisent de la chaleur.
Cela peut entraîner un risque d’explosion ou
de fuite de liquide ou de gaz inflammable.
2. Ne pas percer, écraser, modifier ou provoquer
un impact inutile sur la batterie. La batterie peut
présenter un risque d'incendie, d'explosion ou
de brûlure chimique si elle est maltraitée.
3. N’utilisez que les extensions / accessoires
spécifiés par le fabricant.
4. Pour réduire le risque d'incendie ou de
choc électrique, n'exposez pas cet appareil
à la pluie ou l'humidité.
5. L’appareil ne doit pas être exposé aux
égouttements ou aux éclaboussures et
aucun objet rempli de liquide ne doit être
placé dessus.
6. Les piles ne doivent pas être exposées
à des chaleurs excessives telles que la
lumière du soleil, le feu ou autres.
7. Tout changement ou modification non
approuvée expressément par la partie
responsable de la conformité peut entraîner
l’annulation de l’autorisation pour l’utilisateur
d’utiliser l’équipement et la garantie.
8. ATTENTION
Risque d’explosion en cas de remplacement
des piles par des piles de type incorrect.
9. N’exposez pas la radio à l’eau, la vapeur ou
au sable.
10. Ne laissez pas votre radio
dans un endroit où une
chaleur excessive pourrait
causer des dommages.
11. La batterie doit être utilisée ou stockée à une
pression d'air supérieure à 11,6kPa, sinon
elle risque d’exploser ou de laisser échapper
des liquides et des gaz inflammables.
12. Pou r de s m esures de séc u ri té p l us
importantes, les informations suivantes doivent
être incluses dans la mesure du possible:
●les distances minimales autour de
l'appareil pour une ventilation efficace;
●la ventilation ne doivent pas être entravée
en couvrant les ouvertures de ventilation
avec des articles tels que des journaux, des
nappes, des rideaux, etc .
●aucune source de flamme nue, telle
qu'une bougie allumée, ne doit être
placée sur l'appareil;
●une attention toute particulière doit être
porter sur les aspects environnementaux
de l'élimination des batteries;
●I 'utilisation d'appareils dans des climats
tropicaux et / ou modérés.
13. ATTENTION
Danger risque d'explosion si la batterie
est remplacée incorrectement. Remplacez
uniquement avec le même type ou un type
équivalent.
14. Si un appareil est fourni avec une batterie au
lithium remplaçable, ce qui suit s'appliquera:
●si la batterie est destinée à être remplacée
par l'utilisateur, il doit comporter un
avertissement à proximité de la batterie
ou dans les instructions d'utilisation et
d'entretien;
●si la batterie n'est pas destinée à être
remplacée par l'utilisateur, il doit y avoir un
avertissement à proximité de la batterie ou
dans les instructions d'entretien.
Contrôles
1Haut-parleur
2Indicateur de charge de la batterie
3Icône LED Bluetooth
4Écran LCD
5Bouton de réglage Tuning haut / Piste
précédente / Rembobinage
6Bouton Mode
7Bouton Volume Haut (Augmenter le volume)
8Bouton Select / Menu / Info
9Bouton de réglage Tuning bas / Piste
suivante / Avance rapide
10 Bouton Volume Bas (Diminuer le volume)
11 Bouton d’Alimentation
12 Prise de charge USB DC IN 5V / 2,4A
13 Prise d’entrée auxiliaire Aux In
14 Fiche de l’antenne externe
15 Commutateur de verrouillage
16 Haut-parleur passif
Recharger la radio
La radio fonctionne sur une batterie Lithium-ion
intégrée qui peut être rechargée à l'aide du port
de charge USB ou d'un adaptateur USB (non
fourni) ayant une puissance nominale de 5V
CC et de 2,4A. La batterie doit être rechargée
lorsque vous observez les signes suivants: une
puissance réduite, une distorsion, des bruits
de bégaiement ou un indicateur de batterie
affichant une charge faible .
Avant d’utiliser la radio pour la première fois,
chargez complètement la batterie.
●Connectez uniquement des appareils
compatibles avec une source d'alimentation
CC de 5V et de 2,4A au port d'alimentation
USB car cela pourrait entraîner un
dysfonctionnement du produit.
●Connectez le câble USB (fourni) au port
d'alimentation USB du produit. Connectez
ensuite l'autre extrémité du câble à
l'appareil.
●Lorsque la batterie est en charge,
l'indicateur de charge s'allumera en rouge.
Lorsque la batterie est complètement
chargée, l'indicateur de charge s'éteindra.
REMARQUE
Écouter la radio DAB
Syntonisation des stations DAB
Pour syntoniser les stations de radio DAB,
procédez comme suit:
1. Insérez la fiche de l'antenne externe
(fournie) dans la prise d'antenne externe
située à l'arrière de votre radio.
2. Allumez la radio à l'aide du bouton
d'alimentation.
3. Sélectionnez le mode radio DAB en
appuyant plusieurs fois sur le bouton Mode.
4. Si c'est la première fois que le mode
radio DAB est utilisé, la radio effectuera
automatiquement un balayage complet
afin de trouver toutes les stations de radio
DAB disponibles. Si la radio a été déjà
utilisée avant la dernière station utilisée
sera sélectionnée.
5. Durant le processus de recherche, comme
les nouvelles stations seront détectées, le
compteur des stations augmentera et les
stations seront ajoutées à la liste stockée
dans la radio. Le graphique à barres
indique la progression du scan.
6. Lorsque le scan est complet, la première
station sera sélectionnée (en ordre
alphanumérique 0…9…A…Z…).
7. Appuyez sur le bouton de réglage Tuning
haut ou Tuning bas pour faire défiler la
liste des stations et appuyez sur le bouton
Select pour rechercher une station.
8. Réglez les boutons Volume Haut ou Bas
au niveau désiré.
REMARQUE
Si après la sélection d'une station, la station
ne syntonise pas, il peut être nécessaire de
repositionner votre radio dans une position
donnant une meilleure réception.
Menu du mode radio DAB
Vous pouvez ouvrir le menu de la radio DAB
en appuyant sur le bouton Select et en le
maintenant enfoncé lorsque la radio est en
mode radio DAB.
Utilisez le bouton de réglage Tuning haut
ou Tuning bas pour sélectionner l'une des
options, puis appuyez sur le bouton Select
pour confirmer votre choix.
Les paramètres par défaut et recommandés
de la radio sont indiqués par un astérisque.
Le menu de la radio DAB propose les options
suivantes:
●[Favorite Station]: sélectionnez cette
option pour accéder aux paramètres du
menu « Station favorite » (reportez-vous
aux chapitres « Préréglage des stations
en modes DAB et FM » et « Rappel d'une
présélection en modes DAB et FM » pour
plus de détails).
●[Station list]: sélectionnez cette option
pour afficher toutes les stations de radio
DAB trouvées et syntoniser l'une des
stations.
●[Manual tune]: sélectionnez cette option
pour syntoniser manuellement un canal /
une fréquence DAB.
●[Full Scan]: sélectionnez cette option
pour effectuer une recherche complète et
stocker toutes les stations de radio DAB
trouvées dans la liste des stations.
●[Prune Station]: sélectionnez cette
option pour supprimer toutes les stations
indisponibles de la liste des stations.
●[Station Order]: sélectionnez cette
opti on et ens ui te [Alphanumeric]
pour trier la liste des stations par
ordre alphanumérique ou sélectionnez
[Ensemble] pour trier la liste des stations
par multiplex DAB ou sélectionnez [Valid]
pour afficher uniquement les stations
pour lesquelles un signal peut être trouvé.
●[DRC Value]: le compresseur audio ou
Dynamic Range Control (également
connu sous le nom de DRC) peut rendre
les sons plus faibles plus faciles à
entendre lorsque votre radio est utilisée
dans un environnement bruyant en
réduisant la plage dynamique du signal
audio.
Sélectionnez cette option, puis utilisez
le bouton de réglage Tuning haut ou
Tuning bas pour mettre en surbrillance le
paramètre DRC requis:
[Off]: le DRC est désactivé. La diffusion
DRC sera ignorée.
[Low]: le niveau DRC est réglé à 1 / 2 du
niveau envoyé par la société de diffusion.
[High]: le DRC est défini comme le
niveau envoyé par la société de diffusion.
Appuyez sur le bouton Select pour
confirmer le réglage.
REMARQUE
toutes les émissions DAB n'utilisent
pas la fonction DRC. Si l'émission
ne fournit pas d'informations DRC, le
réglage DRC de la radio n'aura aucun
effet.
●[System Setup]: sélectionnez cette option
pour accéder au menu de configuration du
système et configurer la radio (reportez-
vous au chapitre « Utilisation du menu de
configuration du système » pour plus de
détails).
●[Back]: sélectionnez l’option « Back »
(retour) pour revenir dans les menus
précédents de la radio ou revenir à l'écran
précédent.
Affichage des informations
DAB sur l'écran
Lors de l'écoute d'une émission de radio
DAB, appuyez à plusieurs reprises sur le
bouton Select pour parcourir les informations
suivantes sur l'écran de la radio:
texte défilant, type de programme, nom du
multiplex, date, fréquence, débit binaire et
type audio, informations de codage, titre,
artiste, force du signal.
Écouter la radio FM
Syntonisation des stations FM
Pour syntoniser les stations de radio FM,
procédez comme suit:
1. Insérez la fiche de l'antenne externe
(fournie) dans la prise d'antenne externe
située à l'arrière de votre radio.
2. Allumez la radio à l'aide du bouton
d'alimentation.
3. Sélectionnez le mode radio FM en appuyant
plusieurs fois sur le bouton Mode.
4. Appuyez et maintenez enfoncé le bouton
de réglage Tuning haut ou Tuning bas
pour rechercher automatiquement une
station FM selon un ordre croissant
(Tuning haut) ou décroissant (Tuning
bas). Votre radio arrêtera le balayage
l o rs q u ' e l l e tr o uv e r a u n e st a t i o n
suffisamment puissante. L'écran affichera
la fréquence du signal qui a été trouvé.
Si les informations RDS sont disponibles,
après quel ques secondes, l'écran
affichera le nom de la station de radio.
5. Appuyez sur le bouton de réglage Tuning
haut ou Tuning bas pour régler avec
précision la fréquence par incréments de
0,05MHz si nécessaire.
6. Répétez les étapes 4 et 5 pour syntoniser
d'autres stations de radio.
7. Réglez les boutons Volume Haut ou Bas au
niveau désiré.
Menu du mode radio FM
Vous pouvez ouvrir le menu de la radio FM
en appuyant sur le bouton Select et en le
maintenant enfoncé lorsque la radio est en
mode radio FM.
Utilisez le bouton de réglage Tuning haut
ou Tuning bas pour sélectionner l'une des
options, puis appuyez sur le bouton Select pour
confirmer votre choix.
Les paramètres par défaut et recommandés de
la radio sont indiqués par un astérisque.
Le menu de la radio FM propose les options
suivantes:
●[Scan]: sélectionnez cette option pour que
votre radio balaye d’une valeur basse de
la fréquence vers une valeur supérieure.
Lorsqu'elle trouve une station d'une puissance
suffisante, la fréquence clignotera pendant 6
secondes sur l'écran, puis la radio continue à
balayer. Pour syntoniser la station ou arrêter
le balayage, appuyez sur le bouton Select.
●[Favorite Station]: sélectionnez cette
option pour accéder aux paramètres du
menu « Station favorite » (reportez-vous aux
chapitres « Préréglage des stations en modes
DAB et FM » et « Rappel d'une présélection
en modes DAB et FM » pour plus de détails).
●[FM Scan Zone]: sélectionnez cette option
(Zone de balayage de la bande FM) pour
configurer si la radio ne doit rechercher que
des signaux forts (« Local ») ou tous les
signaux (« Distant ») lors de l'utilisation de la
fonction de syntonisation automatique.
●[System Setup]: sélectionnez cette option pour
accéder au menu de configuration du système
et configurer la radio (reportez-vous au chapitre
« Utilisation du menu de configuration du
système » pour plus de détails).
●[Back]: sélectionnez l’option « Back » (retour)
pour revenir dans les menus précédents de la
radio ou revenir à l'écran précédent.
Affichage des informations FM sur
l'écran
Lorsque vous écoutez une station de radio
FM qui diffuse également des données RDS,
appuyez plusieurs fois sur le bouton Select
pour faire défiler les informations suivantes sur
l'écran de la radio:
Radio texte, Type de programme, Date, Fréquence.
Présélectionner des stations en
modes – DAB et FM
Il y a 10 présélections de mémoire pour la
bande DAB et pour la bande FM. La procédure
pour régler des présélections et les utiliser pour
régler des stations est la même pour les modes
FM et DAB, et est décrite ci-dessous.
1. Appuyez sur le bouton d’Alimentation pour
allumer la radio.
2. Syntonisez la station de radio souhaitée
comme décrit précédemment.
3. Appuyez sur le bouton Select et maintenez-le
enfoncé pour ouvrir le menu du mode actuel.
4. Appuyez sur le bouton de réglage Tuning
haut ou Tuning bas pour sél ectionner
« Station favorite ». Appuyez sur le bouton
Select pour entrer dans le menu.
5. Appuyez sur le bouton de réglage Tuning
haut ou Tuning bas pour sélectionner «
Station préréglée ». Appuyez sur le bouton
Select pour confirmer.
6. Appuyez sur le bouton de réglage Tuning
haut ou Tuning bas pour faire défiler la
liste des préréglages jusqu'à ce que vous
atteigniez un préréglage inutilisé ou un
préréglage que vous souhaitez modifier.
7. Appuyez sur le bouton Select pour mémoriser
le préréglage. « Preset 2 Saved » (Préréglage
1 mémorisé) par exemple s'affichera à l'écran.
8. Répétez cette procédure au besoin pour
les préréglages restants. Les stations déjà
enregistrées dans les préréglages peuvent
être écrasées en suivant la procédure ci-
dessus. Les préréglages des stations de
radio sont conservés en mémoire lorsque la
radio est éteinte.
Rappeler une station préréglée
dans les modes DAB et FM
1. Appuyez sur le bouton d'Alimentation pour
allumer votre radio.
2. Sélectionnez le mode de fonctionnement
souhaité à l’aide du bouton Mode.
3. Appuyez sur le bouton Select et maintenez-le
enfoncé pour ouvrir le menu du mode actuel.
4. Appuyez sur le bouton de réglage Tuning
haut ou Tuning bas pour sél ectionner
« Station favorite ». Appuyez sur le bouton
Select pour entrer dans le menu.
5. Appuyez sur le bouton de réglage Tuning
haut ou Tuning bas pour sélectionner « Recall
Station » (Rappeler un préréglage). Appuyez
sur le bouton Select pour confirmer.
6. Appuyez sur le bouton de réglage Tuning
haut ou Tuning bas pour sélectionner la
station préréglée souhaitée. Appuyez sur le
bouton Select pour confirmer. Votre radio se
syntonisera alors sur la station enregistrée
dans la mémoire préréglée sélectionnée. Le
numéro de préréglage choisi est également
affiché à l'écran, par ex. « P2 ».
Utilisation du menu de configuration
du système
Le menu de configuration du système peut
être utilisé pour configurer la radio. Suivez ces
étapes pour accéder aux paramètres système:
1. Allumez la radio à l'aide du bouton d'alimentation.
2. Appuyez sur le bouton Select et maintenez-le
enfoncé pour ouvrir le menu du mode actuel.
3. Utilisez le bouton de réglage Tuning haut
ou Tuning bas pour sélectionner [System
Setup] et appuyez sur le bouton Select pour
ouvrir le menu.
Le menu de configuration du système
propose les options suivantes:
Utilisez le bouton de réglage Tuning haut
ou Tuning bas pour sélectionner l'une des
options, puis appuyez sur le bouton Select
pour confirmer votre choix.
Les paramètres par défaut et recommandés
de la radio sont indiqués par un astérisque.
●[Sleep]: la radio peut être réglée pour
s'éteindre après un délai prédéfini.
Sélectionnez cette option pour accéder au
menu de la minuterie de mise en veille.
Appuyez sur le bouton de réglage Tuning
haut ou Tuning bas pour sélectionner la durée
de mise en veille souhaitée. La minuterie
de mise en veille peut être réglée de 15 à
120 minutes ou sélectionnez « Sleep off »
(Fonction sommeil désactivée) pour annuler
la minuterie de mise en veille. Appuyez sur le
bouton Select pour confirmer le réglage.
Une minuterie de mise en veille active est
affichée à l'aide d'un indicateur de minuterie
de mise en veille sur l'écran de lecture. Pour
afficher le temps restant d'un réglage de
minuterie de mise en veille active, suivez les
étapes ci-dessus pour sélectionner [System
Setup] [Sleep], puis sélectionnez . Appuyez
sur le bouton Select pour afficher le temps
restant d'une minuterie de mise en veille
active sur l'écran.
Pour annuler le temps de veille avant que
le temps préréglé ne se soit écoulé et pour
éteindre la radio, appuyez sur le bouton
d'alimentation pour éteindre l'appareil
manuellement.
●[Contrast]: sélectionnez cette option pour
régler le contraste de l'affichage. Utilisez le
bouton de réglage Tuning haut ou Tuning
bas pour régler le niveau de contraste et
appuyez sur le bouton Select pour confirmer.
●[Time Update]: Sélectionnez cette option
pour sélectionner une source pour la mise
à jour automatique de l'heure et de la date.
●[Language]: sélectionnez cette option
pour configurer la langue dans laquelle les
menus de la radio sont affichés.
●[Factory reset]: sélectionnez cette option
pour réinitialiser la radio aux paramètres
d'usine par défaut. Après confirmation,
tous les réglages utilisateur et les stations
préréglées seront effacés.
●[SW Version]: sélectionnez cette option pour
afficher la version du logiciel de la radio. Pour
quitter la page, appuyez sur le bouton Select.
●[Back]: sélectionnez l’option « Back » (retour)
pour revenir dans les menus précédents de
la radio ou revenir à l'écran précédent.
Écouter de la musique via le
streaming Bluetooth
Vo u s dev ez cou p ler votre périp h é riqu e
Bluetooth avec votre DDR-7X avant de pouvoir
effectuer une liaison automatique pour lire /
diffuser de la musique Bluetooth via votre DDR-
7X. Le couplage crée une « liaison » afin que
les deux appareils puissent se reconnaître.
Coupler et lire votre appareil
Bluetooth pour la première fois
1. Avec votre radio allumée, appuyez sur le
bouton Mode pour sélectionner la fonction
Bluetooth. « Bluetooth Pairing » (Couplage
Bluetooth) sera affiché à l’écran. L’icône LED
Bluetooth sur l’écran de la radio clignotera
rapidement en bleu indiquant que la radio est
maintenant détectable.
REMARQUE
lorsque la radio n'est pas connectée à un
appareil Bluetooth en mode Bluetooth, elle
s'éteindra automatiquement après 15 minutes.
2. Activez le Bluetooth sur votre appareil en
fonction du mode d'emploi de l'appareil pour
établir un lien avec la radio. Localisez la liste
des périphériques Bluetooth et sélectionnez le
périphérique nommé « DDR-7X» (avec certains
smartphones équipés de versions antérieures
au périphérique Bluetooth BT2.1, vous devrez
peut-être entrer le code d'accès « 0000 »).
3. Une fois connectée, une notification sonore
se fera entendre et le nom de l’appareil
connecté sera affiché à l’écran. L’icône LED
Bluetooth s’arrêtera de clignoter pour rester
allumé. Vous pouvez simplement sélectionner
et lire la musique que vous voulez depuis
votre appareil source.
4. La molette de contrôle du volume peut être
réglée à partir de votre appareil source ou
directement à partir de la radio. Utilisez
les commandes de votre périphérique
compatible Bluetooth ou de la radio pour lire
/ mettre en pause et parcourir les pistes.
●S i d e u x a p pa r e i l s Bl u e t o o t h s o n t
couplés pour la première fois, les deux
rechercheront votre radio. Elle montrera
sa disponibilité sur les deux appareils.
Cependant, si un appareil a été couplé
avant à cet appareil, l'autre appareil
Bluetooth ne le trouvera pas dans sa liste.
●Si vous sortez votre appareil source
hors de la portée effective, la connexion
sera temporairement interrompue avec
votre radio. Votre radio se reconnectera
automatiquement si l'appareil source est
ramené à portée. Sachez que pendant
la période de déconnexion, aucun autre
périphérique Bluetooth ne peut être couplé
ou connecté à votre radio.
●Si « DDR-7X » s'affiche dans votre liste
d'appareils Bluetooth mais que votre
appareil ne peut pas s'y connecter, veuillez
supprimer l'élément de votre liste et
couplez l'appareil à la radio en suivant les
étapes décrites précédemment.
●La portée de fonctionnement effective entre
le système et l'appareil couplé est d'environ
10 mètres (30 pieds). Tout obstacle entre le
système et l'appareil peut réduire la portée
de fonctionnement.
●Les performances de la connectivité
Bluetooth peuvent varier en fonction des
périphériques Bluetooth connectés. Veuillez-
vous référer aux capacités Bluetooth de votre
appareil avant de vous connecter à votre
radio. Toutes les fonctionnalités peuvent
ne pas être prises en charge sur certains
appareils Bluetooth couplés.
REMARQUE
●Avec certains téléphones portables, passer
ou recevoir des appels, des messages texte,
des e-mails ou toute autre activité sans
lien avec le streaming audio peut couper
le streaming audio Bluetooth ou même
vous déconnecter temporairement de votre
appareil. Un tel comportement est une
fonction de l'appareil connecté et n'indique
pas une erreur avec votre DDR-7X.
REMARQUE
Lecture de fichiers audio en mode
Bluetooth
Lorsque vous avez connecté avec succès
votre radio avec l'appareil source Bluetooth
choisi, vous pouvez commencer à écouter votre
musique à l'aide des commandes de votre
appareil Bluetooth connecté.
1. Une fois la lecture commencée, le volume
peut être réglé à la fois sur la radio à l'aide des
boutons de volume et sur l'appareil Bluetooth
à l'aide du contrôle du volume de l'appareil.
2. Utilisez les commandes de votre appareil
Bluetooth pour lire / mettre en pause et parcourir
les pistes. Vous pouvez également contrôler la
lecture à l'aide des boutons Lecture / Pause,
Piste suivante, Piste précédente de votre radio.
3. Appuyez sur le bouton Avance rapide ou
Retour rapide et maintenez-le enfoncé pour
vous déplacer dans la piste en cours. Relâchez
le bouton lorsque le point souhaité est atteint.
REMARQUE
Toutes les applications ou tous les périphériques
du lecteur ne peuvent pas répondre à toutes
ces commandes.
Options d'affichage en mode
Bluetooth
Si votre appareil connecté est en mesure de
fournir des informations à partir de la piste en
cours de lecture, votre radio peut afficher les
informations suivantes en mode Bluetooth:
Nom de l’appareil, Titre, Artiste, Album.
Appuyez sur le bouton Select pour faire défiler
les différentes options.
Veuillez noter que la disponibilité des informations
dépend spécifiquement du format du support.
Reconnexion d'un périphérique
source Bluetooth précédemment
couplé
La radio peut mémoriser jusqu'à 8 ensembles
d'appareils Bluetooth couplés. Lorsque la mémoire
dépasse cette quantité, le premier appareil couplé
en mémoire sera écrasé et remplacé.
Si votre appareil Bluetooth a déjà été couplé à
la radio précédemment, l'appareil mémorisera
votre appareil Bluetooth et tentera de se
reconnecter à l’appareil Bluetooth en mémoire
qui a été connecté en dernier.
Dé c o n n e c t e r v o t re ap p a r e i l
Bluetooth
1. Appuyez sur le bouton Select et maintenez-
le enfoncé pour accéder au menu Bluetooth.
2. Appuyez sur le bouton de réglage Tuning haut
ou Tuning bas pour sélectionner « Cancel
Pair » (Annuler le couplage). Appuyez ensuite
sur le bouton Select pour confirmer.
3. Pour vous déconnecter de votre appareil
Bluetooth, utilisez le bouton de réglage
Tuning haut ou Tuning bas pour sélectionner
« Yes » (Oui), puis appuyez sur le bouton
Select. Il y aura une tonalité de confirmation
et l'indicateur LED Bluetooth sur la radio
clignotera rapidement en bleu pour montrer
que la radio est à nouveau détectable pour
le couplage. La sélection de « No » (Non) ou
« Back » (Retour) ne déconnectera pas votre
appareil Bluetooth. Appuyez sur le bouton
Select pour confirmer votre choix.
4. Vous pouvez aussi appuyez sur le bouton Mode
pour sélectionner tous les modes sauf le mode
Bluetooth ou désactiver le Bluetooth sur l’appareil
connecté pour supprimer la connexion.
.
Supprimer la liste des appareils
Bluetooth couplés
1. Appuyez sur le bouton Select et maintenez-
le enfoncé pour accéder au menu Bluetooth.
2. Appuyez sur le bouton de réglage Tuning
haut ou Tuning bas pour sélectionner « Clear
pairing » (Supprimez la liste des appareils
couplés). Appuyez ensuite sur le bouton
Select pour confirmer.
3. Pour effacer la mémoire de tous les appareils
couplés, utilisez le bouton de réglage Tuning
haut ou Tuning bas pour sélectionner « Yes
» (Oui), puis appuyez sur le bouton Select.
La sélection de « No » (Non) ou « Back »
(Retour) n'effacera pas la mémoire de tous
les appareils couplés. Appuyez sur le bouton
Select pour confirmer votre choix.
Fonction True Wireless Stereo
(TWS)
La fonction True Wireless Stereo (également
co nnu e sou s le nom d e TW S) es t un e
fonctionnalité qui permet à un appareil de se
connecter sans fil à un autre appareil. Votre
DDR-7X peut être connectée sans fil à une
deuxième radio DDR-7X et lire de la musique sur
les deux haut-parleurs en même temps.
Configuration du premier haut-
parleur
1. Assurez-vous que le premier haut-parleur est
en mode Bluetooth et connectez-vous à un
appareil Bluetooth.
2. Appuyez sur le bouton Select et maintenez-
le enfoncé pour accéder au menu Bluetooth.
3. Appuyez sur le bouton de réglage Tuning
haut ou Tuning bas pour sélectionner la
« TWS Pair » (Couplage TWS).
4. Appuyez sur le bouton Select pour accéder
au mode de couplage TWS.
Configuration du deuxième haut-
parleur
1. Assurez-vous que le deuxième haut-parleur
est en mode Bluetooth et qu'il n'est pas
connecté à un appareil Bluetooth.
2. Appuyez sur le bouton Select et maintenez-
le enfoncé pour accéder au menu Bluetooth.
3. Appuyez sur le bouton de réglage Tuning
haut ou Tuning bas pour sélectionner la
« TWS Pair » (Couplage TWS).
4. Appuyez sur le bouton Select pour accéder
au mode de couplage TWS.
Une fois les haut-parleurs connectés avec
succès, le premier haut-parleur affichera
« Main: Mono » (Principal: Mono) et le nom
du périphérique Bluetooth. Le deuxième haut-
parleur affichera « Sub: Mono »(Secondaire:
Mono).
●Configurez le deuxième haut-parleur dans la
minute qui suit le premier, sinon le réglage
du premier haut-parleur sera annulé.
REMARQUE
●Lorsque les deux haut-parleurs sont
connectés au même périphérique
Bluetooth, la fonction True Wireless
Stereo (TWS) sera inactive. Dans ce cas,
vous devez déconnecter la connexion
Bluetooth de l'une des enceintes pour
configurer la fonction TWS.
REMARQUE
Lancer la lecture
1. Lancez la lecture sur l'appareil Bluetooth
connecté et réglez le volume sur l'appareil
Bluetooth ou sur l'un des haut-parleurs
pour une écoute confortable.
REMARQUE
Le réglage du volume d'un haut-parleur
se reflète sur l'autre.
2. Utilisez les commandes de votre appareil
Bluetooth pour lire / mettre en pause
et parcourir les pistes. Vous pouvez
également contrôler la lecture à l'aide des
boutons Lecture / Pause, Piste suivante et
Piste précédente sur l'un ou l'autre haut-
parleur.
3. Appuyez sur le bouton Piste suivante ou
Piste précédente de l'un des haut-parleurs
et maintenez-le enfoncé pour avancer
ou reculer rapidement dans la piste en
cours. Relâchez le bouton lorsque le point
souhaité est atteint.
REMARQUE
Toutes l e s applications ou tous l es
périphériques du lecteur ne peuvent pas
répondre à toutes ces commandes.
Changer de mode audio
Lorsque vous utilisez deux haut-parleurs, vous
pouvez basculer entre les modes « Mono », «
Stereo L » et « Stereo R ».
1. Appuyez sur le bouton Select et maintenez-
le enfoncé pour accéder au menu Bluetooth.
2. Appuyez sur le bouton de réglage Tuning
haut ou Tuning bas pour sélectionner
la « TWS Setting » (Paramètres TWS).
Appuyez ensuite sur le bouton Select pour
entrer le paramètre.
3. Appuyez sur le bouton de réglage Tuning
haut ou Tuning bas pour sélectionner «
Mono-Pairing », « Stereo L / R » ou « Stereo
R / L ». Appuyez ensuite sur le bouton Select
pour confirmer votre choix. L'écran affichera
les modes suivants:
Mode « Mono »: les deux haut-parleurs
diffusent le même son. Ce sont les
paramètres par défauts.
Mode « Stereo L » et « Stereo R »: un
haut-parleur joue le son sur le canal gauche,
tandis que l'autre haut-parleur joue le son sur
le canal droit pour une lecture stéréo entre les
haut-parleurs.
Déconnexion de la fonction True
Wireless Stereo (TWS)
1. Appuyez sur le bouton Select et maintenez-
le enfoncé pour accéder au menu Bluetooth.
2. Appuyez sur le bouton de réglage Tuning
haut ou Tuning bas pour sélectionner la «
TWS Cancel » (Déconnexion de la fonction
TWS). Appuyez ensuite sur le bouton Select
pour déconnecter la fonction TWS.
Verrouillage des touches
La fonction de verrouillage des touches est
utilisée pour empêcher le fonctionnement
involontaire de la radio.
1. Avec votre radio allumée, faites glisser le
commutateur de verrouillage à l'arrière de
la radio vers la gauche. Le symbole de
verrouillage apparaîtra à l'écran. Tous
les boutons seront désactivés.
2. P o u r an n u l e r l e v e r r o u i l l a g e de s
touches, faites glisser le commutateur de
verrouillage vers la droite. Le symbole de
verrouillage disparaîtra de l'écran.
Prise d’entrée auxiliaire Aux In
Une prise d’entrée auxiliaire stéréo de 3,5mm
est située sur le côté droit de votre radio
pour permettre l’arrivée d’un signal audio
dans l’unité depuis un appareil audio externe
comme un iPod, MP3 ou lecteur CD.
1. Avec votre radio allumée, appuyez sur le
bouton Mode jusqu'à ce que « Aux In »
s'affiche.
2. Connectez une source audio externe (par
exemple, iPod, MP3 ou lecteur CD) sur la
prise d'entrée auxiliaire (marquée « Aux In »).
3. Réglez les paramètres du volume sur votre
iPod, lecteur MP3 ou CD pour garantir un
signal adéquat et réglez le volume sur la
radio pour une écoute confortable.
La marca de Bluetooth
® y sus logotipos son
marcas registradas pertenecientes a Bluetooth
SIG, Inc. y el uso de dichas marcas por
SANGEAN ELECTRONICS INC. se realiza bajo
licencia.
Importantes instrucciones de
seguridad
1. No lo instale cerca de fuentes de calor
como radiadores, rejillas de calefacción,
estu fas u otros aparatos (i n clu i dos
amplificadores) que produzcan calor.
Eso podría provocar una explosión o la
fuga de líquido o gas inflamable.
2. No perfore, aplaste, modifique ni cause golpes
innecesarios a la batería. La batería podría
representar un riesgo de incendio, explosión o
quemaduras químicas si se trata mal.
3. Utilice únicamente accesorios especificados
por el fabricante.
4. Para reducir el riesgo de incendio o descarga
eléctrica, no exponga este aparato a la lluvia
o la humedad.
5. El aparato no debe ser expuesto a goteos
ni salpicaduras y no deberán colocarse
objetos que contengan líquidos sobre este.
6. Las pilas no deberán ser expuestas a un
calor excesivo, como el producido por la luz
solar, un fuego, etc.
7. Cualquier cambio o modificación no
aprobada expresamente por la parte
responsable podría anular la autoridad del
usuario para operar el equipo y su garantía.
8. PRECAUCIÓN
Riesgo de explosión si la batería se
reemplaza por el tipo incorrecto.
9. No deje que su radio quede expuesta a
agua, vapor o arena.
10. No deje su radio donde
haya calor excesivo que
pudiera causar daños.
11. La batería debe usarse o guardarse a una
presión de aire inferior a 11,6kPa, de lo
contrario, la batería podría explotar o tener
una fuga de líquidos y gases inflamables.
12. Si fuera relevante para la seguridad, en
la medida de lo posible se debe incluir la
siguiente información:
●las distancias mínimas alrededor del
aparato para una ventilación suficiente;
●la ventilación no debe impedirse cubriendo
las aperturas de ventilación con elementos
como periódicos, manteles, cortinas, etc.;
●no se deben colocar llamas descubiertas,
como velas encendidas, sobre el aparato;
●al eliminar la batería, se debe prestar
atención a los aspectos medioambientales;
●el uso del aparato en climas tropicales o
moderados.
13. PRECAUCIÓN
Existe peligro de explosión si la batería se
reemplaza incorrectamente. Reemplácela
solo con una del mismo tipo o equivalente.
14. Si el aparato se suministra con batería de
litio reemplazable, se aplica lo siguiente:
●si la batería está pensada para ser
reemplazada por el usuario, deberá
haber una advertencia cerca de la batería
o tanto en las instrucciones de uso como
en las de servicio;
●si la batería no está pensada para ser
reemplazada por el usuario, deberá
haber una advertencia cerca de la batería
o en las instrucciones de servicio.
Controles
1Altavoz
2Indicador de carga de la batería
3Indicador LED Bluetooth
4Pantalla LCD
5Botón de sintonizar hacia arriba / pista
anterior / rebobinar
6Botón de modo
7Botón de subir volumen
8Botón de seleccionar / menú / información
9Botón de sintonizar hacia abajo / pista
siguiente / avance rápido
10 Botón de bajar volumen
11 Botón de encendido
12 Toma de carga USB de entrada de CC 5V / 2,4A
13 Toma de entrada auxiliar
14 Toma de antena externa
15 Interruptor de bloqueo
16 Altavoz pasivo
Carga de la radio
La radio funciona con una batería de iones
de litio integrada que puede cargarse usando
el puerto de carga USB o un adaptador de
corriente USB (no incluido) con una potencia
de salida nominal de CC de 5V y 2,4A. Una
potencia reducida, distorsión, cortes en el sonido
o que el indicador de batería este bajo son
señales de que la batería necesita ser cargada.
Antes de usar la radio por primera vez, cargue
completamente la batería.
●Conecte al puerto de alimentación USB
solo dispositivos que sean compatibles con
una fuente de alimentación de CC de 5V y
2,4A. De lo contrario, podría provocar un
mal funcionamiento del producto.
●Conecte el cable USB (suministrado)
con el puerto de alimentación USB del
producto. A continuación, conecte el otro
extremo del cable al dispositivo.
●Cuando la batería se esté cargando, el
indicador de carga se iluminará en color
rojo. Cuando la batería se haya cargado
completamente, el indicador de carga rojo
se apagará.
NOTA
Escuchar la radio DAB
Sintonizar emisoras DAB
Para sintonizar emisoras de radio DAB, siga
estos pasos:
1. Inserte el enchufe de la antena externa
(suministrado) en la toma de antena externa
ubicada en la parte trasera de la radio.
2. Encienda la radio usando el botón de
encendido.
3. Seleccione el modo de radio DAB presionando
repetidamente el botón de modo.
4. Si es la primera vez que usa el modo de
radio DAB, la radio realizará una búsqueda
completa de forma automática para encontrar
todas las emisoras de radio DAB disponibles.
Si la radio se p1-ha usado con anterioridad, se
seleccionará la última emisora usada.
5. Durante el escaneo, a medida que se
detecten nuevas emisoras, el contador
de emisoras aumentará y las emisoras se
añadirán a la lista guardada en la radio. La
barra indica el progreso del escaneo.
6. Cuando se complete el escaneo, la primera
emisora (en orden alfanumérico: 0…9, A…Z)
se seleccionará.
7. Presione el botón de sintonizar hacia arriba
o abajo para recorrer la lista de emisoras
y presione el botón de seleccionar para
sintonizar una emisora.
8. Use los botones de subir / bajar volumen
para ajustar el volumen según desee.
NOTA
Si tras seleccionar una emisora, esta no se
sintoniza, puede ser necesario reubicar la
radio a una posición que proporcione mejor
recepción.
El menú de radio DAB
Puede abrir el menú de radio DAB manteniendo
presionado el botón de seleccionar mientras la
radio está en el modo de radio DAB.
Use el botón de sintonizar hacia arriba o abajo
para seleccionar una de las opciones y, a
continuación, presione el botón de seleccionar
para confirmar su elección.
Los ajustes predeterminados y recomendados
se indican mediante un asterisco.
El menú de radio DAB ofrece las siguientes
opciones:
●[Favorite Station] (Emisora favorita): seleccione
esta opción para acceder a los ajustes del
menú de "Emisora favorita" (para más detales,
consulte los capítulos de "Presintonizar emisoras
en los modos DAB y FM" y "Seleccionar una
presintonía en los modos DAB y FM").
●[Station list] (Lista de emisoras): seleccione
esta opción para mostrar todas las emisoras
de radio DAB que se encontraron y sintonizar
una de ellas.
●[Manual tune] (Sintonización manual):
seleccione esta opción para sintonizar
manualmente un canal / frecuencia DAB.
●[Full scan] (Búsqueda completa): seleccione
esta opción para realizar una búsqueda
completa y guardar todas las emisoras de
radio DAB encontradas en la lista de emisoras.
●[Prune Station] (Depurar emisoras): seleccione
esta opción para eliminar todas las emisoras no
disponibles de la lista de emisoras.
●[Station Order] (Orden de las emisoras):
seleccione esta opción y a continuación
[Alphanumeric] (Alfanumérico) para ordenar
la lista de emisoras alfanuméricamente o
seleccione [Ensemble] (Conjunto) para
ordenar la lista de emisoras por el multiplex
DAB o seleccione [Valid] (Válidas) para
mostrar solo aquellas emisoras para las que
se pueda encontrar una señal.
●[DRC Value] (Valor DRC): El control de
rango dinámico (Dynamic Range Control,
también conocido como DRC) puede hacer
que los sonidos más bajos sean más fáciles
de escuchar cuando la radio se usa en un
ambiente ruidoso al reducir el rango dinámico
de la señal de audio.
Seleccione esta opción y use el botón de
sintonizar hacia arriba o abajo para resaltar la
configuración DRC deseada:
[Off] (Apagado): el DRC se desactiva. El
DRC de la transmisión se ignorará.
[Low] (Bajo): el nivel de DRC se establece a
1 / 2 del enviado por la emisora.
[High] (Alto): el DRC se establece como es
enviado por la emisora.
Presione el botón de seleccionar para
confirmar el ajuste.
NOTA
no todas las transmisiones DAB usan
la función DRC. Si la transmisión no
proporciona información DRC, los ajustes
DRC en la radio no tendrán ningún efecto.
●[System Setup] (Configuración del sistema):
seleccione esta opción para ir a los ajustes
del menú de sistema y configurar la radio
(para más detalles, consulte el capítulo "Uso
del menú de configuración del sistema").
●[Back] (Atrás): seleccione esta opción
retroceder un paso en los menús de la radio
o volver a la pantalla anterior.
20 21
DDR-7X
3A81eZ1100010
2 31 4
11
6
15
14
13
12
7
16
810 9
5
Specifications
Frequency Coverage FM 87.5-108 MHz
DAB 174.928-239.200 MHz
Output power
DAB / FM mode 1.6W 10%T.H.D. @ 100Hz
AUX / Bluetooth mode 3.0W 10%T.H.D. @ 100Hz
Aux In
Input sensitivity IN 300mV Output 3.0W @ 100Hz
Speaker
Speaker 40mm 4ohm x 1
Passive speaker 74.2X36.7 mm
Bluetooth
Bluetooth specification Bluetooth
® Ver 5.2
Profile Support A2DP, AVRCP
Bluetooth Audio CODEC SBC, AAC
Transmitting Power Specification Power Class 2
Line of sight range 10meters / 30feet
The frequency and maximum
transmitted power 2402MHz ~ 2480MHz: 3.21dBm (Bluetooth BLE)
Built-in Battery
Battery Rechargeable Lithium-ion battery 3.65V 2600mAh
Battery life Speaker output 10mW, the battery life is approx.19 hours for
4 hours a day at normal volume level.
Charging current Max. 900mA
Charging time approximately 4.0Hr
General
DC IN Type-C USB jack 5V 2.4A
This symbol indicates DC voltage.
Operating temperature range 0°C to + 35°C
※ The barcode label on the product is defined as below:
Serial number
Production month
Production year
Product code
The marking information is located at the bottom of apparatus.
The company reserves the right to amend the specifications without notice.
If at any time in the future you should need to dispose of this product please note that: Waste
electrical products should not be disposed of with household waste. Please recycle where
facilities exist. Check with your Local Authority or retailer for recycling advice. (Waste Electrical
and Electronic Equipment Directive)
Spécifications
Couverture des fréquences FM 87.5-108 MHz
DAB 174.928-239.200 MHz
Puissance de sortie
Mode DAB / FM 1,6W de 10%T.H.D. @ 100Hz
Mode AUX / Bluetooth 3,0W de 10%T.H.D. @ 100Hz
Aux In
Sensibilité d'entrée Entrée 300mV Sortie 3.0W @ 100Hz
Haut-parleur
Haut-parleur 40mm 4ohm x 1
Haut-parleur passif 74.2X36.7 mm
Bluetooth
Spécification du Bluetooth Bluetooth
® Version 5.2
Profile supporté A2DP, AVRCP
CODEC Audio Bluetooth SBC, AAC
Puissance d’émission Spécification Classe 2 de puissance
Portée de fonctionnement 10mètres / 30pieds
Fréquence et puissance maximale
transmise 2402MHz ~ 2480MHz: 3.21dBm (Bluetooth BLE)
Batterie intégrée
Batterie Batterie Lithium-ion rechargeable de 3,65V et
2600mAh
Autonomie de la batterie sortie du haut-parleur de 10mW, l’autonomie de la
batterie est d'environ 19 heures pour 4 heures par
jour d’écoute à un niveau de volume normal.
Tension de charge Max. 900mA
Temps de charge environ 4Heures
Général
Entrée DC IN prise USB de type C de 5V et 2,4A
Ce symbole indique une tension continue.
Plage de température de
fonctionnement 0°C à + 35°C
※ L'étiquette du code-barres sur le produit est définie ci-dessous:
Numéro de série
Mois de production
Année de production
Code du produit
Les informations de marquage sont situées au bas de l'appareil.
La Société se réserve le droit de modifier les caractéristiques sans avertissement.
Si à tout moment ce produit devait à être éliminé, veuillez noter les points suivants: les déchets
électriques ne doivent pas être jetés avec les ordures ménagères. Veuillez recycler là où les
installations existent. Vérifiez auprès de votre collectivité locale ou votre détaillant pour des
conseils de recyclage. (Directive sur les déchets d'équipements électriques et électroniques)
Mostrar información de DAB en
pantalla
Cuando escuche una transmisión de radio DAB,
presione repetidamente el botón de seleccionar
para recorrer la siguiente información en la
pantalla de la radio:
Texto con desplazamiento, tipo de programa,
nombre del multiplex, fecha, frecuencia, tasa de
bits y tipo de audio, información de codificación,
título, artista, intensidad de la señal.
Escuchar la radio FM
Sintonizar emisoras FM
Para sintonizar emisoras de radio FM, siga
estos pasos:
1. Inserte el enchufe de la antena externa
(suministrado) en la toma de antena externa
ubicada en la parte trasera de la radio.
2. Encienda la radio usando el botón de
encendido.
3. Seleccione el modo de radio FM presionando
repetidamente el botón de modo.
4. Mantenga presionado el botón de sintonizar
hac ia arriba o abaj o pa ra s into niz ar
automáticamente una emisora FM con una
frecuencia más alta o baja, respectivamente.
La radio dejará de buscar cuando encuentre
una emisora lo suficientemente fuerte. En
pantalla se mostrará la frecuencia de la señal
que se p1-ha encontrado. Si hay información RDS
disponible, tras unos segundos, la pantalla
mostrará el nombre de la emisora de radio.
5. Si fuera necesario, presione el botón de
sintonizar hacia arriba o abajo para ajustar la
frecuencia a intervalos de 0.05MHz.
6. Repita los pasos 4 y 5 para sintonizar otras
emisoras de radio.
7. Use los botones de subir / bajar volumen
para ajustar el volumen según desee.
El menú de radio FM
Puede abrir el menú de radio FM manteniendo
presionado el botón de seleccionar mientras la
radio está en el modo de radio FM.
Use el botón de sintonizar hacia arriba o abajo
para seleccionar una de las opciones y, a
continuación, presione el botón de seleccionar
para confirmar su elección.
Los ajustes predeterminados y recomendados
se indican mediante un asterisco.
El menú de radio FM ofrece las siguientes
opciones:
●[Scan] (Búsqueda): seleccione está opción
para que la radio realice una búsqueda desde
la frecuencia baja a la alta. Cuando encuentre
una emisora lo suficientemente fuerte, la
frecuencia parpadeará durante 6 segundos
en pantalla y la radio continuará la búsqueda.
Para sintonizar la emisora o detener la
búsqueda, presione el botón de seleccionar.
●[Favorite Station] (Emisora favorita):
seleccione esta opción para acceder a los
ajustes del menú de "Emisora favorita"
(para más detales, consulte los capítulos de
"Presintonizar emisoras en los modos DAB
y FM" y "Seleccionar una presintonía en los
modos DAB y FM").
●[FM Scan Zone] (Zona de búsqueda FM):
seleccione está opción para configurar si
la radio solo debe buscar señales fuertes
("Local", Locales) o todas las señales
("Distant", Lejanas) al usar la función de
sintonización automática.
●[System Setup] (Configuración del sistema):
seleccione esta opción para ir a los ajustes
del menú de sistema y configurar la radio
(para más detalles, consulte el capítulo "Uso
del menú de configuración del sistema").
●[Back] (Atrás): seleccione esta opción
retroceder un paso en los menús de la radio
o volver a la pantalla anterior.
Mostrar información de FM en
pantalla
Cuando escuche una emisora de radio FM
que también transmita datos RDS, presione
repetidamente el botón de seleccionar para
recorrer la siguiente información en la pantalla
de la radio:
Texto de la radio, tipo de programa, fecha,
frecuencia.
Presintonizar emisoras en los
modos DAB y FM
Hay 10 presintonías para la radio DAB y otras
10 para la radio FM. Se usan de la misma
forma en ambos modos.
1. Presione el botón de encendido para
22
Operating instruction
GB
Mode d’emploi
F
Instruccions de manejo
E
encender la radio.
2. Sintonice la emisora de radio deseada tal
y como se p1-ha descrito anteriormente.
3. Mantenga presionado el botón de seleccionar
para abrir el menú del modo actual.
4. Presione el botón de sintonizar hacia arriba
o bajo para seleccionar "Favorite Station"
(Emisora favorita). Presione el botón de
seleccionar para entrar a los ajustes.
5. Presione el botón de sintonizar hacia
arriba o bajo para seleccionar "Preset
station" (Presintonizar emisora). Presione
el botón de seleccionar.
6. Presione el botón de sintonizar hacia arriba
o bajo para recorrer la lista de presintonías
hasta que llegue a una presintonía vacía o
una que desee cambiar.
7. Presione el botón de seleccionar para
guardar la presintonía. En pantalla se
mostrará por ejemplo "Preset 2 Saved"
(Presintonía 2 guardada).
8. Repita este procedimiento según necesite
para las presintonías restantes. Las
emisoras p1-ya guardas en las presintonías
pueden s obrescribirse siguiendo el
procedimiento anterior. Cuando la radio
se apaga, las presintonías de emisoras de
radio se conservan en la memoria.
Seleccionar una presintonía en
los modos DAB y FM
1. Presione el botón de encendido para
encender la radio.
2. Seleccione el modo de uso deseado
usando el botón de modo.
3. Mantenga presionado el botón de seleccionar
para abrir el menú del modo actual.
4. Presione el botón de sintonizar hacia arriba
o bajo para seleccionar "Favorite Station"
(Emisora favorita). Presione el botón de
seleccionar para entrar a los ajustes.
5. Presione el botón de sintonizar hacia
arriba o bajo para seleccionar "Recall
Station" (seleccionar emisora). Presione el
botón de seleccionar.
6. Presione el botón de sintonizar hacia
arriba o abajo para seleccionar la emisora
presintonizada deseada. Presione el
botón de seleccionar. A continuación, la
radio sintonizará la emisora guardada en
la presintonía de memoria seleccionada.
El número de la presintonía seleccionada
también se muestra en pantalla, por
ejemplo "P2".
Uso del menú de configuración
del sistema
El menú de configuración del sistema puede
usarse para configurar la radio. Siga estos
pasos para acceder a los ajustes del sistema:
1. Encienda la radio usando el botón de
encendido.
2. Mantenga presionado el botón de seleccionar
para abrir el menú del modo actual.
3. Use el botón de sintonizar hacia arriba o
abajo para seleccionar [System Setup]
(Configuración del sistema) y presione el
botón de seleccionar para abrir el menú.
El menú de configuración del sistema
ofrece las siguientes opciones:
Use el botón de sintonizar hacia arriba o
abajo para seleccionar una de las opciones
y, a continuación, presione el botón de
seleccionar para confirmar su elección.
Los ajustes predeterminados y recomendados
se indican mediante un asterisco.
●[Sleep] (Apagado automático): la
radio puede configurarse para que se
apague una vez transcurrido un tiempo
preestablecido. Seleccione esta opción
para entrar al menú del temporizador
de apagado automático. Presione el
botón de sintonizar hacia arriba o abajo
para seleccionar el tiempo de apagado
automático deseado. El temporizador de
apagado automático puede establecerse
de 15 a 120 minutos, o puede seleccionar
"Sleep off" (Apagado automático apagado)
para cancelar el temporizador de apagado
automático. Presione el botón de
seleccionar para confirmar los ajustes.
Un temporizador de apagado automático
activo se muestra mediante un indicador
de temporizador de apagado automático
en la pantalla de reproducción. Para ver
el tiempo restante de un temporizador
de apagado automático activo, siga
los pasos anteriores para seleccionar
[System Setup] (Configuración del
sistema) y, a continuación, seleccione
[Sleep] (Apagado automático). Presione
el botón de seleccionar para ver el
tiempo restante de un temporizador de
apagado automático activo en pantalla.

De Bluetooth® markering en logo’s zijn
geregistreerde handelsmerken die eigendom
zijn van Bluetooth SIG, Inc. en elk gebruik van
deze markering en logo’s door SANGEAN
ELECTRONICS INC. is onder licentie.
Belangrijke
veiligheidsinstructies
1. Installeer het apparaat niet in de buurt
van warmtebronnen zoals radiatoren,
warmteroosters, kachels of andere apparaten
(inclusief versterkers) die warmte produceren.
Dit kan leiden tot een explosie of het
lekken van brandbare vloeistof of gas.
2. De batterij mag niet worden doorboord,
geplet, aangepast of blootgesteld aan
onnodige schokken. De batterij kan bij
verkeerd gebruik een risico op brand,
explosie of chemische brandwonden
vormen.
3. Gebruik alleen accessoires / hulpstukken
die door de fabrikant zijn gespecificeerd.
4. Stel het apparaat niet bloot aan regen of
vocht om het risico van brand of elektrische
schok te voorkomen.
5. Het apparaat mag niet worden blootgesteld
aan druppend of spattend water en er
mogen geen voorwerpen gevuld met
vloeistof op het apparaat worden geplaatst.
6. De batterijen mogen niet worden blootgesteld
aan extreme warmte zoals zonlicht, vuur en
dergelijke.
7. Wijzigingen of aanpassingen die niet
uitdrukkelijk zijn goedgekeurd door de partij
verantwoordelijk voor naleving kunnen
ertoe leiden tot de bevoegdheid van de
gebruiker om dit apparaat te bedienen en
de garantie komen te vervallen.
8. LET OP
Explosiegevaar indien batterij wordt
vervangen door een batterij van een
onjuist type. .
9. Stel uw radio niet bloot aan water, stoom
of zand.
10. Laat uw radio niet achter
o p p l a a t s e n w a a r
extreme warmte schade
kan veroorzaken.
11. De batterij moet worden gebruikt of
opgeslagen bij een luchtdruk hoger
dan 11,6kPa. Als dit niet het geval is,
kan de batterij exploderen of kunnen er
ontvlambare vloeistoffen en gassen lekken.
12. Indien veiligheid relevant is, moet de
volgende informatie worden opgenomen
voor zover van toepassing:
●minimale afstanden rond het apparaat
voor voldoende ventilatie;
●de ventilatie mag niet worden belemmerd
door ventilatieopeningen te bedekken met
voorwerpen zoals kranten, tafelkleden,
gordijnen, etc.;
●er mogen geen voorwerpen met open
vlam, zoals brandende kaarsen, op het
apparaat worden geplaatst;
●er moet aan het milieu worden gedacht
bij de verwijdering van batterijen;
●het gebruik van het apparaat in tropische
en / of gematigde klimaten.
13. LET OP
Explosiegevaar indien de batterij onjuist
wordt vervangen. Vervang alleen door
hetzelfde of soortgelijk type.
14. Indien een apparaat wordt geleverd met
een vervangbare lithiumbatterij, geldt het
volgende:
●als de batterij door de gebruiker moet
wo rden vervang en, moet er een
waarschuwing dicht bij de batterij of
in zowel de gebruiksinstructies als de
onderhoudsinstructies staan;
●als de batterij niet moet worden
vervangen door de gebruiker, moet er
een waarschuwing dicht bij de batterij
of in de onderhoudsinstructies staan.
Bedieningselementen
1Luidspreker
2Batterij-indicator
3Bluetooth-indicator
4LCD-display
5Afstemmen omhoog / Vorige track /
Terugspoelen-knop
6Mode-knop
7Volume hoger-knop
8Select / Menu / Info-knop
9Afstemmenomlaag / Volgendetrack /
Vooruitspoelen-knop
10 Volumelager-knop
11 Power-knop
12 DC IN 5V / 2,4A USB-oplaadpoort
13 Aux-ingang
14 Externeantenneaansluiting
15 Toetsvergrendelingsschakelaar
16 Passieveluidspreker
De radio opladen
De radio werkt op een ingebouwde lithium-
ionbatterij die kan worden opgeladen met
behulp van de USB-oplaadpoort of met behulp
van een USB-netadapter (niet meegeleverd)
met een nominale uitgangsspanning / -stroom
van DC 5V, 2,4A. Een verminderd vermogen,
stotterende geluiden of een batterij-indicator
die aangeeft dat de batterij bijna leeg is
zijn allemaal tekenen dat de batterij moet
worden opgeladen.
Voordat u de radio voor het eerst gebruikt
moet de batterij volledig worden opgeladen.
●U mag alleen apparaten die compatibel
zijn met stroombronnen die 5V / 2,4A
gelijkstroom leveren aansluiten op de
USB-oplaadpoort. Als u andere apparaten
aansluit, kan het product defect raken.
●Sluit de USB-kabel (meegeleverd) aan
op de USB-oplaadpoort van het product.
En sluit vervolgens het andere uiteinde
van de kabel aan op het apparaat.
●Wanneer de batterij wordt opgeladen,
licht het oplaadindicatielampje rood
op. Wa nnee r de batt e ri j vol led ig
i s op ge la de n, s c h a k el t he t ro d e
oplaadindicatielampje uit.
OPMERKING
Luisteren naar DAB-radio
Afstemmen op DAB-zenders
Volg deze stappen om af te stemmen op
DAB-radiozenders:
1. Steek de stekker van de (meegeleverde)
externe antenne in de aansluiting voor de
externe antenne op de achterkant van uw
radio.
2. Schakel de radio in met de Aan / uit-knop.
3. S e l e c t e e r d e D A B - m o d u s d o o r
herhaaldelijk o p de Modus-knop te
drukken.
4. Als de DAB-radiomodus voor het eerst
wordt gebruikt, voert de radio automatisch
een volledige scan uit om alle beschikbare
DAB-radiozenders te vinden. Als de radio
al eerder is gebruikt, wordt de laatst
gebruikte zender geselecteerd.
5. Tijdens het scanproces zal de zenderteller
word e n o pge h oog d a l s er ze n ders
worden gevonden en de zenders worden
toegevoegd aan de lijst die is opgeslagen
in de radio. De weergegeven balk geeft de
voortgang van de scan aan.
6. Als het scannen is voltooid, zal de eerste
zen d er (i n al fa nume ri ek e v olg o rd e
0...9...A....Z) worden geselecteerd.
7. Druk op Afstemmen omhoog of Afstemmen
omlaag om door de lijst met beschikbare
zenders te bladeren en druk op Select om
af te stemmen op een zender.
8. Gebruik Volume hoger / Volume lager om
het geluidsniveau naar wens in te stellen.
OPMERKING
Als de radio na het selecteren van een
zender niet afstemt op de zender, dan is
het mogelijk dat u uw radio op een andere
positie moet plaatsen voor betere ontvangst.
Het DAB-menu
U kunt het DAB-menu openen door Select
ingedrukt te houden wanneer de radio zich in
de DAB-radiomodus bevindt.
Druk op Afstemmen omhoog of Afstemmen
omlaag om een van de volgende opties te
selecteren en druk vervolgens op Select om
uw keuze te bevestigen.
De standaardinstellingen en aanbevolen
instellingen van de radio aangegeven met
een asterisk.
Het DAB-menu biedt de volgende opties:
3029 31 32 33
●[Favorite Station]: Selecteer deze optie om
de instellingen van het menu 'Favorite Station'
te openen (raadpleeg de hoofdstukken
'Voorkeurzenders instellen in de DAB- en FM-
radiomodus' en 'Voorkeurzender oproepen
in de DAB- en FM-radiomodus' voor meer
informatie).
●[Station list]: Selecteer deze optie om alle
DAB-radiozenders die gevonden zijn weer
te geven en af te stemmen op een van de
gevonden zenders.
●[Manual tune]: Selecteer deze optie om
handmatig af te stemmen op een DAB-kanaal
/ frequentie.
●[Full Scan]: Selecteer deze optie om een
volledige scan uit te voeren en alle gevonden
DAB-radiozenders op te slaan in de zenderlijst.
●[Prune Station]: Selecteer deze optie om alle
niet-beschikbare zenders uit de zenderlijst te
verwijderen.
●[Station Order]: Selecteer deze optie en
vervolgens [Alphanumeric] om de zenderlijst
alfanumeri e k te s ortere n of s el ec te e r
[Ensemble] om de zenderlijst op DAB-
multiplex te sorteren of selecteer [Valid] om
alleen de zenders waarvoor een signaal kan
worden gevonden weer te geven.
●[DRC Value]: Dynamic Range Control (ook
bekend als DRC) kan zachtere geluiden
eenvoudiger hoorbaar maken wanneer
uw radio wordt gebruikt in een lawaaiige
omgeving door het dynamisch bereik van het
audiosignaal te reduceren.
Selecteer deze optie en gebruik vervolgens
Afstemmen omhoog of Afstemmen omlaag
om de gewenste DRC-instelling te selecteren:
[Off]: DRC is uitgeschakeld. Uitgezonden
DRC wordt genegeerd.
[Low]: DRC-niveau wordt ingesteld op 1 / 2
van het niveau dat wordt uitgezonden door de
zender.
[High]: DRC wordt ingesteld zoals uitgezonden
door de zender.
Druk op Select om de instelling te bevestigen.
OPMERKING
Niet alle DAB-uitzendingen maken gebruik
van de DRC-functie. Als een uitzending
geen DRC-gegevens verstrekt, heeft het
instellen van DRC op de radio geen effect.
●[System Setup]: Selecteer deze optie om
naar het systeeminstellingenmenu te gaan
en de radio te configureren (raadpleeg het
hoofdstuk 'Het systeeminstellingenmenu
gebruiken' voor meer informatie).
●[Back]: Selecteer deze optie om één stap
terug te gaan in de menu's van de radio of
terug te keren naar het vorige scherm.
Informatie over DAB-radio
weergeven op het display
Druk tijdens het luisteren naar een DAB-zender
herhaaldelijk op Select om op het display van de
radio door de volgende informatie te bladeren:
Scrollende tekst, Programmatype, Multiplex-
naam, Datum, Frequentie, Bitrate en audiotype,
Codec-informatie, Titel, Artiest, Signaalsterkte.
Luisteren naar FM-radio
Afstemmen op FM-zenders
Volg deze stappen om af te stemmen op FM-
radiozenders:
1. Steek de stekker van de (meegeleverde)
externe antenne in de aansluiting voor de
externe antenne op de achterkant van uw radio.
2. Schakel de radio in met de Aan / uit-knop.
3. Selecteer de FM-modus door herhaaldelijk
op de Modus-knop te drukken.
4. Houd Afstemmen omhoog of Afstemmen
omlaag ingedrukt om automatisch af te
stemmen op een FM-zender met respectievelijk
een hogere of lagere frequentie. Uw radio
stopt met scannen wanneer deze een zender
met een voldoende sterk signaal heeft
gevonden. Het display toont de frequentie van
het gevonden signaal. Als er RDS-gegevens
beschikbaar zijn, toont het display na een paar
seconden de naam van de radiozender.
5. Druk indien nodig op Afstemmen omhoog of
Afstemmen omlaag om de frequentie nauwkeurig
af te stemmen met stappen van 0.05MHz.
6. Herhaal de stappen 4 en 5 om af te stemmen
op andere radiozenders.
7. Gebruik Volume hoger / Volume lager om het
geluidsniveau naar wens in te stellen.
Het FM-menu
U kunt het FM-menu openen door Select
ingedrukt te houden wanneer de radio zich in
de FM-radiomodus bevindt.
Druk op Afstemmen omhoog of Afstemmen
omlaag om een van de volgende opties te
selecteren en druk vervolgens op Select om uw
keuze te bevestigen.
De standaardinstellingen en aanbevolen instellingen
van de radio aangegeven met een asterisk.
Het FM-menu biedt de volgende opties:
●[Scan]: Selecteer deze optie om de radio te
laten scannen van een lage frequentie naar
een hoge frequentie. Wanneer de radio een
zender met een voldoende sterk signaal heeft
gevonden, knippert de frequentie 6 seconden
op het display en vervolgens gaat de radio door
met de scan. Druk op Select om af te stemmen
op de zender of om de scan te stoppen.
●[Favorite Station]: Selecteer deze optie
om de instellingen van het menu 'Favorite
Station' te openen (raadpleeg de hoofdstukken
'Voorkeurzenders instellen in de DAB- en FM-
radiomodus' en 'Voorkeurzender oproepen in de
DAB- en FM-radiomodus' voor meer informatie).
●[FM Scan Zone]: Selecteer deze optie om
te configureren of de radio alleen naar sterke
signalen ('Local') of naar alle signalen ('Distant)
moet zoeken wanneer u de automatische
afstemfunctie gebruikt.
●[System Setup]: Selecteer deze optie om
naar het systeeminstellingenmenu te gaan
en de radio te configureren (raadpleeg het
hoofdstuk 'Het systeeminstellingenmenu
gebruiken' voor meer informatie).
●[Back]: Selecteer deze optie om één stap
terug te gaan in de menu's van de radio of
terug te keren naar het vorige scherm.
Informatie over FM-radio
weergeven op het display
Als u naar een FM-radiozender luistert die ook
RDS-gegevens uitzendt, druk dan herhaaldelijk
op Select om op het display van de radio door
de volgende informatie te bladeren:
Radiotekst, Programmatype, Datum, Frequentie.
Voorkeurzenders instellen in DAB-
en FM-modus
De radio beschikt over 10 voorkeurzenders
voor elk DAB- en FM-radio. Voorkeurzenders
worden op dezelfde manier gebruikt in de beide
gebruiksmodi.
1. Druk op Power om uw radio in te schakelen.
2. Stem zoals eerder beschreven af op de
gewenste radiozender.
3. Houd de Select-knop ingedrukt om het menu
voor de huidige modus te openen.
4. Druk op Afstemmen omhoog of Afstemmen
omlaag om 'Favorite Station' te selecteren.
Druk op Select om de instelling te openen.
5. Druk op Afstemmen omhoog of Afstemmen
omlaag om 'Preset station' te selecteren.
Druk op Select.
6. Druk op Afstemmen omhoog of Afstemmen
omlaag om door de lijst met voorkeurzenders
te bladeren totdat u een voorkeurzender bereikt
die niet wordt gebruikt of die u wilt wijzigen.
7. Druk op Select om de voorkeurzender op
te slaan. Er wordt nu bijvoorbeeld 'Preset 2
Saved' weergegeven op het display om aan te
geven dat voorkeurzender 2 is opgeslagen.
8. Herhaal deze procedure indien gewenst voor
de resterende voorkeurzenders. Zenders die
al zijn opgeslagen als voorkeurzender kunnen
worden overschreven door de bovenstaande
procedure te volgen. De voorkeurzenders
blijven in het geheugen bewaard wanneer de
radio wordt uitgeschakeld.
Een voorkeurzender oproepen in
DAB- en FM-modus
1. Druk op Power om uw radio in te schakelen.
2. Selecteer de gewenste gebruiksmodus met
behulp van de knop Mode.
3. Houd de Select-knop ingedrukt om het menu
voor de huidige modus te openen.
4. Druk op Afstemmen omhoog of Afstemmen
omlaag om 'Favorite Station' te selecteren.
Druk op Select om de instelling te openen.
5. Druk op Afstemmen omhoog of Afstemmen
omlaag om 'Recall Station' te selecteren.
Druk op Select.
6. Druk op Afstemmen omhoog of Afstemmen
omlaag om de gewenste voorkeurzender te
selecteren. Druk op Select. Uw radio stemt nu
af op de zender die is opgeslagen onder het
geselecteerde voorkeurzendernummer. Het
gekozen voorkeurzendernummer wordt ook
weergegeven op het display, bijvoorbeeld 'P2'.
Het systeeminstellingenmenu
gebruiken
U kunt het systeeminstellingenmenu gebruiken
om de radio te configureren. Volg deze stappen
om de systeeminstellingen te openen:
1. Schakel de radio in met de Aan / uit-knop.
2. Houd de Select-knop ingedrukt om het menu
voor de huidige modus te openen.
3. Gebruik de knoppen Afstemmen omhoog en
Afstemmen omlaag om [System Setup] te
selecteren en druk op Select om het menu te
openen.
Het systeeminstellingenmenu biedt de
volgende opties:
Druk op Afstemmen omhoog of Afstemmen
omlaag om een van de volgende opties te
selecteren en druk vervolgens op Select om
uw keuze te bevestigen.
De standaardinstellingen en aanbevolen
instellingen van de radio aangegeven met
een asterisk.
●[Sleep]: De radio kan worden ingesteld
om uit te schakelen nadat een vooraf
ingestelde tijd is verstreken. Selecteer
deze optie om het slaaptimermenu te
openen. Druk op Afstemmen omhoog
of Afstemmen omlaag om de gewenste
slaaptijd te selecteren. De slaaptimer kan
worden ingesteld op een periode van 15 tot
120 minuten of kan worden uitgeschakeld
door 'Sleep off' te selecteren. Druk op
Select om de instelling te bevestigen.
Een actieve slaaptimer wordt weergegeven
met behulp van een slaaptimerindicator op
het afspeelscherm. Als u de resterende tijd
van een actieve slaaptimer wilt bekijken,
volg dan de bovenstaande stappen om
[System Setup] te selecteren en selecteer
vervolgens [Sleep]. Druk op Select om de
resterende tijd van een actieve slaaptimer
weer te geven op het display.
Als u de slaaptimer wilt annuleren en de radio
wilt uitschakelen voordat de vooraf ingestelde
tijd is verstreken, druk dan op Aan / uit-knop
om de radio handmatig uit te schakelen.
●[Contrast]: Selecteer deze optie om het
contrast van het display in te stellen. Druk op
Afstemmen omhoog of Afstemmen omlaag
om het contrastniveau aan te passen en
druk vervolgens ter bevestiging op Select.
●[Time Update]: Selecteer deze optie om
een bron voor het automatisch bijwerken
van de tijd en datum te selecteren.
●[Language]: Selecteer deze optie om de
taal te configureren waarin de menu's van
de radio worden weergegeven.
●[Factory reset]: Selecteer deze optie om
de instellingen van de radio te herstellen
naar de standaard fabrieksinstellingen. Na
bevestiging worden alle gebruikersinstellingen
en voorkeurzenders gewist.
●[SW Version]: Selecteer deze optie om de
softwareversie van de radio te bekijken.
Druk op Select om de weergave van de
softwareversie af te sluiten.
●[Back]: Selecteer deze optie om één stap
terug te gaan in de menu's van de radio of
terug te keren naar het vorige scherm.
Luisteren naar muziek via
Bluetooth-streaming
U moet uw Bluetooth-apparaat koppelen met de
radio voordat u automatisch verbinding kunt maken
en Bluetooth-muziek kunt afspelen / streamen via
uw DDR-7X. Koppelen creëert een ‘band’, zodat
twee apparaten elkaar kunnen herkennen.
Voor het eerst koppelen met uw
Bluetooth-apparaat en afspelen
van het apparaat
1. Zorg ervoor dat uw radio is ingeschakeld en
druk vervolgens op Mode om de Bluetooth-
functie te selecteren. De melding “Bluetooth
Pairing” wordt getoond op het display. De
Bluetooth-indicator op de radio knippert snel
blauw om aan te geven dat de radio kan
worden gedetecteerd.
OPMERKING
Als de radio zich in de Bluetooth-modus
bevindt en gedurende 15 minuten niet is
verbonden met een Bluetooth-apparaat,
dan schakelt de radio automatisch uit.
2. Activeer Bluetooth op uw bronapparaat
volgends de handleiding van dit apparaat. Ga
op het bronapparaat naar de lijst met Bluetooth-
apparaten en selecteer het apparaat met de
naam ‘DDR-7X’. (Bij sommige bronapparaten
die zijn uitgerust met een Bluetooth-versie
ouder dan Bluetooth 2.1 is het mogelijk dat er
om een pincode wordt gevraagd. Als dit het
geval is, voer dan ‘0000’ in).
3. Zodra de apparaten zijn verbonden, klikt er
een bevestigingstoon en de naam van het
verbonden Bluetooth-apparaat wordt getoond
op het display. De Bluetooth-indicator
blijft continue blauw branden. U kunt nu
simpelweg muziek selecteren en afspelen
vanaf uw bronapparaat.
4. Het volume kan worden ingesteld op uw
bronapparaat of rechtstreeks op de radio.
Gebruik de bedieningselementen op uw
Bluetooth-apparaat of op de radio om het
afspelen te starten / stoppen of om de
gewenste track te selecteren.
●Als er voor de eerste keer wordt gekoppeld
en er 2 Bluetooth-apparaten naar uw
radio zoeken, dan wordt de radio op beide
apparaten als beschikbaar getoond. Als er
echter één apparaat verbinding maakt met
de radio, zal het andere Bluetooth-apparaat
de radio niet meer vinden in de lijst.
OPMERKING
●Als het Bluetooth-apparaat buiten het
Bluetooth-bereik van de radio wordt
verplaatst, dan zal de Bluetooth-verbinding
met de radio tijdelijk worden verbroken. Uw
radio zal automatisch opnieuw verbinding
maken met het Bluetooth-apparaat als het
weer binnen bereik komt. Houd er rekening
mee dat er in de periode dat de verbinding
is verbroken geen andere Bluetooth-
apparaten mogen koppelen of verbinden
maken met de radio.
●Als ‘DDR-7X’ wordt getoond in de lijst
met Bluetooth-apparaten, maar u geen
verbinding kunt maken met de radio,
verwijder het item dan uit de lijst en koppel
het apparaat nogmaals met de radio door
de eerder beschreven stappen te volgen.
●Het effectieve bereik tussen het systeem
en het gekoppelde apparaat is ongeveer
10 meter (30 voet). Eventuele obstakels
tussen het systeem en het apparaat
kunnen het bereik reduceren.
●De prestaties van Bluetooth-connectiviteit
kunnen variëren, afhankelijk v an de
verbonden Bluetooth-apparaten. Bekijk
de Bluetooth-mogeli j k he d e n die uw
apparaat biedt voordat u verbinding maakt
met de radio. Het is mogelijk dat niet alle
functies worden ondersteund op sommige
gekoppelde Bluetooth-apparaten.
●Het is bij gebruik van bepaalde mobiele
telefoons mogelijk dat het geluid van
de Bluetooth-audiostream tijdelijk wordt
gedempt of dat de verbinding met het
apparaat zelfs tijdelijk wordt verbroken
tijdens het verzenden / ontvangen van
oproepen, sms-berichten, e-mails of
andere activiteiten die niet in verband
staan met het s treamen van a udi o.
Dergelijk gedrag is een functie van het
Bluetooth-bronapparaat en duidt niet op
een probleem met uw DDR-7X.
OPMERKING
Audiobestanden afspelen in de
Bluetooth-modus
Als u uw radio succesvol heeft verbonden
met het gekozen Bluetooth-apparaat, dan
kunt u het afspelen van muziek starten met
behulp van de bedieningselementen van het
verbonden Bluetooth-apparaat.
1. Zodra het afspelen is gestart, kan het
volume worden ingesteld met behulp van
de volumeknoppen op de radio en de
volumeregeling op het Bluetooth-apparaat.
2. Gebruik de bedieningselementen op uw
Bluetooth-apparaat om het afspelen te
starten / pauzeren en de gewenste track te
selecteren. Als alternatief kunt u het afspelen
bedienen met behulp van de knoppen
Afspelen / pauzeren, Volgende track en
Vorige track op uw radio.
3. Houd de Vooruitspoelen- of Terugspoelen-
knop ingedrukt om vooruit of terug te spoelen
in de huidige track. Laat de knop los wanneer
het gewenste punt is bereikt.
OPMERKING
Het is mogelijk dat niet alle afspeelapplicaties of
apparaten reageren op alle bedieningselementen.
Weergave-opties Bluetooth-modus
Als het apparaat waarmee u bent verbonden
informatie kan verstrekken over de track die
wordt afgespeeld, kan uw radio de volgende
informatie tonen in de Bluetooth-modus:
Apparaatnaam, Titel, Artiest, Album.
Druk herhaaldelijk op Select om door de
verschillende opties te bladeren.
Houd er rekening mee dat de beschikbaarheid
van informatie afhankelijk is van het specifieke
mediaformaat.
Opnieuw verbinding maken met
een B lueto o t h - b ro n a p p ara at
waarmee eerder is gekoppeld
De radio kan tot 8 Bluetooth-apparaten
onthouden waarmee eerder is gekoppeld.
Als er met meer dan 8 Bluetooth-apparaten
is gekoppeld, dan wordt het eerste apparaat
waarmee is gekoppeld overschreven in het
geheugen.
Als uw Bluetooth-apparaat al eerder is gekoppeld
met de radio, zal deze uw Bluetooth-apparaat
opslaan in het geheugen en probeert de radio
opnieuw verbinding te maken het Bluetooth-
apparaat in het geheugen waarmee het laatst
verbinding is gemaakt.
De verbinding met uw Bluetooth-
apparaat verbreken
1. Houd Select ingedrukt om het Bluetooth-
menu te openen.
2. Druk op Afstemmen omhoog of Afstemmen
omlaag om 'Cancel Pair' te selecteren. Druk
vervolgens op Select.
3. U kunt de verbinding met uw Bluetooth-
apparaat verbreken door Afstemmen
o m h o o g of A f s t e m m e n o m l a a g t e
gebruiken om 'Yes' te selecteren en
vervolgens op Select te drukken. U hoort
nu een bevestigingstoon en het Bluetooth-
indicatielampje op de radio knippert snel
blauw om aan te geven dat de radio
weer gedetecteerd kan worden en kan
koppelen. Als u 'No' of 'Back' selecteert,
d a n wo rd t d e ve r b i n d i n g me t h e t
Bluetooth-apparaat niet verbroken. Druk
op Select om uw keuze te bevestigen.
4. U kunt de verbinding ook verbreken door
op Mode te drukken en een willekeurige
modus anders dan de Bluetooth-modus
te selecteren of door Bluetooth uit te
schakelen op uw Bluetooth-apparaat.
Het geheugen met apparaten
waarmee eerder is gekoppeld
verwijderen
1. Houd Select ingedrukt om het Bluetooth-
menu te openen.
2. Druk op Afstemmen omhoog of Afstemmen
omlaag om 'Clear Pairing' te selecteren.
Druk vervolgens op Select.
3. U kunt het geheugen van alle gekoppelde
apparaten wi ssen do o r Afs t e m men
o m h o o g of A f s t e m m e n o m l a a g t e
gebruiken om 'Yes' te selecteren en
vervolgens op Select te drukken. Als u 'No'
of 'Back' selecteert wordt het geheugen
van alle gekoppelde apparaten niet
gewist. Druk op Select om uw keuze te
bevestigen.
De TWS-functie (True
Wireless Stereo)
Tru e W i r e le ss S te r eo (o ok w el T W S
genoemd) is een functie waarmee een
apparaat draadloos verbinding kan maken
met een ander apparaat. Uw DDR-7X kan
draadloos worden verbonden met een
tweede DDR-7X en muziek afspelen via
beide luidsprekers tegelijk.
De eerste luidspreker instellen
1. Zorg ervoor dat de eerste luidspreker zich
in de Bluetooth-modus bevindt en maak
verbinding met een Bluetooth-apparaat.
2. Houd Select ingedrukt om het Bluetooth-
menu te openen.
3. Druk op Afstemmen omhoog of Afstemmen
omlaag om de 'TWS Pair' te selecteren.
4. Druk op Select om uw keuze te bevestigen
en de TWS-koppelingsmodus te openen.
De tweede luidspreker instellen
1. Zorg ervoor dat de tweede luidspreker zich in
de Bluetooth-modus bevindt en dat deze niet
is verbonden met een Bluetooth-apparaat.
2. Houd Select ingedrukt om het Bluetooth-
menu te openen.
3. Druk op Afstemmen omhoog of Afstemmen
omlaag om de 'TWS Pair' te selecteren.
4. Druk op Select om uw keuze te bevestigen
en de TWS-koppelingsmodus te openen.
Nadat de verbinding tussen de luidsprekers
succesvol tot stand is gebracht, toont het
display op de eerste luidspreker de melding
'Main: Mono' en de naam van het Bluetooth-
apparaat. Het display op de tweede
luidspreker toont de melding 'Sub: Mono'.
●Stel de tweede luidspreker binnen 1
minuut na de eerste in, anders wordt
de instelling van de eerste luidspreker
geannuleerd.
●Als beide luidsprekers zijn verbonden
met hetzelfde Bluetooth-apparaat, dan
kan de TWS-functie (True Wireless
Stereo) niet worden ingesteld. In dit
geval moet u de Bluetooth-verbinding
van een van de luidsprekers verbreken
om de TWS-functie in te stellen.
OPMERKING
Het afspelen starten
1. Start het afspelen op het verbonden
Bluetooth-apparaat en stel het volume
naar wens in op het Bluetooth-apparaat of
een de luidsprekers.
OPMERKING
Wanneer het volume wordt aangepast
op één luidspreker, dan worden deze
veranderingen ook doorgevoerd op de
andere luidspreker.
2. Gebruik de bedieningselementen op uw
Bluetooth-apparaat om het afspelen te
starten / pauzeren en de gewenste track te
selecteren. Als alternatief kunt u het afspelen
bedienen met behulp van de knoppen
Afspelen / pauzeren, Volgende track en
Vorige track op een van beide luidsprekers.
3. Houd Volgende track of Vorige track op een
van beide luidsprekers ingedrukt om in de
huidige track vooruit of terug te spoelen.
Laat de knop los wanneer het gewenste
punt is bereikt.
OPMERKING
Het is mogelijk dat niet alle afspeelapplicaties
o f a p p a r a t e n r e a g e r e n o p a l l e
bedieningselementen..
De audiomodus selecteren
Als u twee luidsprekers gebruikt, kunt u schakelen
tussen de modi 'Mono', 'Stereo L' en 'Stereo R'.
1. Houd Select ingedrukt om het Bluetooth-
menu te openen.
2. Druk op Afstemmen omhoog of Afstemmen
omlaag om de 'TWS Setting' te selecteren.
Druk vervolgens op Select om de instelling
te openen.
3. Druk op Afstemmen omhoog of Afstemmen
omlaag om 'Mono-Pairing', 'Stereo L / R' of
'Stereo R / L' te selecteren. Druk vervolgens
op select om uw keuze te bevestigen. Het
display toont de volgende modi:
De modus 'Mono': Beide luidsprekers spelen
hetzelfde geluid af. Dit is de standaardinstelling.
De modi 'Stereo L' en 'Stereo R': Eén
luidspreker speelt het geluid van het
linkerkanaal af, terwijl de andere luidspreker
het geluid van het rechterkanaal afspeelt voor
een stereoweergave met beide luidsprekers.
De TWS-verbinding (True Wireless
Stereo) verbreken
1. Houd Select ingedrukt om het Bluetooth-
menu te openen.
2. Druk op Afstemmen omhoog of Afstemmen
omlaag om de 'TWS Cancel' te selecteren.
Druk vervolgens op select om de verbinding
van de TWS-functie te verbreken.
Toetsblokkering
De toetsblokkeringsfunctie kan worden
gebruikt om het onbedoeld bedienen van de
radio te voorkomen.
1. Zorg ervoor dat de radio is ingeschakeld en
schuif de toetsvergrendelingsschakelaar
op de achterkant van de radio vervolgens
naar links. Het blokkeringssymbool
verschijnt op het display. Alle knoppen zijn
nu uitgeschakeld.
2. U kunt de blokkering opheffen door de
toetsvergrendelingsschakelaar naar rechts
te schuiven. Het blokkeringssymbool
wordt nu niet langer weergegeven op het
display.
Aux-ingang
Er zit een 3,5mm aux-ingang op de achterkant
van uw radio die het mogelijk maakt een
audiosignaal te ontvangen van een extern
audioapparaat zoals een iPod, MP3- of CD-
speler.
1. Zorg ervoor dat uw radio is ingeschakeld en
druk op Mode tot “Aux In” wordt weergegeven.
2. Sluit een externe audiobron (bijv. iPod,
MP3- of CD-speler) aan op de aux-ingang.
3. Stel het volume in op uw iPod, MP3- of
CD-speler en zorg ervoor dat uw radio een
adequaat signaalniveau ontvangt van het
apparaat. Stel vervolgens het volume naar
wens in op de radio om comfortabel te
kunnen luisteren.
34
35 36
Der Bl ue t oo t h®-Markenn a m e und da m it
verbundene Logos sind Eigentum der Firma
Bluetooth SIG, Inc. Jegliche Benutzung dieser
Marken durch die SANGEAN ELECTRONICS
INC. stehen unter Lizenz.
Wichtige Sicherheitshinweise
1. Nicht in der Nähe von Wärmequellen wie
z.B. Heizstrahlern, Heizkörpern, Öfen oder
anderen wärmeerzeugenden Geräten
(einschließlich Verstärkern) verwenden.
Anderenfalls besteht die Gefahr v on
Explosionen oder des Austritts brennbarer
Gase oder Flüssigkeiten.
2. Die Batterie darf nicht durchstochen,
gequetscht, modifiziert oder unnötigen
Vibrati on e n ausges e t z t werden. Be i
Fehlhandhabung der Batterie besteht die
Gefahr von Feuer, Explosion oder Verätzung.
3. Verwenden Sie lediglich vom Hersteller
angegebenes Zubehör.
4. Um Feuer und elektrischen Schlägen
vorzubeugen, vermeiden Sie es das Gerät
Regen oder Feuchtigkeit auszusetzen.
5. Dieses Gerät darf keinen Wassertropfen und
-spritzern ausgesetzt werden. Gegenstände
die mit Flüssigkeiten gefüllt sind dürfen nicht
auf das Gerät gestellt werden.
6. Die Batterien dürfen niemals starker Hitze, wie z.
B. Sonnenlicht, Feuer o. Ä. ausgesetzt werden.
7. Änderungen oder Modifizierungen, die nicht
ausdrücklich von der für die Einhaltung
der Vorschriften verantwortlichen Partei
genehmigt wurden, können dazu führen,
dass die Berechtigung zum Betrieb des
Geräts und die Gewährleistung erlöschen.
8. VORSICHT
Explosionsgefahr, wenn die Batterie
durch einen falschen Typ ersetzt wird.
9. Radio nicht Wasser, Dampf oder Sand
aussetzen.
10. Lassen Sie Ihr Radio nicht
an Orten, an denen
übermäßige Hitze Schäden
verursachen kann.
11. Die Batterie muss bei einem Luftdruck von
über 11,6kPa verwendet und gelagert werden,
da anderenfalls die Batterie explodieren oder
brennbare Flüssigkeiten und Gase aus der
Batterie austreten könnten.
12. Soweit es zutreffend und für die Sicherheit
relev ant ist, sind die nachfolgenden
Informationen einzubeziehen:
●Mindestabstände um das Gerät herum
für die ausreichende Belüftung;
●Die Belüftung darf nicht durch Abdeckung
der Ventilationsöffnungen mit Gegenständen
wie Zeitungen, Tischdecken, Gardinen usw.
behindert werden;
●Es darf kein offenes Feuer, wie z.B.
angezündete Kerzen, auf das Gerät gestellt
werden;
●Bei der Entsorgung von Batterien sind
Umweltaspekte zu beachten;
●Verwendung des Geräts in tropischen
und / oder moderaten Klimazonen.
13. VORSICHT
Es bes teht Explosions gefahr, fal l s
Batterien fal s c h eingelegt werden.
Nur durch Batterien des gleichen oder
gleichwertigen Typs ersetzen.
14. Falls ein Gerät über eine austauschbare
Lithium-Batterie verfügt, gelten folgende
Vorschriften:
●Falls die Batterie vom Nutzer auszutauschen
ist, muss eine entsprechende Warnung
neben der Batterie angebracht oder
sowohl in die Bedienungs- als auch in die
Wartungsanleitung eingefügt werden;
●Falls die Batterie nicht vom Nutzer
auszutauschen muss eine entsprechende
Warnung neben der Batterie angebracht bzw.
in die Wartungsanleitung eingefügt werden.
Tasten und Anschlüsse
1Lautsprecher
2Batterieladeanzeige
3Bluetooth-LED-Anzeige
4LCD
5Tuning+ / Vorheriger Titel / Suchlauf
rückwärts
6Modus-Taste
7Lautstärke erhöhen
8Auswahl / Menü / Info
9Tuning- / Nächster Titel / Suchlauf vorwärts
10 Lautstärke reduzieren
11 Betriebstaste
12 DC IN 5V / 2,4A USB-Ladeanschluss
13 Aux-Eingang
14 Externe Antennenbuchse
15 Tastensperre
16 Passiver Lautsprecher
Radio aufladen
Das Radio wird über eine integrierte Lithium-
Ion-Batterie betrieben, die entweder via USB-
Ladeanschluss oder via DC 5V, 2,4A Netzteil
(nicht enthalten) aufgeladen werden kann. Eine
reduzierte Leistung, Störungen, Klirrgeräusche
sowie eine niedrige Batterieanzeige
sind alles Anzeichen dafür, dass die Batterie
aufgeladen werden muss.
Laden Sie die Batterie vor dem erstmaligen
Gebrauch vollständig auf.
●Verbinden Sie nur solche Geräte mit dem
USB-Stromanschluss, die mit einer DC 5V 2,4A
Stromversorgung kompatibel sind. Anderenfalls
könnten Fehlfunktionen auftreten.
●Schließen Sie das (mitgelieferte) USB-
Kabel an den USB-Stromanschluss des
Produkts und dann das andere Ende an Ihr
externes Gerät an.
●Während des Ladevorgangs leuchtet die
Ladeanzeige rot. Nach dem vollständigen
Aufladen erlischt die Anzeige.
HINWEIS
DAB-Radio hören
DAB-Radiosender einschalten
Gehen Sie wie folgt vor, um DAB-Radiosender
einzuschalten:
1. Schließen Sie den Stecker der (mitgelieferten)
externen Antenne an die Antennenbuchse an
der Rückseite des Radios an.
2. Schalten Sie das Radio mit der Betriebstaste ein.
3. Stellen Sie den DAB-Radiomodus durch
wiederholtes Drücken der Modus-Taste ein.
4. Falls Sie den DAB-Radiomodus zum ersten
Mal verwenden, führt das Radio automatisch
eine vollständige Suche nach verfügbaren DAB-
Radiosendern durch. Falls Sie das Radio bereits
früher verwendet haben, stellt das Radio den
zuletzt wiedergegebenen Sender ein.
5. Sobald während der Sendersuche ein neuer
Sender gefunden wird, erhöht sich der Zähler
entsprechend und der neue Sender wird zur
Senderliste hinzugefügt. Der Balken weise
auf den Fortschritt der Sendersuche hin.
6. Nach Abschluss der Sendersuche wird der
erste Sender (alphanumerische Reihenfolge
0...0...A...Z) wiedergegeben.
7. Scrollen Sie mit den Tuning-Tasten durch die
Senderliste und drücken Sie die Auswahl-
Tas te , um de n gew ün s c ht e n Se nd e r
auszuwählen und einzuschalten.
8. Mit den Lautstärke-Tasten können Sie die
Lautstärke je nach Bedarf erhöhen bzw.
reduzieren.
HINWEIS
Falls sich ein ausgewählter Sender nicht nden
lässt, ist es möglicherweise erforderlich, das
Radio für einen besseren Empfang umzustellen.
DAB-Radiomenü
Sie können das DAB-Radiomenü nur öffnen,
indem Sie im DAB-Radiomodus die Auswahl-
Taste gedrückt halten.
Wählen Sie mit den Tuning-Tasten eine Option
aus und bestätigen Sie diese durch Drücken
der Auswahl-Taste.
Die werksseitigen und empfohlenen Einstellungen
des Radios sind mit einem Sternchen markiert.
Im DAB-Radiomenü sind folgende Optionen
verfügbar:
●[Lieblingssender]: Wählen Sie diese Option,
um die Einstellungen für die „Lieblingssender“
zu öffnen (weitere Informationen siehe Kapitel
„DAB- und UKW-Radiosender speichern“ und
„Gespeicherte DAB- und UKW-Sender aufrufen“).
●[Station list]: Wählen Sie diese Option,
um alle gefundenen DAB-Radiosender
aufzulisten und einen Sender auszuwählen.
●[Manual tune]: Wählen Sie diese Option, um
einen DAB-Sender / eine Frequenz manuell
einzustellen.
●[A u t o m . Su c h e ]: Wä h l en S i e d i e s e
Option, um eine vollständige Sendersuche
durchzuführen und alle gefundenen DAB-
Radiosender in der Senderliste zu speichern.
●[Prune Station]: Mit dieser Option können
Sie alle nicht mehr verfügbaren Sender aus
der Senderliste löschen.
●[Senderreihenfolge]: Wählen Sie diese
Option und anschließend [Alphanumerisch],
um die Liste alphanumerisch zu sortieren.
Mit der Option sortieren Sie die [Ensemble]
Senderliste nach DAB-Multiplex und mit der
Option [Gültig] zeigen Sie nur solche Sender
an, für die ein Signal gefunden wird.
●[ D R C - W e r t ] : M i t d e r d y n a m i s c h e n
Bereichskontrolle (kurz DRC) werden leisere
Töne in lauten Umgebungen lauter, indem
der dynamische Bereich des Audiosignals
reduziert wird.
Wählen Sie diese Option und dann mit den
Tuning-Tasten die gewünschte DRC-Einstellung:
[Off]: DRC ist deaktiviert. Die übertragene
DRC-Einstellung wird ignoriert.
[Low]: DRC entspricht der Hälfte d er
Einstellung der Sendeanstalt.
[High]: Gleiche Einstellung wie die der
Sendeanstalt.
Drücken Sie Auswahl-Taste zum Bestätigen.
HINWEIS
Nicht alle DAB-Übertragungen unterstützen
die DRC-Funktion. Falls keine DRC-
Daten übertragen werden, bleibt die DRC-
Einstellung am Radio ohne Wirkung.
●[System-Setup]: Wählen Sie diese Option,
um das Systemmenü zu öffnen und das
Radio zu konfigurieren (weitere Informationen
siehe Kapitel „System-Setup“).
●[Zurück]: Wählen Sie diese Option, um im
Menü einen Schritt zurückzugehen oder um
zur vorherigen Anzeige zurückzukehren.
DAB-Informationen anzeigen
Drücken Sie während der Wiedergabe eines
DAB-Senders wiederholt die Auswahl-Taste, um
unterschiedliche Informationen anzuzeigen:
Lauftext, Programmtyp, Multiplex-Name,
Datum, Frequenz, Bitrate und Audiotyp,
Verschlüsselungsdaten, Titel, Künstler, Signalstärke.
UKW-Radio hören
UKW-Radiosender einschalten
Gehen Sie wie folgt vor, um UKW-Sender
einzuschalten:
1. Schließen Sie den Stecker der (mitgelieferten)
externen Antenne an die Antennenbuchse an
der Rückseite des Radios an.
2. Schalten Sie das Radio mit der Betriebstaste
ein.
3. Stellen Sie den UKW-Radiomodus durch
wiederholtes Drücken der Modus-Taste ein.
4. Halten Sie die Taste Tuning+ oder Tuning-
gedrückt, um automatisch nach einem UKW-
Sender mit höherer bzw. niedriger Frequenz
zu suchen. Das Radio beendet die Suche,
sobald es einen Sender mit ausreichender
Signalstärke gefunden hat. Im Display wird die
Frequenz des gefundenen Signals angezeigt.
Sofern RDS-Daten übertragen werden,
wird nach einigen Sekunden im Display der
Sendername angezeigt.
5. Mit den Tuning-Tasten können Sie die
Frequenz in Schritten von 0,05MHz einstellen.
6. Wiederholen Sie die Schritte 4 und 5, um
weitere Sender zu suchen.
7. Mit den Lautstärke-Tasten können Sie die
Lautstärke je nach Bedarf erhöhen bzw.
reduzieren.
UKW-Radiomenü
Sie können das UKW-Radiomenü nur öffnen,
indem Sie im UKW-Radiomodus die Auswahl-
Taste gedrückt halten.
Wählen Sie mit den Tuning-Tasten eine Option
aus und bestätigen Sie diese durch Drücken
der Auswahl-Taste.
Die werksseitigen und empfohlenen Einstellungen
des Radios sind mit einem Sternchen markiert.
Im UKW-Radiomenü sind folgende Optionen
verfügbar:
●[Scan]: Wenn Sie diese Option wählen, startet
das Radio die Sendersuche von der niedrigen
zur höheren Frequenz. Sobald das Radio
einen Sender mit ausreichender Signalstärke
gefunden hat, blinkt im Display 6 Sekunden
lang die Frequenz und dann setzt das Radio
die Suche fort. Drücken Sie die Auswahl-Taste,
um den gefunden Sender einzuschalten oder
um die Suche zu beenden.
●[Lieblingssender]: Wählen Sie diese Option,
um die Einstellungen für die „Lieblingssender“
zu öffnen (weitere Informationen siehe Kapitel
„DAB- und UKW-Radiosender speichern“
und „Gespeicherte DAB- und UKW-Sender
aufrufen“).
●[UKW-Suchbereich]: Nach Auswahl dieser
Option können Sie festlegen, ob das Radio
während der automatischen Sendersuche nur
nach starken Signalen („Lokal“) oder nach
allen Signalen („Entfernt“) suchen soll.
●[System-Setup]: Wählen S i e diese
Option, um das Systemmenü zu öffnen
und das Radio zu konfigurieren (weitere
Informationen siehe Kapitel „System-
Setup“).
●[Zurück]: Wählen Sie diese Option, um im
Menü einen Schritt zurückzugehen oder um
zur vorherigen Anzeige zurückzukehren.
UK W -Se n d e rinformatio n e n
anzeigen
Drücken Sie während der Wiedergabe eines
UKW-Senders, der RDS-Daten überträgt,
wiederholt die Auswahl-Taste, um nacheinander
folgende Informationen anzuzeigen:
Radiotext, Programmtyp, Datum, Frequenz.
Rad io se nder im DAB- oder
UKW-Modus speichern
Das Radio verfügt über jeweils 10 DAB- und
UKW-Speicherplätze. Die Vorgehensweise
zum Speichern von Sendern ist in beiden
Modi identisch.
1. Schalten Sie das Radio mit der Betriebstaste
ein.
2. Schalten Sie wie oben beschrieben einen
Radiosender ein.
3. Halten Sie die Auswahl-Taste gedrückt, um
das Menü für den aktuellen Modus zu öffnen.
4. Wählen Sie mit den Tuning-Tasten die
Option „Lieblingssender“ und drücken
Sie dann die Auswahl-Taste, um die
Einstellungen zu öffnen.
5. Wählen Sie mit den Tuning-Tasten die
Option „Sender speichern“ und drücken
Sie dann die Auswahl-Taste.
6. Scrollen Sie mit den Tuning-Tasten durch
die Liste mit den gespeicherten Sendern,
bis Sie einen freien Speicherplatz oder
einen Sender, den Sie überschreiben
möchten, gefunden haben.
7. Drücken Sie die Auswahl-Taste, um den
Sender zu speichern. Im Display erscheint
dann z.B. die Anzeige „Gespeichert auf
Platz 2“.
8. Wiederholen Sie diese Vorgehensweise für
die verbleibenden Speicherplätze. Bereits
gespeicherte Sender können anhand dieser
Vorgehensweise überschrieben werden.
Auch nach dem Ausschalten des Radios
bleiben gespeicherte Sender erhalten.
Gespeicherte Radiosender im
DAB- oder UKW-Modus aufrufen
1. Schalten Sie das Radio mit der Betriebstaste
ein.
2. Schalten Sie mit der Modus-Taste den
gewünschten Modus ein.
3. Halten Sie die Auswahl-Taste gedrückt, um
das Menü für den aktuellen Modus zu öffnen.
4. Wählen Sie mit den Tuning-Tasten die
Option „Lieblingssender“ und drücken
Sie dann die Auswahl-Taste, um die
Einstellungen zu öffnen.
5. Wählen Sie mit den Tuning-Tasten die
Option „Recall Station“ und drücken Sie
dann die Auswahl-Taste.
6. Wählen Sie mit den Tuning-Tasten einen
gespeicherten Sender aus. Drücken Sie dann
die Auswahl-Taste, um den ausgewählten
Sender einzuschalten; im Display wird die
Speicherplatznummer angezeigt, z.B. „P2“.
Menü mit den System-
Setupeinstellungen
Über dieses Menü können Sie das Radio
konfigurieren. Gehen Sie wie folgt vor, um
die Systemeinstellungen zu öffnen:
1. Schalten Sie das Radio mit der Betriebstaste
ein.
2. Halten Sie die Auswahl-Taste gedrückt, um
das Menü für den aktuellen Modus zu öffnen.
3. Wählen Sie mit den Tuning-Tasten die Option
[System-Setup] und drücken Sie dann die
Auswahl-Taste, um das Menü zu öffnen.
Das Menü enthält folgende Optionen:
Wählen Sie mit den Tuning-Tasten eine
Option aus und bestätigen Sie diese durch
Drücken der Auswahl-Taste.
Die werksseitigen und empfohlenen
Einstellungen des Radios sind mit einem
Sternchen markiert.
●[Sleep-Timer]: Sie können eine Timer
einstellen, nach Ablauf dessen sich
das Radio automatisch ausschaltet.
Wählen Sie diese Option, um das
Sleep-Timer-Menü zu öffnen, und
stellen Sie dann mit den Tuning-Tasten
den gewünschten Timer ein. Wählen
Sie eine Dauer zwischen 15 und 120
Minuten oder die Option „Timer aus“,
um den Timer zu deaktivieren. Drücken
Sie zum Bestätigten die Auswahl-Taste.
Ein aktivierter Sleep-Timer wird anhand
eines entsprechenden Icons im Display
angezeigt. Um die verbleibende Zeit
eines aktivierten Timers anzuzeigen,
öffnen Sie anhand der oben erläuterten
Vorgehensweise das Menü [System-
Setup] [Sleep- und wählen Sie die Option
Timer]. Drücken Sie dann die Auswahl-
Taste, um die verbleibende Dauer des
eingestellten Timers anzuzeigen.
Um den Sleep-Timer noch vor Ablauf
der Zeit zu deaktivieren und das Radio
auszuschalten, drücken Sie direkt auf
die Betriebstaste.
●[Kontrast]: Über diese Option stellen
Sie den Kontrast des Displays ein.
Wählen Sie mit den Tuning-Tasten die
gewünschte Einstellung und bestätigen
Sie durch Drücken der Auswahl-Taste.
●[Zeit aktualisieren]: Wählen Sie
diese Option, um die Quelle für die
automatische Aktualisierung von Datum
und Uhrzeit einzustellen.
●[Language]: Über diese Option wählen
Sie die Sprache, in der die Menüs
angezeigt werden sollen.
●[Factory reset]: Wählen Sie diese
O p t i o n , u m d a s R a d i o a u f d i e
Werkseinstellungen zurückzusetzen.
Nach der Bestätigung werden alle vom
Benutzer geänderten Einstellungen sowie
gespeicherte Radiosender gelöscht.
●[SW-Version]: Wählen Sie diese Option,
um die Software-Version des Radios
anzuzeigen. Verlassen Sie die Anzeige,
indem Sie die Auswahl-Taste drücken.
●[Zurück]: Wählen Sie diese Option, um
im Menü einen Schritt zurückzugehen
oder um zur v orherig e n A nzei g e
zurückzukehren.
Musikwiedergabe via
Bluetooth-Übertragung
Bevor Sie mit dem DDR-7X Musik via
Bluetooth-Übertragung abspielen können,
müssen Sie Ihr externes Bluetooth-Gerät
zunächst mit dem DDR-7X koppeln. Durch
die Kopplung entsteht eine „Verbindung“,
a n h a n d de r e r s i c h di e z we i Ge r ä t e
gegenseitig identifizieren können.
Ers t m a l i g e K o p p l u n g u n d
Wiedergabe Ihres Bluetooth-
Geräts
1. D r ü c k e n S i e , w e n n d a s R a d i o
eingeschaltet ist, die Modus-Taste zur
Auswahl der Bluetooth-Funktion. Im
Display erscheint die Anzeige „Bluetooth
Pairing“. Die Bluetooth-LED-Anzeige am
Radio blinkt zügig blau und weist somit
darauf hin, dass das Radio verfügbar ist.
HINWEIS
Falls das Radio im Bluetooth-Modus
n i c h t mi t ei n e m B l u et oo t h -G er ä t
verbunden wird, schaltet sich das Radio
nach 15 Minuten automatisch aus.
2. Aktivieren Sie die Bluetooth-Funktion
a n I h r e m e x t e r n e n G e r ä t ( s i e h e
Bedi e n un g sanlei tu n g de s ex te rn e n
Geräts). Öffnen Sie die Liste mit den
Blu e t o oth-G e rä t e n und wä h l en S ie
das Gerät mit dem Namen „DDR-7X“
aus . (Bei einiben Smartpho n es mit
Bluetooth-Versionen älter als BT2.1
ist gegebenenfalls die Eingabe eines
Passworts erforderlich. Geben Sie in solch
einem Fall „0000“ ein).
3. Nach der erfolgreichen Verbindung ertönt
ein Bestätigungston und der Name des
verbundenen Bluetooth-Geräts erscheint
im Display. Die Bluetooth-LED-Anzeige
leuchtet dann stetig blau. Sie können nun
am externen Gerät Musik auswählen und
abspielen.
4. Die Lautstärke können Sie am externen
Gerät oder direkt am Radio einstellen.
Verwenden Sie die entsprechenden Tasten
am Bluetooth-Gerät, um die Wiedergabe
zu starten, zu unterbrechen, oder um Titel
auszuwählen.
●Falls 2 Bluetooth-Geräte das erste Mal
gekoppelt werden, suchen beide Geräte
nach dem Radio; die Verfügbarkeit des
Radios wird an beiden Geräten angezeigt.
Sobald jedoch ein Gerät die Verbindung
mit dem Radio hergestellt hat, wird das
Radio nicht in der Geräte-Liste des zweiten
Bluetooth-Geräts erscheinen.
●Falls das externe Gerät umgestellt wird und
dadurch die Reichweite verlässt, wird die
Verbindung vorübergehend getrennt. Das
Radio stellt die Verbindung automatisch
wieder her, sobald das externe Gerät
wieder in Reichweite ist. Bitte beachten
Si e, das s wäh r e nd di e s e r Z e it de r
Trennung kein anderes Bluetooth-Gerät
mit dem Radio gekoppelt oder verbunden
werden kann.
●Falls „DDR-7X“ in der Geräte-Liste
des externen Geräts erscheint, die
Verbindung jedoch nicht hergestellt
werden kann, löschen Sie den Namen
aus der Liste und koppeln Sie das
Radio erneut anhand oben erläuterter
Vorgehensweise.
●Die effektive Reichweite zwischen dem
Radio und dem gekoppelten Gerät
beträgt ungefähr 10 Meter (30 Fuß).
Hindernisse zwischen beiden Geräten
können die Reichweite reduzieren.
●Die Leistungsfähigkeit der Bluetooth-
Verbindung kann je nach verbundenem
Bluetooth-Gerät variieren. Informieren
Sie sich über die Bluetooth-Fähigkeiten
Ihres externen Geräts, bevor Sie dieses
verbinden. Nicht alle Bluetooth-Geräte
unterstützen alle Bluetooth-Funktionen.
●Bei einigen Handys ist es möglich, dass die
Bluetooth-Übertragung stummgeschaltet
oder die Verbindung vorübergehend
unterbrochen wird, während Sie Anrufe
tätigen / entgegennehmen, Textnachrichten
oder E-Mails senden / empfangen
oder andere Funktionen, die nicht im
Zusammenhang mit der Audioübertragung
stehen, durchführen. Dies ist abhängig vom
verbundenen Gerät und keine Fehlfunktion
des DDR-7X.
HINWEIS Wiedergabe von Audiodateien im
Bluetooth-Modus
Nach der erfolgreichen Verbindung des Radios
mit Ihrem externen Bluetooth-Gerät können
Sie die Musikwiedergabe mit den Tasten des
Bluetooth-Geräts starten.
1. Während der Wiedergabe können Sie die
Lautstärke mit den Lautstärketasten des
Radios oder des externen Bluetooth-Geräts
einstellen.
2. Verwenden Sie die Tasten an Ihrem externen
Bluetooth-Gerät, um die Wiedergabe zu starten
/ zu unterbrechen oder um durch die Titel zu
scrollen. Alternativ dazu können Sie auch die
Tasten Wiedergabe / Pause, Nächster Titel
oder Vorheriger Titel am Radio verwenden.
3. Halten Sie die Taste Suchlauf vorwärts
oder Suchlauf rückwärts gedrückt, um den
aktuellen Titel zu durchsuchen. Lassen Sie
die Taste los, sobald Sie die gewünschte
Stelle gefunden haben.
HINWEIS
Nic h t alle Anw e nd ungen od e r Geräte
unterstützen die Steuerung mit diesen Tasten.
Bluetooth-Anzeigeoptionen
F a l l s d a s v e r b u n d e n e G e r ä t i n d e r
Lage ist, Informationen bzgl. des aktuell
wiedergegebenen Titels bereitzustellen, kann
das Radio im Bluetooth-Modus folgende
Informationen anzeigen:
Gerätename, Titel, Künstler, Album.
Drücken Sie die Auswahl-Taste, um durch die
unterschiedlichen Optionen zu scrollen.
Bitte beachten Sie, dass die Verfügbarkeit der
Informationen von dem jeweils spezifischen
Medienformat abhängig ist.
Erneute Verbindung eines früher
gekoppelten Bluetooth-Geräts
Das Radio kann bis zu 8 gekoppelte Bluetooth-
Geräte speichern. Wird diese Zahl überschritten,
wird das jeweils älteste gekoppelte Gerät
überschrieben.
Falls Ihr Bluetooth-Gerät bereits zu einem
früheren Zeitpunkt mit dem Radio gekoppelt war
und noch gespeichert ist, wird das Radio das
Gerät erkennen und versuchen, die Verbindung
mit diesem Gerät herzustellen.
Trennung des Bluetooth-Geräts
1. Halten Sie die Auswahl-Taste gedrückt, um
das Bluetooth-Menü zu öffnen.
2. Wählen Sie mit den Tuning-Tasten die Option
„Kopplung trennen“ und drücken Sie zum
Bestätigen die Auswahl-Taste.
3. Um das Bluetooth-Gerät zu trennen, wählen
Sie mit den Tuning-Tasten die Option „Ja“ und
drücken Sie dann die Auswahl-Taste. Es ertönt
ein Bestätigungston und die Bluetooth-LED-
Anzeige am Radio blinkt zügig blau, um darauf
hinzuweisen, dass das Radio wieder für die
Kopplung verfügbar ist. Falls Sie „Nein“ oder
„Zurück“ wählen, wird das Bluetooth-Gerät
nicht getrennt. Drücken Sie die Auswahl-Taste,
um Ihre Auswahl zu bestätigen.
4. Drücken Sie alternativ dazu die Modus-
Taste, um einen anderen als den Bluetooth-
Modus auszuwählen, oder deaktivieren Sie
die Bluetooth-Funktion an Ihrem Bluetooth-
Gerät, um die Verbindung zu trennen.
Löschung gekoppelter Bluetooth-
Geräte
1. Halten Sie die Auswahl-Taste gedrückt, um
das Bluetooth-Menü zu öffnen.
2. Wählen Sie mit den Tuning-Tasten die
Option „Clear Pairing“ und drücken Sie zum
Bestätigen die Auswahl-Taste.
3. Um alle gekoppelten Geräte aus dem
Speicher zu löschen, wählen Sie mit den
Tuning-Tasten die Option „Ja“ und drücken
Sie dann die Auswahl-Taste. Wenn Sie „Nein“
oder „Zurück“ wählen, werden die Geräte
nicht gelöscht. Drücken Sie die Auswahl-
Taste, um Ihre Auswahl zu bestätigen.
TWS-Funktion (True Wireless
Stereo)
Anhand der TWS-Funktion (True Wireless
Stereo) können Sie ein Gerät schnurlos mit
einem anderen Gerät verbinden. Sie können Ihr
DDR-7X schnurlos mit einem anderen DDR-7X
verbinden und Musik über beide Lautsprecher
abspielen.
Ersten Lautsprecher einrichten
1. Vergewissern Sie sich, dass am ersten
Lautsprecher Bluetooth aktiviert und dieser
mit einem Bluetooth-Gerät verbunden ist.
2. Halten Sie die Auswahl-Taste gedrückt, um
das Bluetooth-Menü zu öffnen.
3. Wählen Sie mit den Tuning-Tasten „TWS-
Kopplung”.
4. Drücken Sie die Auswahl-Taste, um den
TWS-Kopplungsmodus auszuwählen.
Zweiten Lautsprecher einrichten
1. Vergewissern Sie sich, dass am zweiten
Lautsprecher der Bluetooth-Modus aktiviert
ist, dieser jedoch noch nicht mit einem
Bluetooth-Gerät verbunden ist.
2. Halten Sie die Auswahl-Taste gedrückt, um
das Bluetooth-Menü zu öffnen.
3. Wählen Sie mit den Tuning-Tasten „TWS-
Kopplung”.
4. Drücken Sie die Auswahl-Taste, um den
TWS-Kopplungsmodus auszuwählen.
Nach der erfolgreichen Verbindung beider
La u t s pr e c h e r er s c h ei n e n a m e rs t en
Lautsprecher die Anzeige „Primär“: Mono”
sowie der Name des Bluetooth-Geräts. Im
Display des zweiten Lautsprechers erscheint
die Anzeige „Sekundär: Mono“.
●Richten Sie den zweiten Lautsprecher
i n n e r h a l b v o n 1 Mi n u t e n a c h d e r
Einrichtung des ersten Lautsprechers ein,
da anderenfalls die Einstellung am ersten
Lautsprecher deaktiviert wird.
●Wenn beide Lautsprecher mit dem gleichen
Bluetooth-Gerät verbunden sind, kann
die TWS-Funktion (True Wireless Stereo)
nicht eingestellt werden. Sie müssten in
solch einem Fall zunächst die Bluetooth-
Verbindung eines Lautsprechers trennen,
um dann die TWS-Funktion einstellen zu
können.
HINWEIS
3837 39 40
41 4442 4543 46
23
Para cancelar el temporizador de
apagado automático antes de que haya
transcurrido el tiempo preestablecido
y para apagar la radio manualmente,
presione el botón de encendido.
●[Contrast] (Contraste): seleccione esta
opción para ajustar el contraste de la
pantalla. Use el botón de sintonizar
hacia arriba o abajo para ajustar el nivel
de contraste y presione el botón de
seleccionar para confirmar.
●[Time Update] (Actualización de la hora):
seleccione esta opción para seleccionar
una fuente para l a ac t u a l ización
automática de la hora y fecha.
●[Language] (Idioma): seleccione esta
opción para configurar el idioma en el
que se muestran los menús de la radio.
●[Factory reset] (Restablecimiento
de los valores de fábrica): seleccione
está opción para restablecer la radio
a la configuración predeterminada de
fábrica. Tras la confirmación, todos
los ajustes del usuario y emisoras
presintonizadas se borrarán.
●[SW Version] (Versión del software):
seleccione esta opción para ver la versión
del software de la radio. Presione el botón
de seleccionar para salir.
●[Back] (Atrás): seleccione esta opción
retroceder un paso en los menús de la
radio o volver a la pantalla anterior.
Escuchar música vía
retransmisión por Bluetooth
Necesitará emparejar su dispositivo Bluetooth
con su DDR-7X antes de poder autoenlazarlos
para reproducir / retransmitir música por
Bluetooth en su DDR-7X. El emparejamiento
creará un 'enlace' de modo que ambos
dispositivos puedan reconocerse mutuamente.
Vincular y reproducir el
dispositivo Bluetooth por
primera vez
1. Con la radio encendida, presione el botón
de modo para seleccionar la función
Bluetooth. "Bluetooth Pairing" (vinculación
Bluetooth) se mostrará en pantalla. El
indicador LED Bluetooth de la radio
parpadeará rápidamente en color azul
para mostrar que la radio es visible.
NOTA
cuando la radio no está conectada a
un dispositivo Bluetooth mientras en
está en modo Bluetooth, se apagará
automáticamente tras 15 minutos.
2. Active la función Bluetooth en su dispositivo
y enlácelo con la radio, siguiendo lo
especificado en su manual de instrucciones.
Acceda a la lista de dispositivos Bluetooth
y seleccione el dispositivo "DDR-7X" (en
algunos smartphones equipados con
versiones anteriores a BT2.1, podría
necesitar introducir la clave "0000").
3. Una vez conectado, habrá un tono de
sonido de confirmación y el nombre del
dispositivo Bluetooth conectado se mostrará
en pantalla. El indicador LED Bluetooth
se volverá de color azul. Ahora puede
simplemente seleccionar y reproducir
cualquier música desde el dispositivo fuente.
4. El volumen podrá ser ajustado desde su
dispositivo o directamente desde la radio.
Utilice los controles en su dispositivo con
funcionalidad Bluetooth o los de la radio para
reproducir / pausar y navegar por pistas.
●Si 2 dispositivos Bluetooth se intentaran
emparejar por primera vez y ambos
buscaran su radio, ésta se mostrará
disponible en ambos dispositivos. Sin
embargo, si un dispositivo se enlazase
con esta unidad primero, entonces
el otro dispositivo Bluetooth no la
encontrará en el listado.
●Si moviera el dispositivo fuera del alcance
de Bluetooth, la conexión a su radio se
desconectará temporalmente. Su radio
se reconectará automáticamente si el
dispositivo al que estuviera conectado
volviese a estar dentro del radio de
alcance. Tenga en cuenta que durante
el periodo de desconexión, ningún otro
dispositivo Bluetooth podrá emparejarse
o enlazarse con su radio.
●Si se mostrase 'DDR-7X' en su listado de
dispositivos Bluetooth pero su dispositivo
no pudiera conectarse a él, elimine
el elemento de la lista y empareje el
dispositivo de nuevo con la radio siguiendo
los pasos descritos anteriormente.
NOTA
●El radio de alcance operativo entre el
sistema y el dispositivo emparejado es de
aproximadamente 10 metros (30 pies).
Cualquier obstáculo entre el sistema y el
dispositivo podría reducir el rango de alcance.
●El funcionamiento de la conexión Bluetooth
podría variar dependiendo de los dispositivos
Bluetooth conectados. Por favor, consulte
las capacidades Bluetooth de su dispositivo
antes de conectarlo a su radio. Todas las
funcionalidades podrían no ser compatibles en
algunos dispositivos Bluetooth emparejados.
●En algunos teléfonos móviles, hacer /
recibir llamadas, mensajes de texto, correos
electrónicos o cualquier otra actividad no
relacionada con la retransmisión de audio
podría silenciar la retransmisión de audio
por Bluetooth o incluso desconectarse
temporalmente de su dispositivo. Este tipo
de comportamiento es una función del
dispositivo conectado y no indica ningún fallo
de funcionamiento de su DDR-7X.
NOTA
Reproducir ficheros de audio en
modo Bluetooth
Una vez haya conectado satisfactoriamente
su radio con el dispositivo Bluetooth deseado,
podrá comenzar a reproducir música utilizando
los controles de su dispositivo Bluetooth.
1. Una vez que la reproducción haya comenzado,
el volumen puede ajustarse tanto en la radio,
usando los botones de volumen, como en el
dispositivo Bluetooth, usando sus controles de
volumen.
2. Use los controles en el dispositivo Bluetooth
para reproducir / pausar y recorrer las pistas.
Alternativamente, puede controlar la reproducción
usando los botones de reproducir / pausar, pista
siguiente o pista anterior en la radio.
3. Mantenga presionado el botón de avance
rápido o rebobinar para moverse por la pista
actual. Suelte el botón cuando llegue al
punto deseado.
NOTA
No todas las aplicaciones de reproducción o
dispositivos podrían responder a todos estos
controles.
Opciones de visualización Bluetooth
Si el dispositivo conectado puede proporcionar
información de la pista que está siendo
reproducida, la radio puede mostrar lo siguiente
en modo Bluetooth:
Nombre del dispositivo, título, artista, álbum.
Presione el botón de seleccionar para recorrer
las diferentes opciones.
Tenga en cuenta que la disponibilidad de la
información depende del formato del contenido
multimedia específico.
Reconectar a un dispositivo
Bluetooth emparejado anteriormente
La radio puede memorizar hasta 8 juegos de
dispositivos Bluetooth vinculados, cuando la
memoria excede esta cantidad, el dispositivo
vinculado hace más tiempo se sobrescribirá.
S i el di sp os i ti v o Bl u e t o o th s e v i n c u l ó
anteriormente con la radio, la unidad memorizará
el dispositivo Bluetooth e intentará volver a
conectarse con un dispositivo Bluetooth en la
memoria que se conectó por última vez.
Desconectar el dispositivo Bluetooth
1. Mantenga presionado el botón de seleccionar
para entrar al menú de Bluetooth.
2. Presione el botón de sintonizar hacia arriba o
abajo para seleccionar "Cancel Pair" (Cancelar
vinculación). A continuación, presione el botón
de seleccionar.
3. Para desconectarse del dispositivo Bluetooth,
use el botón de sintonizar hacia arriba o abajo
para seleccionar "Yes" (Sí) y, a continuación,
presione el botón de seleccionar. Se escuchará
un tono de confirmación y el indicador LED de
Bluetooth de la radio parpadeará rápidamente
en color azul para mostrar que la radio
está disponible de nuevo para vincularse.
Seleccionar "No" o "Back" (Atrás) no desconecta
el dispositivo Bluetooth. Presione el botón de
seleccionar para confirmar su elección.
4. Altern ativamente , puede pres i onar el
botón de modo para seleccionar cualquier
otro modo que no sea el de Bluetooth o
puede apagar el Bluetooth en el dispositivo
Bluetooth para deshabilitar la conexión.
24 25 26 27 28
Borrar la memoria de dispositivos
Bluetooth vinculados
1. Mantenga presionado el botón de seleccionar
para entrar al menú de Bluetooth.
2. Presione el botón de sintonizar hacia arriba o
abajo para seleccionar "Clear Pairing" (borrar
vinculaciones). A continuación, presione el
botón de seleccionar.
3. Para borrar todos los dispositivos vinculados
de la memoria, use el botón de sintonizar
hacia arriba o abajo para seleccionar "Yes"
(Sí) y, a continuación, presione el botón de
seleccionar. Seleccionar "No" o "Back" (Atrás)
no borrará los dispositivos vinculados de la
memoria. Presione el botón de seleccionar
para confirmar su elección.
Función True Wireless Stereo
(TWS)
True wireless stereo (también conocida como
TWS) es una función que permite que un
dispositivo se conecte de forma inalámbrica con
otro dispositivo. El DDR-7X puede conectarse
inalámbricamente con un segundo DDR-7X y
reproducir música a través de ambos altavoces
al mismo tiempo.
Configurar el primer altavoz
1. Asegúrese de que el primer altavoz esté en
modo Bluetooth y conéctelo al dispositivo
Bluetooth.
2. Mantenga presionado el botón de seleccionar
para entrar al menú de Bluetooth.
3. Presione el botón de sintonizar hacia arriba
o abajo para seleccionar la "TWS Pair"
(Vinculación TWS).
4. Presione el botón de seleccionar para entrar
al modo de vinculación TWS.
Configurar el segundo altavoz
1. Asegúrese de que el segundo altavoz
esté en modo Bluetooth y de que no esté
conectado a un dispositivo Bluetooth.
2. Mantenga presionado el botón de seleccionar
para entrar al menú de Bluetooth.
3. Presione el botón de sintonizar hacia arriba
o abajo para seleccionar la "TWS Pair"
(Vinculación TWS).
4. Presione el botón de seleccionar para entrar al
modo de vinculación TWS.
Una vez que los altavoces se hayan conectado
exitosamente, el primer altavoz mostrará
"Main: Mono" (Principal: Mono) y el nombre
del dispositivo Bluetooth. El segundo altavoz
mostrará "Sub: Mono" (Secundario: Mono).
●Configure el segundo altavoz en un plazo de
1 minuto tras el primero, de lo contrario, la
configuración del primer altavoz se cancelará.
●Cuando ambos altavoces estén conectados
al mismo dispositivo Bluetooth, la función
True Wireless Stereo (TWS) no puede
configurarse. En este caso, debe desconectar
la conexión Bluetooth de uno de los altavoces
para configurar la función TWS.
NOTA
Comenzar la reproducción
1. Comience la reproducción en el dispositivo
Bluetooth conectado y ajuste el volumen
en el dispositivo Bluetooth o en uno de los
altavoces para una escucha agradable.
NOTA
El ajuste de volumen de un altavoz se
reeja en el otro.
2. Use los controles en el dispositivo Bluetooth
para reproducir / pausar y recorrer las
pistas. Alternativamente, puede controlar
la reproducción usando los botones de
reproducir / pausar, pista siguiente o pista
anterior en cualquiera de los altavoces.
3. Mantenga presionado el botón pista siguiente
o anterior en cualquiera de los altavoces
para avanzar rápido o rebobinar la pista
actual. Suelte el botón cuando llegue al
punto deseado.
NOTA
No todas las aplicaciones de reproducción o
dispositivos podrían responder a todos estos
controles.
Cambiar el modo de audio
Al usar dos altavoces, puede cambiar entre los
modos "Mono", "Stereo L" (Estéreo izquierdo) y
"Stereo R" (Estéreo derecho).
1. Mantenga presionado el botón de seleccionar
para entrar al menú de Bluetooth.
2. Presione el botón de sintonizar hacia arriba
o abajo para seleccionar la "TWS Setting"
(Ajustes de TWS). A continuación, presione el
botón de seleccionar para entrar a los ajustes.
3. Presione el botón de sintonizar hacia arriba
o abajo para seleccionar "Mono-Pairing"
(Vinculación Mono), "Stereo L / R" (Estéreo
izquierdo / derecho) o "Stereo R / L" (Estéreo
derecho / izquierdo). A continuación, presione el
botón de seleccionar para confirmar su elección.
La pantalla mostrarán los siguientes modos:
Modo "Mono": Ambos altavoces reproducen
el mismo sonido. Esta es la configuración por
defecto.
Modo "Stereo L" (Estéreo izquierdo) y "Stereo
R" (Estéreo derecho): Un altavoz reproduce
el sonido en el canal izquierdo mientras que
el otro lo hace en el derecho para lograr una
reproducción estéreo entre los altavoces.
Desconectar la conexión True
Wireless Stereo (TWS)
1. Mantenga presionado el botón de seleccionar
para entrar al menú de Bluetooth.
2. Presione el botón de sintonizar hacia arriba o
abajo para seleccionar la "TWS Cancel" (Cancelar
TWS). A continuación, presione el botón de
seleccionar para desconectar la función TWS.
Bloqueo de las teclas
La función de bloqueo de teclas es usa para
evitar un uso involuntario de la radio.
1. Con la radio encendida, deslice el interruptor
de bloqueo en la parte trasera de la radio
hacia la izquierda. El símbolo de bloqueado
aparecerá en la pantalla. Todos los
botones quedarán desactivados.
2. Para eliminar el bloqueo, deslice el interruptor
de bloqueo a la derecha. El símbolo de
bloqueado desaparecerá de la pantalla.
Toma de entrada auxiliar
En la parte trasera de la radio se encuentra una
toma de entrada auxiliar estéreo de 3,5mm para
permitir la entrada de una señal de audio en la
unidad desde un dispositivo de audio externo,
como un iPod o un reproductor de MP3 o de CD.
1. Con la radio encendida, presione el botón de
modo hasta que se muestre "Aux" (auxiliar).
2. Conecte una fuente de audio externa (por
ejemplo, un iPod o un reproductor de MP3 o
de CD) a la toma de entrada auxiliar.
3. Ajuste el volumen en el iPod o en el reproductor
de MP3 o CD para asegurarse de que haya un
nivel de señal adecuado desde su dispositivo.
A continuación, ajuste el volumen en la radio
según necesite.
Bluetooth
Especificación Bluetooth Bluetooth
® versión 5.2
Perfil soportado A2DP, AVRCP
Códec de audio Bluetooth SBC, AAC
Potencia de transmisión Especificación Power Class 2
Alcance 10metros / 30pies
Frecuencia y potencia máxima
transmitida 2402MHz ~ 2480MHz: 3.21dBm (Bluetooth BLE)
Batería integrada
Batería Batería de iones de litio recargable de 3,65V y 2600mAh
Duración de la batería Salida de altavoz de 10mW. La duración de la batería es de
aproximadamente 19 horas, durante 4 horas al día a un nivel
de volumen normal.
Corriente de carga Máx. 900mA
Tiempo de carga Aproximadamente 4horas
General
Entrada de CC conector USB de tipo C de 5V y 2,4A
El símbolo indica voltaje de CC.
Temperatura de funcionamiento De 0°C a + 35°C
※ El código de barras en el producto se define de la siguiente manera:
Número de serie
Mes de producción
Año de producción
Código del producto
La información de marcado se encuentra en la parte inferior del aparato.
La empresa se reserva el derecho de modificar las especificaciones sin notificación previa.
Si requiere desechar este producto en cualquier momento futuro, por favor note que: Los
residuos de productos eléctricos no deben tirarse en la basura doméstica. Por favor recicle
donde existan centros para ello. Consulte con su autoridad local o minorista para obtener
información sobre el reciclaje (Directiva de Residuos de Aparatos Eléctricos y Electrónicos).
Especificaciones
Cobertura de frecuencia FM 87.5-108 MHz
DAB 174.928-239.200 MHz
Potencia de salida
Modo DAB / FM 1,6W, 10%T.H.D. a 100Hz
Modo auxiliar / Bluetooth 3,0W, 10%T.H.D. a 100Hz
Entrada auxiliar
Sensibilidad de entrada Entrada 300mV Salida 3.0W @ 100Hz
Altavoz
Altavoz 1 de 40mm y 4ohmios
Altavoz pasivo 74.2X36.7 mm
Gebruiksaanwijzing
NL
Specificaties
Frequentiebereik FM 87.5-108 MHz
DAB 174.928-239.200 MHz
Vermogen
DAB / FM-modus 1,6W 10%T.H.D. @ 100Hz
AUX / Bluetooth-modus 3,0W 10%T.H.D. @ 100Hz
Aux-ingang
Ingangsgevoeligheid IN 300mV Output 3.0W @ 100Hz
Luidspreker
Luidspreker 40mm 4ohm x 1
Passieve luidspreker 74.2X36.7 mm
Bluetooth
Bluetooth-specificatie Bluetooth
® Ver 5.2
Ondersteund profiel A2DP, AVRCP
Bluetooth-audiocodec SBC, AAC
Zendvermogen Specificatie Vermogensklasse 2
Bereik in rechte lijn 10meter / 30voet
De frequentie en het maximale
uitgezonden vermogen 2402MHz ~ 2480MHz: 3.21dBm (Bluetooth BLE)
Ingebouwde batterij
Batterij Oplaadbare lithium-ionbatterij 3,65V 2600mAh
Batterijduur Bij gebruik luidspreker 10mW, is de batterijduur ca.19 uur bij
gebruiksperiode van 4 uur per dag op normaal volume.
Laadstroom Max. 900mA
Laadtijd ca. 4.0uur
Algemeen
DC-INGANG Type-C USB-aansluiting, 5V, 2,4A
Dit symbool geeft gelijkspanning aan.
Bedrijfstemperatuurbereik 0°C tot + 35°C
※
De streepjescode van de radio is als volgt opgebouwd
:
Productcode
Productiejaar
Productiemaand
Serienummer
Het typeplaatje bevindt zich aan de onderkant van het apparaat.
Het bedrijf behoudt zich het recht voor om de specificaties te wijzigen zonder voorafgaande kennisgeving.
Als u dit product op enig moment in de toekomst wilt weggooien, houd er dan rekening mee
dat afgedankte elektrische producten niet met het huisafval mogen worden weggegooid.
Recycle indien mogelijk. Neem contact op met uw gemeente of winkel voor advies over
recycling. (Richtlijn voor afgedankte elektrische en elektronische apparatuur)
Bedienungsanleitung
D
Wiedergabe starten
1. S tar t en Si e di e Wi ed e rga b e an dem
verbundenen Bluetooth-Gerät und stellen Sie
die Lautstärke am externen Gerät oder an
einem der Lautsprecher ein.
HINWEIS
Di e Lautstärkeeinstellung des einen
Lautsprechers wird vom zweiten Lautsprecher
übernommen.
2. V erw en d en S ie d ie Tas te n a n Ihr e m
Bluetooth-Gerät, um die Wiedergabe zu
starten / zu unterbrechen und um zwischen
Titeln zu wechseln. Alternativ dazu können
Sie die Wiedergabe auch mit den Tasten
Wiedergabe / Pause, Nächster Titel und
Vorheriger Titel an einem der Lautsprecher
steuern.
3. Halten Sie die Nächster Titel oder Vorheriger
Titel Taste an einem der Lautsprecher gedrückt,
um den aktuellen Titel vor- oder zurückzuspulen.
Lassen Sie die Taste los, sobald Sie die
gewünschte Stelle gefunden haben.
HINWEIS
Nic h t alle Anw e nd ungen od e r Geräte
unterstützen die Steuerung mit diesen Tasten.
Audiomodus umschalten
W ä h r e n d d e r Ve r w e n d u n g v o n z w e i
Lautsprechern können Sie zwischen den Modi
„Mono“, „Stereo L“ und „Stereo R“ wechseln.
1. Halten Sie die Auswahl-Taste gedrückt, um
das Bluetooth-Menü zu öffnen.
2. Wählen Sie mit den Tuning-Tasten „TWS-
Einstellung“. Drücken Sie dann die Auswahl-
Taste, um die Einstellung zu öffnen.
3. Wählen Sie mit den Tuning-Tasten die Option
„Mono-Kopplung“, „Stereo L / R“ oder „Stereo
R / L“ und drücken Sie zum Bestätigen die
Auswahl-Taste. Im Display erscheint je nach
Modus folgende Anzeige:
„Mono“: An beiden Lautsprechern wird der
gleiche Ton wiedergegeben. Dies ist die
Standardeinstellung.
„ S t e r e o L “ o d e r „ S t e r e o R “ : E i n
Lauts precher gibt den Ton des linken
Kanals und der andere Lautsprecher den
Ton des rechten Kanals wieder. So wird die
Stereowiedergabe während der Verwendung
beider Lautsprecher ermöglicht.
True Wire l e s s S t e reo ( T W S)
deaktivieren
1. Halten Sie die Auswahl-Taste gedrückt, um
das Bluetooth-Menü zu öffnen.
2. Wählen Sie mit den Tuning-Tasten „TWS
abbrechen”. Drücken Sie dann die Auswahl-
Taste, um die TWS-Funktion zu deaktivieren.
Tastensperre
M i t de r Tas t en s p e r re kö n n e n Si e d e n
unerwünschten Betrieb des Radios verhindern.
1. S c h i e b e n S i e , w ä h r e n d d a s R a d i o
eingeschaltet ist, die Verriegelung an der
Rückseite des Radios nach links. Im Display
erscheint das Icon ; alle Tasten sind nun
deaktiviert.
2. Um die Sperre aufzuheben, schieben Sie
die Verriegelung nach rechts; das Icon
verschwindet dann aus dem Display.
Aux-Eingang
An der Rückseite des Radios befindet sich
ei n 3,5 m m A ux -S te reo e in ga n g für den
Anschluss und die Wiedergabe eines externen
Audiogeräts, wie z.B. iPod, MP3- oder CD-
Player.
1. Drücken Sie, wenn das Radio eingeschaltet
ist, die Modus-Taste, bis im Display die
Anzeige „Aux In“ erscheint.
2. Schließen Sie ein externes Audiogerät (z.B.
iPod, MP3- oder CD-Player) an den Aux-
Eingang an.
3. Stellen Sie die Lautstärke an Ihrem iPod,
MP3- oder CD-Player und anschließend ggf.
am Radio entsprechend ein.
Technische Daten
Frequenzbereich UKW 87.5-108 MHz
DAB 174.928-239.200 MHz
Ausgangsleistung
DAB- / UKW-Modus 1,6W 10%T.H.D. @ 100Hz
AUX- / Bluetooth-Modus 3,0W 10%T.H.D. @ 100Hz
Aux-Eingang
Eingangsempfindlichkeit Eingabe 300mV Ausgabe 3.0W @ 100Hz
Lautsprecher
Lautsprecher 40mm 4Ohm x 1
Passiver Lautsprecher 74.2X36.7 mm
Bluetooth
Bluetooth-Spezifikationen Bluetooth
® Ver 5.2
Unterstütztes Profil A2DP, AVRCP
Bluetooth Audio-CODEC SBC, AAC
Übertragungsleistung Spezifikation Power Class 2
Reichweite (im Freien) 10Meter / 30Fuß
Frequenzbereich und
Übertragungsleistung 2402MHz ~ 2480MHz: 3.21dBm (Bluetooth BLE)
Integrierte Batterie
Batterie Wiederaufladbare Lithium-Ion-Batterie 3,65V 2600mAh
Wiedergabedauer Batterie Lautsprecherwiedergabe 10mW, ca. 19 Stunden für 4
Stunden pro Tag bei normaler Lautstärke.
Ladestrom Max. 900mA
Ladedauer ca. 4Hr
Allgemein
DC IN Typ C USB-Port 5V 2,4A
Dieses Symbol weist auf Gleichspannung hin.
Betriebstemperatur 0°C bis + 35°C
※ Nachfolgend wird der Barcode am Produkt erläutert
:
Seriennummer
Herstellungsmonat
Herstellungsjahr
Produkt-Code
Das Typenschild befindet sich an der Unterseite des Geräts.
Veränderungen der Spezifikationen ohne vorherige Ankündigung vorbehalten.
Sollten sind irgendwann das Gerät nicht mehr benutzen, bedenken Sie bei der
Entsorgung bitte, dass Altgeräte niemals mit dem normalen Hausmüll entsorgt werden
sollten. Bitte geben Sie das Gerät zur Wiederverwertung ab, wenn entsprechende
Einrichtungen existieren. Erkundigen Sie sich bei Ihrer örtlichen Behörde oder Ihrem
Händler über die sachgerechte Entsorgung des Geräts. (WEEE-Richtlinie - Waste
Electrical and Electronic Equipment Directive.)
Product specificaties
| Merk: | Sangean |
| Categorie: | Radio |
| Model: | DDR-7X |
Heb je hulp nodig?
Als je hulp nodig hebt met Sangean DDR-7X stel dan hieronder een vraag en andere gebruikers zullen je antwoorden
Handleiding Radio Sangean
26 Augustus 2025
7 Juni 2025
7 Juni 2025
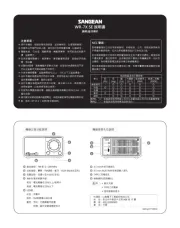
20 Januari 2025

16 Februari 2024

16 Februari 2024

16 Februari 2024

16 Februari 2024
16 Februari 2024

11 December 2023
Handleiding Radio
- Motorola
- Roadstar
- OK
- Sanyo
- FosPower
- Brennenstuhl
- Stabo
- Duronic
- Moulinex
- Balance
- Medion
- PPLEE
- Whistler
- PAC
- Alpine
Nieuwste handleidingen voor Radio
16 September 2025
15 September 2025
15 September 2025
15 September 2025
13 September 2025

13 September 2025
12 September 2025
9 September 2025
8 September 2025
8 September 2025