Rivera RockCrusher Recording Handleiding
Rivera Gitaarversterker RockCrusher Recording
Bekijk gratis de handleiding van Rivera RockCrusher Recording (6 pagina’s), behorend tot de categorie Gitaarversterker. Deze gids werd als nuttig beoordeeld door 14 mensen en kreeg gemiddeld 4.4 sterren uit 3 reviews. Heb je een vraag over Rivera RockCrusher Recording of wil je andere gebruikers van dit product iets vragen? Stel een vraag
Pagina 1/6
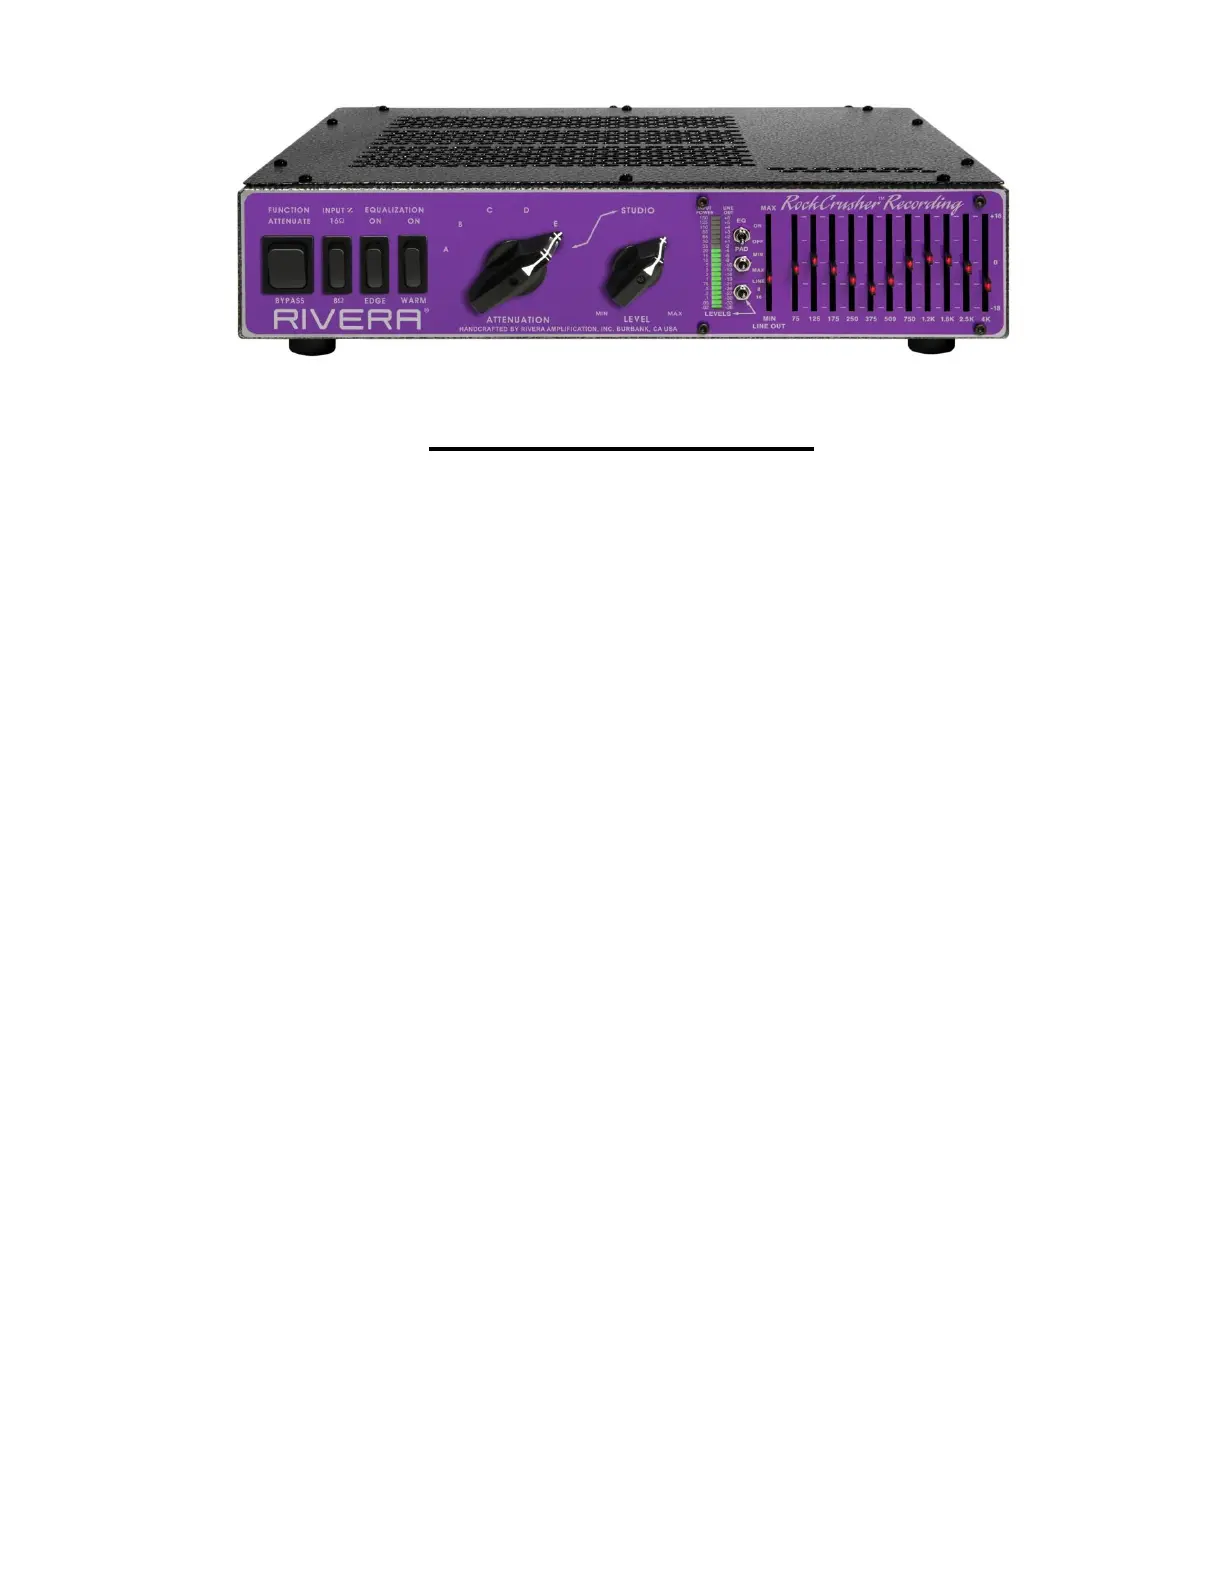
RockCrusher Recording
Congratulations and welcome to the Rivera® family of outstanding products!
We hand-build this fine product in our facility in Burbank, California, USA, using the most robust, finest
quality components from North America, Germany, and Japan. With correct use and care, you will
experience many years of enjoyment with the RockCrusher Recording. It is an invaluable tool on stage
as well as in the studio.
WARNINGS! PLEASE READ BEFORE USING!
YOU MUST HAVE A LOAD OF THE PROPER IMPEDANCE CONNECTED TO THE SPEAKER OUTPUTS OF THE
ROCKCRUSHER WHEN OPERATING IN THE BYPASS POSITION! IF NOT, YOUR AMPLIFIER WILL POTENTIALLY SEE
AN OPEN LOAD CONDITION, WHICH MAY RESULT IN SEVERE DAMAGE TO YOUR AMPLIFIER!
YOU MUST MAKE SURE THAT THE IMPEDANCE OF THE AMPLIFIER’S SPEAKER OUTPUT MATCHES THE
SETTINGS ON THE ROCKCRUSHER (8 OR 16 OHM), AND THAT THE SPEAKER(S) CONNECTED TO THE
ROCKCRUSHER IS OF THE SAME IMPEDANCE. IF MULTIPLE SPEAKERS ARE CONNECTED (ROCKCRUSHER
SPEAKER OUTPUT JACKS ARE IN PARALLEL), THEIR COMBINED LOAD IMPEDANCE MUST MATCH THE SETTINGS
ON THE AMPLIFIER AND ON THE ROCKCRUSHER. AN IMPEDANCE MISMATCH CAN POTENTIALLY RESULT IN
DAMAGE TO YOUR AMPLIFIER, AND EXCESSIVE HEATING TO THE ROCKCRUSHER INTERNAL COMPONENTS. DO
NOT USE THE ROCKCRUSHER ON AMPLIFIERS THAT ARE HARDWIRED FOR 2 OR 4 OHMS, OR DO NOT HAVE 8 OR
16 OHM OUTPUT IMPEDANCE CAPABILITY. DO NOT USE THE ROCKCRUSHER WITH ANY SPEAKER LOAD LOWER
THAN 8 OHMS IMPEDANCE.
ON THE BACK OF THE ROCKCRUSHER, YOU MUST USE THE SPEAKER JACK #1, FIRST.
YOU MAY NOT EXCEED THE 120W RMS POWER RATING OF THE ROCKCRUSHER.
DO NOT COVER THE TOP OR BOTTOM OF THE ROCKCRUSHER, AS PROPER VENTILATION IS REQUIRED TO
DISSIPATE THE POTENTIAL HEAT GENERATED.
DO NOT EXPOSE THE ROCKCRUSHER TO ANY MOISTURE OF ANY SORT, AS A POTENTIAL ELECTRICAL
SHOCK HAZARD OR DAMAGE TO THE ROCKCRUSHER MAY BE POSSIBLE.
EXCESSIVE USE OF YOUR AMPLIFIER’S OUTPUT POWER WILL PLACE THERMAL STRESS ON THE OUTPUT TUBES
AND THEIR ASSOCIATED COMPONENTS, AS WELL AS ON THE OUTPUT TRANSFORMER, AND MAY RESULT IN
DAMAGE TO YOUR AMPLIFIER. OLDER VINTAGE AMPLIFIERS MAY HAVE CRITICAL COMPONENTS WHICH HAVE
DETERIORATED, SUCH AS COUPLING AND FILTER CAPACITORS, WIRING INSULATION, TUBE SOCKETS, GRID
RESISTORS, AND THE INSULATION PROPERTIES OF THE OUTPUT TRANSFORMER WINDINGS.THESE
COMPONENTS MAY BE EXCESSIVELY STRESSED WHEN SUSTAINING HIGH POWER LEVELS OVER A PERIOD OF
TIME AND MAY FAIL. ASIAN- AND EASTERN EUROPEAN-BUILT AMPLIFIERS ARE FOR THE MOST PART
NOTORIOUS FOR POOR QUALITY COMPONENTS, AND SUCH COMPONENTS MAY EASILY FAIL IF STRESSED.
PLEASE CHECK THE CONDITION OF YOUR OUTPUT TUBES, AND REPLACE THEM IF THEY ARE OLD OR
FRAGILE BEFORE USING THE AMPLIFIER AT HIGH POWER LEVELS WITH THE ROCKCRUSHER. WEAK AND OLD
OUTPUT TUBES ARE THE LINK THAT CAN EASILY BREAK WHEN STRESSED. IF THERE IS OUTPUT TUBE FAILURE,
OTHER ANCILLARY COMPONENTS MAY BE DAMAGED AS WELL.
BY RESPECTING THE CORRECT USE OF THE ROCKCRUSHER, YOU WILL AVOID POTENTIAL DAMAGE TO
YOUR AMPLIFIER AS WELL AS THE ROCKCRUSHER.
Product specificaties
| Merk: | Rivera |
| Categorie: | Gitaarversterker |
| Model: | RockCrusher Recording |
Heb je hulp nodig?
Als je hulp nodig hebt met Rivera RockCrusher Recording stel dan hieronder een vraag en andere gebruikers zullen je antwoorden
Handleiding Gitaarversterker Rivera

14 Augustus 2023
Handleiding Gitaarversterker
Nieuwste handleidingen voor Gitaarversterker
21 Juli 2026
21 Juli 2026
20 Juli 2026
20 Juli 2026
20 Juli 2026
19 Juli 2026
19 Juli 2026
19 Juli 2026
18 Juli 2026
18 Juli 2026