Perlick 650 Handleiding
Bekijk gratis de handleiding van Perlick 650 (2 pagina’s), behorend tot de categorie Niet gecategoriseerd. Deze gids werd als nuttig beoordeeld door 64 mensen en kreeg gemiddeld 4.4 sterren uit 4 reviews. Heb je een vraag over Perlick 650 of wil je andere gebruikers van dit product iets vragen? Stel een vraag
Pagina 1/2
P
erlick’s Forward Sealing Beer Faucets are unique in both appearance and
function. The revolutionary ball and oating O-ring design eliminates
the need for a valve shaft. Beer is not exposed to air so the handle lever
doesn’t stick, and there is no build up of mold and bacteria in the faucet body. The
polished interior produces a smooth ow with less foaming, ensuring a perfect
pour each and every time. Fewer internal parts means better reliability and fewer
service calls. This faucet will t all standard North American shanks.
Cleaning Instructions
Before using your new Perlick faucet, clean the faucet as you would for regular cleaning (see cleaning instructions below.)
This will ensure that the faucet is clear of any materials that may be present from the manufacturing process.
We recommend that the faucet be cleaned when the beer system is cleaned. Regular cleaning of the faucet is extremely
important. The faucet can be cleaned “in place” by simply pumping your cleaning solution through the beer system with the
beer faucet in the opened position (handle forward). There is no need to remove or disassemble the faucet! By leaving the
faucet installed, the cleaning solution will thoroughly clean all internal parts including the oating O-ring and its groove.
If your specic cleaning procedure requires removing the faucet from the dispensing head, soak the faucets in cleaning
solution for 10-15 minutes. Use a faucet brush inside the spout, then brush out from the back of the faucet (there is no need
to remove the handle assembly.) Rinse with clean water and install back on the dispensing head.
SymptomPossible Cause (see back for Parts diagram)Possible Solution
Faucet drips or leaks from
the spout
• Front Seat (7) is damaged or worn
• Handle Lever (5A or 5B) is damaged
• Bearing Cup (4) is not installed properly
• Bonnet is loose
• Replace Front Seat
• Replace Handle Lever
• Reinstall Bearing Cup
• Tighten Bonnet
Faucet leaks from ow control
lever
• Worn or damaged seal
• Loose cap
• Replace seals
• Tighten cap
Faucet leaks from bonnet• O-ring (6) is not installed properly in
O-ring groove
• O-ring (6) may be damaged
• Replace O-ring
Flow control handle lever does not
change ow rate
• Handle lever orientation incorrect• Install faucet onto shank with
handle lever orientated to front
of faucet (towards spout)
Faucet leaks at the shank• Faucet not connected tightly
• Bad Coupling Gasket (8)
• Tighten Coupling Nut
• Replace Coupling Gasket
Beer pours in a semi-circular shape• CO2 may be low or turned o• Check and adjust CO2 pressure
Faucet cannot be removed
from shank
• May not have been removed recently• Pour hot water on the Coupling
Nut on the shank to loosen it
Troubleshooting
Form No. 67952
Rev. 06.05.14
PERLICK CORPORATION 8300 W. Good Hope Rd., Milwaukee, WI 53223 • 800.558.5592 • perlick.com
PRODUCT SPECIFICATION SHEETS Assembly, Disassembly and Cleaning Instructions
FORWARD SEALING BEER FAUCETS
U.S. PATENT #8066257
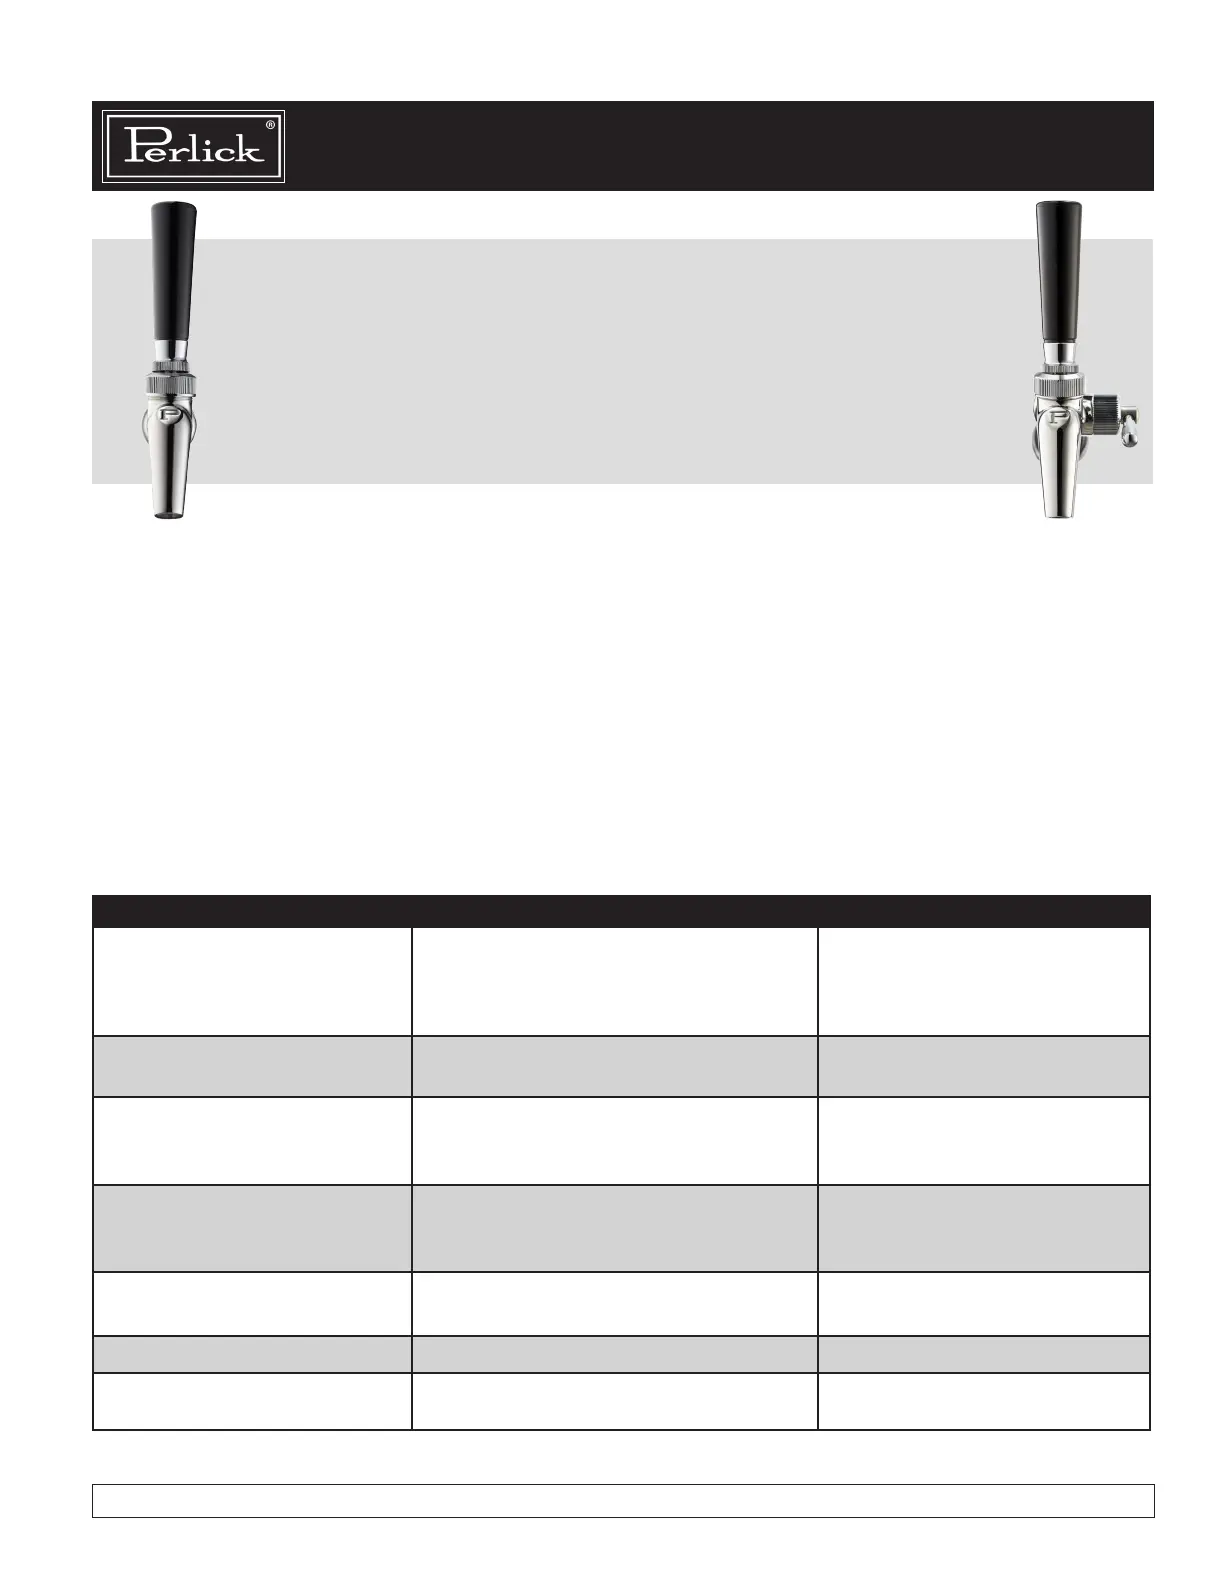
650SS Flow Control630SS
Product specificaties
| Merk: | Perlick |
| Categorie: | Niet gecategoriseerd |
| Model: | 650 |
Heb je hulp nodig?
Als je hulp nodig hebt met Perlick 650 stel dan hieronder een vraag en andere gebruikers zullen je antwoorden
Handleiding Niet gecategoriseerd Perlick

20 September 2025
9 December 2024
9 December 2024
9 December 2024
9 December 2024
22 Augustus 2024
22 Augustus 2024
5 Augustus 2024
5 Augustus 2024
5 Augustus 2024
Handleiding Niet gecategoriseerd
Nieuwste handleidingen voor Niet gecategoriseerd
19 Juni 2026
19 Juni 2026
19 Juni 2026
19 Juni 2026
19 Juni 2026
19 Juni 2026
19 Juni 2026
19 Juni 2026
19 Juni 2026
19 Juni 2026