Pentair Azur Handleiding
Bekijk gratis de handleiding van Pentair Azur (16 pagina’s), behorend tot de categorie Waterpomp. Deze gids werd als nuttig beoordeeld door 46 mensen en kreeg gemiddeld 3.5 sterren uit 23.5 reviews. Heb je een vraag over Pentair Azur of wil je andere gebruikers van dit product iets vragen? Stel een vraag
Pagina 1/16

English Deutsch
Nederlands
Español Italiano
2
4
6
8
10
12
INSTALLATION GUIDE / INSTALLATIEHANDLEIDING
BEDIENUNGSANTLEITUNG / GUIDE DE L’INSTALLATION
GUIA DE INSTALACION / GUIDE ALL’INSTALLAZIONE
Français
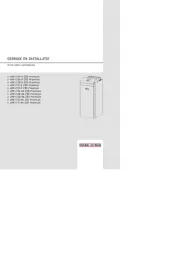
FILTER SYSTEM
AZUR™ WITH SWIMMEY™/ FREEFLO™
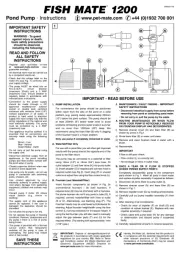
IMPORTANT SAFETY INSTRUCTIONS READ AND FOLLOW ALL INSTRUCTIONS SAVE THESE INSTRUCTIONS
AQUATIC SYSTEMS G-FSB-SWM (Rev. 12/2013)

Customer Support
HERENTALS, BELGIUM (8:30 A.M. to 4:30 P.M.) CET
Website: www.pentairpooleurope.com
Declaration of Conformity
We declare, under our sole responsibility, that the product identied in
this declaration, and to which this declaration relates, are in conformity
with the protection requirements of Council Directive 2006/42/EG
The manufacturer, Pentair, has the right to modify the
products without previous notice for as far as their
characteristics are not really changed by this.
© 2013 Pentair. All rights reserved
This document is subject to change without notice
Trademarks and disclaimers: FreeFloTM, SwimmeyTM,, AzurTM and Pentair® are
trademarks and/or registered trademarks of Pentair and/or its aliated
companies. Unless noted, names and brands of others that may be used
in this document are not used to indicate an alitation or endorsement
between the proprietors of these names and brands and Pentair. Those
names and brands may be the trademarks of those parties or others.
IMPORTANT SAFETY PRECAUTIONS
ENGLISH INSTRUCTIONS
The manufacturer has the right to modify the products
without previous notice for as far as their characteristics
are not really changed by this.
Technical information
Maximum working pressure 2 bar
Maximum working temperature 35° C
Voltage 230 V
Rpm at 50 Hz 2800 min-1
Protection IP 44
Isolation F
Sound pressure level of kit > 70 dB (A)
2. GENERAL
Check ltration kit for any evidence of damage due
to rough handling in shipment. If ltration kit is
damaged notify the carrier immediately. The ltration
kit may only be used for the ltering of swimming pool
water, garden pond water or similar applications.
3. INSTALLATION INSTRUCTIONS
Please note: there can be specic needs to use
ltration kits nearby swimming pools, garden ponds
or such places.
The pump should be placed on a at, solid foundation,
high enough to prevent ooding of the motor.
Install the lter and pump in a sheltered location,
ensuring ventilation and adequate access for
servicing. Place the lter in its permanent loca-
tion. Make sure you can reach the valve easily. Then
x the piping. Use only plastic piping. Size all piping
adequately and keep the number of elbows to a
minimum. Use a direct and short suction line with
continuous slope in order to avoid long priming times.
It is essential that the suction line is free of air leaks.
The suction line should always have at least the same
size as the suction inlet of the pump.
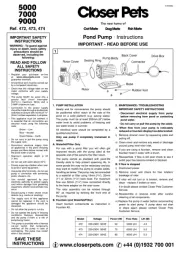
4. OPERATION
Look inside and check lower distribution system (6) on
broken or loose laterals (5). Fill tank for 1/3 with water.
Before lling the lter, sand guide (10) should be on
the pipe (4). Fill the lter with the specied quantity of
gravel, afterwards with sand. Remove the sand guide.
Put some vaseline on the O-ring (7) of the valve (8).
Assemble the valve (8) to the lter and tighten with
the clamp ring (9). Connect the piping. Turn the valve
into position “Rinse” and start the pump for at least 1
minute. Before starting the pump, the strainer basket
should be lled with water up to the level of the suc-
tion line. Lubricate the lid O-ring with silicone each
time the lid is removed. Energize the motor, the pump
will prime. The priming time depends on the suction
lift and distance to the pool. Five minutes is a reason-
able time. Pump will not lift more than 2 meter.
If pump does not prime, see troubleshooting guide.
CAUTION: NEVER SHIFT VALVE HANDLE POSITION
WHILE PUMP IS RUNNING. NEVER DISASSEMBLE
VALVE WHILE FILTER IS UNDER PRESSURE.
5. FILTRATION
1. Shift valve handle to position “Filtration”
2. Start the pump
3. Note here the pressure of the pressure gauge (11).
6. TO CLEAN ( BACKWASH) THE FILTER
When the pressure rises approximately 0.5 bar above
the recorded pressure it is time to backwash.
1. Shut o the pump
2. Shift the valve handle to “Backwash”
3. Start pump and let it run until water is clean
(about 3 minutes).
4. Shut o the pump
5. Shift valve handle to position “Rinse” and start the
pump
6. Start pump and run for approximately one minute
7. Shut o the pump
THESE OPERATING INSTRUCTIONS CONTAIN IMPORTANT
INFORMATION ON THE SAFE, PROPER AND ECONOMICAL OPERATION
OF THE SWIMMING POOL PUMP. STRICT OBSERVATION OF THE
OPERATING INSTRUCTIONS WILL HELP TO AVOID DANGERS,
REDUCE REPAIR COSTS AND SHUTDOWN TIMES AND INCREASE THE
RELIABILITY AND WORKING LIFE OF THE PRODUCT.
Filter area (m²) 0.05 0.11 0.18 0.25
Filter ow rate 5 6 9 12
Gravel Ø 3-5 mm (kg) 5 12 15 20
Sand Ø 0.35-0.5mm (kg) 15 30 65 120
Filter empty weight (kg) 11 15 18 24
Ø 305 Ø 375 Ø 475 Ø 560
2
English

8. Shift valve handle to position “Filtration” and start
the pump
7. MAINTENANCE
The strainer basket should be daily removed and
cleaned. Never operate the pump without its strainer
basket. The lter needs no maintenance.
CAUTION: ALWAYS DISCONNECT THE POWER SUPPLY
TO THE PUMP BEFORE SERVICING
8. WINTERIZING
Protect the pump, the lter and the piping from
freezing. Open the drain (3) and shift the valve handle
to “Backwash”. Remove the pump to a dry and warm
room. Do not wrap the motor with plastic covering as
condensation may damage the pump.
In installations where the pump can not be drained, a
40% propylene glycol, 60% water solution will protect
to -46°C. Do not use other anti-freeze solutions, these
are all highly toxic and will damage the pump.
9. ELECTRICAL CONNECTION
The electrical motor must be wired by a professional
according to the installation instructions of your local
electricity company.
CAUTION: AT THE INSTALLATION OF THE PUMP A
MOTOR SECURITY HAS TO BE FORESEEN WHICH
SHOULD BE IN ACCORDANCE WITH THE NOMINAL
POWER OF THE MOTOR.
Monophase
TO THE ABOVE-MENTIONED SAFETY INSTRUCTIONS,
ARE NOT COVERED BY THE WARRANTY.
10. REPLACING THE SAND
Disassemble the drain (3) and let the water ow
out. Remove the sand. The sand in the lter must be
changed every 5 years.
11. TROUBLE SHOOTING
Pump will not prime
1. No water in strainer pot
2. Strainer pot is not tight
3. Damage lid O-ring
4. Water level is below skimmer
5. Strainer basket or skimmer basket is clogged
6. Closed valve in piping system
7. Air leak in suction line
Motor does not turn
1. Power switch is o
2. Circuit breaker has tripped
3. Pump is o-mode of a timer controlled circuit
4. Motor terminal connections are incorrect
5. Motor shaft is locked by bad bearing
6. Impeller is locked by debris
Low ow-high lter pressure
1. Filter is dirty
2. Restriction in return line
Low ow-low lter pressure
1. Strainer basket or skimmer basket is clogged
2. Clogged impeller
3. Air leak in suction line
4. Restriction in suction line
Noisy pump
1. Air leak in suction
2. Foreign matter in pump housing
3. Cavitation
12. Warranty
Pentair Water is not responsible for transport damage.
In case of damage notify carrier immediately.
Warranty period:
Limited warranty: 2 years
The supply voltage should be within ± 5% of the
design voltage, specied on the nameplate of the
motor. Single-phase motors should be connected at the
terminals as indicated in the junction box.
CAUTION: MAKE SURE THAT YOU INTERRUPT THE
POWER SUPPLY TO THE CABLES WHEN CONNECTING
THE CABLES OF THE PUMP
Every motor must be permanently grounded.
An earth safety or circuit breaker switch with a
sensitivity of 30mA should always be included at the
installation. The wiring size and the type of fuses (min-
imum H05RN-F) should be selected in accordance with
the motor capacity.
CAUTION: CONNECTIONS WHICH ARE NOT CONFORM
3
English
Swimmey -8M P1 0.43 kW / 230 V
P2 0.18 kW / 230 V 2.2 A
Swimmey -10M
FreeFlo - 10M
P1 0.48 kW / 230 V
P2 0.25 kW / 230 V
2,35 A
3,0 A
Swimmey -12M
FreeFlo - 12M
P1 0.55 kW / 230 V
P2 0.37 kW / 230 V
2,5 A
3,0 A
Swimmey -15M
FreeFlo - 15M
P1 0.65 kW / 230 V
P2 0.50 kW / 230 V
3,0 A
4,2 A
Swimmey -19M
FreeFlo - 19M
P1 1.10 kW / 230 V
P2 0.75 kW / 230 V
4,5 A
5,5 A
Product specificaties
| Merk: | Pentair |
| Categorie: | Waterpomp |
| Model: | Azur |
Heb je hulp nodig?
Als je hulp nodig hebt met Pentair Azur stel dan hieronder een vraag en andere gebruikers zullen je antwoorden
Handleiding Waterpomp Pentair

5 December 2024

12 Augustus 2023

12 Augustus 2023
Handleiding Waterpomp
- Heissner
- SereneLife
- DAB
- Hillvert
- Hitachi
- Pattfield
- Maxicool
- Toolcraft
- Hayward
- Zodiac
- Gude
- Norsup
- Eden
- Reefe
- Nowax
Nieuwste handleidingen voor Waterpomp

9 September 2025
8 September 2025
8 September 2025
1 September 2025
26 Augustus 2025
26 Augustus 2025
26 Augustus 2025
26 Augustus 2025

25 Augustus 2025
25 Augustus 2025