Pentacon Praktisix II Handleiding
Pentacon Niet gecategoriseerd Praktisix II
Bekijk gratis de handleiding van Pentacon Praktisix II (7 pagina’s), behorend tot de categorie Niet gecategoriseerd. Deze gids werd als nuttig beoordeeld door 37 mensen en kreeg gemiddeld 4.8 sterren uit 5 reviews. Heb je een vraag over Pentacon Praktisix II of wil je andere gebruikers van dit product iets vragen? Stel een vraag
Pagina 1/7
Praktisix II Manual
Instructions for use
The Praktisix II is a single lens reflex camera with focal plane shutter for the 6 X 6-cm (21/4 X 21/a) picture format. It possesses all the
advantages of a modern precision camera, as there are: Automatic diaphragm Focal plane shutter with speeds from 1 second to 1/1,000
second and B Rapid wind lever Interchangeable finder elements Interchangeable field lenses Shutter wind coupled to film transport Lock
against double exposures and blanks Synchronization (X-socket) for flash tubes and flash bulbs Built-in delayed action Interchangeable
lenses.
The following items deserve special attention (abridged instructions)
1 Place film into the left-hand spool chamber.
2 Remove the gumstrip completely, pull the paper leader across the picture gate and insert it into the longer slit of the receiving spool.
3 Swing rapid lever (2) around once as far as it will go, then continue operating it by rocking movements to advance the film up to the
point where the index mark on the paper leader stands against the white dot on the picture gate. At the same time keep the spring support of
the left-hand spool under slight pressure to assure taut and even winding of the film. Move the rapid lever back to its initial position.
4 Depress set-back knob (9); a red dot becomes visible in the window of exposure counter (13).
5 Adjust film speed indicator (8) on the inner side of the camera back.
6 Release the shutter and cock it began four times. The rapid wind lever (2) must be swung around completely each time as far as it will go
and then moved back again. The exposure counter (13) now stands at number 1.
7 View and focus your image on the ground glass field. A magnifier may be swung in for critical focusing.
8 After the 12th exposure (an "E" appears in the counter window) the paper backing has to be wound up to the end by one full stroke of the
rapid wind lever followed by short rocking movements.
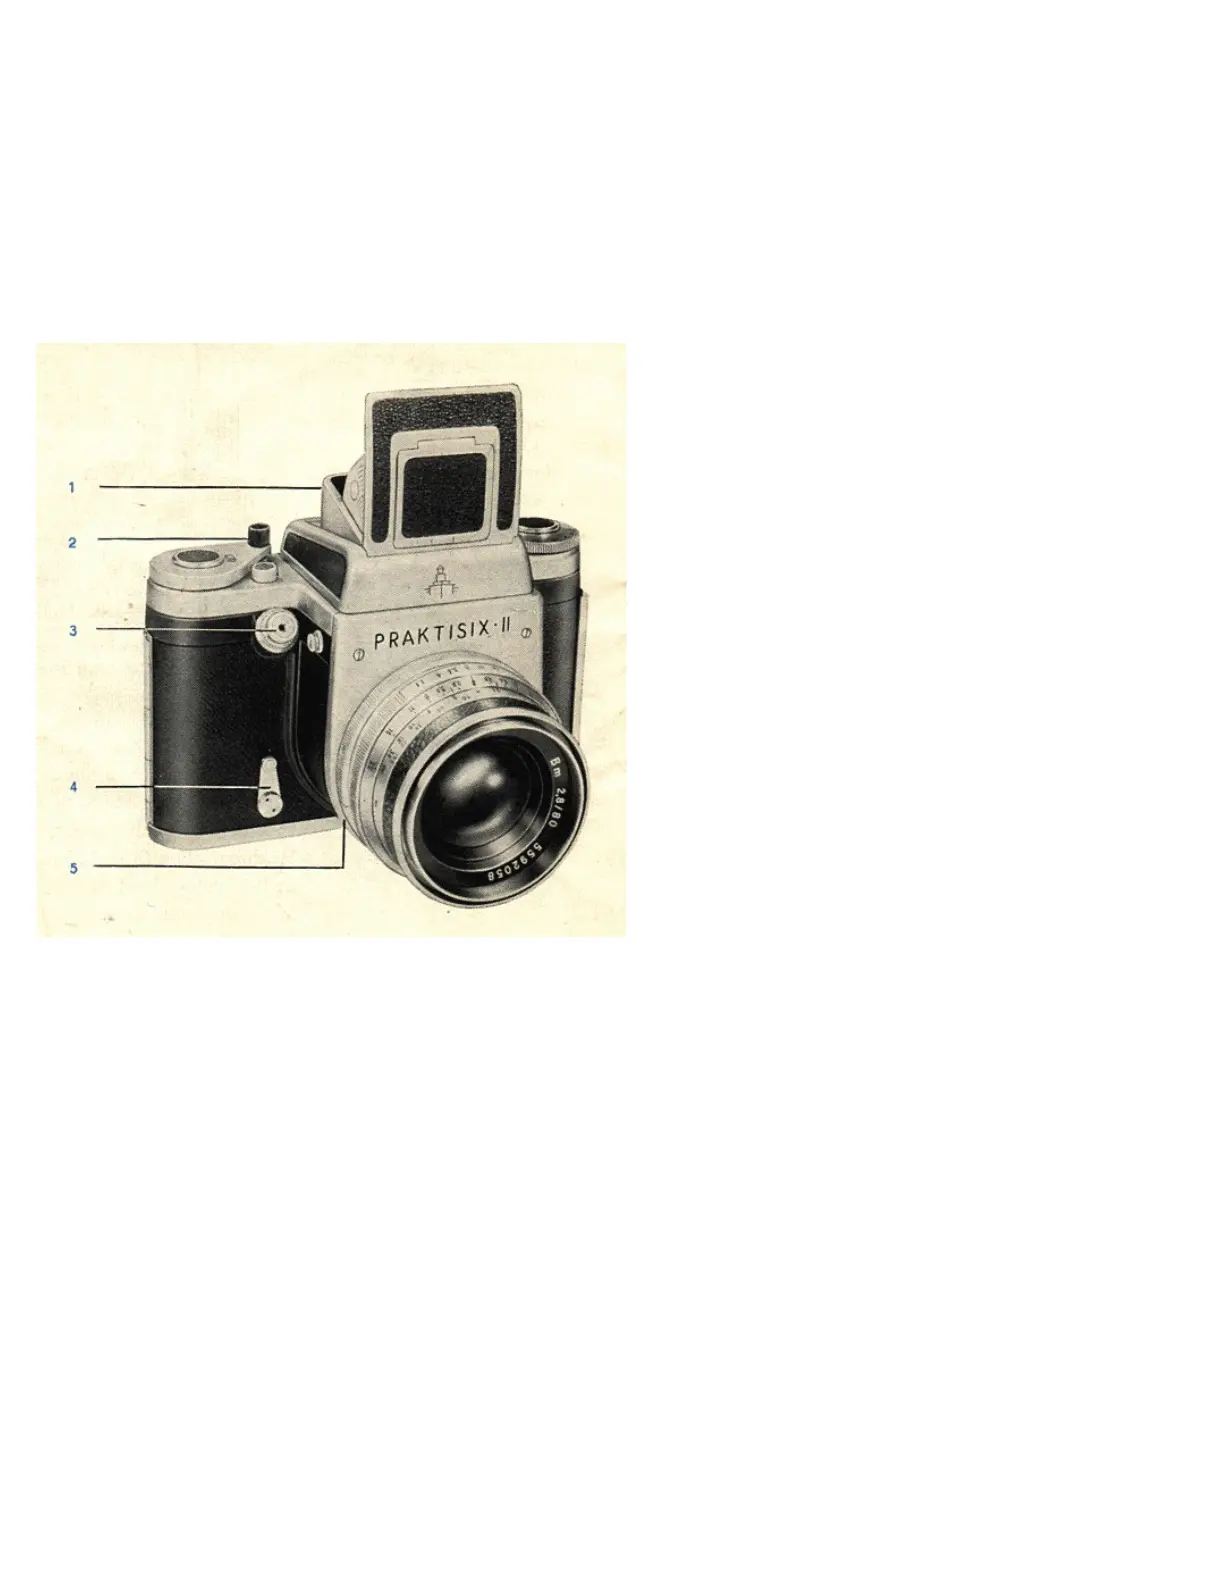
Important parts of the camera
1.finder hood
2.rapid wind lever
3.shutter release with cable release connection
4.lever for setting delayed action mechanism
5.flash socket
Product specificaties
| Merk: | Pentacon |
| Categorie: | Niet gecategoriseerd |
| Model: | Praktisix II |
Heb je hulp nodig?
Als je hulp nodig hebt met Pentacon Praktisix II stel dan hieronder een vraag en andere gebruikers zullen je antwoorden
Handleiding Niet gecategoriseerd Pentacon

7 Juli 2023
6 Juli 2023
5 Juli 2023
3 Juli 2023
3 Juli 2023
2 Juli 2023
2 Juli 2023
1 Juli 2023
30 Juni 2023
27 Juni 2023
Handleiding Niet gecategoriseerd
Nieuwste handleidingen voor Niet gecategoriseerd
28 Juli 2026
28 Juli 2026
28 Juli 2026
28 Juli 2026
28 Juli 2026
28 Juli 2026
28 Juli 2026
28 Juli 2026
28 Juli 2026
28 Juli 2026