Packard Bell Viseo Handleiding
Packard Bell LCD monitor Viseo
Bekijk gratis de handleiding van Packard Bell Viseo (56 pagina’s), behorend tot de categorie LCD monitor. Deze gids werd als nuttig beoordeeld door 94 mensen en kreeg gemiddeld 4.3 sterren uit 3 reviews. Heb je een vraag over Packard Bell Viseo of wil je andere gebruikers van dit product iets vragen? Stel een vraag
Pagina 1/56
VISEO 160 W
-
1
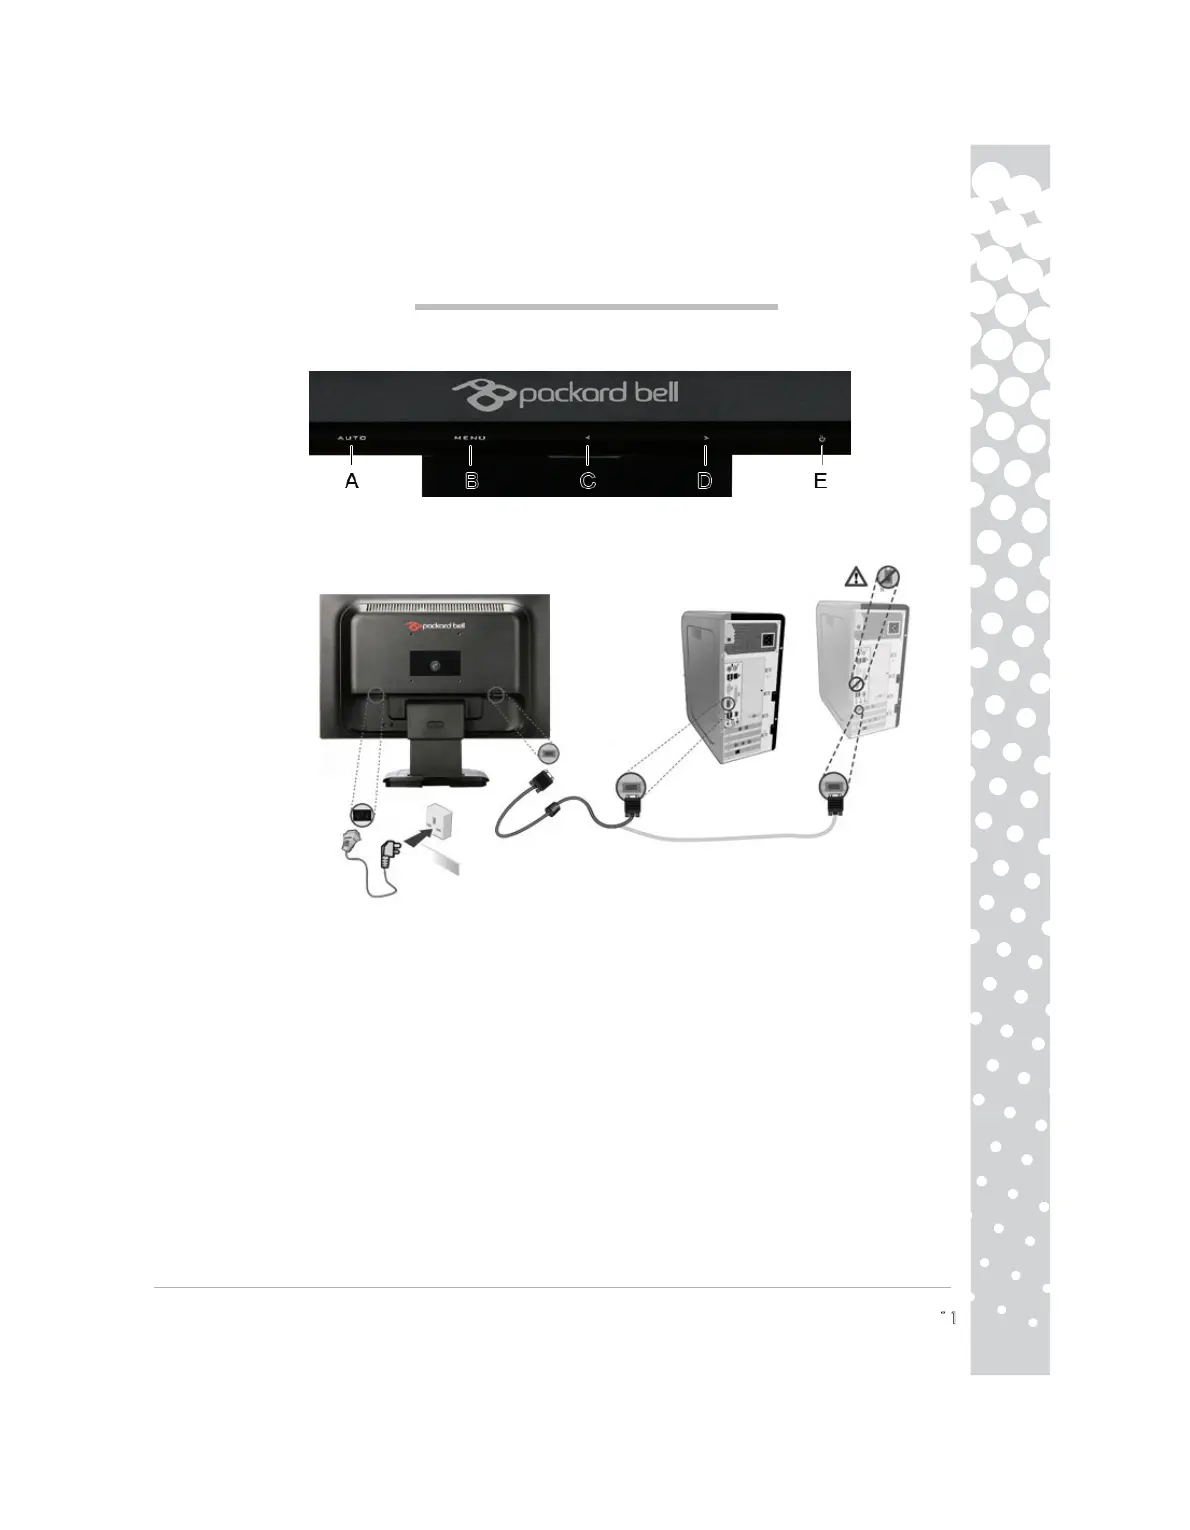
Items reproduced are for illustration purposes only. Pictures are not contractual. The characteristics of this product are subject to
change without notice.
Les éléments représentés ne sont fournis qu'à des fins d'illustration. Images non contractuelles.Les caractéristiques de ce produit sont
susceptibles de changer sans préavis.
Los elementos representados son meramente ilustrativo. Las imágenes pueden ser distintas. Las características de este producto están
sujetas a cambios sin previo aviso.
Gli articoli riprodotti sono solo a scopo illustrativo. Le immagini non costituiscono vincolo contrattuale. Le caratteristiche di questo
prodotto sono soggette a modifiche senza preavviso.
De getoonde items zijn alleen ter illustratie. Afbeeldingen kunnen afwijken van de werkelijkheid. De eigenschappen van dit product
kunnen zonder voorafgaande aankondiging worden gewijzigd.
Viseo 160 W
Product specificaties
| Merk: | Packard Bell |
| Categorie: | LCD monitor |
| Model: | Viseo |
Heb je hulp nodig?
Als je hulp nodig hebt met Packard Bell Viseo stel dan hieronder een vraag en andere gebruikers zullen je antwoorden
Handleiding LCD monitor Packard Bell

20 December 2023
14 November 2022
15 November 2022
14 November 2022
14 November 2022
14 November 2022
14 November 2022
14 November 2022
15 November 2022
Handleiding LCD monitor
Nieuwste handleidingen voor LCD monitor
31 Januari 2024
31 Januari 2024
31 Augustus 2023
31 Augustus 2023
24 Januari 2023
3 Juni 2023
24 Januari 2023
24 Januari 2023
23 December 2022
3 Juni 2023