PAC GM1A-RT Handleiding
PAC Niet gecategoriseerd GM1A-RT
Bekijk gratis de handleiding van PAC GM1A-RT (5 pagina’s), behorend tot de categorie Niet gecategoriseerd. Deze gids werd als nuttig beoordeeld door 10 mensen en kreeg gemiddeld 4.3 sterren uit 5 reviews. Heb je een vraag over PAC GM1A-RT of wil je andere gebruikers van dit product iets vragen? Stel een vraag
Pagina 1/5
GM1A-RT
Radio Replacement Interface with
Telematics Retention
for select General Motors Vehicles
with Class II Data-Bus
© 2018 AAMP Global. All rights reserved. PAC is a Power Brand of AAMP Global.
PAC-audio.com
C
Rev: V6
Date: 018927
Page 1
Important Notes
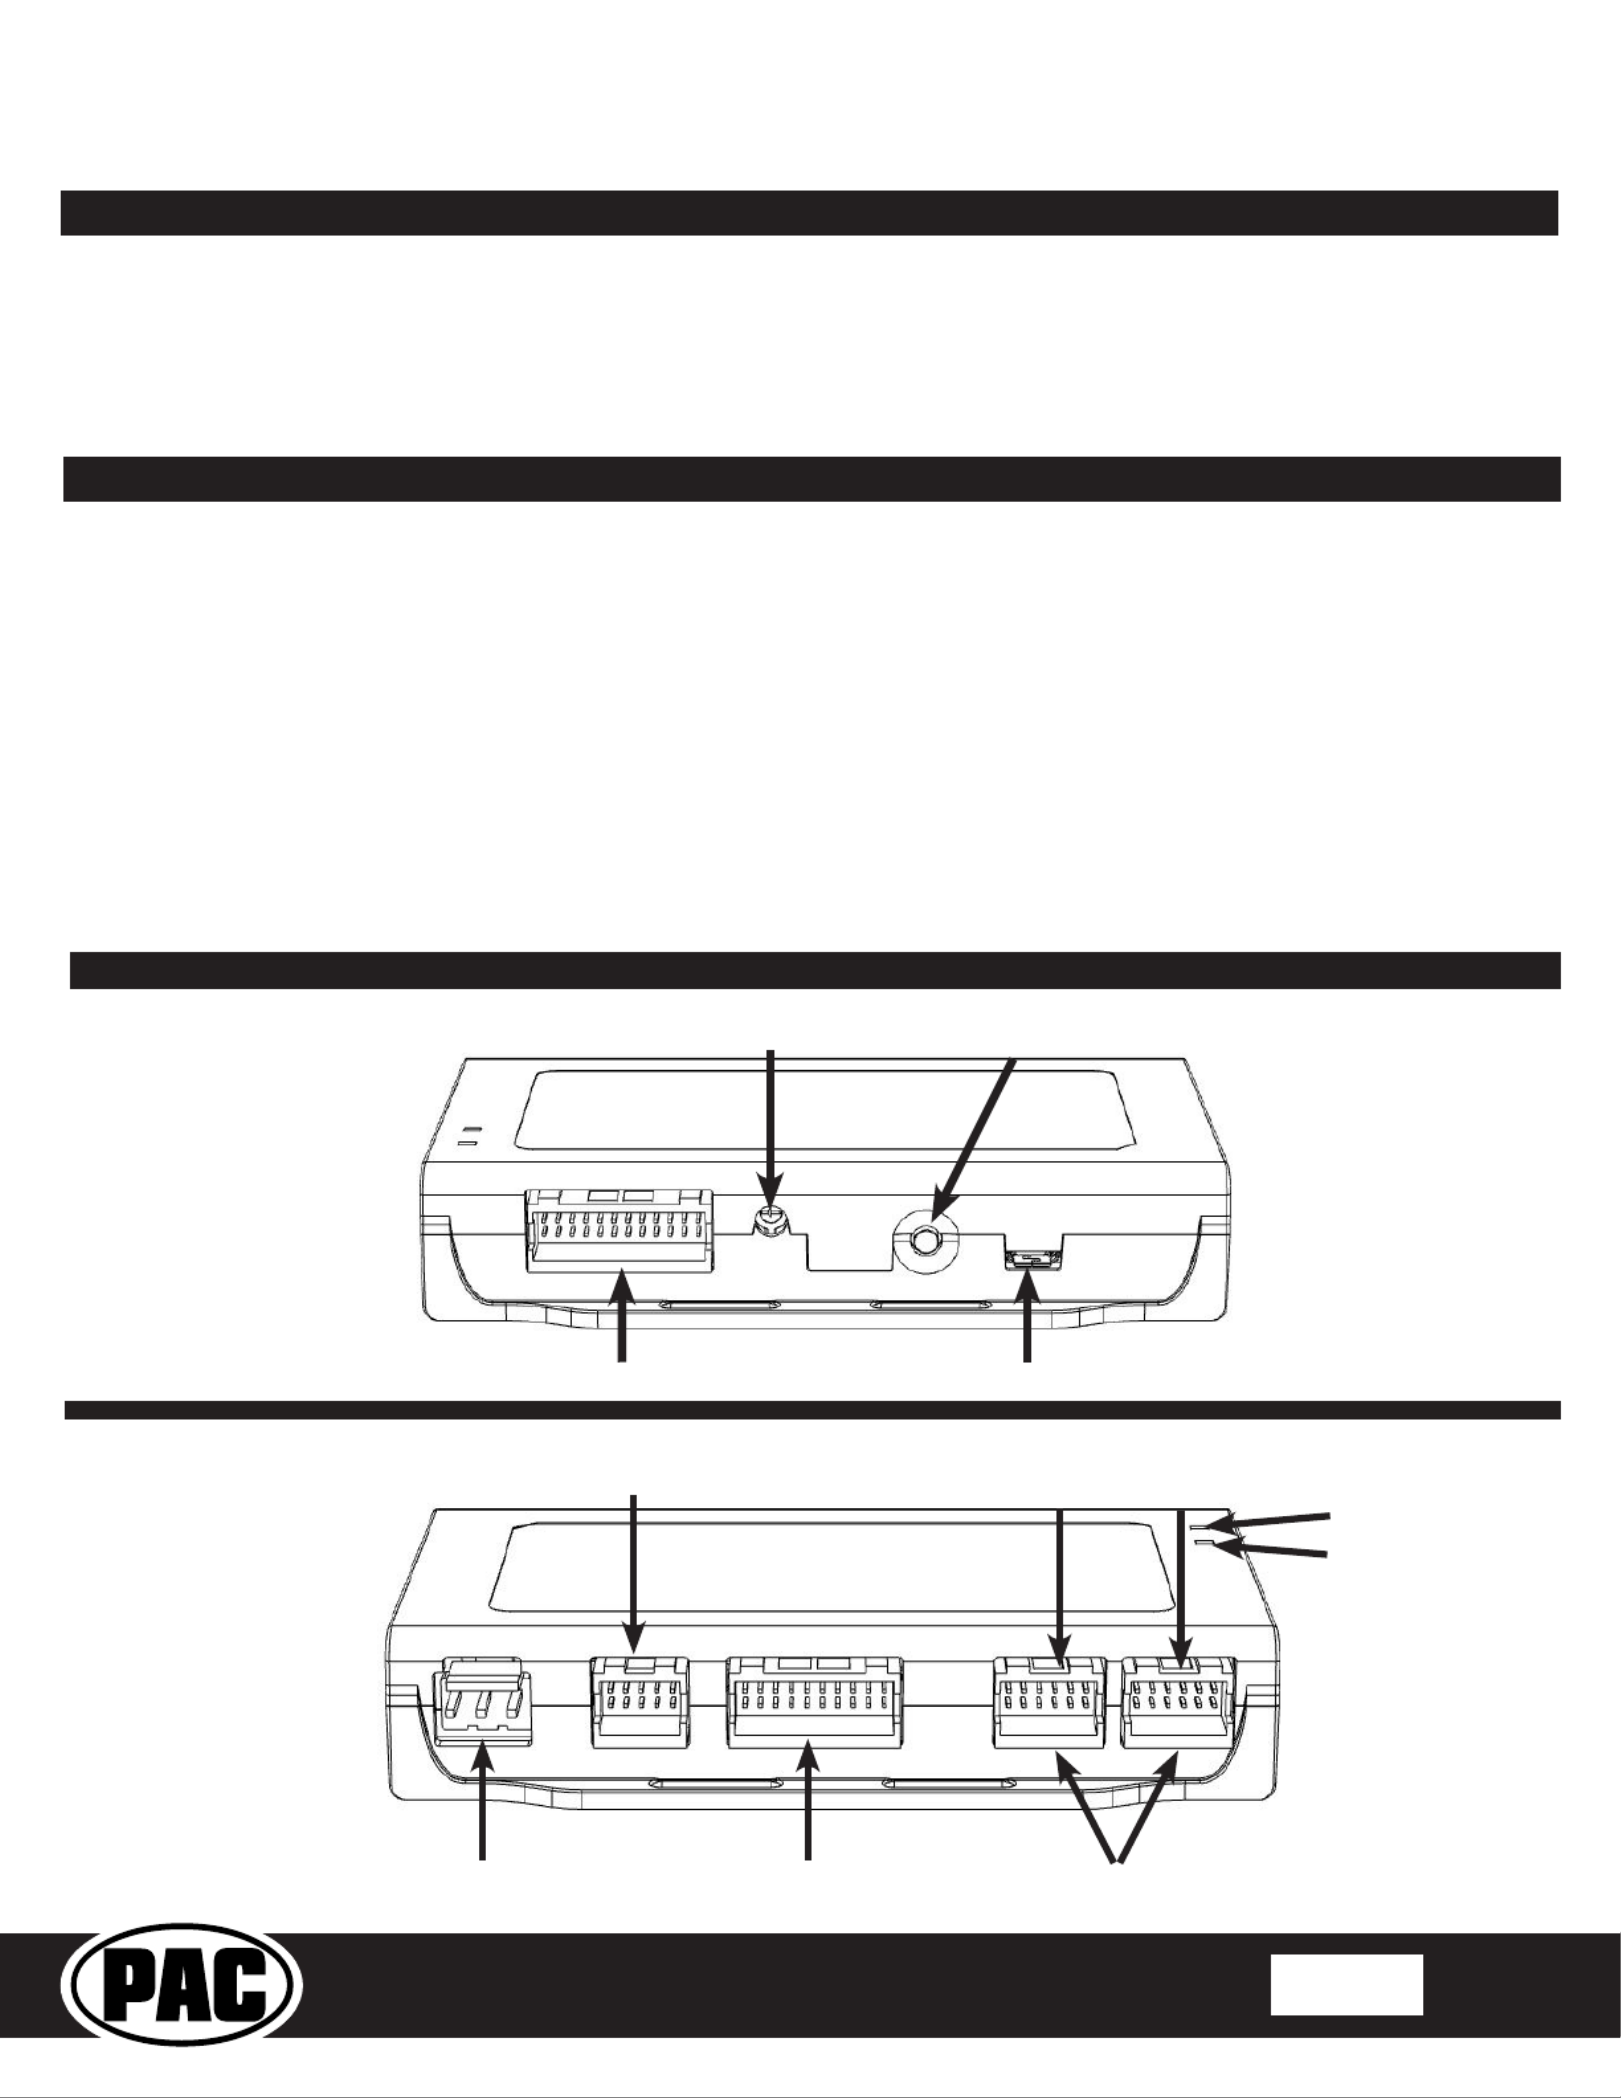
Module Layout
Programming Button
USB PortInterface Connector 4
Adjustment Dial
Interface Connector 1
Expansion Port
Interface Connector 2
The GM1A-RT interface allows the replacement of a factory radio in select General Motors vehicles with the Class II Data-Bus.
Using this interface will retain factory features such asOnStar, warning chimes and the factory Bose amplierwhen the original
radio is removed. The GM1A-RT provides data bus driven outputs such as retained accessory power (RAP), vehicle speed signal
(VSS), illumination, reverse trigger and parking brake. The GM1A-RT also provides an SWI Direct output for adding an optional
PAC Steering Wheel Control (SWC) retention interface (SWI-RC or SWI-CP2). Rear Seat Controls (RSC) if equipped will also
be retained with the SWI interface. You can also add multiple camera inputs to your aftermarket radio with Data-Bus controlled
automatic activation (front camera only) by connecting a VS41 into the expansion port on the GM1A-RT.
Introduction and Features
1.The included chime speaker should be used when: The vehicle has a standard Bose system (UQ7), the vehicle does not have
a factory amplier at all, or if you are connecting an aftermarket amplier to the cabin speakers.
2.The Programming Button and Adjustment Dial on the side of the interface have multiple functions. Please see Page 3 for
more details.
3.Compatible in both Premium Bose (Y91 / UQA) and Standard Bose systems.
4. Real time speaker fading on Premium factory amplied systems (UQA / Y91) is only supported with the “amplied output”
connection of the GM1A-RT.
5.When using real time speaker fading (Premium Bose only), if the fader setting is biased more to the front or rear, as the radio
turns on the sound may begin at the default setting and then quickly transition to your custom setting.
6. Aftermarket radio features such as High Pass Filters (crossovers), DSP or “Network Mode” will interfere with proper fader
function (Premium Bose Only). In order for the GM1A-RT’s fader function to work, the audio from the aftermarket radio’s
output must match so it can compare the front and rear audio levels and determine the proper fader setting for the factory
amplier.
7.When used in conjunction with the add on camera controller (VS41) the GM1A-RT will only provide Data-Bus controlled
automatic activation for the front camera. Please refer to the vehicle specic VS41 instructions for more detail.
Interface Connector 3
Non-Amplied
Audio Output
LED 1
LED 2
Amplied
Audio Output
Product specificaties
| Merk: | PAC |
| Categorie: | Niet gecategoriseerd |
| Model: | GM1A-RT |
Heb je hulp nodig?
Als je hulp nodig hebt met PAC GM1A-RT stel dan hieronder een vraag en andere gebruikers zullen je antwoorden
Handleiding Niet gecategoriseerd PAC

5 Mei 2026
4 Mei 2026
2 Mei 2025
10 Maart 2025
10 Maart 2025
19 Februari 2025
19 Februari 2025
19 Februari 2025
19 Februari 2025
19 Februari 2025
Handleiding Niet gecategoriseerd
Nieuwste handleidingen voor Niet gecategoriseerd
30 Mei 2026
30 Mei 2026
30 Mei 2026
30 Mei 2026
30 Mei 2026
29 Mei 2026
29 Mei 2026
29 Mei 2026
29 Mei 2026
29 Mei 2026