NightStick XPP-5453G Handleiding
NightStick Zaklamp XPP-5453G
Bekijk gratis de handleiding van NightStick XPP-5453G (3 pagina’s), behorend tot de categorie Zaklamp. Deze gids werd als nuttig beoordeeld door 72 mensen en kreeg gemiddeld 4.6 sterren uit 2 reviews. Heb je een vraag over NightStick XPP-5453G of wil je andere gebruikers van dit product iets vragen? Stel een vraag
Pagina 1/3
Bayco Products, Inc. • 640 South Sanden Blvd. • Wylie, TX 75098 • 1-800-233-2155 • 1-469-326-9400 • www.nightstick.com
3M, Dual-Lock are trademarks of 3M Coompany. INS-XPP-5453G-DL-21
08-06-2021
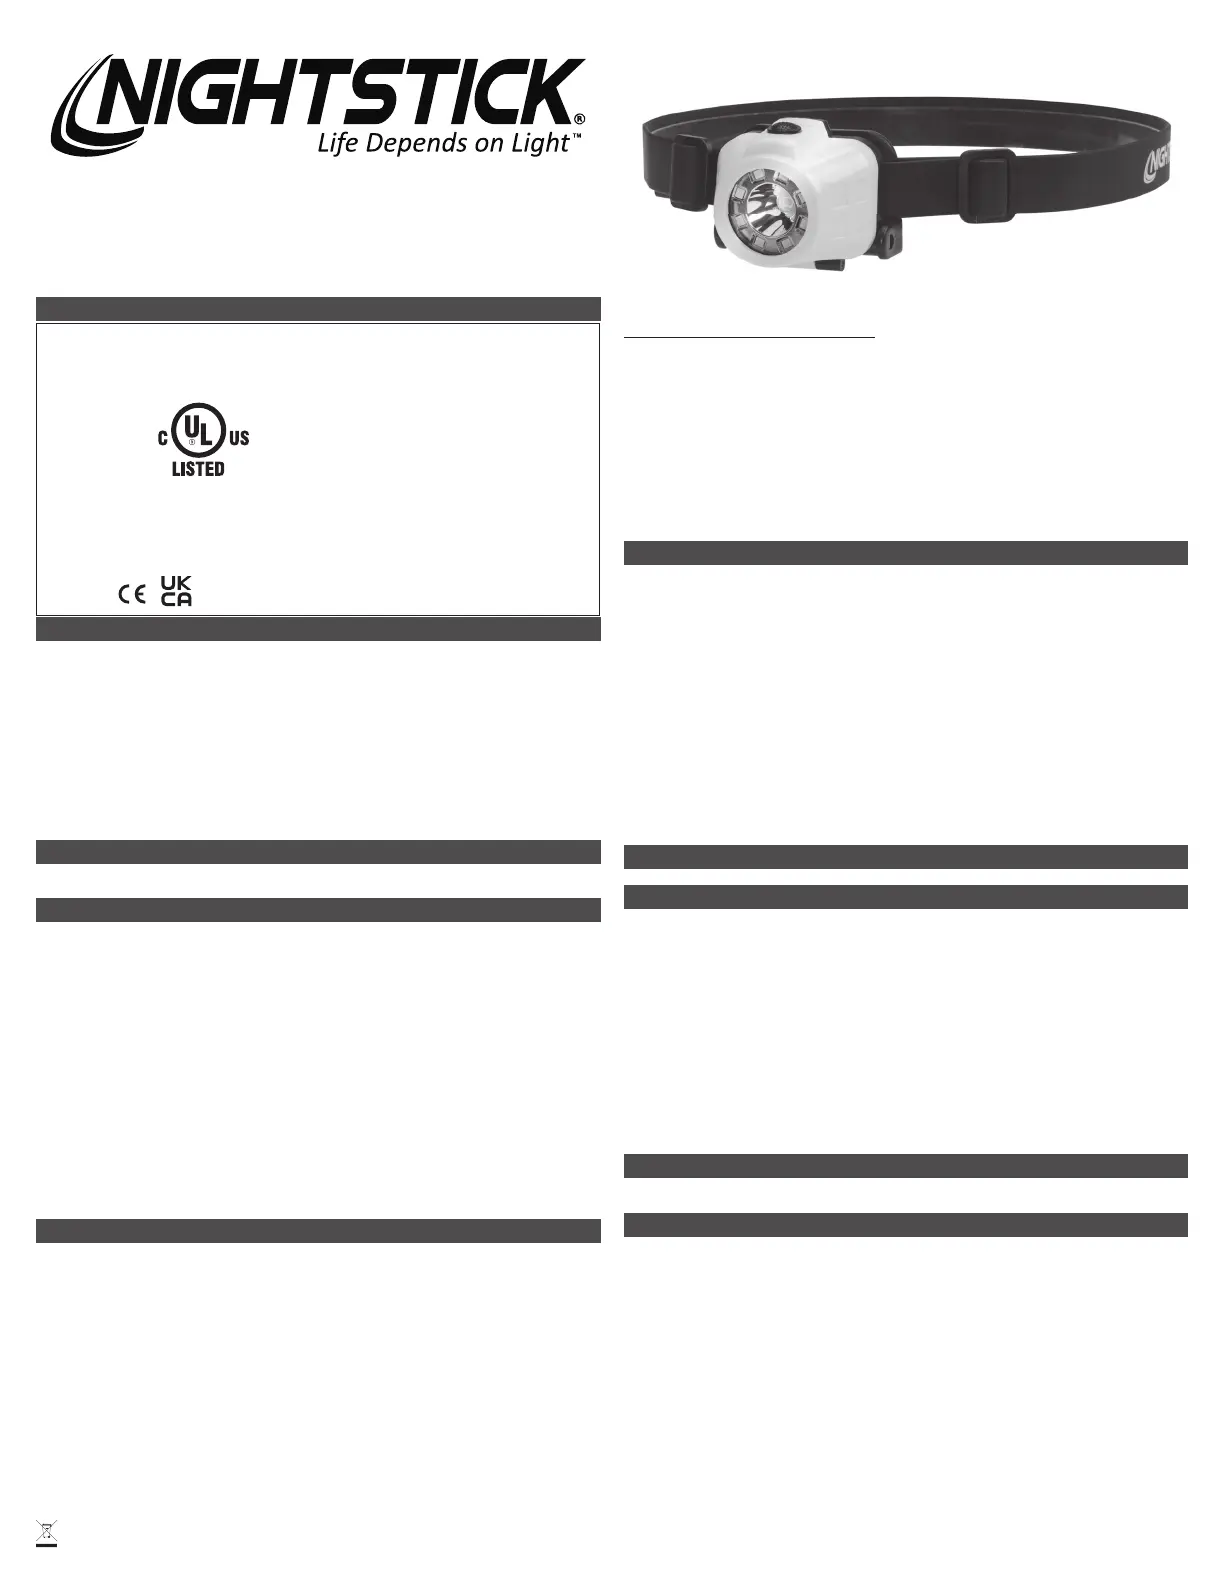
Instruction Manual
XPP-5453G
THE XPP-5453G IS APPROVED FOR USE
CLASS I DIV 1 GRPS A-D T3C
CLASS II & III GRPS E-G T160ºC
CLASS I ZONE 0 GRP IIC T3
ZONE 20 GRP IIIC T200ºC
-20ºC ≤ Tamb ≤ +40ºC
1.5V/Cell AAA Alkaline
ID 4003544
INTRINSICALLY SAFE
SECURITE INTRINSEQUE
Bayco Products, Inc. XPP-5453G
Wylie, TX 75098
640 S. Sanden Blvd.
E 467756
WARNINGS - INTRINSICALLY SAFE
yWarning: Use only the approved non-rechargeable batteries listed below.
yWarning: Do NOT attempt to use rechargeable AAA batteries with this light.
yWarning: To prevent ignition of a hazardous atmosphere, do not open the battery compartment
in the hazardous environment. This task must ONLY be performed in an area known to be non-
hazardous.
yWarning: When exchanging batteries, use only ENERGIZER E92 or EN92 BATTERIES.
yWarning: To prevent ignition of a hazardous atmosphere, the AAA batteries must only be
exchanged in an area known to be non-hazardous.
yWarning: To reduce the risk of explosion, do not mix new non-rechargeable batteries with used
non-rechargeable batteries, or mix non-rechargeable batteries from different manufacturers.
yWarning: Substitution of components may impair intrinsic safety.
SPECIAL INSTRUCTIONS FOR INTRINSIC SAFETY
For personal safety, always con rm the rating of any known hazardous or potentially hazardous
location where the light is to be used.
BATTERY INSTALLATION
WARNING: In order to maintain the XPP-5453G’s Intrinsically Safe rating, the only AAA
batteries certi ed for use with this light are the ENERGIZER E92 or EN92 BATTERIES.
yDo not attempt to use any other brand or model of AAA batteries with this light.
yDo not attempt to use any type of rechargeable AAA batteries with this light.
Warning: To prevent ignition of a hazardous atmosphere, do not open the battery
compartment door in the hazardo us environment. This task must ONLY be done in an area
known to be non-hazardous.
yLoosen the locking screw located on the back of the battery compartment door. NOTE: Do NOT
attempt to completely remove the locking screw. Doing so is not necessary and may damage
the threads. The screw simply needs to be loosened enough to allow the battery compartment
door to open.
yUsing 3 – AAA ENERGIZER E92 or EN92 BATTERIES (make sure that all 3 batteries are of the
same model), install the batteries in the back of the light paying close attention to the markings
inside the battery compartment for proper battery terminal polarity alignment.
yClose the battery compartment door.
yTighten locking screw. CAUTION: Do NOT over-tighten. Doing so may damage the threads and
impact the light’s Intrinsic Safety.
OPERATION
LIGHTING MODES
ySPOTLIGHT: Press switch one time to turn on the spotlight.
yFLOODLIGHT: Press the switch two times to turn on the oodlight.
yDUAL-LIGHT: Press the switch three times to turn on both the spotlight and the oodlight at the
same time for Dual-Light mode.
yOFF: Press the switch a fourth time to turn off.
TILT ADJUSTMENT FEATURE:
Adjust the tilt angle of the light to illuminate the desired area.
HEADBANDS AND HELMET MOUNT
yUse the elastic non-slip headband for wearing directly on your head or on a soft hat such as
a ball cap.
yUse the heavy-duty rubber headband on any hardhat.
ZERO BAND MOUNTING INSTRUCTIONS
Use the 3M™ Dual-Lock™ Reclosable Fastener (included) to mount the light onto a hardhat
or helmet. Adhere one side to the backplate on the light and the other side onto a clean, smooth
surface on the front of the helmet.
yRemove headband
yEnsure mounting surface is clean and oil-free (use alcohol wipe if needed)
yPrior to installing, determine mounting location that allows headlamp to fully tilt without
interfering with helmet brim.
yRemove adhesive backing from each side of the fastener and adhere to the helmet and the
back of the bracket.
yFirmly press light into place on the helmet.
yNote: adhesive reaches peak strength in 24 hours.
WARRANTY
LIMITED LIFETIME WARRANTY
Bayco Products, Inc. warrants this product to be free from defects in workmanship and materials
for the original purchaser’s lifetime. The Limited Lifetime Warranty includes the LEDs, housing
and lenses. Rechargeable batteries, chargers, switches, electronics and included accessories are
warranted for a period of two years with proof of purchase. Normal wear and failures which are
caused by accidents, misuse, abuse, faulty installation and lightning damage are excluded.
We will repair or replace this product should we determine it to be defective. This is the only warranty,
expressed or implied, including any warranty of merchantability or tness for a particular purpose.
For a complete copy of the warranty, go to www. baycoproducts.com/bayco-product-support/
warranties. Retain your receipt for proof of purchase.
Mode d’emploi
XPP-5453G
LA LAMPE FRONTALE XPP-5453G A ÉTÉ APPROUVÉE POUR UTILISATION
AVERTISSEMENTS : SÉCURITÉ INTRINSÈQUE
yAvertissement : Utiliser seulement les piles non rechargeables approuvées et énumérées ci-
dessous.
yAvertissement : NE PAS essayer d’utiliser des piles rechargeables AAA avec cette lampe de poche.
yAvertissement : Pour éviter l’in ammation d’atmosphère dangereuse, ne pas ouvrir le
compartiment de pile dans un endroit dangereux. Cette tâche doit être effectuée UNIQUEMENT
dans une zone non dangereuse.
yAvertissement : Lorsque vous remplacer les piles, utiliser uniquement les PILES ENERGIZER
E92 ou EN92
yAvertissement : Pour éviter l’in ammation d’atmosphère dangereuse, les piles AAA doivent être
remplacées dans une zone non dangereuse.
yAvertissement : Pour réduire les risques d’explosion, ne pas mélanger les piles neuves
non rechargeables avec des piles non rechargeables utilisées, ou mélanger les piles non
rechargeables de différents fabricants.
yAvertissement : la substitution de composants peut compromettre la sécurité intrinsèque.
DIRECTIVES PARTICULIÈRES POUR UNE SÉCURITÉ INTRINSÈQUE
Pour votre propre sécurité, toujours con rmer la charge d’une zone dangereuse ou
potentiellement dangereuse quand la lampe de poche est utilisée.
INSTALLATION DES PILES
AVERTISSEMENT : A n de maintenir le bon fonctionnement de votre lampe frontale XPP-
5453G à sécurité intrinsèque, les seules piles AAA certi ées pour l’utilisation de cette lampe
sont les piles ENERGIZER E92 or EN92.
yNE PAS utiliser d’autres marques ou modèles de piles AAA avec cette lampe.
yNE PAS utiliser n’importe quel type de piles rechargeable AAA avec cette lampe.
Avertissement : Pour éviter l’in ammation d’atmosphère dangereuse, ne pas ouvrir le
compartiment de pile dans un endroit dangereux. Cette tâche doit être effectuée UNIQUEMENT
dans une zone non dangereuse.
yDesserrer la vis de verrouillage située à l’arrière de la porte du compartiment de pile. À NOTER :
NE PAS enlever complètement la vis de verrouillage. Cette opération n’est pas nécessaire et
risquerait d’endommager les lets de la vis. La vis doit être simplement desserrée pour permettre
à la porte du compartiment de pile de s’ouvrir.
yEn utilisant 3 piles – AAA ENERGIZER E92 ou EN92, installer les piles dans la lampe en
portant une attention particulière à la polarité sur le compartiment de pile a n de respecter
l’alignement des bornes de polarité des piles.
Product specificaties
| Merk: | NightStick |
| Categorie: | Zaklamp |
| Model: | XPP-5453G |
Heb je hulp nodig?
Als je hulp nodig hebt met NightStick XPP-5453G stel dan hieronder een vraag en andere gebruikers zullen je antwoorden
Handleiding Zaklamp NightStick

21 Maart 2026
6 Januari 2026
5 Januari 2026
21 December 2025
20 December 2025
19 December 2025
19 December 2025
18 December 2025
18 December 2025
18 December 2025
Handleiding Zaklamp
Nieuwste handleidingen voor Zaklamp
8 Maart 2026
8 Maart 2026
8 Maart 2026
6 Maart 2026
6 Maart 2026
3 Maart 2026
2 Maart 2026
1 Maart 2026
25 Februari 2026
25 Februari 2026