Moultrie C-80 Handleiding
Moultrie
Fotocamera
C-80
Bekijk gratis de handleiding van Moultrie C-80 (8 pagina’s), behorend tot de categorie Fotocamera. Deze gids werd als nuttig beoordeeld door 8 mensen en kreeg gemiddeld 4.5 sterren uit 4.5 reviews. Heb je een vraag over Moultrie C-80 of wil je andere gebruikers van dit product iets vragen? Stel een vraag
Pagina 1/8

Important Battery lnformation
- Only use Alkaline or Lithium batteries. We recommend the use of Duracell or Energizer batteries.
- Do not mix old and new batteries. Always replace ALL the batteries at the same time.
- When the camera is not in use, please remove the batteries.
Moultrie Limited Warranty
This product has been thoroughly tested and inspected before shipment. It is guaranteed from
defects in material and workmanship from the date of purchase for 1 year. Under this limited
guarantee we agree to replace or repair free of charge any part or parts which have been found to
be defective in original material or workmanship. Should you require in-warranty service, call our
Customer Service Department. If your problem cannot be addressed over the telephone, we may
need you to send us your defective product plus proof of purchase.
CAMERA OVERVIEW
I
Page 1
C-80 Digital Game Camera
FCC Statements
Moultrie Products, LLC
MCG-12593
Note: Changes and modifications not expressly approved by the party responsible could void the user’s authority to operate this device.
This device complies with Part 15 of the FCC Rules. Operation is subject to the following two conditions: (1) This device may not cause harmful
interference, and (2) this device must accept any interference received, including interference that may cause undesired operation.
NOTE: THE MANUFACTURER IS NOT RESPONSIBLE FOR ANY RADIO OR TV INTERFERENCE CAUSED BY UNAUTHORIZED MODIFICATIONS TO THIS
EQUIPMENT. SUCH MODIFICATIONS COULD VOID THE USER’S AUTHORITY TO OPERATE THE EQUIPMENT.
NOTE: This device complies with the limits for a Class B digital device, pursuant to Part 15 of the FCC Rules. These limits are designed to provide
reasonable
protection against harmful interference in a residential installation. This device generates,
uses, and can radiate radio frequency energy
and, if not installed
and used in accordance with the instructions, may cause harmful interference to radio communications. However, there is no
guarantee that interference
will not occur in a particular installation. If this device does cause harmful interference to radio or television reception,
which can be determined by turning the equipment o and on, the user is encouraged to try to correct the interference by one or more of the
following measures:
- Reorient or relocate the receiving antenna.
- lncrease the separation between the equipment and receiver.
- Connect the equipment into an outlet on a circuit dierent from that to which the receiver is connected.
- Consult the dealer or an experienced radio/TV technician for help.
Our Service Department will gladly answer any questions you
have. Call 800-653-3334, Monday - Friday, 8:00 AM to 5:00 PM CST.
www.moultriefeeders.com
12262012 / MCG-12593
Instructions for C-80
Digital Game Camera
THANK YOU for your purchase of the C-80 Digital Game Camera. Please read this booklet
before using the unit. If you should have any questions about this product or any other
Moultrie product, please contact us using the information on the back of this booklet.
Please register your camera at to activate your www.moultriefeeders.com/warranty
1-year warranty.
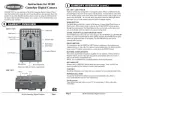
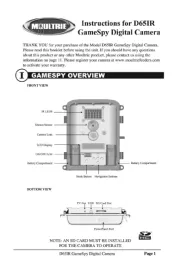
FRONT VIEW
BOTTOM VIEW
Status Indicator
Light Sensor
LCD Display
LED Flash
IRAIM / OFF / ON
OK/Select Button
Menu Button
Navigation Buttons
External Power Port
Push Button Release for battery compartment
USB Port
SD Card Slot
Camera Lens
Motion Sensor

Using a Tree Mount
The camera can also be mounted directly to a
tree using a mounting bracket that attaches
directly to a tree or pole. Strap the tree mount
to the tree and secure, then attach the camera
to the tree mount using the tree mount socket
located on the back of the camera.
Using the Moultrie Camera Power Panel
Place near the tree where the camera is mounted.
Place for best exposure to sun. To attach to a
tripod secure the power panel to the tripod
angled upward for best exposure. Plug the power
panel to the Power Panel Plug. This will extend the
life of your camera in the field.
Note: Leave internal batteries in the camera
during use. The Camera Power Panel needs
4 hours of sunlight to fully power the camera.
Using the Moultrie Battery Box
Extend the eld life of your Moultrie camera with a
long-lasting, rechargeable external power source.
Place near the tree where the camera is mounted.
Plug the Battery Box to the Power Panel Plug.
This will extend the life of your camera in the field.
MOULTRIE ACCESSORIES
X
Page 2
C-80 Digital Game Camera
Page 15
C-80 Digital Game Camera
IRAIM / OFF / ON
IR Aim - When IR Aim is ON and the PIR sensor detects motion, the red LED on the front of the camera
will come on for 2 seconds and then shut o.
MENU BUTTON
The Menu Button selects Camera Setup or Main Screen. When camera mode is selected, the LEFT and
RIGHT buttons navigate through the menu options. The Menu Button is also used to wake-up the
camera and turn on the display when the camera is in power saving (or sleep) mode.
OK, UP/DOWN and LEFT/RIGHT BUTTONS
The OK button selects the item to be changed. The UP/DOWN and LEFT/RIGHT buttons are used to
step through the menu options. Pressing the OK button again, selects the option indicated on the
display. The OK button is also used to manually take a picture.
BATTERY COMPARTMENT
The camera is powered by eight (8) AA alkaline or lithium batteries. Push the battery compartment
release button to eject the battery tray. Install batteries as indicated on the engravings on the battery
tray, taking care to note the correct polarity.
NOTE: It is recommended to use lithium batteries for best performance. (Do not mix battery types)
See Important Battery Information section on the back page of this manual.
SD CARD SLOT
Accepts up to a 32GB SD Card for photo and video storage.
NOTE: An SD Card must be installed for the camera to operate (sold separately).
USB PORT
Download still pictures and video onto your computer by connecting a USB cable (sold separately)
to the USB port.
EXTERNAL POWER PORT
Accepts the Moultrie PowerPanel or Moultrie Battery Box accessories (sold separately) only.
Refer to www.moultriefeeders.com for more information.
NOTE: The use of any other power source will void your warranty and possibly harm your camera.
CAMERA OVERVIEW (cont.)
I

To turn photo sequences into Time Lapse Video
Reasons you may want to create a video with your images:
• Makes it easier to e-mail your image sequences.
• Allows you to select the range of images you want included, to eliminate uninteresting images.
• Allows you to store the images as a video rather than a large number of images.
1. Download time lapse images to Time Lapse Software.
(see section on downloading images).
2. Click on File. You will see the screen image to the right.
3. Choose a starting image (frame) and an ending
image (frame). Note: The frame limit is 300.
4. Choose the frame rate. Options include 1, 5, 10, 20,
and 30 frames per second (fps).
Note: The frame rate says how many images of a video are displayed every second a video is
played. The higher frame rate a video has the smoother movement appears in the video. However,
a higher frame rate video will create a larger le and will require more memory.
5. Choose the video resolution:
The higher the resolution, the sharper the image. However, higher resolutions createNote:
a larger file and will require more memory. VGA (640x480) / 720p / 1080p
6. Choose frame filter: None, Low, Medium, or High.
7. Click on Save the Video As. Name the video and choose the location file folder you wish
to save it in.
8. Click Start Video Export. The program will start to convert the images to video based on the
settings chosen above. The green bars will advance until the conversion is complete.
Click on Cancel to abort the transfer. Note:
To View Time Lapse Video
1. Find the video in the folder
you saved it into.
2. Click on the video.
3. The video will be open up
automatically in QuickTime
player. To install a free version
of QuickTime, follow the on screen
instructions at www.apple.com/quicktime/download.
4. Press play to view your time lapse video.
Use the steps below as a guide to quickly set up your camera so it will function using the factory
default settings.
STEP 1
Open camera cover. Press the battery chamber release button. Install 8 AA batteries.
Recommended for use: Duracell® or Energizer® lithium batteries.
STEP 2
Insert SD Memory Card until you hear an audible click. Camera will not operate without SD Card.
Slide the power switch to ON. Press the Menu button to switch the camera to Setup and set the
time and date.
STEP 3
Mount camera in desired location using a mounting
strap. NOTE: Camera must be attached to a stable
object for motion detection to function properly.
STEP 5
Slide the power switch to ON. Close cover. The
camera will operate using Default settings.
You may also customize the settings if required.
Eyelet
Mounting
Strap
QUICK START INSTRUCTIONS
II
DEFAULT SETTINGS
III
VIEWING TIME LAPSE (cont.)
IX
Page 3
C-80 Digital Game Camera
Page 14
Time Lapse Software
General Motion Detect Time Lapse
DATE/TIME: EVENT DELAY: INTERVAL: 01/01/99 12:00am 10 SECONDS 10 SECONDS
ERASE IMAGES: NO PHOTO OR VIDEO: PHOTO MULTI PROGRAM: 2 PROGRAM
CAPTURE MODE: PHOTO QUALITY: PROGRAM 1 WAKE UP:MOTION DETECT HIGH (4 MP) 6 AM
IR FLASH: MULTI-SHOTS: PROGRAM 1 SLEEP:AUTO OFF 9 AM
GEOTAGGING: MOTION FREEZE: PROGRAM 2 WAKE UP:OFF ON 4 PM
CAMERA NAME: MOULTRIECAM 10 SECONDS 7 PMVIDEO LENGTH: PROGRAM 2 SLEEP:
TEMPERATURE: FAHRENHEIT PHOTO QUALITY: HIGH (4 MP)
STEP 4
Switch camera to IR Aim. Aim camera using motion
detection to determine target area. Walk in front of the
camera at the desired distance and the camera LED will
ash showing the covered area. Switch camera to .ON
Product specificaties
| Merk: | Moultrie |
| Categorie: | Fotocamera |
| Model: | C-80 |
Heb je hulp nodig?
Als je hulp nodig hebt met Moultrie C-80 stel dan hieronder een vraag en andere gebruikers zullen je antwoorden
Handleiding Fotocamera Moultrie
5 Augustus 2025
5 Augustus 2025
5 Augustus 2025
5 Augustus 2025
4 Augustus 2025

4 Augustus 2025

4 Augustus 2025
4 Augustus 2025
4 Augustus 2025
4 Augustus 2025
Handleiding Fotocamera
- Leitz Focomat IIc
- Hanwha
- Eufy
- Levenhuk
- Zenit
- Velleman
- JVC
- TP Link
- HP
- Berger & Schröter
- ClearOne
- Kyocera Yashica
- AquaTech
- Nikon
- Azden
Nieuwste handleidingen voor Fotocamera

6 Augustus 2025

5 Augustus 2025
4 Augustus 2025
29 Juli 2025

29 Juli 2025
29 Juli 2025
28 Juli 2025
28 Juli 2025
15 Juli 2025
14 Juli 2025