Metra 99-7309 Handleiding
Bekijk gratis de handleiding van Metra 99-7309 (9 pagina’s), behorend tot de categorie Carkit. Deze gids werd als nuttig beoordeeld door 60 mensen en kreeg gemiddeld 4.3 sterren uit 30.5 reviews. Heb je een vraag over Metra 99-7309 of wil je andere gebruikers van dit product iets vragen? Stel een vraag
Pagina 1/9

METRA. THE WORLD’S BEST KITS.™
© COPYRIGHT 2004-2011 METRA ELECTRONICS CORPORATION
APPLICATIONS
1-800-221-0932 metraonline.com
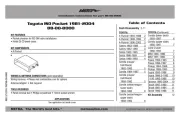
INSTALLATION INSTRUCTIONS FOR PART 99-7309
REV. 3/22/12
WIRING & ANTENNA CONNECTIONS (sold separately)
Wiring Harness:
• 70-7300 - Hyundai wiring harness for select 1992-up
• 70-7301 - Hyundai wiring harness for select 1999-up
• 70-2003 - GMC wiring harness for select 1998-up
Antenna Adapter:
• 40-GM10 (select vehicles)
• Panel removal tool • Phillips screwdriver
TOOLS REQUIRED
• A) Radio housing • B) Spacer 1L and 1R • C) Spacer 2L and 2R •D) Spacer 3L and 3R
• E) Spacer 4L and 4R • F) (4) #10 x 3/4” Phillips truss head screws
KIT FEATURES
KIT COMPONENTS
B CA
• DIN radio with pocket provision
• ISO mount radio with pocket provision
D
C
D

Table of Contents
Dash Disassembly
– ..................................................................................Hyundai Elantra (DDIN) 1996-2000 3
– ..........................................................................................Hyundai Santa Fe 2001-2006 4
– Hyundai Sonata (DDIN) 1995-1998 ..................................................................................5
– Hyundai Sonata 1999-2001 .............................................................................................6
– Hyundai Tiburon 1997-2002 ............................................................................................7
Kit Assembly
– .......................................................................................DIN radio with pocket provision 8
– .............................................................................ISO mount radio with pocket provision 8
K PNOWLEDGE IS OWER
Enhance your installation and fabrication skills by
enrolling in the most cognized and spected re re
mobile electronics school in our industry.
Log onto www.installerinstitute.com or call
800-354-6782 for mo information and take steps re
toward a better tomorrow.
Metra recommends MECP
certified technicians
99-7309
CAUTION: Metra recommends disconnecting the negative battery terminal before
beginning any installation. All accessories, switches, and especially air bag indicator
lights must be plugged in before reconnecting the battery or cycling the ignition.
Note: Refer to the instructions included with the aftermarket radio.

1. Pop out the dimmer switch panel and
remove (1) Phillips crew exposed.
Unsnap the gear shifter trim plate and
remove (1) Phillips screw exposed at
the base of the dash trim bezel.
Reach under the driver’s side dash,
locate the temperature control cable
and remove the cable from the white
plastic bracket.
Position the gear shifter in low, pull the
dash panel away and disconnect all
wiring harnesses.
Remove the trim bezel (the temperature
controllable will be attached).
Remove (4) Phillips screws securing the
factory head unit and disconnect the
wiring. (Figure A)
2. Attach spacer 1L and 2L to the left
mounting tabs of the radio housing and
spacer 1R and 2R to the right mounting
tabs of the radio housing as shown.
(Figure B)
Continue to kit assembly
Hyundai Elantra (DDIN) 1996-2000
Dash Disassembly 99-7309
(Figure A)
“1R”
“1L”
“2L”
“2R”
(Figure B)
Product specificaties
| Merk: | Metra |
| Categorie: | Carkit |
| Model: | 99-7309 |
Heb je hulp nodig?
Als je hulp nodig hebt met Metra 99-7309 stel dan hieronder een vraag en andere gebruikers zullen je antwoorden
Handleiding Carkit Metra
3 Juni 2025
3 Juni 2025
7 Mei 2025

3 April 2025

3 April 2025

3 April 2025

3 April 2025
31 Maart 2025

31 Maart 2025
31 Maart 2025
Handleiding Carkit
- Lenco
- Caliber
- Jensen
- Veho
- Clarion
- SiriusXM
- Nedis
- Blaupunkt
- B-Speech
- Belkin
- Gembird
- Parrot
- SuperTooth
- BlueAnt
- Renegade
Nieuwste handleidingen voor Carkit

4 Augustus 2025
5 Juli 2025

3 Juni 2025
2 Juni 2025
19 Mei 2025
27 April 2025

31 Maart 2025

11 Februari 2025

30 November 2024

17 November 2024