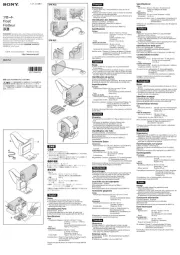
Melnor 93280 Handleiding
Melnor
Niet gecategoriseerd
93280
Bekijk gratis de handleiding van Melnor 93280 (2 pagina’s), behorend tot de categorie Niet gecategoriseerd. Deze gids werd als nuttig beoordeeld door 6 mensen en kreeg gemiddeld 4.4 sterren uit 3.5 reviews. Heb je een vraag over Melnor 93280 of wil je andere gebruikers van dit product iets vragen? Stel een vraag
Pagina 1/2

4
Schedule “By Frequency”
Tap “Start Time” to adjust the first watering start
time of the day and tap “OK”.
Tap “Duration” to adjust how long you want to water
and tap “OK”
Tap “Frequency” to adjust how often you want to
water and tap “OK”
The Valve is now ready to water. If using a 2 or 4 zone
Timer, complete scheduling as needed for each Valve
following the same steps.
You can return to the home screen by tapping in “<”
the upper left corner. The time until the next watering cycle will display on the
Valve setting screen.
5
Schedule “By Week Day”
Tap “Watering Day” to select which days you want
to water.
NOTE: The selected days will be highlighted in yellow. All
days are selected by default.
Ensure Cycle 1 is turned on. (Green)
Tap “Start Time” to adjust watering time for that
cycle. Tap “OK”.
Tap “Watering” to adjust how long you want to water.
Tap “OK”.
Watering Cycle 1 is now programmed.
To add additional watering cycles, tap “Add”. You may
set up to 12 watering cycles on each Valve.
Set "Start Time" and "Watering" as in the previous steps. Tap "OK".
If using a 2 or 4 zone Timer complete scheduling as needed for each valve
following the same steps.
You can return to the home screen by tapping in the upper left corner. “<”
The time until the next watering cycle will display on the Valve setting screen.
NOTE: You may deactivate a temporarily (Gray) and reactivate as “Cycle”
needed. Turn on (Green) to resume.
You may permanently delete a cycle by tapping the button. “Delete”
Trash icons will appear beside each cycle. Tap the trash can icon to
remove.
6
Manual Watering
There are two ways to turn on the water manually: Directly
from the timer through the app or .
Manual watering from the app:
Tap on the you want to control. Timer
Tap on the Valve that you want to open manually.
Set “Manual” to turn on (green) the valve. The water
will begin to run.
Tap the time to adjust how long you want to water. Tap
“OK” to set. This will become your new default manual
watering time.
The app will show the remaining manual watering
duration.
You can cancel Manual Watering at any time by setting
“Manual” to off (Gray)
Manual watering from the Timer:
Press the yellow button on the Timer above the Valve you want to use.
The Valve will open for the last manual watering time
set in the app. (Default factory setting is 20 minutes)
To stop the water at any time, press the yellow button
above the Valve again.
NOTE: You can turn the water on using the app and off
from the Valve or vice versa.
93015, 93100, 93280
1, 2 & 4 Zone Bluetooth® Water Timers
An easy and convenient way to manage your lawn and garden watering.
This instruction guide is a universal manual for Melnor 1, 2 and 4 Zone
Bluetooth® Water Timers.
User Instructions English
93XXX_INS_ENG_01
Instruction Update
We recommend you download the latest version of these instructions at:
www.melnor.com/btupdate
This is: Revision 01
1
Battery Installation & Assembly
Remove the battery holder from the back of the Timer. Insert 4× AA Alkaline
batteries. Replace the battery holder, making sure that
it is firmly and securely placed in the Timer.
NOTE: Once batteries are in place in the Timer, a green
light will flash twice.
Attach the Timer to an outside faucet and turn water
on slowly. The water must be left on while the Timer is
attached to the faucet for your Timer to operate.
NOTE: Replace batteries when Timer battery indicator
flashes a red light or when the battery icon in the app turns red. Please
use only Alkaline batteries. Do not use rechargeable batteries.
2
Download Melnor BT App
Compatible with Bluetooth® 4.0 devices
(minimum required iOS 9 or Android V7.0).
Download and install the app from the Melnor BT
Google Play or Apple Store.
Visit the Google Play Store Apple App Store or
and search for or scan the QR code to Melnor BT
download the app.
Make sure Bluetooth® is activated on your smart
phone or tablet.
After the app is installed, tap to launch the app.
NOTE: Your phone must be within 30 feet of the timer to operate the device.
3
Automatic Watering
Open the Melnor BT app.
Tap or the Timer photo to go to the Valve screen.
Tap or image on the Valve you want to schedule.
Tap “Program On/Off” to on. (Green)
Tap “Watering Mode” to set the scheduling “By
Frequency” Setting” or “By Week Day”. Tap “ to
confirm.
NOTE: Scheduling “By Frequency” waters at regular
intervals.
i.e., Every 12 Hours, Every Day, Every 2 Days.
Scheduling “By Week Day” allows you to select
specific days to water.
i.e., Monday—Wednesday—Friday;
Sunday—Wednesday; Tuesday only.

7 Delay Watering
If there is rain in the forecast, you can skip watering for a period of time.
From the Valve screen select the valve you want to delay.
Activate the delay by tapping the switch on (green) “Watering Delay”
Once the “Watering Delay” is on (green)you can adjust the duration by tapping
the delay period.
Select the amount of time you want to pause the watering schedule and tap
“OK”.
NOTE: You must set Watering Delay separately for each Valve.
8
Eco Mode
Eco Mode is an optional setting that creates a 1 minute
pause for every 3 minutes of watering. This allows the
water to soak in the soil and reduce water run-off.
Open the app.Melnor BT Timer
Enter the Valve you want to create Eco Mode on.
In the Valve Setting screen turn on Eco Mode by
tapping “Water Saving Eco”.
You may choose to alter the Eco Mode values by
tapping and changing the preset Watering and Pause
times.
The Eco mode setting will apply to all cycles on that Valve.
9
Set a password
For security you can create a password for your
device to protect it from unauthorized users. The
password will be required for any user to access the
Timer.
To create a password Tap the pencil icon, then
“Change Password” and tap “OK".
Enter a four-character password and tap confirm. You
can use numbers, letters, or both.
To reset your password, remove the batteries from
the Valve Unit. Reinsert the batteries while holding
down the button on Valve 1 until the battery indicator
turns red, then release. The unit is now reset.
NOTE: There is no default password. If you forget your password you will need to
reset the device, this will reset all saved setting as well.
10
Customizing Melnor BT App
Customizing your Device
You can customize the Timer’s name and image as it appears in your app.
Tap pencil icon on the screen.
Tap “Change Photo” to replace the default image with a new one and tap
“OK”.
Use an existing photo
To use an existing image on your smart device, tap “Albums” and tap
“OK”.
Tap which image you want to use and tap “Choose”.
To revert to the original preset image, tap Pre-Set Photo and tap “OK”.
Take a new photo
To take a new photo, tap camera and tap “OK".
Your device camera will open. Take the photo you want and tap “Use
Photo".
Change the device name
Change the name of your Bluetooth® Timer to easily identify where you are
watering or distinguish between multiple timers.
To change the device name, tap and tap “Change Name” “OK”.
Enter the desired name (max 12 characters) and tap “OK”.
Customizing Valves
You can customize the name and image of each Valve in your app to easily
identify where you are watering.
Use an existing photo
To use an existing image on your smart device, tap “Albums” and tap
“OK”.
Tap which image you want to use, and it will load into place.
To revert to the original preset image, tap Pre-Set Photo and tap “OK”.
Take a new photo
To take a new photo, tap camera and then tap “OK”.
Your device camera will open. Take the photo you want, and tap save.
Change the Valve/Valves name
To change the device name, tap and tap “Change Name” “OK”.
Enter the desired name (max 12 characters) and tap “OK”.
11
Additional Information
Freezing temperatures can cause water to freeze and expand, damaging the
Valve Unit. At the end of the season or when there is frost in the forecast,
remove your timer from the faucet, remove the batteries and be sure to store
the timer indoors, away from freezing temperatures.
When attaching the Valve Unit to the faucet, be sure to turn the water on
slowly.
FCC ID: VAF-93B1
This device complies with part 15 of the FCC Rules. Operation is subject to the following two
conditions:
(1) This device may not cause harmful interference, and
(2) this device must accept any interference received, including interference that may cause undesired
operation.
Caution: Any changes or modifications not expressly approved by Melnor® could void the user’s
authority to operate the equipment. Note: This equipment has been tested and found to comply
with the limits for a Class B digital device, pursuant to part 15 of the FCC Rules. These limits are
designed to provide reasonable protection against harmful interference in a residential installation. This
equipment generates, uses and can radiate radio frequency energy and, if not installed and used in
accordance with the instructions, may cause harmful interference to radio communications. However,
there is no guarantee that interference will not occur in a particular installation. If this equipment does
cause harmful interference to radio or television reception, which can be determined by turning the
equipment of and on, the user is encouraged to try to correct the interference by one or more of the
following measures:
Reorient or relocate the receiving antenna.
Increase the separation between the equipment and receiver.
Connect the equipment into an outlet on a circuit different from that to which the receiver is connected.
Consult the dealer or an experienced radio/TV technician for help.
To comply with FCC RF exposure requirements, the device and the antenna for this device must be
installed to ensure a minimum separation of 20cm or more from a person’s body. Other operating
configurations should be avoided.
CAN ICES-3 (B)/NMB-3(B) Canada Statement (ISED Statement)
ISED Certification Number: 7111A-93B1
Model: 93015, 93100, 93280
This device complies with Industry Canada’s license-exempt RSSs. Operation is subject to the
following two conditions:
(1) This device may not cause interference; and
(2) This device must accept any interference, including interference that may cause undesired
operation of the device.
The device meets the exemption from the routine evaluation limits in section 2.5 of RSS 102 and
compliance with RSS-102 RF exposure, users can obtain Canadian information on RF exposure and
compliance.
Range: 30 ft. (10 meters) without interference
Pressure Operating: 10 - 120 PSI
Temperature Operating: 32 - 110° F (0 - 45° C)
Frequency Band: 2402 - 2480 MHz
Operating Frequency: 915MHz
Max Power: < 20 dBm
Melnor, Inc.
109 Tyson Drive
Winchester, VA 22603, USA
Product specificaties
| Merk: | Melnor |
| Categorie: | Niet gecategoriseerd |
| Model: | 93280 |
| Kleur van het product: | Zwart |
| Ingebouwd display: | Nee |
| Gewicht: | 498.95 g |
| Breedte: | 210.82 mm |
| Diepte: | 60.96 mm |
| Hoogte: | 144.78 mm |
| LED-indicatoren: | Ja |
| Ondersteund aantal accu's/batterijen: | 4 |
| Timermodi: | Handmatige bewatering |
| Bedrijfstemperatuur (T-T): | 0 - 45 °C |
| Type product: | Digitale besproeiingsbesturing |
| Batterijtechnologie: | Alkaline |
| Type batterij: | AA |
| Lichtsensor: | Nee |
| Aantal bewateringen per dag: | 12 |
Heb je hulp nodig?
Als je hulp nodig hebt met Melnor 93280 stel dan hieronder een vraag en andere gebruikers zullen je antwoorden
Handleiding Niet gecategoriseerd Melnor

8 Juli 2023

8 Juli 2023

4 Juli 2023

30 Juni 2023

27 Juni 2023
Handleiding Niet gecategoriseerd
- Cherub
- Ark
- Intellinet
- Enphase
- KeepOut
- Oertli
- Oreck
- Marantz
- Fritel
- Tot Tutors
- Key Digital
- Pfaff
- CRUX
- AMZ Pilot
- Go-eCharger
Nieuwste handleidingen voor Niet gecategoriseerd
16 September 2025

16 September 2025
16 September 2025

16 September 2025

16 September 2025
16 September 2025
16 September 2025
16 September 2025

16 September 2025

16 September 2025