Losi 1/18 Mini-Rock Crawler RTR Handleiding

Losi Radiografisch bestuurbaar speelgoed 1/18 Mini-Rock Crawler RTR

Lees hieronder de 📖 handleiding in het Nederlandse voor Losi 1/18 Mini-Rock Crawler RTR (16 pagina's) in de categorie Radiografisch bestuurbaar speelgoed. Deze handleiding was nuttig voor 19 personen en werd door 2 gebruikers gemiddeld met 4.5 sterren beoordeeld

Pagina 1/16
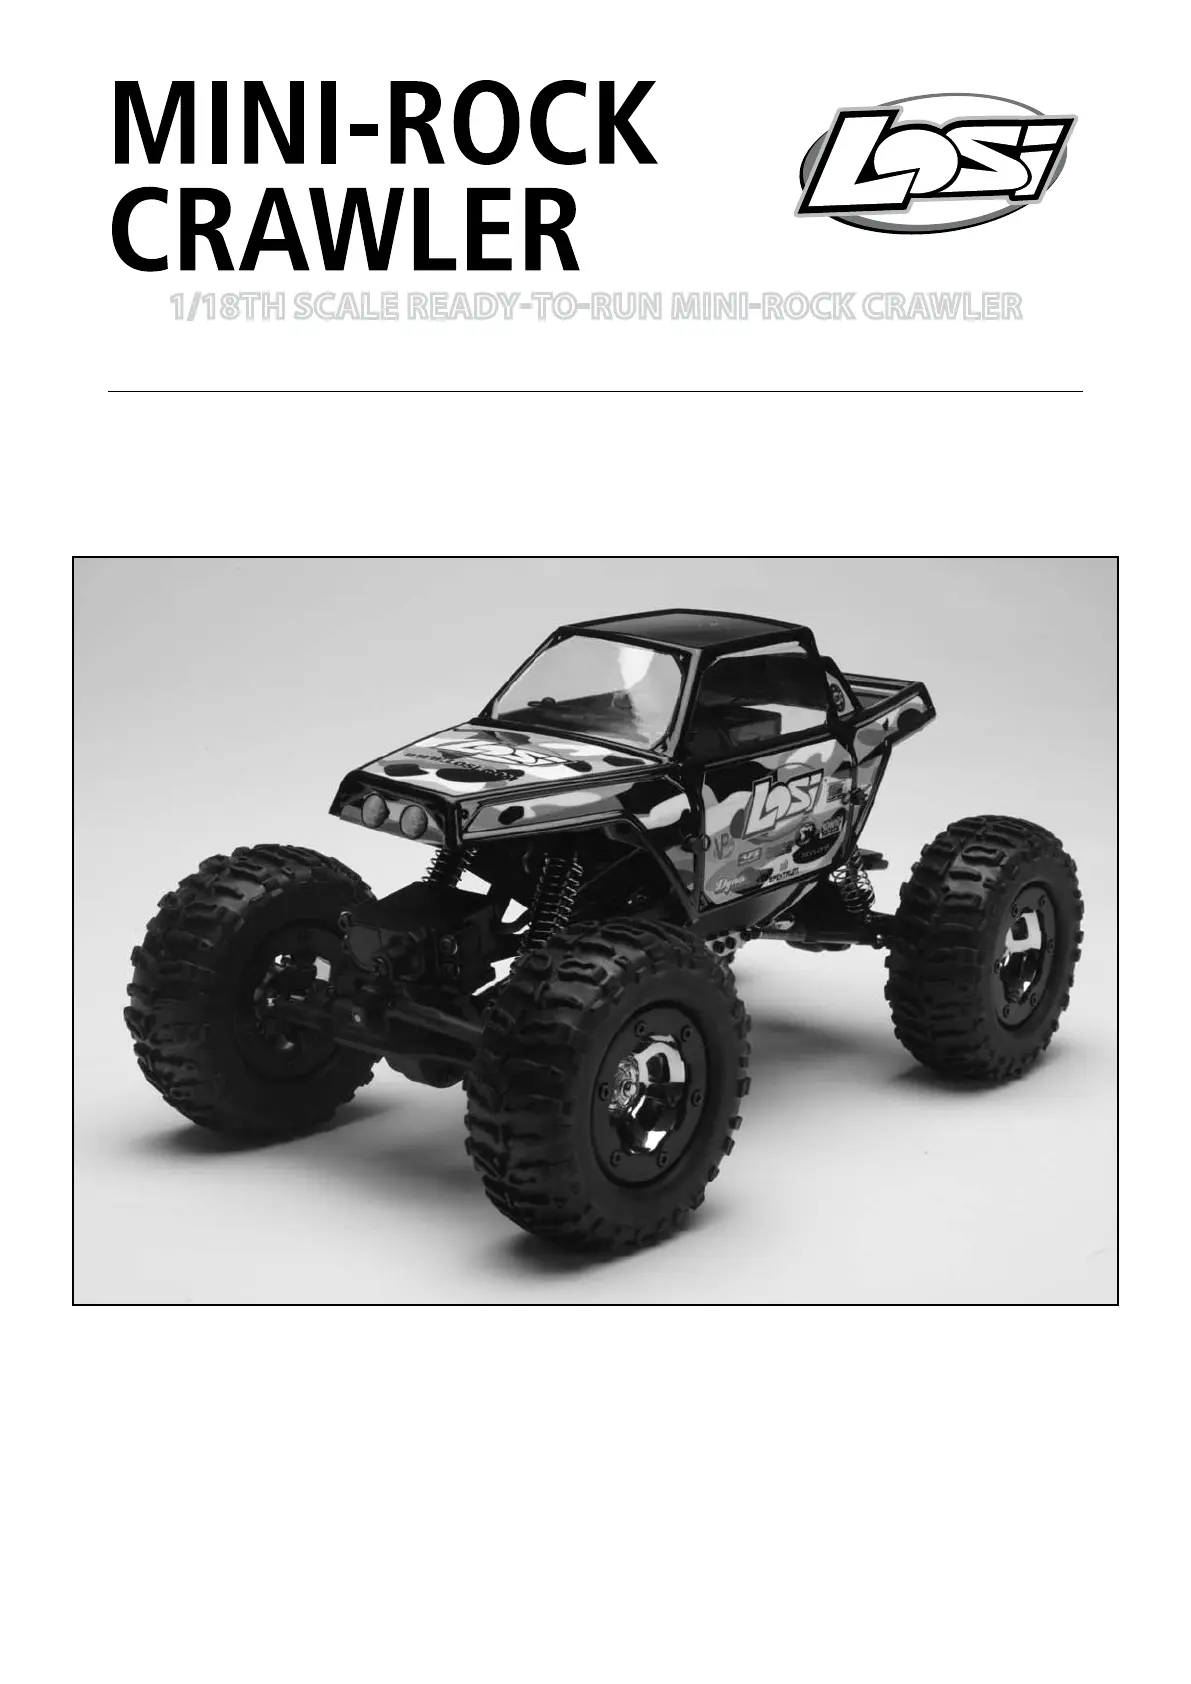
1/18th scale ready-to-run mini-rock crawler
Owners Manual
Thank you for choosing the Mini-Rock Crawler from Losi. This guide contains the basic instructions for operating your new
Mini-Rock Crawler. While the Mini-Rock Crawler is great for first-time RC drivers, it does require some mechanical experience
and/or parental supervision for drivers under 14. It is critical that you read all of the instructions in order to operate your
model correctly and avoid unnecessary damage. Please take a moment to look over all the printed materials before operating
your new Mini-Rock Crawler.
GO REGISTER YOUR PRODUCT ONLINE
Losi, a division of Horizon Hobby, wants to ensure that you get maximum enjoyment from your 1/18 Mini-Rock Crawler.
We strongly encourage you to register your product using the online Product Registration tool so we can notify you when
there are updates, tech tips, new option parts, or service bulletins available for your product.
Log onto WWW.LOSI.COM to complete the Product Registration form.
Not responsible for errors. All prices subject to
change without notice.
Losi, a Division of Horizon Hobby, Inc.
TM
Page 2
Safety Precautions
This is a sophisticated radio controlled model that must be operated with caution and common sense. Failure to operate your
Mini-Rock Crawler in a safe and responsible manner could result in damage to the model and property. The Mini-Rock Crawler
is not intended for use by children without direct adult supervision. Losi and Horizon Hobby shall not be liable for any loss or
damages, whether direct, indirect, special, incidental, or consequential, arising from the use, misuse, or abuse of this product
or any product required to operate it.
This model is controlled by a radio signal subject to interference from many sources outside your control. This interference
may cause momentary loss of control, so it is advisable to always keep some distance in all directions around your model
as a safety margin to avoid collisions.
Always operate your model in an open area away from cars, traffic and people.
Avoid running your model in the street where damage can occur.
Never run your Mini-Rock Crawler with low transmitter batteries.
Carefully follow the directions and warnings for this and any optional support equipment.
Keep all chemicals, small parts and anything electrical out of the reach of children.
Tools and Items You Will Find Handy
Soft bristle brush for cleaning
5.5mm nut driver for the wheel nuts.
#0 or #1 Phillips screwdriver
.050-inch Allen Wrench (LOSA99100)
Note: Use only Losi tools or other high-quality tools. Use of
inexpensive tools can cause damage to the small screws and
parts used on this type of model.
The Radio System
The following is an overview of the various functions and adjustments found on the Mini-Rock Crawler radio system. Since
the Mini-Rock Crawler operates on a radio signal you control, it is important for you to read and understand about all of these
functions and adjustments before driving.
The Receiver
1. Throttle Port: Where the Electronic Speed Control (ESC) plugs in.
2. Steering Port: Where the steering servo(s) plugs in.
3. Bind Port: Used to “bind” the receiver to the transmitter.
4. Indicator Light: Shows that a frequency/channel is being received.
The Electronic Speed Controller (ESC)
1. On/Off Switch: Powers the receiver and ESC.
2. Setup Button and Indicator Light: Used for resetting the ESC.
3. Battery Lead: Connects to the battery pack for power.
4. Motor Lead: Connects to the wire leads from the motor.
4
1
2
3
1
3
2
4
Page 3
The Transmitter
1. Steering Wheel: Controls direction (left/right) of the model.
2. Throttle Trigger: Controls speed and direction (forward/reverse)
of the model.
3. Antenna: Transmits signal to the model.
4. On/Off Switch: Turns the power on for the transmitter operation.
5. Indicator Lights: Green (top) light indicates adequate battery
power. Red (bottom) light indicates signal strength.
6. Steering Trim (ST. TRIM): Adjusts the “hands off direction of the
model.
7. Throttle Trim (TH. TRIM): Adjusts the motor speed to stop at
neutral.
8. Steering Rate: Adjusts amount front wheels move when the
steering wheel is turned left or right.
9. Steering Reverse Switch (ST. REV): Reverses the function of the
steering when the wheel is turned left or right.
10. Throttle Reverse Switch (TH. REV): Reverses the function of the
speed control when pulled back or pushed forward.
11. Bottom Cover: Covers and holds the batteries powering the
transmitter.
Re-Binding the Transmitter to the Receiver
The Losi DSM® radio system included in the Mini-Rock Crawler operates on 2.4GHz, and provides 79 different channels, which
are automatically selected when the transmitter and vehicle are turned on. The communication between the transmitter and
receiver starts in the few seconds after the transmitter and vehicle are both turned on. This is called the “binding process. The
Losi DSM radio system will not interfere with previous technology radio systems that operate on 27MHz or 75MHz frequencies
and you will not receive any interference from them.
Although set at the factory, below are the steps required to re-bind your transmitter to the receiver should the need arise.
During the bind process there is a unique ID from the transmitter communicated to the receiver to ensure trouble free radio
operation.
Steps to Re-Bind the Receiver to the Transmitter
1. Ensure that the transmitter and vehicle are both turned off.
2. Using the supplied Bind plug (which looks like a standard receiver
plug with a wire loop installed) insert the plug into the receiver
slot labeled “BIND. Looking down on the receiver this slot would
be below the LED and is the furthest from the LED, or nearest to
the corner of the receiver.
Note: You do not need to remove any of the other plugs
to re-bind.
3. With the Bind plug installed, turn on the vehicle. Notice a blinking
orange LED within the receiver
4. Now you are ready to turn on the transmitter. You should notice
on the back of the transmitter a similar blinking orange LED under
the translucent cover.
5. Both the receiver and transmitter orange LED will stop blinking
and become solid indicating they have “bound” themselves
together.
6. Please turn off both the vehicle and transmitter to remove the
Bind plug from the receiver. Failing to remove the Bind plug will
cause the transmitter to attempt to rebind every time you turn on the vehicle and transmitter.
7. Turn on both the vehicle and transmitter to ensure operation. If the transmitter does not control the vehicle, please
repeat steps 1 to 6. Should this not correct the problem please call Horizon Service/Repair for further assistance.
8. The Bind process is complete. Your vehicles radio system should be ready for use.
1
7
6
3
9
10
5
4
8
11
2


Product specificaties

Merk: Losi
Categorie: Radiografisch bestuurbaar speelgoed
Model: 1/18 Mini-Rock Crawler RTR
Gewicht: 926 g
Breedte: 177.8 mm
Capaciteit van de accu/batterij: 1100 mAh
Frequentieband: 2.4 GHz
Batterijtechnologie: Nikkel-Metaalhydride (NiMH)

Heb je hulp nodig?

Als je hulp nodig hebt met Losi 1/18 Mini-Rock Crawler RTR stel dan hieronder een vraag en andere gebruikers zullen je antwoorden


Handleiding Radiografisch bestuurbaar speelgoed Losi

Handleiding Radiografisch bestuurbaar speelgoed

Nieuwste handleidingen voor Radiografisch bestuurbaar speelgoed